Account Settings: Click on Account -> Register.
Parameters of the account:
Account Settings:
Configuring via phone user interface
Register status icons on the LCD screen:
It shows the register status of the current account.
You can select Enabled/Disabled to enable/disable the account.
It is shown on the LCD screen to identify the account.
It is shown as Caller ID when placing a call.
It is an authenticated ID for authentication provided by ITSP (required).
It is provided by ITSP for registration (required).
It is provided by ITSP for registration (required).
It is provided by ITSP for registration (required).
Press the Menu soft key when the phone is idle, select Settings ->Advanced Settings (default password: admin)
-> Account to configure the account.
Register Status:
Registered Register Failed Registering
4
Accessing the web user interface:
Configuring via web user interface
1. Press the OK key when the phone is idle to obtain the IP address of the phone.
2. Open the web browser on your computer, enter the IP address into the address bar (e.g., "http://192.168.0.10"
or "192.168.0.10") and press Enter.
3. Enter the user name (default: admin) and password (default: admin) in the login page and click Confirm.
16
17
2
4
5
6
7
8
3
9
12
10
11
1515
13
14
12
1
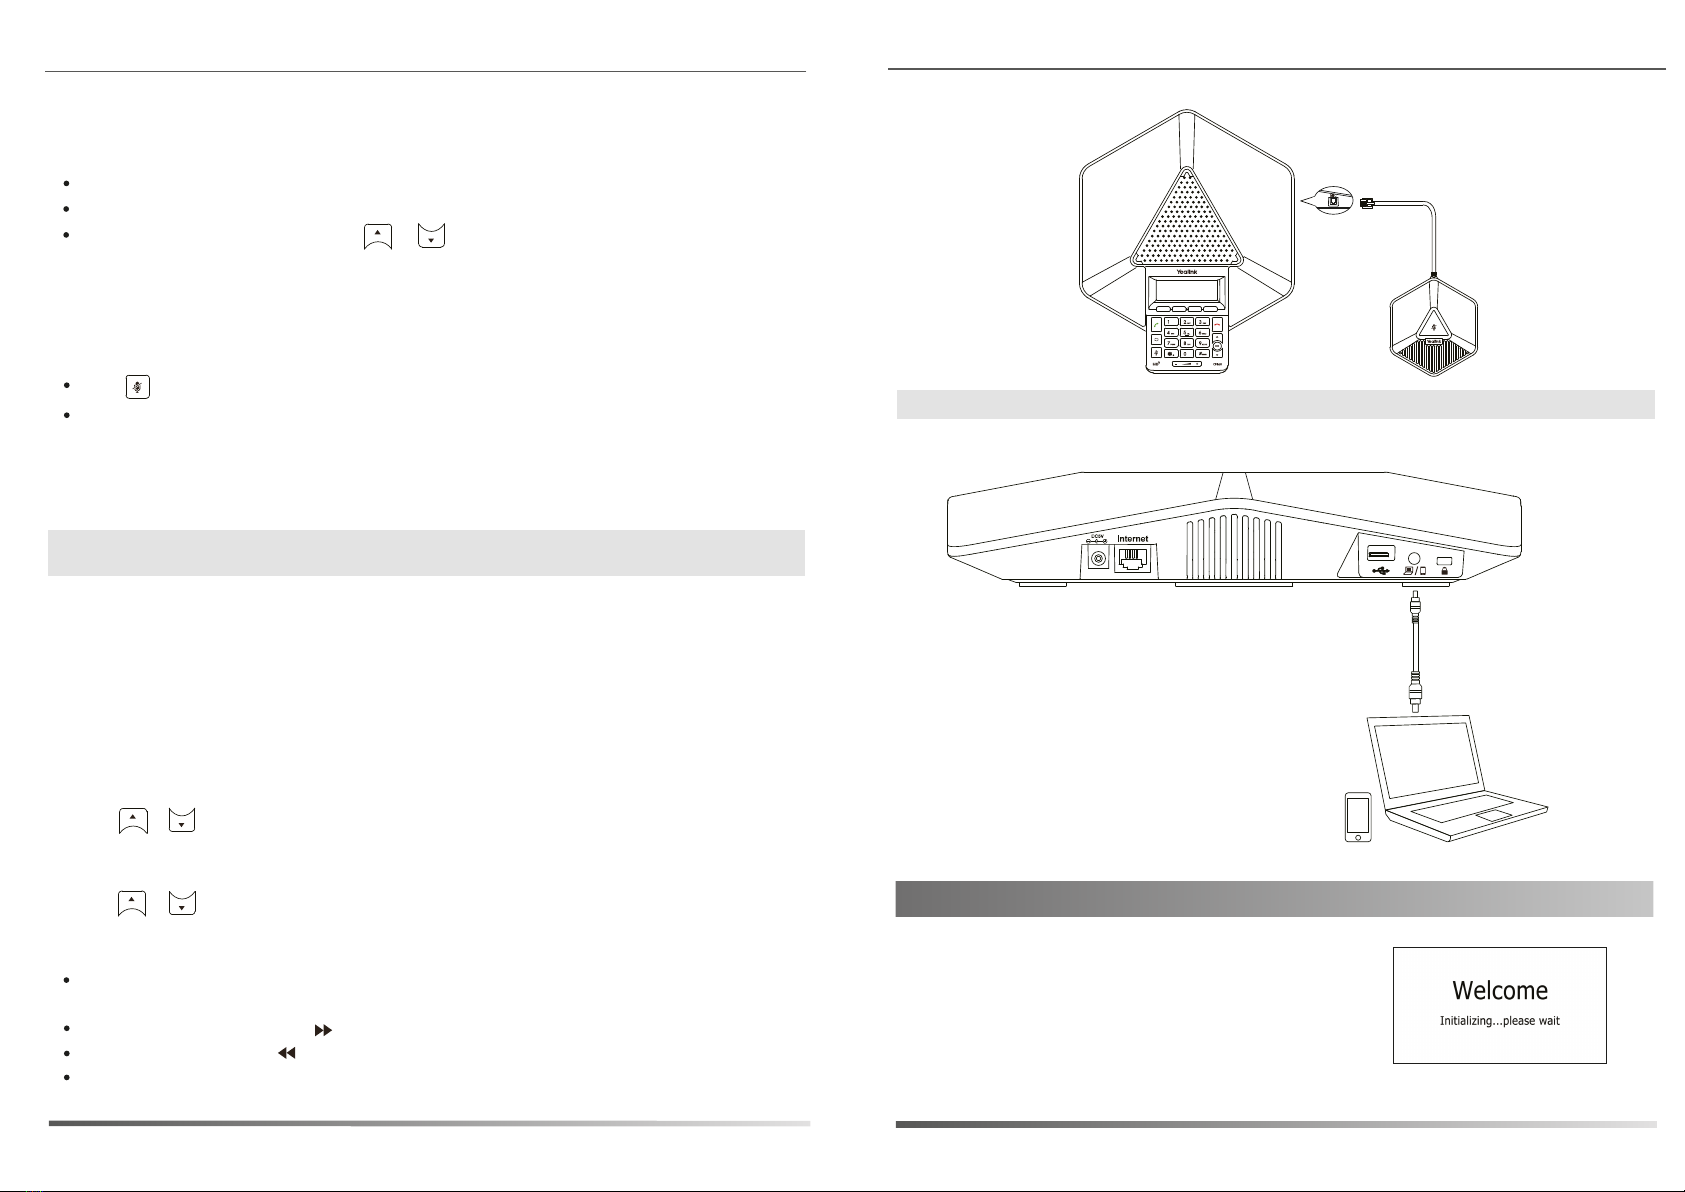
LED Indicator
13
13
12
Microphone
LCD Screen
Soft Keys
On-hook Key
OK Key
Up Navigation Key
Down Navigation Key
Keypad
Volume Key
Mute Key
Redial Key
Off-hook Key
Speaker
MIC Port
18 19
20
USB Port
PC/Mobile Port
Security Slot
Internet Port
DC5V Port
Line Active:
Label:
Display Name:
Register Name:
User Name:
Password:
Server Host:
Hardware Component Instructions
Configuring Your Phone
Note: Check with your system administrator if any error appears during the registration process or if a specific
configuration is required for your registration.
Note: For more information on account parameters, refer to Configuring via web user interface.
Placing a Call
Answering a Call
Ending a Call
Call Mute and Un-mute
Redial
Call Hold and Resume
To place a call on hold:
Do one of the following:
- Press .
- Enter the number.
Enter the number, and then press , , or the Send soft key.
Press or the Cancel soft key.
Press to enter the Placed Calls list, press or to select the desired entry, and then press or the
Sendsoft key.
Press twice when the phone is idle to dial out the last dialed number.
To resume the call, do one of the following:
Press to mute the microphone during a call.
Press again to un-mute the call.
If there is only one call on hold, press the Resume soft key.
Press the Hold soft key during an active call.
5
Local Conference
1. Press the Conf soft key during an active call. The call is placed on hold.
2. Enter the number of the second party, and then press the Send soft key.
3. Press the Conf soft key again when the second party answers.
If there is more than one call on hold, press or to select the desired held call, and then press the
Resume soft key.
Press , , or the Send soft key.
Press , or the Answer soft key.
To create a three-way local conference:
To join more parties in an established conference call:
1. Press the Manage soft key after the conference call is established.
2. Press the New Call soft key to place a new call.
3. Enter the number of the new party, and then press , , or the Send soft key.
CP860 can host up to five-way conference call with other parties.
Basic Call Features
Note: You can reject an incoming call by pressing the Reject soft key.