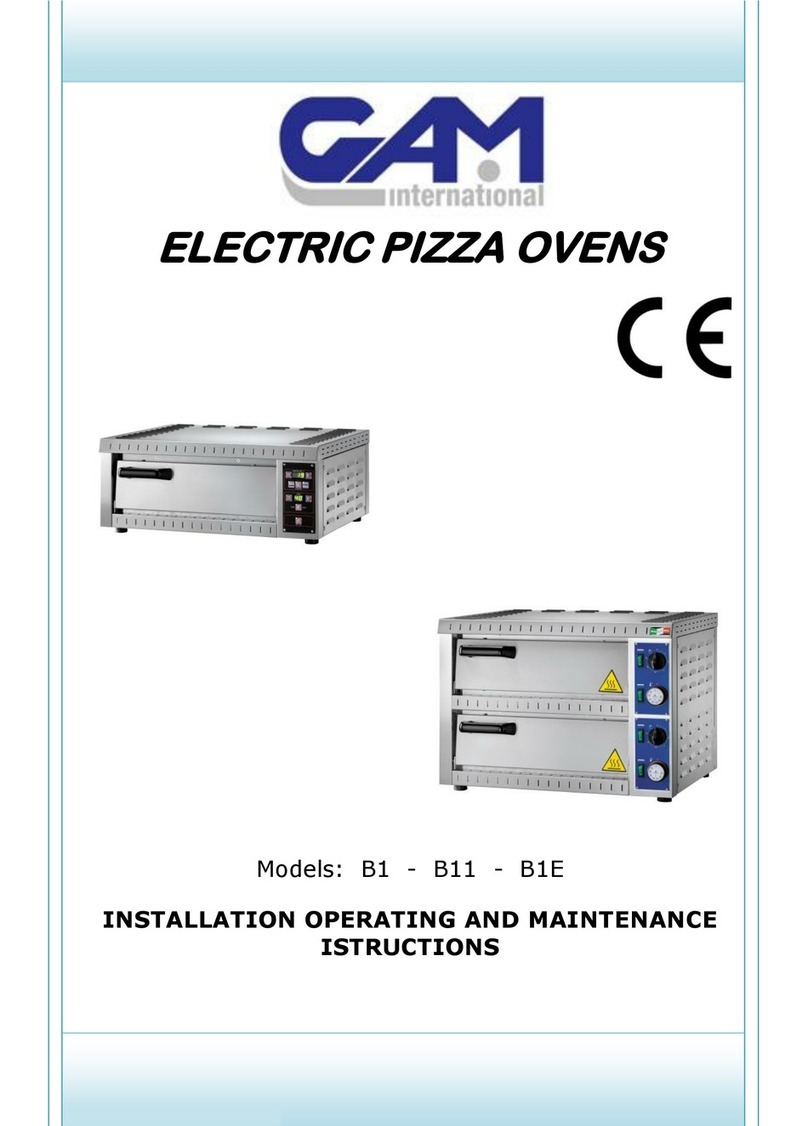
cam MS44 User manual

ELECTRIC PIZZA OVENS
Models: MS44 –MS66
INSTALLATION OPERATING AND MAINTENANCE
ISTRUCTIONS

2- Ed.1/2012 Rev.0
ENG
INTRODUCTION
READ THIS ENTIRE MANUAL BEFORE UNPACKING AND INSTALLING THIS
PRODUCT.
Dear client,
Thank you for choosing a quality product manufactured by us.
Our expert production follows the guiding principle of the strictest quality control of each
component so as to guarantee that our products will function efficiently far into the future.
The mechanical, electrical, and electronic parts were designed and manufactured to
guarantee reliability and high-quality functioning.
The use of parts that are not original could cause functioning problems or damage to the
product. Therefore, always ask for any spare parts from authorized dealers to return the
product to perfect working order and to guarantee that it will last longer.
All the machines we manufacture are made using modern technology and systems of
tested reliability. We systematically referred to the current standards and regulations for
mechanical products, specifically the UNI standards and the CEI standards for electric and
electronic equipment. The units that are described in this manual, like all our products, are
manufactured according to criteria of good practice and in strict compliance with the
European directives and related regulations.
Note:
The unit that is illustrated or described could be different from your unit for
commercial or technical reasons, depending on the standards and safety
regulations in force in the different countries in Europe and in the world. The
technical specifications and dimensions, the described functioning, and any
equipment cited are not binding. The figures show a generic unit only for
illustrative purposes.
Before operating on the machine, read carefully the
technical instructions included in this manual and follow the
indications described.
Keep this manual and all the annexed literature in a readily
accessible place and known to all the users (operators and
maintenance personnel).

Electric Pizza Ovens –Mod. “MS”
Ed.1/2012 Rev.0 - 3
ENG
GENERAL TABLE OF CONTENTS
Section 1: General information - Instructions
1.1–Introduction and safety recommendations
1.1.1 –Residual risks
1.2 - Machine data and use
1.2.1 - Application sectors
1.3–EC Declaration of Conformity
1.4 - Technical specifications
1.5- Machine description
1.6- Packing and standard equipment
1.6.1 - Accessories available on request
1.7 - Safety devices
1.7.1 - Operator safety
1.7.2 - Safety devices of electric equipment - Wiring diagram
1.7.3 - Safety devices of mechanical equipment
Section 2: Installing the machine
2.1 - Unpacking
2.2 - Position in place
2.2.1 - Assembly of the stand
2.3 - Connection to the electrical power supply
2.4 - Preliminary installation requirements
2.4.1 - Technical information reserved to the qualified installer
Section 3: Intended use of machine
3.1 - Controls descriptions
3.2 - Machine start-up
3.3 - Periodic use of the oven
3.4 - Cleaning the machine
3.5 - Regular maintenance
3.6 - Troubleshooting
3.7 - Long inactivity periods
3.8 - Disposal
Section 4: Spare parts - Electric Diagram
4.1 - List of spare parts
4.2 - Connecting diagram
Appendix
Warranty terms

4- Ed.1/2012 Rev.0
ENG
SECTION 1
GENERAL INFORMATION - INSTRUCTIONS
1.1 Introduction and safety recommendations
These operating and maintenance instructions are intended to operators and qualified
personnel for the correct use of the machine.
In order to facilitate understanding of the content of this manual, we provide a list of
terms and symbols used:
Definition - Symbol
Description
Danger Zone
Any area within and/or around the machine in which an
exposed person is subject to a risk to his health or safety.
Exposed Person
Any person who is wholly or partially in a danger zone.
Operator
Person in charge of installing, operating, adjusting, servicing
and cleaning the machine.
Provides significant information.
Indicates a potentially hazardous situation that may arise if
the operations described are not carried out correctly, and
which may result in damage to the machine and/or serious
injury to operators.
Warnings of precautions and safety are written in this manual in order to remind the
operator and staff on the possible dangers due to improper use of this machine.
The instructions or the warnings do not want to substitute the safe working practice but
to complete them and to stimulate their compliance.
Only warning does not eliminate the hazard.
Failure to observe this safety recommendations and improper use of
the device may pose risk of accidents for the operator or other
people.

Electric Pizza Ovens –Mod. “MS”
Ed.1/2012 Rev.0 - 5
ENG
1.1.1 Residual risks
Safety, as far as possible, has been integrated in the design and construction of the
machine, however risks remain from which the operators must be especially protected
during maintenance, installation, production and cleaning:
Do not place your bare hands or any part of the body on the hot parts of the oven
or near the doors of the baking chambers.
Do not put hands or arms or other body parts inside the oven. To open the door
use the insulated handle.
Do not put in the oven food packaging such as sealed metal cans or other material
as it may explode due to high temperature with serious consequences for both the
machine and the operator.
1.2 Machine data and use
The manual describes the operating instructions for electric ovens for pizzeria
mod. MS44, MS66.
Our electric pizza ovens have been designed for baking of pizza and similar
products in a simple and fast way, with the right temperature, ensuring the
fragrance that was once the prerogative only of the traditional wood-fired
cooking.
The model identification plate, placed at the rear part of the machine, next to the power
line is as follows:

6- Ed.1/2012 Rev.0
ENG
1.2.1 Application sectors
Electric ovens of our production are available in models of different sizes to meet the diverse
needs of professional customers, such as:
the kitchens of restaurants, institutions, cafeterias, pizzerias, etc..
wherever it is necessary to cook preparations of flour for human consumption type,
shape and texture similar to pizza.
1.3 EC Declaration of Conformity

Electric Pizza Ovens –Mod. “MS”
Ed.1/2012 Rev.0 - 7
ENG
1.4 Technical specifications
MODEL
MS44
MS66
POWER SUPPLY
Volt
400V AC3/N/PE
230V AC1/N/PE
400V AC3/N/PE
230V AC1/N/PE
WORKING THERMOSTAT
°C
60-450
60-450
CHAMBER INTERNAL
DIMENSIONS
mm
700x700x145
700x1050x145
CHAMBER INTERNAL
DIMENSIONS TOP
mm
670x685x145
670x1035x145
EXTERNAL DIMENSIONS
mm
1010x1120x770
1010x1470x770
ABSORBTION
kW
9,6
14,4
NET WEIGHT
Kg
142
193
NET WEIGHT TOP
Kg
178
243
STAND
mm
1010x850x910
1010x1200x910
DIMENSIONS PACKING
mm
1150x1240x870
1150x1590x870
NEUTRAL UNIT
Mm
/ Kg
1010X970X70 / 11
1010X1320X70 / 13
All models have a working temperature ranging from 60 ° C to 450 ° C
Specifications, dimensions, performance, accessories and other data provided
in this publication and business documentation are indicative and not binding
on the manufacturer and therefore are subject to change without notice and
without incurring any obligation.

8- Ed.1/2012 Rev.0
ENG
1.5 Machine description
The machine consist mainly of the following groups:
1. Control panel
2. Internal baking surface
3. Door + handle
4. Neutral unit (or extractor hood)
5. Valve for smoke discharge
The main features are:
External structure made entirely of stainless steel. Cooking surface made of refractory material
suitable for food use. Circular nozzle for venting fumes and smoke in the kitchen connected by
suitable tubing (not supplied) to the chimney outside. Integral insulation of the baking chamber
with insulating material for high temperature. Electric armored heating elements of durable
high-quality materials. Single-phase power supply (230V) or three-phase (400V) AC at 50/60
Hz with tolerances according to CEI 8-6 of 3 / 1990. Adequate internal lighting to monitor the
cooking cycle. Door equipped with spring hinges that can be easily removed for maintenance
and cleaning.
1.6 Packaging and standard equipment
In order to avoid any damage during handling or transport, the machines are supplied
with:
Type of packaging
Objective
Box of heavy corrugated cardboard
Protection against careless
impacts and movements
Anti-static PVC bag
Protection against dust
1
4
3
5
2

Electric Pizza Ovens –Mod. “MS”
Ed.1/2012 Rev.0 - 9
ENG
protective casing made of elements of semi-
rigid expanded polystyrene placed outside and
inside the internal room.
Internal stability, impact
protection and locking flat
refractory
The packaging of all the models is secured to a wooden support (pallet) so that they
can be perfectly handled with lifting means/transport.
The standard equipment of all the models consists of the following:
An operations and maintenance instructions manual
A catalogue of spare parts with exploded diagram
Warranty Certificate
EC Declaration of Conformity
Only the price list and the order confirmation of Your machine certify the
effective general configuration with standard equipment and accessories.
1.6.1 Accessories available on request
Accessory
Image
Stand ( see section 2.2.1 for assembly).
It is the natural support for pizza oven.
It is designed to overlay the oven. It
can be equipped with wheels for easy
moving.
Baking tins’ holder: it is necessary to
rearrange the baking tins
Neutral unit
Extractor hood

10 - Ed.1/2012 Rev.0
ENG
Leavening cell
1.7 Safety devices
In order to ensure observance of the Essential Safety and Health Protection
Requirements (ESHRs), all our products comply with the requirements of the following
European Directives:
Electrical Safety Directive (2006/95/EC).
Electromagnetic Compatibility Directive (2004/108/EC).
Machine Directive (2006/42/EC).
and include the criteria and the suitable devices that ensure all the provisions.
All the protection and safety devices of the machine and the equipment
installed and all the signs that indicate danger, or provide information or
recommendations must be kept in good conditions in their corresponding
places.
To tamper, modify or change the elements of the machine and the
safety devices constitute fraudulent actions and bear civil and penal
responsibilities for any direct or indirect damage to people, animals,
objects or the environment.
1.7.1 Operator safety
The operators must:
reach the age foreseen by the social laws,
have good general competence and manual ability for coordination and be
precise;
have received proper technical and practical preparation (training) from an skilled
operator;
be aware of the dangers that derive from an improper use of the machine or from
carrying out the prescriptions of this manual in a different way;
wear personal protection equipment (thermal insulation gloves, glasses, masks,
etc.) in compliance with the safety legislation and regulations in force in the

Electric Pizza Ovens –Mod. “MS”
Ed.1/2012 Rev.0 - 11
ENG
respective country, as prescribed by Directive 89/391/EEC and annexed
directives.
1.7.2 Safety devices of the electrical equipment –Wiring diagram
The electrical equipment of a machine designed and prepared following the EN - CEI
standards already mentioned, as being of class I, is configured as follows:
Control panel for electronic and control the temperature of the baking chamber:
Armored heating elements with outer tube made of stainless steel AISI 321
annealed with neutral zone of 10 mm for the reduction of heat conduction to
the supports. Heating element in nickel chrome 80/20. MgO ceramic insulation.
terminal connection and derivation installed inside the compartment containing
the equipment for command and control, general wiring connecting devices of
the circuit unit, made of cables suitable for harsh operating conditions and
proper-voltage limit.
The wiring diagram has been carried out according to the standard instructions related to
the electric equipments of industrial machines.
There is a copy of the wiring diagram in the appendix of this manual.
1.7.3 Safety devices of the mechanical equipment
The mechanical safety devices, to achieve the highest degree of safety and reliability
are built into the machine and made inviolable:
The door, with double glass with air space for air flow in an optimal operating
range (up to around 330 ° C), is kept within limits of temperature that guarantee
the total security from risk of burns.
A hinge system release, with spring, allows to extract a few seconds the door for
any necessary cleaning and / or maintenance.

12 - Ed.1/2012 Rev.0
ENG
SECTION 2
INSTALLING THE MACHINE
2.1 Unpacking
Normally unpacking involves:
Step
Action
1
Remove the fastening strap from the cardboard box
and the wooden bedplate (pallet) by using a suitable
tool (pair of scissors, cutter, etc).
2
Introduce the point of a screwdriver between the
cardboard and the points that fasten the lower part
of the packaging and remove them by pulling
outwards.
3
Remove the upper cover of the cardboard
packaging.
4
Take away the anti-static PVC bag and the expanded polystyrene.
5
Unscrew the “L” elements around the machine.
6
Open the packaging completely and introduce the ropes and the lifting belts
under the bedplate, towards both ends (make sure the capacity of the ropes
are adequate for the weight of the machine).
Adjust the ropes or the belts so that all the lifting points are wrapped
around and there is no chance that they slip off and the weight loses
its balance.
7
Carefully sling the machine by protecting the parts of the structure that make
direct contact with the lifting ropes/belts.
8
Lift the machine from the wooden bedplate (pallet) and unload it in the
allotted site on the ground.

Electric Pizza Ovens –Mod. “MS”
Ed.1/2012 Rev.0 - 13
ENG
9
If necessary, use a soft and dry cloth to clean the outside part.
10
proceed with the removal of the boards of polystyrene designed to protect
the refractory tiles.
The machine must be handled only by personnel who are trained and
familiar with the risks and the procedures related to unpacking,
lifting and correct handling.
Lift only by the help of suitable mechanical means. Absolutely ruled
out lifting and manual handling.
2.2 Position in place
To position the machine in place proceed as follows:
Step
Action
1
Place the oven:
in an appropriate area and protected from the weather, considering in
addition to its space also the one required for containers of raw materials
and processed product. In a space effectively lit and large enough. In a
place protected from sources of moisture or water faucet.
2
Consider the space around a minimum of not less than 50 cm for the proper
ventilation, cleaning and maintenance purposes.
3
Verify that the proximity of the area you have a system capable of
distributing electricity to the power of the machine (230V or 400V)
4
Place the base of the oven and the feet of the stand on a
solid, uniform, well-polished, flat surface.
The stand (par. 2.2.1) doesn’t require anchoring to the
ground, possibly normalize the unit using the screws
M12:
put a level on the oven first longitudinally then
transversely;
block the screws once you reached the leveling.

14 - Ed.1/2012 Rev.0
ENG
5
The oven does not require any kind of attachment to the
work surface on which it lies.
If the oven is placed on a stand or leavening cell, make
sure the latches are fully inserted on mounting holes on
the stand or on the roof of the cell and that they are
placed on the appropriate holes at the bottom of the
oven itself.
6
Proceed with the positioning, if provided, of the neutral
unit or the extractor hood.
2.2.1 Assembly of the stand
List of the components:
4 square sections - legs (1, 2, 3, 4) 2 lateral sections (7, 8)
1 shelf for low position (9) 4 leveling screws, M12 x 50
2 front sections (5, 6 ) 24 nuts, M 8
24 fastening screws, M 8 x 15
6
1
3
4
9
7
8
2
5
10

Electric Pizza Ovens –Mod. “MS”
Ed.1/2012 Rev.0 - 15
ENG
Temporarily attach the legs (1, 2, 3, 4) to the sheet-metal shelf by placing the
screws (A) in the lowest hole, as shown in the figure, and then screw on the nuts
without tightening them completely.
Attach the short sections (5, 6) to the legs by placing the screws in the upper
holes.
Attach the long lateral sections (7, 8) to the legs by means of the proper screws.
At the ends of the legs adjust the four leveling screws (B) so as to level the unit
well even on uneven surfaces.
Proceed to finish tightening the screws while using a square or a level to check that
the legs are in a perpendicular position and that the shelf is level. Tighten all the
screws very well.
2.3 Connection to the electrical power supply
The electrical connection to the power supply and the operation of
the machine must be done, pursuant to the law, only by a qualified
technician, who will previously check (IEC standards), with suitable
means and tools, the effectiveness of the ground electrodes and the
earthing system to which the device will be connected.
For installations outside the national territory, observe strictly the
regulations in force in the country where the machine will be used.
Make the connection following the provided technical manners, respecting both the
cyclic sequence of phases of connection, and the color coding of conductors.

16 - Ed.1/2012 Rev.0
ENG
2.4 Preliminary installation requirements
Install the machine only after you have checked that:
the voltage indicated on the plate is the voltage the machine will be supplied
with;
the voltage and absorbed power characteristics of each machine model (Sec.
1.4) are suitable for the available voltage and power;
the distribution system has an effective earthing system and safety switch.
All the components and materials necessary to perform the installation must: be done in full
compliance with the laws in force and abide by the dictates of the low voltage directive and
the electromagnetic compatibility directive in force.
2.4.1 Technical information reserved to the qualified installer
The following informations are aimed, only, at qualified technical
staff.
The specialist installer near the point of installation of the oven, must:
Place a length of power cable near the unit so as to permit the installed power cable to reach
the power socket (do not use extension cables to make this connection);
Install a suitable interlocked socket of industrial type;
Install a disconnection switch;
Install a thermal disconnector and differential switch whose sensitivity is suitable to
the current leakage from the heating elements.
Once operating checks and inspections are finished, the installer will have to issue
the Declaration of Conformity in compliance with the provisions of Act 46/90
Protection against overcurrent and differential protection must be installed
upstream of the connected equipment by the user.
Keep in perfect condition and adequately protect against any
damage the cable, the plug connection of the oven and all protective
equipment and isolation of the power distribution box of the oven
itself.

Electric Pizza Ovens –Mod. “MS”
Ed.1/2012 Rev.0 - 17
ENG
SECTION 3
MACHINE USE
3.1 Controls description
The electrical control panel is placed in front of the machine in an ergonomic position, and
is configured as follows:
1. Indicator lamp of the upper deck
2. Control thermostat of the upper deck.
3. Power switch internal light chamber .
4. Temperature display
5. Indicator lamp net presence
6. Switch
7. Indicator lamp of the lower deck
8. Control thermostat of the lower deck.
1
3
5
7
2
4
6
8

18 - Ed.1/2012 Rev.0
ENG
3.2 Machine start-up
Before proceeding to use the oven for cooking food, it is necessary to adequately preheat the
cooking compartment.
Step
Action
1
Insert the plug in the socket located on the shunt box
2
Make sure that the magnetothermic switch and the differential switch are both
on.
3
Turn the power socket’s disconnection switch to I/ON.
4
Turn the oven on and act on temperature commands of the cooking chamber at
a temperature of about 250 ° C and maintain this temperature for about an
hour.
While the oven is being preheated, it will emit steam with an unpleasant smell.
This is due to the surface oxidation of the annealed heating elements.
5
When the first cycle is completed, the metal will be stabilized and will no longer
produce any unpleasant odor. While personally supervising the oven, open the
front door and keep it open for several minutes so as to change the air in the
oven more quickly, then close the door.
6
After the preheating phase has been performed, all the metal and refractory
components in the cooking compartment will have reached the stabilization
temperature and it will then be possible to normally use the oven.
For subsequent use of the oven it will not be necessary to perform the above
preheating cycle again.
The oven is equipped on the left side of the front (see par. 1.4) of a knob
that, acting on a valve placed on the exhaust fumes, regulates the release
of steam. During cooking, depending on the amount of steam produced, the
location of this valve should be adjusted.
To heat up the oven at full speed, it is recommended to keep the steam
control valve tightly closed.

Electric Pizza Ovens –Mod. “MS”
Ed.1/2012 Rev.0 - 19
ENG
3.3 Periodic use of the oven
Before using the oven carry out the following check-outs and arrangements:
Step
Action
1
Insert the plug in the socket located on the shunt box
2
Make sure that the magnetothermic switch and the differential switch are both
on.
3
Turn the power socket’s disconnection switch to I/ON.
4
Turn the oven on and act on the thermostat of the baking chamber, setting the
desired temperature (usually between 300 to 330 °C).
5
Wait for the oven to reach the desired temperature.
6
When the desired temperature is reached, open the door and place the pizzas in
the oven. It is even possible to place them directly on the refractory material
instead of on containers or pans.
It is recommended, in order to avoid thermal shock in the cell area and limit the consumption
of energy, to open the door only for the time necessary to introduce or take out the pizzas or
other food.
3.3 Cleaning the machine
Before carrying out cleaning (or maintenance) procedures:
Place the main switch to 0/0FF and disconnect the line by removing the plug from the
socket;
report the current operation by signboard;
wait until the oven has cooled completely (it takes several hours)
At the end of the production cycle, turn the oven off using the switch ON /
OFF in the section “E” and turn on 0/OFF the switch / outlet line.
Do not use the oven to heat or dry animals and similar.
The oven should not be used for any other purpose outside of those
mentioned.

20 - Ed.1/2012 Rev.0
ENG
To clean adequately the:
Refractory bricks: Use a cloth dampened with only water or a brush with stiff
bristles excluding any kind of detergent, solvent or chemical product (the high
temperature reached provides the automatic sterilization of everything that is inside
the oven).
Outside the machine: Use a clean sponge with a small amount of adequate
detergent and cleaning products.
3.5 Regular maintenance
If the machine is used as prescribed and indicated in this manual, the adequate
manufacture of the mechanical pieces and the choice for suitable materials will allow the
machine to operate with no faults and no need for maintenance for many years.
Whenever regular maintenance operation is performed on the machine, make sure that
the machine is not connected to the mains (cable disconnected and green warning light
off).
Perform at least every 15 days, the control on the efficiency of the switch circuit breaker,
located on the power circuit of the oven by pressing the test button.
3.6 Troubleshooting
Problem
Probable cause
Recommended solution
Machine does
not start
No power supply
I. Check that the plug is properly connected;
II. check that the thermo-magnetic switch has
been activated (“ON”);
III. verify that the differential switch is active (if
you press the “TEST” button and the lever
remains still in high/upper position, this may
indicate that there is no power);
Once cleaning operations of the different pieces of the machine are finished,
refit them in their initial position and make sure they are correctly placed by
tightening the corresponding fixing devices when necessary.
Do not wash and/or clean:
I. by spraying water jets on the machine or its components;
II. Using abrasive cleaners, cream cleaners containing abrasives,
solvents or diluents.
This manual suits for next models
1
Table of contents
Other cam Kitchen Appliance manuals