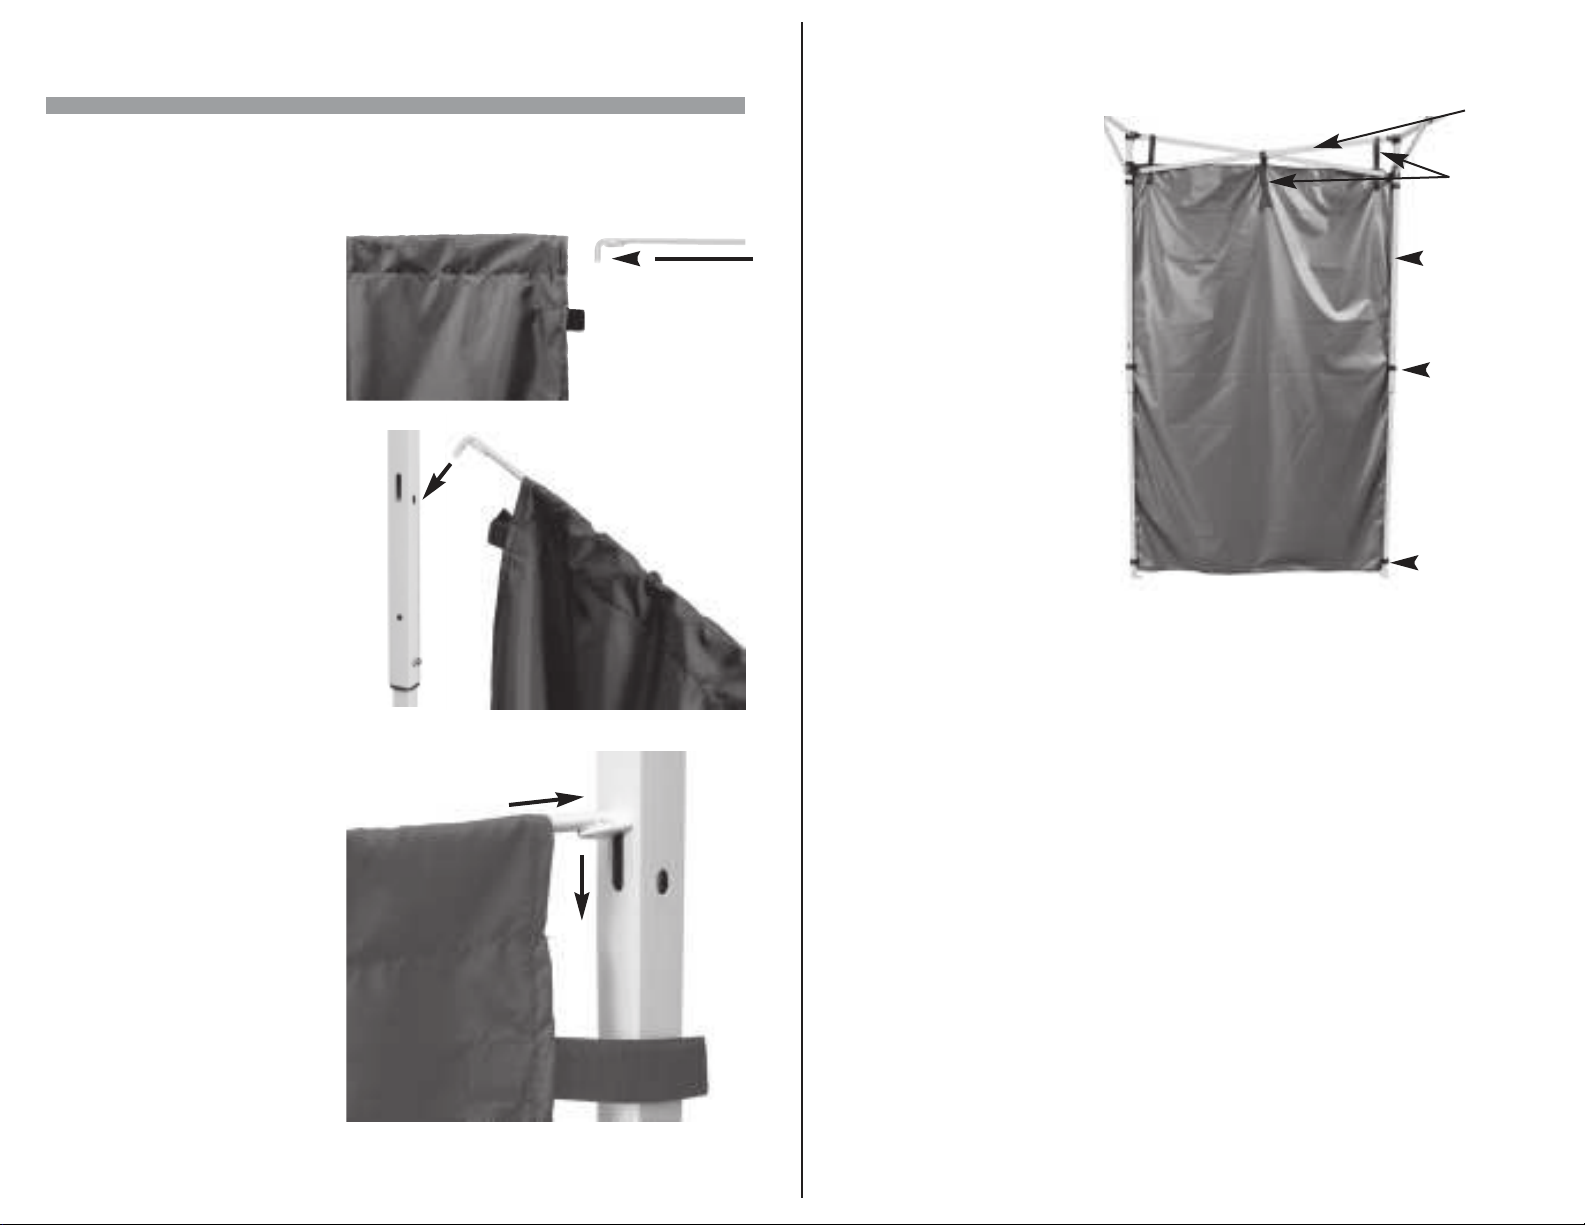
1. After completing the
frame set up step 3, insert
the 60 degree angled end
of the gable wire into the
cap on the top of the leg.
Insert into the inside hole.
Repeat on all corners.
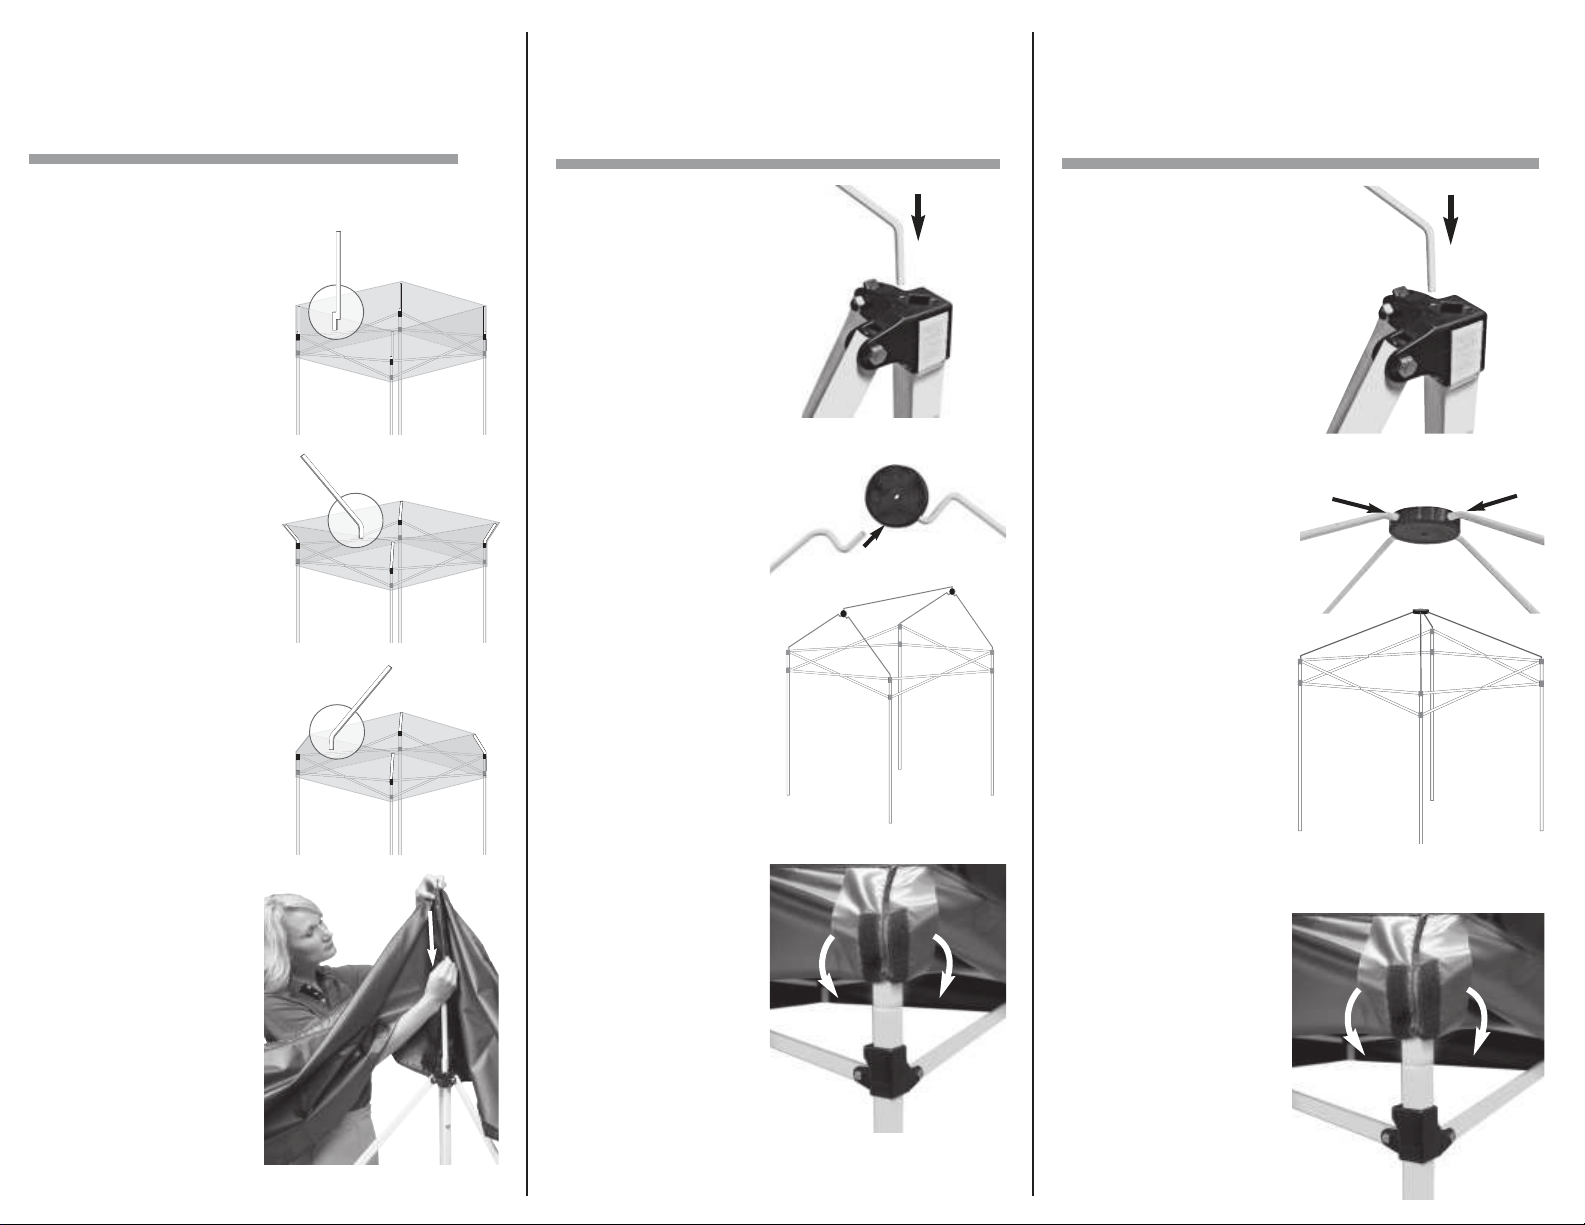
4. Gently unfold the fabric and place it over the open frame.
5. Attach the fabric top to
the frame by matching the
quick attachment strips on
the fabric with the quick
attachment strips on the
frame. Pull the corners
down fully. Push the strips
firmly together at each cor-
ner. Repeat on all corners.
6. Continue frame set up.
2. Connect two gable
wires together with the
peak hub. On the peak
hub, make sure the E-Z UP
logo is facing up so that
the large hole is exposed
on top. Insert the gable
wire into the hole at the
bottom of the peak hub.
Repeat on opposite gable
wire.
3. Insert the beam wir e
into the holes on the top of
the peak hub and push
down gently .
Top
Set-up
Assembly Instruction
for Glade
4.
Continue frame set up.
1.
Complete the frame set up Step 1. Do not open complete-
ly in order to reduce the fabric tension during top set up.
2a.
( KIOSK TOP )
Insert the 3”
portion of the straight peak
tube into the center hole on
the top of the slider. The
long portion of the peak tube
should be facing toward the
outside corner of the shelter.
Repeat on all corners.
2b.
(MARQUEE TOP )
Insert
the 3” portion of the angled
peak tube into the center
hole on the top of the slider .
The long portion of the peak
tube should be facing towar d
the outside cor nerof the
shelter. Repeat on all corners.
2c.
(HALF-PEAK TOP )
Insert
the 3” portion of the angled
peak tube into the center
hole on the top of the slider.
The long portion of the kiosk
tube should be facing toward
the inside cornerof the
shelter. Repeat on all cor ners.
3.
Gently unfold the fabric
top. Place the fabric in the
center of the shelter and
work out fr om the inside.
Slide the interior corner
pocket onto the peak tube
and repeat on all corners.
Secur e the top to the frame
by pushing the quick attach -
ment strips together at each
corner.
( kiosk top shown )
Top Set-up Assembly Instructions
For Kiosk, Marquee and Half - Peak
1.
After completing the
frame set up step 3, insert
the 60 degree angled long
end of the peak wire into
the cap on the top of the
leg. Insert into the inside
hole. Repeat on all corners.
2.
Connect the four ends
of the peak wires together
by inserting the 30 degree
angled short end of the
peak wir e into the r ound
peak hub.
4.
Attach the fabric top to
the frame by matching the
quick attachment strips on
the fabric with the quick
attachment strips on the
frame. Pull the corners
down fully. Push the strips
firmly together at each cor-
ner. Repeat on all corners.
5.
Continue frame set up.
3.
Gently unfold the fabric and place it over the open frame.
Top
Set-up
Assembly Instruction
for Peak