manuals.online logo
Brands
  1. Home
  2. •
  3. Brands
  4. •
  5. Anova
  6. •
  7. Outdoor Furnishing
  8. •
  9. Anova FBW6R User manual

Anova FBW6R User manual

anovafurnishings.com
888.535.5005 tel
TOOLS NEEDED:
• 1/2" Open-end or box-end wrench
• 5/16" Open-end or box-end wrench
• Ratchet with 1/2" socket
• Ratchet with 5/16" socket
• Square
Assembly Instructions
Recycled
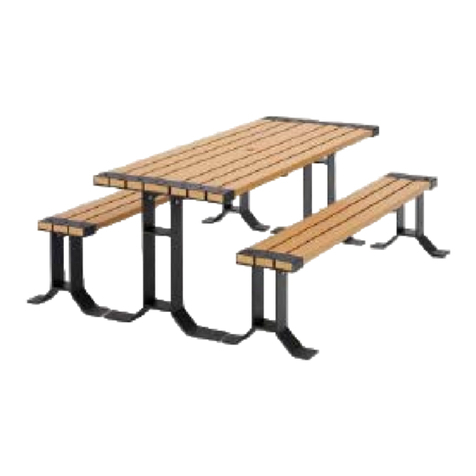
FBW6R - 6' Parkway Recycled Plastic Flat Bench
BENCH COMPONENTS:
ASSEMBLY HARDWARE: All hardware is stainless steel.
(4) No. 12 x 1 1/2"
Pan Head Screws
(6) 5/16"-18 x 1 1/4"
Hex Head Bolts
(12) 5/16" Flat
Washers
(6) 5/16"-18
Nylock Nuts
(18) 5/16" x 2"
Lag Screws
ASSEMBLY:
Inspect the shipping container contents for damage and to
determine that all components and hardware are present.
1.
2. Lay all parts on a so work surface or on the shipping
packaging to prevent damage to nish.
3. Locate the planks and place them with the predrilled holes
facing upward.
NOTE: Before assembling the nuts to the bolts, it is
recommended that a light oil or petroleum jelly be applied
to the screw threads.
Two of the planks have two extra holes toward one
end. These planks must be placed in the center of the
bench with the additional holes located near the bench
centerline. The additional holes are placed to mount the
gusset brackets.
1
(2) Center Planks
Recycled Plastic
(4) Outer Planks
Recycled Plastic
(1) Bench Channel
(2) Cast Iron Bench Legs (2) Bench Brackets
(1) Cross Support(2) Gusset Brackets
IMPORTANT:
Center planks location and orientation
of gusset brace mounting holes
Outer
Planks
Outer
Planks
2
Leave the two center
holes empty
5/16" x 2" Lag Screws
4. Place the cross support across the center of the planks and
line up the holes in the cross support with the predrilled
holes in the middle of the planks. Start a 5/16” x 2" lag
screw into each of the bench support holes, except for the
two center mounting holes. These two holes will be used to
fasten the bench channel.
5. Before tightening the lag screws, place the “L”-shaped
bench brackets across the planks with the raised edge
facing outward at each end of the planks. Start a 5/16” x 2"
lag screw through each of the holes in the brackets into the
predrilled holes in the planks. Aer all 18 of the lag screws
have been started, use the ratchet with the 1/2” socket to
tighten them down.
6. Place the bench channel down the center of the bench
planks with the open side up.
7. Align the mounting holes in one of the bench legs with the
holes in one end of the bench channel and bench bracket.
Insert one of the 5/16”-18 x 1 1/4" hex head bolts, with a
5/16" at washer, through the bench leg, bench channel,
and the bench bracket, with the bolt head on the outside
surface of the bench leg. Place a 5/16"-18 nylock nut and a
at washer on the end of the bolt and tighten it nger tight.
Repeat this step on the other set of mounting holes.
Install the other bench leg assembly in the same manner on
the other end of the bench.
8. Position one of the bench gusset brackets so the single
mounting hole is aligned with the hole in the raised tab
on one of the cast iron bench legs. Before attaching the
bracket, make sure it is oriented so the mounting hole tab
will lie at over the predrilled holes near the center of one
of the planks. Insert one of the provided 5/16”-18 x 1 1/4"
hex head bolts, with 5/16" at washer, through both the
bracket and cast iron leg. Place a 5/16"-18 nylock nut and
at washer on the other end of the bolt and tighten it nger
tight.
Attach the other gusset bracket on the other bench leg in
the same manner.
9. Position the loose end of one of the gusset brackets so that
the holes in the mounting tab line up with predrilled holes
in the center plank.
10. Start a No. 12 x 1 1/2" pan head screw through the hole
in the gusset bracket tab that is closer to the bench leg.
Continue to torque the screw all the way down, tight to the
head of the screw. Install the second pan head screw into
the mounting tab and plank.
Repeat this process in the same manner on the other cast
iron leg to install the remaining gusset bracket.
IMPORTANT : Use a square to keep the bench leg vertical
while attaching the gusset brackets. Driving the pan head
screws may tend to push or pull the end of the leg.
Cross Support
Bench Bracket
Cast Iron
Bench Leg
5/16" Flat Washer
5/16" Flat Washer
5/16" Flat
Washer
5/16" Flat
Washer
5/16"-18 x 1 1/4"
Hex Head Bolt
5/16"-18 x 1 1/4"
Hex Head Bolt
5/16"-18
Nylock Nut
5/16"-18
Nylock Nut
Bench Channel
Gusset Bracket
Install this No. 12 x 1 1/2"
Pan Head Screw rst
Copyright 2018 ANOVA® Made in USA. 3
Note: Please contact Customer Care at 1-866-797-1761 when ordering replacement parts.
01/31/2018
11. Aer both gusset brackets have been secured, tighten the
5/16”-18 x 1 1/4" hex head bolts in the bench legs, channel,
and brackets.
Install two 5/16" X 2" lag screws through the holes in the
channel, into the center planks.
12.
Check that all hardware is tight before turning the bench
upright and placing it on site for use.
13.
Aer two weeks, retighten all of the hardware.
14.
5/16" x 2" Lag Screw
Bench Channel
FBW6R - FOOT MOUNT
18.92"
4 X O 0.40"
52.77"
Assembly and Replacement Parts
Guss Bracket
Cross Support
Bench Channel
Cast Iron Bench Leg
Bench Bracket
Outer Plank Recycled Plastic
Center Plank Recycled Plastic

Other Anova Outdoor Furnishing manuals
Anova D1111 User manual

Anova

Anova D1111 User manual

Anova RCPWF6 User manual

Anova

Anova RCPWF6 User manual

Anova D1121 User manual

Anova

Anova D1121 User manual

Anova Rendezvous L1387 User manual

Anova

Anova Rendezvous L1387 User manual

Anova FBW6R User manual

Anova

Anova FBW6R User manual

Anova L1260 User manual

Anova

Anova L1260 User manual

Anova Signature L1501 User manual

Anova

Anova Signature L1501 User manual

Anova F1030 User manual

Anova

Anova F1030 User manual

Anova F3017 User manual

Anova

Anova F3017 User manual

Anova RCPTC6 User manual

Anova

Anova RCPTC6 User manual

Anova L1391 User manual

Anova

Anova L1391 User manual

Anova RCPTC6 User manual

Anova

Anova RCPTC6 User manual

Anova D1007 User manual

Anova

Anova D1007 User manual

Anova RCPWF6 User manual

Anova

Anova RCPWF6 User manual

Anova Rendezvous L1360 User manual

Anova

Anova Rendezvous L1360 User manual

Anova L1390 User manual

Anova

Anova L1390 User manual

Anova Tuscany T2267R User manual

Anova

Anova Tuscany T2267R User manual

Anova Courtyard F1030 User manual

Anova

Anova Courtyard F1030 User manual
Anova RCPTC4 User manual

Anova

Anova RCPTC4 User manual

Anova Wainwright RCPWT63 User manual

Anova

Anova Wainwright RCPWT63 User manual

Anova L1369A User manual

Anova

Anova L1369A User manual

Anova F1051 User manual

Anova

Anova F1051 User manual
Anova SS1001-TRI User manual

Anova

Anova SS1001-TRI User manual

Anova Airi AE2690LF User manual

Anova

Anova Airi AE2690LF User manual

Popular Outdoor Furnishing manuals by other brands

felton industries FELEPG5T6 Assembly instruction

felton industries

felton industries FELEPG5T6 Assembly instruction

Dreamo OTF-503S quick start guide

Dreamo

Dreamo OTF-503S quick start guide

Garden Furniture Direct Borrowdale Assembly instructions

Garden Furniture Direct

Garden Furniture Direct Borrowdale Assembly instructions

Rowlinson Clarendon Assembly instructions

Rowlinson

Rowlinson Clarendon Assembly instructions

Garden Treasures 8201268 Assembly instructions

Garden Treasures

Garden Treasures 8201268 Assembly instructions

Safavieh Outdoor Marson PAT7062 quick start guide

Safavieh Outdoor

Safavieh Outdoor Marson PAT7062 quick start guide

SSC-LUXon 990070716 Assembly & operating instructions

SSC-LUXon

SSC-LUXon 990070716 Assembly & operating instructions

supremo LEISURE 2-Seat Stool 110*40cm Assembly instruction

supremo LEISURE

supremo LEISURE 2-Seat Stool 110*40cm Assembly instruction

Hatteras Hammocks DCA1-K-HH instructions

Hatteras Hammocks

Hatteras Hammocks DCA1-K-HH instructions

Lemeks Palmako PA120-5959 Assembly, installation and maintenance manual

Lemeks

Lemeks Palmako PA120-5959 Assembly, installation and maintenance manual

OLT 24 Assembly manual

OLT

OLT 24 Assembly manual

forest-style HACIENDA 2354 Building instructions

forest-style

forest-style HACIENDA 2354 Building instructions

Courtyard Creations RUS0188-WM Assembly instructions

Courtyard Creations

Courtyard Creations RUS0188-WM Assembly instructions

kingsley-bate MC-55 Assembly instructions

kingsley-bate

kingsley-bate MC-55 Assembly instructions

Weltevree Carrier product manual

Weltevree

Weltevree Carrier product manual

Grange Fencing Elite Arch Assembly instructions

Grange Fencing

Grange Fencing Elite Arch Assembly instructions

Grosfillex AUVENT YR14 Assembly instructions
Grosfillex

Grosfillex AUVENT YR14 Assembly instructions

X-METAL EAGLE 33511 Assembly instructions

X-METAL

X-METAL EAGLE 33511 Assembly instructions

manuals.online logo
manuals.online logoBrands
  • About & Mission
  • Contact us
  • Privacy Policy
  • Terms and Conditions

Copyright 2025 Manuals.Online. All Rights Reserved.