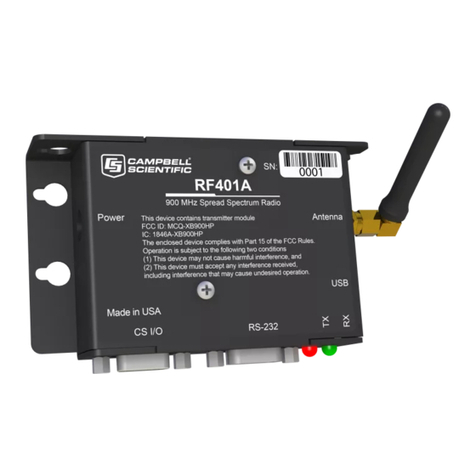
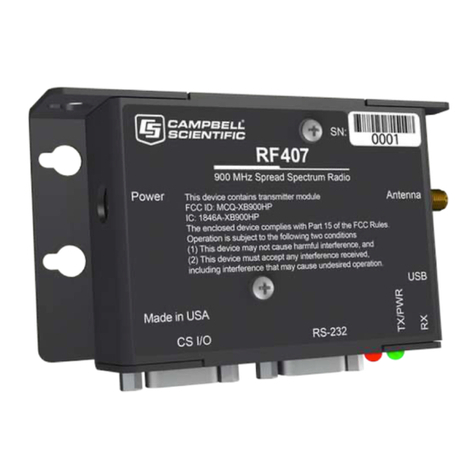
Campbell RF407 Series User manual

Datalogger RF407-Series
Spread Spectrum Radio Option
Revision: 9/16
Copyright © 2016
Campbell Scientific, Inc.
COMMUNICATIONS SETUP GUIDE


Guarantee
This equipment is guaranteed against defects in materials and workmanship.
We will repair or replace products which prove to be defective during the
guarantee period as detailed on your invoice, provided they are returned to us
prepaid. The guarantee will not apply to:
Equipment which has been modified or altered in any way without the
written permission of Campbell Scientific
Batteries
Any product which has been subjected to misuse, neglect, acts of God or
damage in transit.
Campbell Scientific will return guaranteed equipment by surface carrier
prepaid. Campbell Scientific will not reimburse the claimant for costs incurred
in removing and/or reinstalling equipment. This guarantee and the Company’s
obligation thereunder is in lieu of all other guarantees, expressed or implied,
including those of suitability and fitness for a particular purpose. Campbell
Scientific is not liable for consequential damage.
Please inform us before returning equipment and obtain a Repair Reference
Number whether the repair is under guarantee or not. Please state the faults as
clearly as possible, and if the product is out of the guarantee period it should
be accompanied by a purchase order. Quotations for repairs can be given on
request. It is the policy of Campbell Scientific to protect the health of its
employees and provide a safe working environment, in support of this policy a
“Declaration of Hazardous Material and Decontamination” form will be
issued for completion.
When returning equipment, the Repair Reference Number must be clearly
marked on the outside of the package. Complete the “Declaration of
Hazardous Material and Decontamination” form and ensure a completed copy
is returned with your goods. Please note your Repair may not be processed if
you do not include a copy of this form and Campbell Scientific Ltd reserves
the right to return goods at the customers’ expense.
Note that goods sent air freight are subject to Customs clearance fees which
Campbell Scientific will charge to customers. In many cases, these charges are
greater than the cost of the repair.
Campbell Scientific Ltd,
80 Hathern Road,
Shepshed, Loughborough, LE12 9GX, UK
Tel: +44 (0) 1509 601141
Fax: +44 (0) 1509 601091
www.campbellsci.co.uk


PLEASE READ FIRST
About this manual
Please note that this manual was originally produced by Campbell Scientific Inc. primarily for the North
American market. Some spellings, weights and measures may reflect this origin.
Some useful conversion factors:
Area: 1 in2(square inch) = 645 mm2
Length: 1 in. (inch) = 25.4 mm
1 ft (foot) = 304.8 mm
1 yard = 0.914 m
1 mile = 1.609 km
Mass: 1 oz. (ounce) = 28.35 g
1 lb (pound weight) = 0.454 kg
Pressure: 1 psi (lb/in2) = 68.95 mb
Volume: 1 UK pint = 568.3 ml
1 UK gallon = 4.546 litres
1 US gallon = 3.785 litres
In addition, while most of the information in the manual is correct for all countries, certain information
is specific to the North American market and so may not be applicable to European users.
Differences include the U.S standard external power supply details where some information (for
example the AC transformer input voltage) will not be applicable for British/European use. Please note,
however, that when a power supply adapter is ordered it will be suitable for use in your country.
Reference to some radio transmitters, digital cell phones and aerials may also not be applicable
according to your locality.
Some brackets, shields and enclosure options, including wiring, are not sold as standard items in the
European market; in some cases alternatives are offered. Details of the alternatives will be covered in
separate manuals.
Part numbers prefixed with a “#” symbol are special order parts for use with non-EU variants or for
special installations. Please quote the full part number with the # when ordering.
Recycling information
At the end of this product’s life it should not be put in commercial or domestic refuse but
sent for recycling. Any batteries contained within the product or used during the
products life should be removed from the product and also be sent to an appropriate
recycling facility.
Campbell Scientific Ltd can advise on the recycling of the equipment and in some cases
arrange collection and the correct disposal of it, although charges may apply for some
items or territories.
For further advice or support, please contact Campbell Scientific Ltd, or your local agent.
Campbell Scientific Ltd, 80 Hathern Road, Shepshed, Loughborough, LE12 9GX, UK
Tel: +44 (0) 1509 601141 Fax: +44 (0) 1509 601091
www.campbellsci.co.uk


Precautions
DANGER —MANY HAZARDS ARE ASSOCIATED WITH INSTALLING, USING, MAINTAINING, AND WORKING ON
OR AROUND TRIPODS, TOWERS, AND ANY ATTACHMENTS TO TRIPODS AND TOWERS SUCH AS SENSORS,
CROSSARMS, ENCLOSURES, ANTENNAS, ETC. FAILURE TO PROPERLY AND COMPLETELY ASSEMBLE,
INSTALL, OPERATE, USE, AND MAINTAIN TRIPODS, TOWERS, AND ATTACHMENTS, AND FAILURE TO HEED
WARNINGS, INCREASES THE RISK OF DEATH, ACCIDENT, SERIOUS INJURY, PROPERTY DAMAGE, AND
PRODUCT FAILURE. TAKE ALL REASONABLE PRECAUTIONS TO AVOID THESE HAZARDS. CHECK WITH YOUR
ORGANIZATION'S SAFETY COORDINATOR (OR POLICY) FOR PROCEDURES AND REQUIRED PROTECTIVE
EQUIPMENT PRIOR TO PERFORMING ANY WORK.
Use tripods, towers, and attachments to tripods and towers only for purposes for which they are designed. Do not
exceed design limits. Be familiar and comply with all instructions provided in product manuals. Manuals are
available at www.campbellsci.eu or by telephoning +44(0) 1509 828 888 (UK). You are responsible for conformance
with governing codes and regulations, including safety regulations, and the integrity and location of structures or land
to which towers, tripods, and any attachments are attached. Installation sites should be evaluated and approved by a
qualified engineer. If questions or concerns arise regarding installation, use, or maintenance of tripods, towers,
attachments, or electrical connections, consult with a licensed and qualified engineer or electrician.
General
•Prior to performing site or installation work, obtain required approvals and permits. Comply with all
governing structure-height regulations, such as those of the FAA in the USA.
•Use only qualified personnel for installation, use, and maintenance of tripods and towers, and any
attachments to tripods and towers. The use of licensed and qualified contractors is highly recommended.
•Read all applicable instructions carefully and understand procedures thoroughly before beginning work.
•Wear a hardhat and eye protection, and take other appropriate safety precautions while working on or
around tripods and towers.
•Do not climb tripods or towers at any time, and prohibit climbing by other persons. Take reasonable
precautions to secure tripod and tower sites from trespassers.
•Use only manufacturer recommended parts, materials, and tools.
Utility and Electrical
•You can be killed or sustain serious bodily injury if the tripod, tower, or attachments you are installing,
constructing, using, or maintaining, or a tool, stake, or anchor, come in contact with overhead or
underground utility lines.
•Maintain a distance of at least one-and-one-half times structure height, or 20 feet, or the distance
required by applicable law, whichever is greater, between overhead utility lines and the structure (tripod,
tower, attachments, or tools).
•Prior to performing site or installation work, inform all utility companies and have all underground utilities
marked.
•Comply with all electrical codes. Electrical equipment and related grounding devices should be installed
by a licensed and qualified electrician.
Elevated Work and Weather
•Exercise extreme caution when performing elevated work.
•Use appropriate equipment and safety practices.
•During installation and maintenance, keep tower and tripod sites clear of un-trained or non-essential
personnel. Take precautions to prevent elevated tools and objects from dropping.
•Do not perform any work in inclement weather, including wind, rain, snow, lightning, etc.
Maintenance
•Periodically (at least yearly) check for wear and damage, including corrosion, stress cracks, frayed cables,
loose cable clamps, cable tightness, etc. and take necessary corrective actions.
•Periodically (at least yearly) check electrical ground connections.
WHILE EVERY ATTEMPT IS MADE TO EMBODY THE HIGHEST DEGREE OF SAFETY IN ALL CAMPBELL
SCIENTIFIC PRODUCTS, THE CUSTOMER ASSUMES ALL RISK FROM ANY INJURY RESULTING FROM IMPROPER
INSTALLATION, USE, OR MAINTENANCE OF TRIPODS, TOWERS, OR ATTACHMENTS TO TRIPODS AND TOWERS
SUCH AS SENSORS, CROSSARMS, ENCLOSURES, ANTENNAS, ETC.

i
Table of Contents
PDF viewers: These page numbers refer to the printed version of this document. Use the
PDF reader bookmarks tab for links to specific sections.
1. Introduction ................................................................1
2. Communication Setup ...............................................2
2.1 Basic Procedure: PC with RF407 to CRX-RF407 ...............................2
2.2 PC with RF407 to Multiple CRX-RF407s .........................................14
2.3 CRX-RF407 as a Router ....................................................................16
2.4Communication Combinations...........................................................21
2.5 Network Planner ................................................................................21
3. Troubleshooting.......................................................22


1
Datalogger RF407-Series Spread
Spectrum Radio Option
1. Introduction
This manual discusses the RF407-series frequency-hopping spread-spectrum
(FHSS) radio option for the CR6-series and CR300-series dataloggers. This
manual will refer to these dataloggers collectively as “CRX-RF407.”
Throughout the manual CRX-RF407 can be replaced with any datalogger and
radio option, unless otherwise noted. The standalone radios (that is, not the
dataloggers with the radio option) will be referred to collectively as “RF407.”
Throughout the manual RF407 can be replaced with RF412 or RF422, unless
otherwise noted.
The radio options cannot be mixed. A CRX-RF407 can only be
used with other CRX-RF407s and RF407s. A CRX-RF412 can
only be used with other CRX-RF412s and RF412s. A CRX-RF422
can only be used with other CRX-RF422s and RF422s.
These dataloggers are designed for license-free use in several countries:
•The RF407 option has a 902 to 928 MHz operating-frequency range
appropriate for use in the United States and Canada (FCC / IC
compliant).
•The RF412 option has a 915 to 928 MHz operating-frequency range
appropriate for use in Australia and New Zealand (ACMA compliant).
•The RF422 option has an 863 to 873 MHz operating-frequency range
appropriate for use in most of Europe and some of Asia (ETSI
compliant).
A CRX-RF407 can be used with an RF407 at a base computer to establish
communication between LoggerNet and the CRX-RF407. A CRX-RF407 can
also be part of a new or existing RF407 network.
This document describes how to set up a simple base RF407 to remote
CRX-RF407 network. It also describes how to extend that system to include
more CRX-RF407s and how the CRX-RF407 can be used in combination with
other communication methods.
A CRX-RF407 contains the same radio as a standalone RF407. Most of the
radio settings are the same for the CRX-RF407 and the RF407. See the RF407-
Series Spread Spectrum Radios manual for more information on specifications
and radio communication using the CRX-RF407.
NOTE

Datalogger RF407-Series Spread Spectrum Radio Option
2
This equipment has been tested and found to comply with the
limits for a Class A digital device, pursuant to part 15 of the FCC
Rules. These limits are designed to provide reasonable protection
against harmful interference when the equipment is operated in a
commercial environment. This equipment generates, uses, and can
radiate radio frequency energy and, if not installed and used in
accordance with the instruction manual, may cause harmful
interference to radio communications. Operation of this
equipment in a residential area is likely to cause harmful
interference in which case the user will be required to correct the
interference at his or her own expense.
2. Communication Setup
2.1 Basic Procedure: PC with RF407 to CRX-RF407
This procedure assumes the RF407 and the CRX-RF407 are in
their Factory Default settings.
Click the Device Configuration
Utility icon on the PC.
Device Configuration Utility
(DevConfig) opens.
In DevConfig, select Device Type |
Radio | RF407 Series.
DevConfig displays RF407 series
information in the right pane.
NOTE
NOTE

Datalogger RF407-Series Spread Spectrum Radio Option
3
On the right pane, click the Install
the USB device driver link.
The Device Driver Installation
Wizard opens.
Click Next.
The device drivers are installed and
the Wizard advances to the next
screen.

Datalogger RF407-Series Spread Spectrum Radio Option
4
Click Finish.
The Device Driver Installation
Wizard closes.
Connect the USB port on your
RF407 to a USB port on your
computer.
The TX/PWR and RX LEDs flash
once, after which the TX/PWR
LED begins blinking at the Power
Mode interval (0.5 sec, by default).

Datalogger RF407-Series Spread Spectrum Radio Option
5
In the lower left of the DevConfig
screen, click the Communication
Port list button.
A list of available communication
ports appears.
In the list of available
communication ports, click RF407-
Series (COMnn), where nn is the
COM port number assigned by your
PC. Click OK.
The COM port number assigned to
the RF407 populates the
Communication Port box.

Datalogger RF407-Series Spread Spectrum Radio Option
6
In the lower left of the DevConfig
screen, click Connect. If the Avoid
Conflicts with the Local Server
window appears, click OK.
DevConfig displays the Deployment
tab in the right pane.
In the Deployment tab, set the
Active Interface to USB or RS-232
depending on how your computer
will be connected to the RF407.

Datalogger RF407-Series Spread Spectrum Radio Option
7
Click Apply.
The Confirm Settings Apply dialog
box appears.
Click Yes.
The TX/PWR and RX LEDs flash
once, after which the TX/PWR
LED returns to blinking at the
Power Mode interval (0.5 sec, by
default).
The settings changes have been
saved dialog box appears.
Click OK.
DevConfig disconnects from the
RF407 and returns to the main
RF407 screen.

Datalogger RF407-Series Spread Spectrum Radio Option
8
Attach an antenna to the RF407.
Provide power to the RF407. (The
RF407 can be powered through the
USB port or through the DC Power
jack.)
Attach an antenna to the
CRX-RF407.
Provide power to the CRX-RF407:
• connect 12 Vdc at the green
–BAT+ terminals,
• or connect 16 to 32 Vdc at the
–CHG+ terminals.
Open LoggerNet.

Datalogger RF407-Series Spread Spectrum Radio Option
9
From the LoggerNet toolbar, select
Setup from the Main category.
If the Setup screen does not say EZ
(Simplified) View at the top, click
EZ View in the top-right corner, to
switch to the EZ View.
Click Add.
The EZSetup Wizard opens.
Click Next.

Datalogger RF407-Series Spread Spectrum Radio Option
10
Select CR6Series or CR300Series
depending on your datalogger. Click
Next.
Select Direct Connect. Click Next.
In the list of available
communication ports, click RF407-
Series (COMnn), where nn is the
COM port number assigned by your
PC. Click Next.
(Note that you choose RF407-
Series (COMnn) to select the USB
port to which the RF407 is attached.
LoggerNet sees the CRX-RF407 as
directly connected to this port. The
RF407-to-datalogger link does not
need to be indicated in LoggerNet.)
Other manuals for RF407 Series
2
Table of contents
Other Campbell Radio manuals

Campbell
Campbell RF401 User manual

Campbell
Campbell RF451 User manual

Campbell
Campbell RF401A-Series User manual

Campbell
Campbell RF401A Series User manual

Campbell
Campbell RF407 Series User manual

Campbell
Campbell RF451 User manual

Campbell
Campbell RF407 Series User manual

Campbell
Campbell RF400 User manual

Campbell
Campbell RF450 User manual