Camplux GG201S User manual

Visit Us: Camplux.com
8350 Patriot Blvd STE B, North Charleston, SC 29420 1(844) 538-7475
Model: GG201S
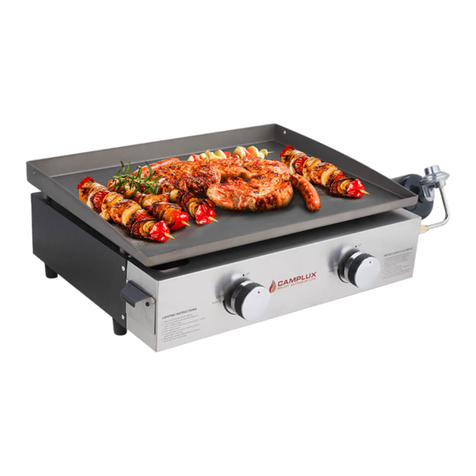
TABLE TOP GAS GRILL GRIDDLE
Instruction For Installation And Use

If you smell gas:
● Turn off gas to the appliance.
● Put out any open fire.
● If smell continues, walk away from the appliance
and call your gas dealer or firemen at once.
● Do not leave this appliance unattended.
● Don’t use this appliance within 25 ft to any
flammable liquid.
● In the event of a fire, walk away from the
appliance and call your firemen at once. Do not try
to put out any oil or a grease fire with water.
Not following these instructions may cause fire or
explosion which may cause property damaged,
personal injury, or death.
DANGER
CALIFORNIA PROPOSITION 65 WARNING:
The State of California is aware of this product can cause cancer and birth defects or other reproductive hard.
(California law requires this warning be given to customers in the State of California.)
WARNING
Please read all necessary information for the
proper assembly and safe use of the appliance
before installing this equipment. If you have any
problems, call your service team or supplier. Do not
try to fix the problems yourself, or it will cause injury
or property damage.
Installing this appliance must conform with state or
other codes, or, in the absence of such codes, with
either the National Fuel Gas Code, ANSI Z223.1 /
NFPA 54, or the Standard for Recreational Vehicles,
ANSI A/NFPA 1192, and CSA Z240 RV Series,
Recreational Vehicle Code, as applicable.
WARNING
Consumers must take responsibility to make sure the griddle is properly assembled, installed and maintained.
Not following the instructions could result in life injury and/or property damage.
WARNING
FOR YOUR SAFETY
Visit Us: Camplux.com
8350 Patriot Blvd STE B, North Charleston, SC 29420 1(844) 538-7475
1
www.camplux.com

Precautions
1. Don’t use the appliance indoors. It is only to be used outdoors.
2. During any pressure test, the griddle must be disconnected from the gas supply piping system at test pressures
in excess of 1/2 PSI (3.5 kPa).
3. The appliance must be separated from the gas supply piping system during any pressure testing of the gas
supply piping system at test pressures equal to or less than 1/2 PSI (3.5 kPa).
4. Before using this appliance, visually inspect the gas hose from the tank connection to the orifice in case there is
any wear, breaks, leaks, cracks, cuts or intrusions. If any of these discovered, replace hose prior to operation.
5. Under the condition of rain, snow, hail, sleet, or other forms of precipitation while cooking with oil or grease, it is
necessary that you must cover the cooking vessel immediately and turn off the appliance burners and gas
supply. Don’t try to move the appliance or cooking vessel.
6. Make sure the appliance must be on level, stable noncombustible surface in an area clear of combustible
material during cooking. An asphalt surface (blacktop) can not be accepted for this purpose.
WARNING
● This device is to be used outdoors only, and can not be used in a building, garage, or any other enclosed area.
● It is not acceptable to be used on or under any flats or condominium balcony or deck.
● Using alcohol, prescription or non-prescription drugs may damage the consumers’ ability to properly assemble or
safely operate the griddle.
● Type BC or ABC fire extinguisher is necessary to be ready during cooking.
● When an oil or grease fire arise, don’t attempt to extinguish with water. Must call the fire Department or use A
Type BC or ABC fire extinguisher.
● The appliance operation must be watched. Don’t let children and pets near the appliance at all times.
● This appliance is not designed and used as a heater and not suitable for frying turkeys.
● During and after use of the appliance, use insulated oven mitts or gloves for protection from hot surfaces or
splatter from cooking liquids.
● Never put empty cooking vessel on the appliance while in operation. Be cautious when placing anything in
cooking vessel while in operation.
Never move the appliance during the use. Must make sure the cooking vessel cool to 115°F before moving or
storing.
● Commercial purpose is not allowed to act on this griddle.
Installation Safety Precautions
● The installation of this appliance must conform with local codes, or in the absence of local codes, with either the
National Fuel Gas Code, ANSI Z223.1/NFPA 54, Natural Gas and Propane Installation Code, CSA B149.1 or
Propane Storage and Handling Code, B149.2, or the Standard for Recreational Vehicles, ANSI A 119.2/NFPA
1192, and CSA Z240 RV Series, Recreational Vehicle Code, as applicable.
● It is not accepted to operate inside RV's or on boats.
● It is safely certified to be used in the countries of United States and Canada.
Never modify and use in any other countries. Modification will cause a safety hazard or damage.
● Replacing pressure regulators need to be those who are specified by the appliance manufacturer.
After you have read and understand all safety information, warnings and precautions, you can proceed to the
next page for assembly & installation instructions regarding your particular model.
2
www.camplux.com
Visit Us: Camplux.com
8350 Patriot Blvd STE B, North Charleston, SC 29420 1(844) 538-7475

What's In the Box
Key
1
2
3
4
5
6
7
8
9
Description
Griddle Plate
Cooking Grid
Flame Tamer
Grease Cup
Unit Body
Grease Tray
Rubber Foot
Pressure Reducing Valve
5/8"-18UNF Quick Connector
Qty
1
1
1
1
1
1
4
1
1
WARNING
Never use this appliance under extended awnings as it may cause a fire or personal injury. Install it on the opposite
side from the fuel distribution/dispensing system of the recreational vehicle.
Never let it be located or used under overhead unprotected combustible buildings or roof.
If not in operation or when in travelling, make sure all low pressure propane gas system precautions are in place
and all propane gas shut off valves are shut off.
1
2
3
4
5
6
7
8
9
3
Visit Us: Camplux.com
8350 Patriot Blvd STE B, North Charleston, SC 29420 1(844) 538-7475
www.camplux.com

Connecting the Gas Supply
CAUTION
Connect to the vehicle's propane system with a flexible hose connector which must comply with the high pressure
requirements of the Standard for Pigtails and Flexible Hose Connectors for LP Gas, ANSI/UL 569, and a length no
longer than that required to allow the griddle to be mounted when “in use” position of mounting. The hose that is
mounted can not be allowed to touch with the hot surface of the griddle while in operation or in the storage/travel
mode.
CAUTION
BEFORE STARTING THE INSTALLATION
MUST fit the recommended minimum clearances to combustible constructions:
6″ from sides
8″ from back
8″ from vertical
Installation
1. When you do not use this appliance or want to store this appliance, it is strongly recommended to place it in a
place with a size of 19.0" x 9.0" to ensure that the bakeware is completely placed in the storage location (keep it
cool during storage).
8''
6''
Don’t check leaks with an open fire. When not
using, it is a correct way by opening the gas
and apply soapy water to all joints to see if
bubbles are formed.
WARNING
17.95''
5.75''
1.3''
4
Visit Us: Camplux.com
8350 Patriot Blvd STE B, North Charleston, SC 29420 1(844) 538-7475
www.camplux.com

Installation Guide for Griddle
2. Put the griddle upside down on a soft surface. Put the four rubber feet to the bottom of the griddle as shown
below.
1. Remove the griddle plate from the griddle body.
4. Push the oil pan along the track.
3. Installing the oil cartridge.
1
6
7
4
5
Visit Us: Camplux.com
8350 Patriot Blvd STE B, North Charleston, SC 29420 1(844) 538-7475
www.camplux.com

5. Put the griddle upside down on a soft surface. Put the four rubber feet to the bottom of the griddle as shown
below.
1
WARNING
Never check leaks with an open flame. Turn on the gas and apply soapy water to all joints to see if bubbles are
formed.
Connection
Installation type 1: With this 5/8"-18UNF quick connector, you can easily and quickly connect with gas grill griddle
and enjoy food.
Installation type 2: With this 5/8”-18UNF gas regulator, you can easily connect with gas grill griddle and 20LB
propane cylinder, and you can enjoy life in camping, park or backyard.
5/8"-18UNF Male Connector
Installation Type 2:
5/8"-18UNF Femal to 5/8"-18UNF Quick Connector
Installation Type 1:
5/8"-18UNF Gas Regulator-5ft
6
Visit Us: Camplux.com
8350 Patriot Blvd STE B, North Charleston, SC 29420 1(844) 538-7475
www.camplux.com

7
1. Remove the griddle plate. 2. Reverse the oven body by 90 degrees and lock the 4
foot pads in turn.
3. Installing the oil cartridge. 4. Push the oil pan along the track.
5. Insert the grease tray. 6. Put on the cooking grill.
Installation Guide for Barbecue
1
46
3
2
7
Visit Us: Camplux.com
8350 Patriot Blvd STE B, North Charleston, SC 29420 1(844) 538-7475
www.camplux.com

Instruction of Operation
To light griddle
Must read all steps carefully
1. Push the control knob in and turn counter-clockwise to the “Light” position.
2. If fire does not appear in 5 seconds, shut the burner control off, wait for 5 minutes, and repeat the lighting
procedure.
Use match for lighting
1. Don’t lean over the griddle while lighting. Ensure no gas leaks occur.
2. Control knob must be in the “OFF” position. Get the griddle top off.
3. Light a long match, then put the match on the right or left side of the burner.
4. Press the control knob in and turn counterclockwise to the “HIGH” position.
Be sure the burner lights and keep it lit.
Check burner fire
Remove the griddle plate or the grease cup before lighting as to visually check the fire. Light burner and turn knob
from high to low you will see a smaller fire in the low position and bigger in the high position.
Check the fire before each use. If you only see low flame, refer to Burner has low flame regardless of knob position
in the TROUBLESHOOTING GUIDE. Change the griddle plate or grease drawer before cooking.
Grease Cup Low Flame
To turn off griddle
Turn the control knob to the “OFF” position.
Seasoning
Seasoning is baking oil into metal to make a sticky resistant surface and protect against oxidation.
There is a layer of soy oil on the appliance to protect against rust during transporting. It can be cleaned off with
warm soapy water when you begin your initial seasoning.
8
Visit Us: Camplux.com
8350 Patriot Blvd STE B, North Charleston, SC 29420 1(844) 538-7475
www.camplux.com

The choice of oil
The choice of some oils are important for seasoning.
Using Flax seed oil for your initial seasoning as it creates a very durable bond. Any of the following oil can be used:
● Flax Seed Oil
● Extra Virgin Olive Oil
● Vegetable Oil
● Soy Oil
The purpose behind your initial seasoning is to create a bond with the griddle top by coating your griddle with oil
and heat the oil above its smoke point to polymerize the oil. You will make a black, stick resistant surface easy to
clean.
Seasoning the griddle
1. Put small amount of chosen oil to the surface of the griddle
top and spread it around with a cloth or paper towel (use
tongs or metal spatulas to hold the cloth or paper towel).
2. Make it medium-high heat.
3. It is good to heat the oil until it reaches its “smoke-point”
and let it continue to discolor.
4. To make a good black surface , make sure to repeat steps 1
through 3 a few times after it cool down.
The Storage of Griddle
DANGER
Never put griddle in storage or travel mode at once after use when it is too hot to touch and make sure it cool
down. Not following the direction could result in fire resulting in property damage, personal injury or death.
● For portable/tabletop griddles, disconnect from the recreational vehicles low pressure LP gas supply system via
quick-disconnect fitting (following applicable safety steps).
● Turn it off before storing portable griddle indoors. Disconnect it from the low pressure gas system, and the unit
itself is at room temperature.
Clean the Burner
Follow these instructions to clean the burner.
1. Shut gas “OFF” at the control knob.
2. Ensure the entire griddle is cooled down.
3. Remove griddle plate from assembly.
4. Use wire brush to clean the entire outer surface of the burner to remove food residue and dirt.
5. Clean any blocked ports with a stiff wire such as an open paper clip.
6. Wear eye protection and use an air hose to force air into the burner tube and out the burner ports.
Ensure each port to make sure air is flowing out each respective nozzle.
Flame
9
Visit Us: Camplux.com
8350 Patriot Blvd STE B, North Charleston, SC 29420 1(844) 538-7475
www.camplux.com

Troubleshooting Guide
Safety of Food
The safety of food is a key part for enjoying the outdoor cooking. For keeping food safe from harmful bacteria, read
these four basic steps:
1. Clean: Use HOT SOAPY water to wash hands, utensils, and surfaces before and after contacting raw meat and
poultry.
2. Separate: To avoid cross contamination, separate raw meats and poultry from ready-to eat foods to. Use a clean
platter and utensils when removing cooked foods.
3. Cook: Make sure meat and poultry are cooked thoroughly to kill bacteria. You can use a thermometer to test
proper internal food temperatures.
Burner can't be
light using the
piezoelectric
ignition system
No propane supply or empty supply Check shut off valves Fill propane
supply
Check regulator call customer service
Ensure electrode is positioned as
shown in "ignition electrode position".
Call customer service
Have injection and gas hose cleaned
Clean the burner following steps
outlined in "CLEAN THE BURNER"
Have shut off valves checked fill
propane supply
Check regulator. Call customer service
Clean injection and gas hose
Refer to "CLEANING THE BURNER"
to clean the burner
Replenish propane supply
Verify gas pressure on both inlet side
and outlet side of appliance regulator.
Call customer service
Refer to "cleaning the burner" to
clean the burner
Have injection and gas hose cleaned
Call customer service
Defective regulator
Electrode not in correct
position or is damaged/faulty
Obstructions in gas injection or gas
hose
Defective control valve
Obstructions in the burner
Obstructions in gas injection or
gas hose
Burner could be damaged
Low gas supply
No propane supply/empty supply
Defective regulator
Obstructions in gas injection or gas
hose
Obstructions in the burner
Low inlet gas supply pressure
Burner can’t be
light with a match
Burner has small
fire regardless of
knob position
Burner has a
hissing or
roaring noise
Problem Possible Cause Solution
10
Visit Us: Camplux.com
8350 Patriot Blvd STE B, North Charleston, SC 29420 1(844) 538-7475
www.camplux.com

Specification of the Griddle
Conforms to ANSI STD Z21.89-2017 Certified to CSA STD 1.18-2017 Outdoor Cooking
Specialty Gas Appliance
This appliance is not intended for commercial use
llustrations below show the Griddle Plate in the stored position.
Burner Input Rate
Inlet Gas Pressure
Unit Weight
15000 BTU/h
MAX: 13''
26.5 lbs.
Portable / Tabletop
2.16''
16.37''
1.49''
17.95''
5.75''
1.30''
11
Visit Us: Camplux.com
8350 Patriot Blvd STE B, North Charleston, SC 29420 1(844) 538-7475
www.camplux.com

Replacement Parts
Key
1
2
3
4
5
6
7
8
9
Description
Griddle Plate
Cooking Grid
Flame Tamer
Grease Cup
Unit Body
Grease Tray
Rubber Foot
Pressure Reducing Valve
5/8"-18UNF Quick Connector
Qty
1
1
1
1
1
1
4
1
1
1
2
3
4
5
6
7
8
9
12
Visit Us: Camplux.com
8350 Patriot Blvd STE B, North Charleston, SC 29420 1(844) 538-7475
www.camplux.com

Visit Us: Camplux.com
8350 Patriot Blvd STE B, North Charleston, SC 29420 1(844) 538-7475

Modèle N°: GG201S
TABLE DU GRIL BARBECUE À GAZ DE
Instruction pour l’installation et l’utilisation
Visit Us: Camplux.com
8350 Patriot Blvd STE B, North Charleston, SC 29420 1(844) 538-7475

Au cas où le gaz sen:
● Arrêter la fourniture de gaz vers l’appareil.
● Éteindre toute flamme nue.
● Au cas où l’odeur persiste, s’éloigner de l’appareil
et appeler votre négociant de gaz ou le service de
pompiers immédiatement.
● Ne pas laisser cet appareil sans surveillance.
● Ne pas utiliser cet appareil dans une distance de
25 pi de tout liquide inflammable.
● En cas d’incendie, s’éloigner de l’appareil et
appeler le service des pompiers immédiatement.
Ne pas essayer d’éteindre un incendie de graisse
ou d’huile avec de l’eau.
Ne pas suivre les consignes suivantes peut entraîner
un incendie ou une explosion susceptible de causer
des dommages matériels, des blessures corporelles
ou la mort.
DANGER
AVERTISSEMENT DE LA PROPOSITION 65 DE LA CALIFORNIE :
L’État de la Californie est conscient de ce que cet produit peut causer le cancer et des anomalies congénitales
ou d’autres risques de reproduction. (La loi de la Californie demande que cet avertissement soit donné aux
clients au sein de l’État de la Californie.)
AVERTISSEMENT
Veuillez lire tous les renseignements nécessaires
pour un assemblage approprié et une utilisation
sécurisée de l’appareil avant d’installer cet
équipement.Au cas où vous avez des problèmes,
appelez l’équipe de service ou le fournisseur. Ne
pas essayer de résoudre un problème vous-même,
au risque de créer des blessures corporelles ou des
dommages aux biens.
L’installation de cet appareil doit se conformer aux
codes d’État ou à d’autres codes, ou en l’absence
de tels codes, au code national sur les combustibles
gazeux, ANSI Z223.1/NFPA 54, ou la norme pour les
véhicules de plaisance, ANSI A/NFPA1192, et CSA
séries Z240 RV, code pour véhicules de plaisance,
selon le cas.
AVERTISSEMENT
Les consommateurs doivent prendre la responsabilité de s’assurer que la plaque chauffante est correctement
assemblée, installée et entretenue. Ne pas suivre ces consignes peut donner lieu à de blessures graves et/ou
des dommages matériels.
AVERTISSEMENT
POUR VOTRE SÉCURITÉ
1
www.camplux.com
Visit Us: Camplux.com
8350 Patriot Blvd STE B, North Charleston, SC 29420 1(844) 538-7475

Précautions
1. E pas utiliser l’appareil à l’intérieur. Il doit uniquement être utilisé à l’extérieur.
2. Rndant l’épreuve de pression, la plaque chauffante doit être déconnectée de la tuyauterie du système
d’alimentation de gaz lorsque l’épreuve de pression excède 1/2 PSI (3,5 kPa).
3. ’Appareil doit être séparé de la tuyauterie du système d’alimentation de gaz lors de l’épreuve de pression de la
tuyauterie du système d’alimentation de gaz lorsque la pression d’épreuve est égale ou inférieure à 1/2 PSI
(3,5 kPa).
4. Vant d’utiliser cet appareil, effectuer une inspection visuelle du tuyau à gaz partant du raccord de réservoir vers
l’orifice au cas où il y a de l’usure, les cassures, les fuites, des fissures, des coupures ou des intrusions. Au cas
où l’une de ces anomalies est découverte, remplacer le tuyau avant la mise en fonctionnement.
5. Ar temps de pluie, de neige, de grêle, de verglas ou d’autres formes de précipitation lors de la cuisson avec de
l’huile ou de la graisse, il est nécessaire que vous couvriez l’ustensile de cuisson immédiatement et éteindre les
brûleurs de l’appareil et l’alimentation en gaz. Ne pas essayer de déplacer l’appareil ou l’ustensile de cuisson.
6. E rassurer que l’appareil se trouve sur une surface plane, stable et non combustible dans un espace dégagé de
tout matériau combustible pendant la cuisson. Une surface asphaltée (revêtement hydrocarboné) ne peut être
acceptée pour cette raison.
AVERTISSEMENT
● Le présent dispositif doit être uniquement utilisé à l’extérieur et ne peut être utilisé dans un bâtiment, garage ou
tout autre espace clos.
● Il n’est pas acceptable de l’utiliser sur ou en dessous des appartements ou de balcon d’immeuble d’habitation en
copropriété ou de terrasse.
● L’utilisation de l’alcool, des produits sur ordonnance ou sans ordonnance peuvent endommager la capacité du
consommateur à assembler correctement et en toute sécurité la plaque chauffante.
● Il est nécessaire d’avoir un extincteur d’incendie de type BC ou ABC bien en place pendant la cuisson.
● Lorsque survient un incendie d’huile ou de graisse, ne pas essayer de l’éteindre avec de l’eau. Vous devez
appeler le service des pompiers ou utiliser un extincteur d’incendie de type BC ou ABC.
● Le fonctionnement de l’appareil doit être surveillé. Ne pas laisser les enfants et les animaux de compagnie près
de l’appareil à tout moment.
● Le présent appareil n’est pas conçu et utilisé comme un dispositif de chauffage. Il n’est pas approprié pour la
friture de la dinde.
● Lors et après l’utilisation de l’appareil, utiliser des gants ou mitaines de cuisine isolants pour se protéger des
surfaces chaudes ou des éclaboussures issues des liquides de cuisson.
● Ne jamais vider l’ustensile de cuisson sur l’appareil pendant son fonctionnement. Faire attention au moment de
placer quoi que ce soit dans l’ustensile de cuisson lors du fonctionnement.
● Ne jamais déplacer l’appareil pendant l’utilisation. Vous devez vous assurer l’ustensile de cuisson se refroidit
115°F avant de déplacer ou de conserver.
● Il n’est pas autorisé d’utiliser cette plaque chauffante à des fins commerciales.
Précautions d’installation de sécurité
● L’installation de cet appareil doit être conforme aux codes locaux, ou en l’absence de tels codes, au code
national sur les combustibles gazeux, ANSI Z223.1/NFPA 54, code d’installation du propane et du gaz naturel,
CSA B 149.1 ou code de manipulation et de stockage du propane B149.2, ou la norme pour les véhicules de
plaisance, ANSI A 119.2/NFPA 1192, et CSA séries Z240 RV, code pour véhicules de plaisance, selon le cas.
● Il n’est pas accepté de faire fonctionner l’appareil à l’intérieur d’un véhicule de plaisance (RV) ou sur des
bateaux.
● Il est homologué à être utilisé en toute sécurité aux États-Unis et au Canada. Ne jamais modifier et utiliser dans
d’autres pays. La modification entraînera un risque de sécurité ou un dommage.
● Le remplacement des régulateurs de pression doit être effectué avec ceux qui sont spécifiés par le fabricant de
l’appareil.
● Après que vous avez lu et compris tous les renseignements de sécurité, les avertissements et les précautions,
vous pouvez continuer à la page suivante pour être imprégner des consignes d’assemblage et d’installation
relatives à votre modèle particulier.
2
www.camplux.com
Visit Us: Camplux.com
8350 Patriot Blvd STE B, North Charleston, SC 29420 1(844) 538-7475

Contenu de la boîte
Clé
1
2
3
4
5
6
7
8
9
Description
Plaque du gril barbecue
Grillage de cuisson
Dresseur de flamme
Récipient à graisse
Corps de l’unité
Bac à graisse
Patte en caoutchouc
Détendeur
Connecteur rapide 5/8"-18UNF
Qté
1
1
1
1
1
1
4
1
1
AVERTISSEMENT
Ne jamais utiliser cet appareil sous des bannes étendues, car cela peut entraîner un incendie ou des blessures
corporelles. L’installer sur le côté opposé du système de répartition/distribution de carburant du véhicule de
plaisance.
Ne jamais le laisser être placé ou utilisé sous des bâtiments de constructions combustibles ou des toitures non
protégés.
Au cas où l’appareil n’est pas utilisé ou qu’il est en cours de transport, se rassurer de prendre toutes les
précautions du système de gaz propane de basse pression et que tous les robinets de fermeture de gaz propane
sont fermés.
1
2
3
4
5
6
7
8
9
3
www.camplux.com
Visit Us: Camplux.com
8350 Patriot Blvd STE B, North Charleston, SC 29420 1(844) 538-7475

8''
6''
17.95''
5.75''
1.3''
Connexion à l’alimentation au gaz
PRÉCAUTION
Connecter le système de propane du véhicule avec le raccord du tuyau flexible qui doit être conforme avec les
exigences de haute pression de la norme relative aux raccords de tuyau flexibles et en queue de cochon pour le
gaz PL, ANSI/UL 569, et une longueur pas plus longue que celle requise pour permettre à la plaque chauffante
d’être montée lorsqu’elle se trouve à la position de montage « en utilisation ». Le tuyau qui est monté ne doit pas
entrer en contact avec une surface chaude de la plaque chauffante lorsqu’elle est en fonctionnement ou en mode
conservation/voyage.
PRÉCAUTION
AVANT DE COMMENCER L’INSTALLATION
DOIT satisfaire le dégagement minimal recommandé par rapport aux constructions combustibles:
6" des côtés
8" de l’arrière
8" par rapport à la verticale
Installation
1. Lorsque vous n’utilisez pas cet appareil ou souhaitez le ranger, il vous est fortement recommandé de le placer
dans une dimension de 19,0" × 9,0" pour garantir que le moule à gâteau est entièrement placé dans
l’emplacement de stockage (le conserver frais pendant le stockage).
Ne pas vérifier les vérifier avec un feu à ciel
ouvert.En cas de non utilisation, il est
approprié d’ouvrir le gaz et appliquer l’eau
savonneuse à tous les joints pour voir s’il se
forme des bulles.
AVERTISSEMENT
4
www.camplux.com
Visit Us: Camplux.com
8350 Patriot Blvd STE B, North Charleston, SC 29420 1(844) 538-7475
Installation Guide for Griddle
2. Placer le gril barbecue à l’envers sur une surface lisse.Placer les quatre pattes en caoutchouc à la partie
inférieure du gril barbecue comme indiqué ci-dessous.
1. Etirer la plaque du gril barbecue du corps du gril barbecue.
4. Pousser le carter d'huile le long du rail.
3. Installation de la cartouche d'huile.
1
6
7
4
5
www.camplux.com
Visit Us: Camplux.com
8350 Patriot Blvd STE B, North Charleston, SC 29420 1(844) 538-7475
Table of contents
Languages:
Other Camplux Kitchen Appliance manuals
Popular Kitchen Appliance manuals by other brands

LEM
LEM MIGHTY BITE 1606 Use & maintenance

CASO DESIGN
CASO DESIGN VR 190 advanced Original operating manual

Trisa electronics
Trisa electronics 6921.83 Instructions for use

U-Line
U-Line U-3036BVWCS-00B User guide & service manual

Zanussi
Zanussi cooker Operating insructions

Bestron
Bestron SWEET DREAMS ACF300P instruction manual