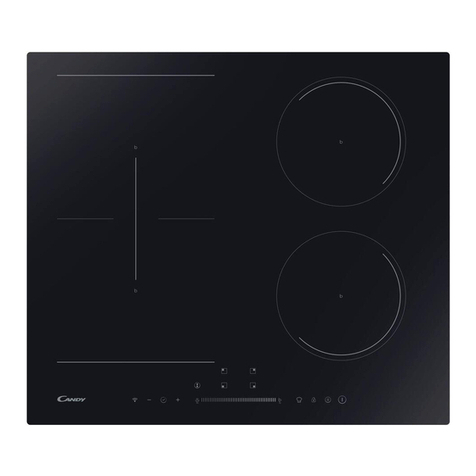
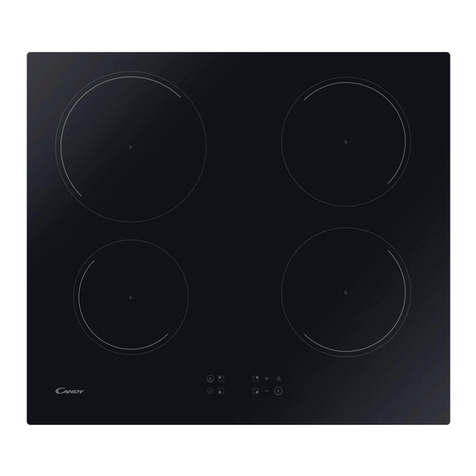
Candy CH64EXCP User manual

PROPERTY OF
CL N° REV. DATE
SPECIFICATION
1/1
MODIFY DESCRIPTION
MODIFIED BY
BASE CODE
TREATMENT
MATERIAL
DATE SIGNATURE
DRAWN
CHECKED
FOR
WEIGHT SCALE
SIZE
NAME
(LOCAL LANGUAGE)
PART CODE SHEET
REPLACE No ORIGIN CL No Class Specification
RELEASE LEVEL
WITHOUT OUR WRITTEN CONSENT IS FORBIDDEN
ALL RIGHTS RESERVED, THE REPRODUCTION OF ANY PART
OF EU DIRECTIVE 2002/95/CE + AMENDMENTS
MATERIALS IN COMPLIANCE WITH REQUIREMENTS
A4 ------------
26.06.2021
KULLANMA KILAVUZU VC HOB PEN CAN. POW.M
XXXXX
26.06.2021
Y.GÜLTÜRK
M.ŞAHİN USER MANUAL VC HOB PEN CAN. POW.M
HOB
GENERAL TOLERANCE
ISO 2768 - m
Printing Color
Grey Scala
-
SC 000-000
PRODUCTION RELEASED
------------
B
C
D
E
F
White Paper
52 gr/m - 70 gr/m
4 2 8 2 8 7 1 3
63040 Kullanma kılavuzuna yeşl nokta eklend/Green dot has been added to user manual.26.06.21 Y.GÜLTÜRK
06.07.22 FR diline logo eklendi/ Logo added to FR language.

CANDY HOOVER GROUP S.R.L. • Via Privata Eden Fumagalli • 20047 Brugherio Milano Italy
HOBS
USER INSTRUCTIONS GB
UGRADNE PLOČE
UPUTE ZA KORISNIKE
PIANI COTTURA
ISTRUZIONI D’USO E DI INSTALLAZIONE IT
TABLE DE CUISSON
NOTICE D’EMPLOI ET D’INSTALLATION FR
PLACAS
MANUAL DE INSTRUCCIONES ES
KOCHMULDE
GEBRAUCHS - UND INSTALLATIONSANWEISUNGEN DE
VARNÉ DESKY
NAVOD POUŽITĺCZ
NAVODILA ZA UPORABO
VGRADNJO IN PRIKLJUČITEV SI
PŁYTY
INSTUKCJE DLA UŻYTKOWNIKA PL
NL
KOOKPLAATS
INSTALLATIE-EN GEBRUIKSINSTRUCTIES
КОТЛОНИ
ИНСТРУКЦИИ ЗА ПОТРЕБИТЕЛЯ
BG
GR
FŐZŐLAPOK
HASZNÁLATI UTASÍTÁS
PLITE
INSTRUCŢIUNI DE UTILIZARE
UGRADNE PLOČE
UPUTSTVO ZA UPOTREBU
ВАРИЛЬНІ ПОВЕРХНІ
ІНСТРУКЦІЯ З ЕКСПЛУАТАЦІЇ
ΕΣΤΙΕΣ ΜΑΓΕΙΡΕΜΑΤΟΣ
ΟΔΗΓΙΕΣ ΧΡΗΣΗΣ
HR
HU
RO
SR
UA
PT
PLACAS
INSTRUÇÕES DO UTILIZADOR

INDICE IT
ISTRUZIONI DI SICUREZZA
1. Avvertenze generali
2. Salvaguardia dell'ambiente
3.Installazione
4. Collegamento elettrico
5. Consigli sui recipienti di cottura per il piano
6. Uso
7. Pulizia e manutenzione
8. Risoluzione del problema
9. Manutenzione aggiuntiva
.........................................12
..................................................13
.......................................13
................................................................13
..............................................14
..............15
............................................................................16
...........................................18
..........................................19
...........................................19
SOMMAIRE FR
CONSIGNES DE SÉCURITÉ
1. Avertissements généraux
2. Protection de l'environnement
3.Installation
4. Raccordement électrique
5. Conseils concernant les ustensiles de
cuisine pour la table de cuisson
6. Utilisation
7. Nettoyage et entretien
8. Résolution de problèmes
9. Contrôle d'entretien préliminaire
........................................20
..........................................21
...................................21
..................................................................21
.......................................22
....................................23
..................................................................24
.......................................26
........................................27
.........................................27
OBSAH CZ
BEZPEČNOSTNÍ OPATŘENÍ
1. Všeobecná upozornění
2. Ochrana životního prostředí
3.Instalace
4. Elektrické připojení
5. Doporučení ohledně nádobí pro varnou desku
6. Použití
7. Čištění a údržba
8. Řešení problémů
9. Následná péče
........................................28
.............................................29
......................................29
.....................................................................29
....................................................30
..........31
........................................................................32
........................................................34
.......................................................34
..........................................................35
INDICE HR
SIGURNOSNE UPUTE
1. Opća upozorenja
2. Zaštita okoliša
3. Ugradnja
4. Priključivanje na električnu mrežu
5. Savjeti za korištenje posuđa za
kuhanje na ugradnoj ploči
6. Upotreba
7. Čišćenje i održavanje
8. Rješavanje problema
9. Naknadno održavanje
.................................................36
.......................................................37
...........................................................37
....................................................................37
..............................38
..............................................39
....................................................................40
.................................................42
................................................42
...............................................43
CONTENT GB
SAFETY INSTRUCTIONS
1. General warnings
2. Protecton of the envronment
3. Installaton
4. Electrical connection
5. Hob cookware advice
6. Use
7. Cleaning and maintenance
8. Problem solving
9. Aftercare
.............................................04
.......................................................05
....................................05
..................................................................05
..................................................06
................................................08
............................................................................08
........................................10
.........................................................10
....................................................................11
TARTALOM HU
BIZTONSÁGI UTASÍTÁSOK
1. Általános figyelmeztetések
2. Környezetvédelem
3. Beszerelés
4. Elektromos csatlakozás
5. A főzőlapon használt edényekkel
kapcsolatos javaslatok
6. Használat
7. Tisztítás és karbantartás
8. Hibaelhárítás
9. Eladást követő szolgáltatás
..........................................44
........................................45
.....................................................45
.................................................................45
.............................................46
...................................................47
..................................................................48
............................................50
..............................................................50
.......................................51
02
SPIS TREŚCI PL
INSTRUKCJE DOTYCZĄCE BEZPIECZEŃSTWA
1. Ogólne ostrzeżenia
2. Ochrona środowiska
3. Instalacja
4. Przyłącze elektryczne
5. Wskazówki dotyczące garnków kuchennych
używanych na płycie
6. OBSŁUGA
7. Czyszczenie i konserwacja
8. Rozwiązywanie problemów
9. Obsługa posprzedażowa
.......52
...................................................53
..................................................53
...................................................................53
................................................54
......................................................55
..................................................................56
........................................58
........................................59
...........................................59
CUPRINS RO
INSTRUCŢIUNI PRIVIND SIGURANŢA
1. Avertsmente generale
2. Protejarea medulu
3. Instalare
4. Conexune electrcă
5. Recomandăr de vase de gătt pentru pltă
6. Utlzare
7. Curăţare ş întreţnere
8. Rezolvarea problemelor
9. Îngrjre ulteroară
........................60
..............................................61
....................................................61
.....................................................................61
....................................................62
................63
......................................................................64
................................................66
.............................................66
.......................................................67
VSEBINA SI
NAVODILA ZA VARNO UPORABO
1. Splošna opozorila
2. Varovanje okolja
3. Namestitev
4. Priključitev na električno napetost
5. Nasvet glede posode za kuhalno ploščo
6. Uporaba
7. Čiščenje in vzdrževanje
8. Reševanje težav
9. Popravila
...............................68
......................................................69
.........................................................69
.................................................................69
.............................70
...................71
....................................................................72
.............................................74
.........................................................74
....................................................................75
SADRŽAJ SR
BEZBEDNOSNA UPUTSTVA
1. Opšta upozorenja
2. Zaštta žvotne sredne
3. Ugradnja
4. Prključvanje na elektrčnu mrežu
5. Savet za koršćenje posuđa na ugradnoj ploč
6. Upotreba
7. Čšćenje održavanje
8. Rešavanje problema
9. Naknadno održavanje
........................................76
.......................................................77
...............................................77
.....................................................................77
.............................78
..........79
...................................................................80
.................................................82
..................................................82
................................................83
03
ЗМІСТ UA
ІНСТРУКЦІЯ З ТЕХНІКИ БЕЗПЕКИ
1. Основні застереження
2. Захист навколишнього середовища
3. Встановлення
4. Електричне підключення
5. Поради щодо вибору посуду для
використання на варильній поверхні
6. Експлуатація поверхні
7. Очищення та обслуговування
8. Можливі проблеми та їх вирішення
9. Післяпродажне обслуговування
.............................84
.............................................85
.......................85
...........................................................85
.........................................86
......................87
.............................................88
..................................90
........................91
..............................91
СЪДЪРЖАНИЕ BG
ИНСТРУКЦИИ ЗА БЕЗОПАСНОСТ
1. Общи предупреждения
2. Защита на околната среда
3. Монтаж
4. Електрическо свързване
5. Съвет относно готварските съдове,
подходящи за плотове
6. Използване
7. Почистване и техническа поддръжка
8. Разрешаване на проблеми
9. Следпродажбено обслужване
..............................92
.............................................93
.......................................93
......................................................................93
..........................................94
.............................................95
...............................................................96
......................98
......................................99
.................................99
CONTENIDO ES
INSTRUCCIONES DE SEGURIDAD
1. Advertencias generales
2. Protección del medio ambiente
3. Instalación
4. Conexión eléctrica
5. Consejo sobre los utensilios de cocina
6. Uso
7. Limpieza y mantenimiento
8. Solución de problemas
9. Cuidado posterior
............................100
............................................101
................................101
.................................................................101
....................................................102
.....................103
...........................................................................104
.........................................106
..............................................107
......................................................107
INHOUD NL
VEILIGHEIDSAANWIJZINGEN
1. Algemene waarschuwingen
2. Bescherming van het milieu
3. Installatie
4. Elektrische aansluiting
5. Advies over te gebruiken pannen
6. Gebruik
7. Reiniging en onderhoud
8. Problemen oplossen
9. NAZORG
....................................108
.......................................109
.......................................109
....................................................................109
...............................................110
...............................111
......................................................................112
.............................................114
..................................................114
....................................................................115
INHALT DE
SICHERHEITSHINWEISE
1. Allgemene Warnhnwese
2. Umweltschutz
3. Installaton
4. Elektrscher Anschluss
5. Tpps zum Kochgeschrr
6. Benutzung
7. Rengung und Wartung
8. Problembehebung
9. Kundendenst
..........................................116
........................................117
..........................................................117
................................................................117
............................................118
..........................................119
................................................................120
............................................122
....................................................122
...........................................................123
ΠΕΡΙΕΧΟΜΕΝΑ GR
ΟΔΗΓΙΕΣ ΑΣΦΑΛΕΙΑΣ
1. Γενικές Προειδοποιήσεις
2. Προστασια Του Περιβαλλοντοσ
3. Τοποθέτηση
4. Ηλεκτρικη Συνδεση
5. Συμβουλεσ Για Μαγειρικα Σκευη
6. Χρηση
7. Καθαρισμός Και Συντήρηση
8. Επιλυση Προβληματων
9. Μεταγοραστικη Φροντιδα
..................................................124
...........................................125
...............................125
..............................................................125
..................................................126
..............................127
.......................................................................128
.....................................130
............................................131
.........................................131
CONTEÚDO PT
INSTRUÇÕES DE SEGURANÇA
1. Avsos geras
2. Proteção do ambente
3. Instalação
4. Lgação elétrca
5. Conselhos de utensílos de coznha
6. Uso
7. Lmpeza e manutenção
8. Resolução de problemas
9. Pós-tratamento
................................132
.............................................................133
...............................................133
..................................................................133
.........................................................134
.........................135
...........................................................................136
.............................................138
..........................................139
.........................................................139

CAUTION: the cookng process must be
supervsed. A short term cookng process has to
be supervsed contnuously.
Ths applance s not ntended to be operated by
means of an external tmer or separate remote
control system.
WARNING: use only hob guards desgned by the
Manufacturer of the cookng applance or
ndcated by the Manufacturer of the applance n
the nstructons for use as sutable or hob guards
ncorporated n the applance. The use of
napproprate guards can cause accdents.
Connect a plug to the supply cable that s able to
bear the voltage, current and load ndcated on the
tag and havng the earth contact. The socket must
be sutable for the load ndcated on the tag and
must be havng the earth contact connected and
n operaton. The earth conductor s yellow-green
n color. Ths operaton should be carred out by a
WARNING: danger of fre: do not store tems on
the cookng surfaces.
WARNING: the applance and ts accessble parts
become hot durng use. Care should be taken to
avod touchng heatng elements. Chldren under
8 years of age must be kept away from the
applance unless they are contnuously
supervsed.
We recommend you keep the nstructons for
nstallaton and use for later reference, and before
nstallng the hob, note ts seral number n case
you need to get help from the after sales servce.
WARNING: unattended cookng on a hob wth fat
or ol can be dangerous and may result n fre.
NEVER try to extngush a fre wth water, but
swtch off the applance and then cover flame e.g.
wth a ld or a fre blanket.
WARNING: f the surface s cracked, do not touch
the glass and swtch off the applance to avod the
possblty of electrc shock.
Ths applance can be used by chldren aged from
8 years and above and people wth reduced
physcal, sensory or mental capabltes or lack of
experence and knowledge f they have been
gven supervson or nstructon concernng use of
the applance n a safe way and understand the
hazards nvolved. Chldren should be supervsed
to ensure that they do not play wth the applance.
Cleanng and user mantenance shall not be
made by chldren wthout supervson.
If present do not to stare nto halogen lamp hob
elements.
It s strongly recommended to keep chldren away
from the cookng zones whle they are n operaton
or when they are swtched off, so long as the
resdual heat ndcator s on, n order to prevent
the rsks of serous burns.
SAFETY INSTRUCTIONS
If the supply cord s damaged, t must be replaced
by Manufacturer, ts servce agent or smlarly
qualfed people n order to avod a hazard. The
earth conductor (yellow-green) must be longer
than 10 mm on the termnal block sde. The
nternal conductors secton should be approprate
to the power absorbed by the hob (ndcated on
the tag). The type of power cable must be
HO5V2V2-F.
sutably qualfed professonal. In case of
ncompatblty between the socket and the
applance plug, ask a qualfed electrcan to
substtute the socket wth another sutable type.
The plug and the socket must be conformed to the
current norms of the nstallaton country.
Connecton to the power source can also be made
by placng an omnpolar breaker between the
applance and the power source that can bear the
maxmum connected load and that s n lne wth
current legslaton.
Do not use the surface as a cuttng board.
After every use, some cleanng of the hob s
necessary to prevent the buld-up of drt and
grease. If left, ths s recooked when the hob s
used and burns gvng off smoke and unpleasant
smells, not to menton the rsks of fre
propagaton.
Do not put metallc objects such as knves, forks,
spoons or lds on the hob. They could heat up.
Alumnum fol and plastc pans must not be placed
on heatng zones.
The yellow-green earth cable should not be
nterrupted by the breaker. The socket or
omnpolar breaker used for the connecton should
be easly accessble when the applance s
nstalled.
The dsconnecton may be acheved by havng the
plug accessble or by ncorporatng a swtch n the
fxed wrng n accordance wth the wrng rules.
Never use a steam or hgh pressure spray to clean
the applance.
Never cook food drectly on the glass ceramc
hob.
Always use the approprate cookware.Always
place the pan n the center of the unt that you are
cookng on.
Do not place anythng on control panel.
Do not use the hob as a workng surface.
Do not touch the heat zones durng operaton or
for a whle after use.
Do not store heavy tems above the hob. If they
drop onto the hob, they may cause damage.
Do not use the hob for storage of any tems.
Do not slde cookware across the hob.
No addtonal operaton/settng s requred n
order to operate the applance at the rated
frequences
04 GB

When nstallng a hood above
the hob, please consult the
nstallaton requrements
specfed for the hood but, n
any case, the dstance between
the hob and the hood must not
be lower than 700 mm.
Leave a dstance of at least 55
mm between the hob and the
back wall and of at least 150
mm between the hob and the
vertcal furnture or walls n the
lateral sde. If a furnture s
nstalled above the hob, the
mnmum dstance requred s
700 mm.
PRODUCT CODE T
Identification Plate (located under the hob's bottom casing)
1. GENERAL WARNINGS
By placng the mark on ths applance we are assurng
complance to all European Safety, Health and Envronment
requrements whch are applcable for ths product category.
2. PROTECTION OF THE ENVIRONMENT
• WEEE shall not be threatened as household waste.
Individuals can play an important role in ensuring that the WEEE
does not become an environmental issue; it is essential to follow
some basic rules:
This appliance is marked according to European
Directive 2012/19/EU on Waste Electrical and
Electronic Equipment (WEEE).
• In many Countries, when you buy a new appliance, the old one
may be returned to the retailer who has to collect it free of charge on
a one-to-one basis, as long as the appliance is of equivalent
typology and has the same functions as the supplied one.
• WEEE shall be handled over to the relevant collection points
managed by the municipality or by registered companies. In many
Countries, for large WEEE, home collection could be present.
WEEE contains both polluting substances (which
can cause negative consequences for the
environment) and basic components which can be
reused.It is important to have WEEE subjected to
specific treatments, in order to remove and dispose
properly all pollutants and recover and recycle all
materials.
3. INSTALLATION
Applance can be nstalled n a Bult-n furnture n “Standard” or “Flush”
mode.
Make sure that the furnture n whch the applance wll be ftted and all
other furnture n the nearby are made wth mater
In the event that ths advce t s gnored and nstallaton s carred out
by an unqualfed person, the Manufacturer declnes all responsblty
for any techncal falure of the applance whether or not t results n
damage of goods or propertes or n njury of people or anmals.
Installng a domestc applance t s a complcated operaton whch, f
not carred out correctly, can serously have mpact on safety of goods,
propertes or people. For ths reason, t should be carred out by a
professonally qualfed person n accordance wth techncal
regulatons.
After havng removed the packagng please be sure that the applance
t s not damaged, otherwse contact the Retaler or Manufacturer After
Sales Servce.
ls whch can wthstand hgh temperatures (mn 100 °C).
In addton, all decoratve lamnates should be fxed wth hgh-resstance
glue.
700 mm 55 mm
150 mm
490 mm
+ 2
- 0
560 mm
+ 2
- 0
Mn. 70 mm
Standard nstallaton
permeter
Note: Inner permeter dmensons are same wth standard nstallaton
703 mm (70 cm hob)
+ 2
- 0
523 mm
+ 2
- 0
593 mm (60 cm hob)
+ 2
- 0
Slot depth: 5 mm
Flush nstallaton
permeter
Worktop thckness should be between 25 and 45 mm.
If the bottom part of the hob is adjacent to an area normally accessible
for handling or cleaning operations, a separator it must be put 20 mm
below the bottom part of the hob.
mn 20 mm
When nstallng an oven under the hob, separator must not be put and
the mnmum dstance between the bottom part of the hob and the
oven must not be lower than 10 mm. Do not nstall not cooled oven
under ths hob and nstall the oven followng ts own nstallaton
requrements.
10 mm
min
05 GB

FLUSH INSTALLATION
After checkng that the poston of
the hob s correct fll the gap
between the worktop and the hob
wth slcone adhesve. Flatten the
slcone layer wth a scraper or
wth wet fnger damped wth water
and soap before t forms.
Do not use the hob untl the
slcone layer t s completely dry.
A watertght seal gasket s
suppled wth the hob. Ft
the seal gasket around the
bottom hob as descrbed
and make sure that t s
properly ftted to avod any
leakage nto the supportng
furnture.
Bottom
Normal Fxng:
- Get the fxng clps from accessory bag
and screw them nto the poston shown
on bottom box. (Do not tghten the
screws to block clps, they should move
freely)
- Turn the clps and tghten
them fully.
- Insert the hob n center
poston of cut out.
Get four sprngs form accesory bag and
screw them onto bottom box as shown
n fgure.
Center and nsert the hob.
Press the sdes of hob untl t
s supported around ts
entre permeter.
Quck Fxng: (Dependng on model)
06 GB
1000+700 W
1000+700 W
1500+900 W 1200 W
1050+900+750 W
1050+900+750 W
1200 W
1200 W
1200 W
1800 W
1200 W
1200 W
1800 W
1000+700 W
-
-
1800 W
1800 W
B
C D
BA
C
B
C
D
A
C
B
B
D
LAYOUT 1 LAYOUT 2 LAYOUT 3
LAYOUT 4 LAYOUT 5
AA
C
A
1
2
3
4
5
LAYOUT
1. ON/OFF
4. TIMER
6. Cooking zone programming indicator
2. " + "
8. Chld lock
According to model
3. " - "
5. Additional cooking zone led
9. Meltng
7. Brdge
10. Bolng
4. ELECTRICAL CONNECTION
8 8
8
8 8
8
8 8 8
8
8
8 8 8
8
8
8 8
8
8 8
8
8 8
8
8 8
8
2
2 2
23
33
3
4
5
55
5
55
7
7
6
1
8
9 10
4
4
4
4
23
23 23
23
23 23 23
23 23 23
23
23 23
23
1
8
1
8
1
8
1
8
6
6
6
6

WARNING: Manufacturer cannot be held responsble for any ncdent
or ts consequences that may arse durng the use of an applance not
lnked to the earth, or lnked to an earth whose contnuty s defectve.
Before any electrcal operaton, please check the supply tenson
shown on the electrcty meter, the adjustment of the crcut- breaker,
the contnuty of the connecton to earth to the nstallaton and that the
fuse s sutable.
The electrcal connecton to the nstallaton should be made accordng
to the rated power of the Applance; ths should be made va an Omn
pole cut-out swtch.
Before makng the connecton, make sure that the nstallaton s
protected by a sutable fuse, and that t s ftted wth wres of a large
enough secton to supply the applance normally.
If the applance has a socket outlet, t must be nstalled so that the
socket outlet s accessble.
For any questons regardng power supply cord refer to After Sales
Servce or a qualfed techncan.
If the hob s ftted wth power supply cord, ths shall be connected only
to a power supply of 220-240 V between phase and neutral.
Manufacturer declnes all responsblty for any damage that
mght be caused by unsutable or unreasonable use.
It s however possble to connect the hob to:
Three Phase 220-240 V3
Turn over the hob, glass sde aganst the workng top, takng care to
protect the glass.
Three Phase 380-415 V2N
Open the cover n the followng sequence:
"Installaton must conform to the standards & drectves."
To proceed to the new connecton, please follow below nstructons:
The yellow/green wre of the power supply cable must be connected to
the earth of both power supply and applance termnals.
- fnd the two tabs located on the sdes;
- unscrew the cable clamp "1";
- put the blade of a flat screw-drver n front of each tab "2" e
"3", push n and press;
- remove the cover.
To release the power supply cord:
- Remove the screws retanng the termnal block whch
contans the shunt bars and the conductors of the supply cord;
- Pull out the supply cord.
Operatons to be carred out to make a new connecton:
- Choose the power supply cable n accordance wth the
recommendatons n the table;
- Pass the power supply cable nto the clamp;
- Strp the end of each conductor of the supply cord on a 10 mm length,
by takng n account the requested length of the cord for the
connecton to the termnal block;
- Accordng to the nstallaton and wth the help of shunt bars whch you
should have recovered n the frst operaton, fx the conductor as
shown on the chart;
- Fx the cover;
- Screw the cable clamp.
Connection to the terminals on the terminal block
ATTENTION:
If it should be necessary to replace the power supply cord, connect the
wire in accordance with following colors/codes:
LAY OUT
"1-3-5"
LAY OUT
"2-4"
MONOPHASE or TWO PHASES 220-240 V~
Cable
HO5V2V2F
Cable
HO5V2V2F
Cable
HO5V2V2F
2
3x2,5 mm 2
3x4 mm
2
4x1,5 mm 2
4x1,5 mm
2
4x1,5 mm 2
4x1,5 mm
THREE PHASES 220-240 V3~
THREE PHASES 380-415 V2N~
- Pass the power supply cable nto the clamp;
- Accordng to the nstallaton and wth the help of
shunt bars whch you should have recovered n
the frst operaton, fx the conductor as shown on
the chart;
Operatons to be carred out to make a new connecton:
- Strp the end of each conductor of the supply
cord on a 10 mm length, by takng n account the
requested length of the cord for the connecton to
the termnal block;
- Fx the cover;
- Choose the power supply cable n accordance wth the
recommendatons n the table;
Note: make sure the termnal board screws are tght.
- Screw the cable clamp.
07 GB
( )
5. HOB COOKWARE ADVICE
Using good quality cookware is critical for setting
the best performance from your hob.
• Always use good quality cookware with perfectly flat and thick
bases : using this type of cookware will prevent hot spots that cause
food to stick. Thick metal pots and pans will provide an even
distribution of heat.
• Ensure that the base of the pot or pan is dry : when filling p a n s
with liquid or using one that has been stored in the r e f r i g e r a t o r ,
ensure that the base of the pan is completely dry before placing it on
the hob. This will help to avoid staining the hob.
2 31
SHUNT
N
=
Neutral PE
=
EarthL1 / L2 / L3 = Phase
220-240V 3 ~
PE L1 L2 L3
380-415V 2N ~
N
PE L1 L2
L3
PE L1
L2
220-240V ~
N
L
220-240V 2 ~
L2
PE L1
PE

6. USE
Swtch ON/OFF a heater zone
2) If there s resdual heat ndcaton n the dsplay whch s ON but n 0
power, "0" wll appear changng over.
To swtch OFF a heater Touch power key durng 1,2 sec. 3 Short
beeps wll be heard and nothng or "H" value wll appear n target zone
dgt f resdual heat exsts. Zone wll be OFF.
1) If any cookng stage s n poston 0, ths dsplay wll swtch OFF
automatcally after 10 seconds and the zone OFF sequence wll
sound.
3) If lock functon s actve you cannot swtch ON a zone.
To swtch ON a heater Touch power key durng 400 msec. Long beep
wll be heard and "0" value wll appear n target zone dgt, ndcatng
power level.
08 GB
8 8
8
88
8
Because of its low melting point, thin aluminium should not be used.
Glass-ceramic : not recommended. Poor performance. May scratch
the surface.
Cast Iron : usable, but not recommended. Poor performance. May
scratch the surface.
• Use pans whose diameter is wide enough to completely cover
the surface unit : the size of the pan should be no smaller than the
heating area. If it is slightly wider the energy will be used at its
maximum efficiency.
Aluminium : heavy weight recommended. Good conductivity.
Aluminium residues sometimes appear as scratches on the hob, but
can be removed if cleaned immediately.
distribution).
Stainless Steel : highly recommended. Especially good with a
sandwich clad base. The sandwich base combines the benefits of
stainless steel (appearance, durability and stability) with the
advantages of aluminium or copper (heat conduction, even heat
THE CHOICE OF COOKWARE - The following information will help
you to choose cookware which will give good performance.
Copper Bottom / stoneware: heavy weight recommended. Good
performance, but copper may leave residues which can appear as
scratches. The residues can be removed, as long as the hob is
cleaned immediately. However, do not let these pots boil
Porcelain/enamel : Good perfomance only with a thiny smooth, flat
base.
dry. Overheated metal can bond to glass hobs. An overheated copper
pot will leave a residue that will permanently stain the hob.
2.- Let touch control fnsh ts ntalzaton process.
Through the "Power management" function, the user can set the
maximum power that can be reached by the hob. Power management
function is only available during first 30 seconds after switch on the
hob. There is even the possibility to repeat this setting switching off
and on the power plug. By setting the desired maximum power, the
hob automatically adjusts the distribution in the various cooking zones
so that this limit is never exceeded; with the added advantage of being
able to simultaneously manage all the zones without overload
problems. The customer can set the maximum power of hob between
2.5 kW and the maximum related power of the hob (this can change
according to the model). For example if the maximum power of the hob
1.- Swtch on hob.
is 7 kW, the maximum power level for setting is between 2.5kW and
7 kW. After connecting the appliance to the electrical power, within 30
seconds you can set the power level based on the points shown
below:
3.-Unlock the control.
P
8
88
8
How to choose power management level
8 8
8
88
8
8 8
8
88
8
5.- After this moment, this message will appear on display, Po on timer
display. Power level divided by 100 in heater displays.
6.- Using '+' and '-' of Timer keys, Power Management value can be
adjusted. When requred value s selected, touch at the same tme “+”
and “–” keys durng 5 seconds.
7.- When ths process s fnshed, a long beep s heard and a reset s
produced. Start-up process wll be generated agan.
After that, touch control won´t allow any combnaton whch
can exceed ths lmt.
c) If ths power management selecton s ON, f any key s touched
except the combnaton of tmer “+” and “–”, process
Notes:
a) Ths power management s only avalable durng frst 30 seconds
after swtch on the hob.
b) If ths power management selecton s ON, f more than 90 seconds
after swtch on the hob ths process wll be fnsh wthout
any new power value were recorded.
wll be fnsh wthout any new power value were recorded and touch
control wll start workng as usual, wthout reset.
d) If ths power management selecton s ON, f any key s touched the
combnaton of tmer “+” and “–”, process wll be
fnsh wth a new power value were recorded , reset and touch
control wll start workng as usual.
4.- Before pass 30 seconds after switch on the hob; touch for 5
seconds “-” key of timer.
P
6
00
5
P
4
00
5
8.- After start-up process, n tmer dsplay power management wll be
showed.
P
4
00
5

Chld Lock
Note: An automatc chld lock wll produce n 15 mnutes after total
Swtch OFF of the hob. Ths functon wll happens automatcally but
prevously s necessary to program t. See User settngs pont.
The acton wll be done when lock key s touched
To deactvate Chld Lock, follow the same process explaned before.
Then Short beep wll be heard and dsplays wll show "n" letter. Hob wll
reman unlocked.
Then, any tme when a key wll be touched, dsplays wll show "L"
durng 2sec. heatng remans at the same state.
8.1- Double zone ON
1st Short Press on extenson key Swtches ON 1st extenson rng. 1
LED over extenson key turns ON f 1st extenson rng s ON (left LED
n case of trple zone, mddle and only LED n case of double zone) 2nd
Short Press on extenson key Swtches ON 2nd extenson rng. 2
LEDs over extenson key turn ON f 1st and 2nd extenson rngs are
ON
To swtch ON double extenson rng, assocated man zone must be
already ON and Indcatng power level must be hgher than 0.
1st Short Press on extenson key Swtches ON extenson rng. LED
over extenson key turns ON f Extenson rng s ON.
Short beep each press on extenson key.
2nd Short Press on extenson key Swtches OFF extenson rng.
8.2- Trple zone ON
Double / Trple zones
8 8
8
88
8
8 8
8
88
8
Brdge functon
The functon wll fnsh:
- If user selects power level “0”
The brdge can be enabled only when both heaters are off. One heater
of the brdge has been selected, to actvate brdge functon touch
brdge key.
Both brdge heaters wll be selected at the same tme.
- If the brdge key s touched n settng mode
A beep sounds and the zone LED s swtched on f the zone s enabled.
Once the heaters selected, f the power level s not the desred power
level, by the + - keys.
Both brdge heater dsplays wll show same power level.
8 8
8
88
8
2) If there s resdual heat ndcaton n the dsplay whch s OFF, "H" wll
be dsplayed.
3) Even lock functon s actve you can swtch OFF a zone.
1) If any cookng stage s n poston 0, ths dsplay wll swtch OFF
automatcally after 10 seconds and the zone OFF sequence wll
sound.
4) If only one heater s actve and ths one s swtched off, 4 Short beep
wll be heard ndcatng all cook top s Off.
Increase / Decrease power level
1. For Long Presses n + or - keys, power level ncreases /decreases
contnuously. Wth a fast ncrease, power stops at level 9, and for a
hgher power another short press s needed on the + key. No beep
sound s heard wth fast ncrease / decrease.
2. Once arrved to P power level, pressng + key agan does not
change power level to 0.Once arrved to 0 power level, pressng - key
agan does not change power level to P.
3. Wth a zone ON at 0 power level, f the zone s hot, 0 wll blnk
alternatvely. After 10 seconds, 0 wll dsappear an ‘H’ letter wll appear
fxed on dsplay.
4. When a heater s selected and ‘+’ & ‘-‘keys are touched at the same
tme, power level wll go to ‘0’ but heater wll mantan selected durng
10 seconds. If heater was temporzed, tmer wll go to Off. Ths acton
can only be developed n several cases dependng touch control
confguraton.The followng examples are for nformaton only.
Personal experence should then let you adapt these settngs to your
taste and habts.
Wth a short press on ‘+’ or ‘-‘ keys, Increase or decrease power n the
selected zones dgt: 0-1-2-3...9-P
8 8
8
88
8
Short beep each press on extenson key.
3rd Short Press on extenson key. Swtches OFF 1st and 2nd
extenson rngs.
Meltng functon
After a heater has been selected, to actvate meltng functon:
- Select meltng key
A tone sounds and heater dsplay shows “U”
The heater wll work at power level “2”
Beng the heater selected, Meltng functon wll fnsh
- If swtched off
- If t s selected to other power level.
Bolng Functon:
- Select Bolng key
After a heater has been selected, to actvate Bolng functon:
A tone sounds and heater dsplay shows “P”
The heater wll work at maxmum power level for 10 mnutes.
After these 10 mnutes a tone sounds heater wll return to level “9”
8 8
8
88
8
8 8
8
88
8
Pause function
To select ths functo , the user should touch “tmer +/- keys” together.
If the “tmer +/- keys” are touched for ½ seconds :
A beep sounds and the cooktop s stopped,
All the tmers runnng count downs are paused,
The heaters actual power settng s stored and all the actve heaters
power s set to power level 0,
Tmer dsplays nothng, and all the heaters dsplays are gettng on and
putng out “0”, swtchng on segment by segment n left drecton, and
after that swtchng off segment by segment n rght drecton,
contnously.
The Pause functon allows temporary pausng of the cookng process,
allowng the users to answer the door or the telephone wthout worryng
that the water s bolng over. Ths functon s also useful to clean the
user nterface surface wthout changng the cookng set up.
The heaters auto-swch off tme s paused,
All keys are locked except “tmer +/- keys” and “on/off key” (Tmer keys
can only be actve f they are used together to deactvate pause
functon),
8 8
8
88
8
09 GB

Overflow securty
Somethng (an object or a lqud) s pressng any key durng more than
5s. 2 Short Beep + 1 Long beep every 30s whle the key s pressed.
Cook-top wll turn Off. Ths symbol wll mantan blnkng whle the
matter persst.
Tmer
To actvate tmer, heater must be selected and ts power level must
be greater than “0”;
Select the zone to be tmed. Power level of the zone greater than 0.
Statc s dsplayed n the zone beng tmed . "0 0" n the dgts
reserved for the tmer.
3) If tmer "+" or "-" keys s mantaned pressed durng TBD tme, there s
quck settng.
1) Wth "+" or "-" keys, tmer tme can be chosen. No Beeps at tme
change.
5) Maxmum tme 99 mnutes.
6) When the tme s elapsed and the hob s beepng, press any key and
the alarm and dgt sequence wll end.
7) It s possble to adjust the tmer tme whle the tmer s prevously
runnng.
2) Pressng smultaneously tmer key the tmer s cancelled (goes to 00).
4) When settng tmer tme, t s possble to go from "00" to "99" wth "-"
key, and from "99" to "00" wth "+" key.
8) Power of tmed zone can be modfed wthout consequences on the
tmer programmng.
Remanng tme s dsplayed n the dgts reserved for the tmer. If
multple zones are tmed, the smallest remanng tme s dsplayed, and
the decmal pont s dsplayed n the correspondng zone.
10) Pressng the Tmer key wthout any selected zone and when no
zone s beng tmed, does nothng.
11) Pressng the Tmer key wthout any selected zone and when many
zones are beng tmed, the tme shown n tme dgts changes n a
rotatory way, and shows the tme whose power dsplay has the decmal
pont ON.
12) Alternatvely Power (5s) and (0,5s) s dsplayed n the zone beng
tmed.
9) Last mnute wll be dsplayed by seconds (For Varants only vsble f
we enter the tmer programmng whle the last mnute of the countdown)
Resdual Heat Indcator (In radant heaters-> calculated)
Whle a temperature on the cook top glass surface s above
o
65 Cb(theory value), ths condton wll be shown n the assocated
dsplay, by means of an “H”.
The same ndcators can be used for “resdual heat” ndcaton as well.
A tme table must be defned on ths purpose: Rest Heat tme=f (power
level, workng tme).
o
To generate a temperature above 65 C a heatng element has to be n
operaton for certan tme, ths tme depends on the power level. Once
ths tme has expred, the resdual heat warnng wll be shown when
the heatng element s swtched off.
Automatc Safety Off
The maxmum tme a heater can stay on, depends on the selected
cookng level.
If the power level s not changed durng a preset tme, the
correspondng heater turns off automatcally.
Power level Max. tme on (hours)
1
2
3
4
5
6
7
8
9
10
5
5
4
3
2
2
2
2
NOTE: whle an overheatng stuaton should occur durng the
operaton of the hghest power levels, the Hob control wll automatcally
adjust the power level n order to protect the hob from overheatng.
10 GB
7. CLEANING AND MAINTENANCE
NB:
Never use a knife or a screwdriver.
Never use abrasive products or scouring powders.
. Only products, (creams and scrapers) specifically designed for
aglass ceramic surfaces should be used. They are obtainable from
hardware stores.
. It is advisable to keep away from the hob all substances which are
liable to melt, such as plastic items, sugar, or sugar-based products.
. Before carrying out any maintenance work on the hob, allow it to
cool down.
. Avoid spillages, as anything which falls on to the hob surface will
quickly burn and will make cleaning more difficult.
.MAINTENANCE:
- Place a few more drops of specialised cleaning fluid on the surface.
- Wipe with a soft cloth or dry kitchen paper until the surface is clean.
- Scrape with a scraper, holding it at an angle of 30° to the hob, until
the stains disappear.
- Wipe with a soft cloth or dry kitchen paper until the surface is clean.
The glass ceramic surface will withstand scraping from flat-bottomed
cooking vessels, however, it is always better to lift them when moving
them from one zone to another.
Do not use a sponge which is too wet.
Frequent cleaning leaves a protective layer which is essential to
prevent scratches and wear. Make sure that the surface is clean
before using the hob again. To remove marks left by water, use a few
drops of white vinegar or lemon juice. Then wipe with absorbent paper
and a few drops of specialised cleaning fluid.
A scraper with a razor blade will not damage the surface, as long
as it is kept at an angle of 30°.
- Place a few drops of the specialised cleaning product on the hob
surface.
If there are still some stubborn stains:
- Rub any stubborn stains with a soft cloth or with slightly damp
kitchen paper.
- Repeat the operation if necessary.
A FEW HINTS:
Never leave a scraper with a razor blade within the reach of
children.
. The metal surround : to safely clean the metal surround wash with
soap and water, rinse, then dry with a soft cloth.
f the cooktop s stopped for more than 10 mnutes the cooktop s
swtched off automatcally.
The stop functon wll fnsh:
f the “tmer +/- keys” (together) are touched for more than ½ second a
beep sounds and the heaters actual power settng and tmer
countdowns are restored, or
30°
Maxi
Any change n the colour of the glass-ceramc surface does
not affect ts operaton or the stablty of the surface. Such
dscoloratons are mostly a result of burnt food resdues or
use of cookware made of materals such as alumnum or
copper; these stans are dffcult to remove.
8. PROBLEM SOLVING
The pan bottom should fully cover the diameter of the selected zone.
The cooking zones do not simmer or only fry gently
Unsuitable pans are being used. Only use flatbottomed utensils, that
are heavy and have a diameter at least the same
as the cooking zone.
Only use flat-bottomed pans. If light is visible between the pan and the
hob, the zone is not transmitting heat correctly.
The cooking is too slow
Small scratches or abrasions on the hob's glass surface
Incorrect cleaning or rough-bottomed pans are used; particles like
grains of sand or salt get between the hob and the bottom of the pan.
Refer to the "CLEANING" section; make sure that pan bottoms are
clean before use and only use smooth bottomed pans. Scratches can
be lessened only the cleaning is done correctly.

Heater dsplay Fault Acton
F0
Fc
Ft
FE
Fb
FU / FJ
FA
FC / Fd
Fr
If error has occurred dsconnected and connect agan the cooktop to the power supply. If error persst,
call after-sales servce. If error appears suddenly n a normal operaton, call after-sales servce.
Touch control software error.
Wat untl temperature goes down, Cook-top wll be recoverd when temperature reaches a normal
value. When the message dsappears, the hob may be used agan.
Touch control zone s too hot
and has turned off all the
heaters.
Wat untl temperature goes down. If message persst when temperature reaches an envronment
value, call after-sales servce.
Touch control temperature
sensor can be damaged.
Wat untl temperature goes down. If message persst when temperature reaches an envronment
value, call after-sales servce.
Touch control temperature
sensor can be damaged.
See f cook-top s mounted correctly. Be sure that keys touch correctly the glass surface.
Excessve senstvty
on any key.
Ths error s a keyboard auto-check. It dsappears when autocheck return to secure value. If error
persst, call after-sale servce.
Securty keyboard error
Ths error s a software auto-check. It dsappears when auto-check return to secure value. If error
persst, call after-sale servce.
Securty software error
Ths error s a software auto-check. It dsappears when auto-check return to secure value. If error
persst, call after-sale servce.
Securty software error
Any relay drver can have any problemn. Remove cook-top from the power supply, wat a mnute
and swtch on agan. If error persst, call after-sale servce.
Relays securty error
9. AFTERCARE
— that the plug is correctly inserted and fused;
Before calling out a Service Engineer please check the
following:
If the fault cannot be identified switch off the appliance — do not
tamper with it — call the Aftercare Service Centre. The appliance is
supplied with a guarantee certificate that ensures that it will be
repaired free of charge at the Service Centre.
If F and numbers appears n the dsplay, your unt has detected a fault.
The followng table lst actons you can take to correct the problem.
Dsplay F and numbers
The man swtch (ON/OFF key) was accdentally touched or there s
any object above any key. Turn the unt on agan wthout any object
about the keyboard. Enter your settngs agan.
Use a razor blade and follow the "CLEANING" section.
The hob does not cut off.
The on-off cycles vary according to the required heat level:
Dark stains
Do not slide aluminium pans on the hob. Refer to the cleaning
recommendations.
Light surfaces on the hob
Caramelisation or melted plastic on the hob.
You use the correct materials, but the stains persist.
Refer to the "CLEANING" section.
Metal marks
Marks from an aluminium or copper pan, but also mineral, water or
food deposits; they can be removed using the cream cleaner.
Use a razor blade and follow the "CLEANING" section.
The hob does not operate or certain zones don't work
The shunts are not positioned correctly on the terminal board.
Have a check made that the connection is done he control panel is
locked. Unlock the hob.
The control panel is locked. Unlock the hob.
Frequency of on/off operations for cooking zones
- low level: short operating time,
- high level: long operating time.
Check the condton of the fuses / crcut breakers at your
locaton.Check to see f you are experencng a power falure.
The cooktop has turned tself off.
The cooktop s not workng.
11 GB
“Vald only for Cyprus”

12 IT
Si consiglia di conservare le istruzioni di uso e
montaggio per riferimento successivo e, prima di
montare il piano di cottura, annotare il suo numero
di serie per richiedere assistenza al Servizio post-
vendita.
L'elettrodomestico può essere utilizzato da
bambini di età superiore a 8 anni e da persone con
ridotte capacità fisiche, sensoriali o mentali,
oppure prive di esperienza e conoscenza, se
supervisionate o istruite riguardo all'uso
dell'elettrodomestico in sicurezza, e se
comprendono i rischi che derivano dall'uso dello
s t e s s o . I b a m b i n i d o v r e b b e r o es s e r e
supervisionati per assicurarsi che non giochino
con l'elettrodomestico. La pulizia e la
manutenzione da parte dell'utente non possono
essere effettuate da bambini senza supervisione.
Collegare al cavo di alimentazione una spina
dimensionata per la tensione, la corrente e la
potenza indicate nella targhetta e dotata del
contatto di terra. La presa deve essere
dimensionata per la potenza indicata sulla
targhetta e deve avere il contatto di terra collegato
e funzionante. Il conduttore di terra è giallo-verde.
Questa operazione deve essere eseguita solo da
un tecnico adeguatamente addestrato. In caso di
AVVERTENZA: l'elettrodomestico e le sue parti
accessibili diventano calde durante l'uso. Prestare
attenzione ad evitare qualsiasi contatto con le
resistenze di riscaldamento. Mantenere lontani
dall'elettrodomestico i bambini di età inferiore agli
8 anni, a meno che non siano continuamente
supervisionati.
AVVERTENZA: utilizzare unicamente protezioni
per piani di cottura progettate dal produttore della
c u c i n a o i n d i c a t e d a l p r o d u t t o r e
dell'elettrodomestico nelle istruzioni d'uso come
adatte, o ancora protezioni incorporate
nell'elettrodomestico. L'utilizzo di protezioni non
adatte può provocare incidenti.
AVVERTENZA: la cottura senza sorveglianza su
un piano di cottura in presenza di grasso o olio
nella pentola può essere pericolosa, con rischio di
incendi. NON cercare MAI di spegnere un
i n c e n d i o c o n a c q u a , b e n s ì s p e g n e r e
l'elettrodomestico e coprire la fiamma con un
coperchio o una coperta antifiamma.
AVVERTENZA: pericolo di incendio: non
appoggiare nulla sulle superfici di cottura.
AVVERTENZA: se la superficie è crepata, non
t o c c a r e l a v e t r o c e r am i c a e s p e g n e r e
l'elettrodomestico per evitare la possibilità di
elettrocuzioni.
ATTENZIONE: il processo di cottura deve essere
supervisionato. Un processo di cottura di breve
termine deve essere supervisionato in continuo.
Si consiglia vivamente di tenere i bambini a
distanza dalle zone di cottura quando queste sono
in funzione o quando sono spente, per tutto il
tempo durante il quale l'indicatore di calore
residuo rimane attivo, per evitare il rischio di
ustioni gravi.
Questo elettrodomestico non è concepito per
funzionare con temporizzatori esterni o con
sistemi di comando a distanza separati.
Se è presente, non guardare direttamente gli
elementi riscaldati della lampada alogena.
ISTRUZIONI DI SICUREZZA
i n c o m p a t i b i l i t à t r a p r e s a e s p i n a
dell'elettrodomestico, richiedere ad un tecnico
specializzato di sostituire la presa con un'altra di
tipo compatibile. La spina e la presa devono
essere conformi alle normative attuali del paese di
installazione.
Il cavo di terra giallo-verde non deve essere
interrotto dall'interruttore automatico. La presa o
l'interruttore automatico onnipolare utilizzati per il
collegamento devono essere facilmente
accessibili al momento del montaggio
dell'elettrodomestico.
La disconnessione può essere eseguita con la
spina accessibile o aggiungendo un interruttore
sul cablaggio fisso, nel rispetto delle normative
relative ai cablaggi.
Se il cavo di alimentazione dell'elettrodomestico
dovesse essere danneggiato, farlo sostituire dal
produttore, dal suo servizio tecnico o da tecnici
qualificati, per evitare rischi. Il conduttore di terra
(giallo-verde) deve essere più lungo di 10 mm sul
lato della morsettiera. La sezione dei conduttori
interni deve essere adatta alla potenza assorbita
dal piano di cottura (come indicato sulla
targhetta). Il cavo di alimentazione deve essere di
tipo HO5V2V2-F.
Non appoggiare sul piano di cottura oggetti
metallici come coltelli, forchette, cucchiai o
coperchi. Potrebbero scaldarsi eccessivamente.
Dopo ogni utilizzo è necessario pulire il piano di
cottura per evitare l'accumulo di sporcizia e
grasso. Se ci sono accumuli di questo tipo
vengono cotti nuovamente quando il piano di
cottura viene acceso, creando fumo e odori
sgradevoli per non parlare del rischio di
propagazione di incendi.
Non appoggiare sulle zone riscaldanti pellicole di
alluminio e padelle in plastica.
Il collegamento alla rete di alimentazione può
essere effettuato anche collocando un interruttore
automatico onnipolare tra l'elettrodomestico e la
rete di alimentazione, in grado di supportare il
carico massimo collegato, in linea con la
legislazione corrente.
Non utilizzare mai un getto di vapore o ad alta
pressione per la pulizia dell'elettrodomestico.
Non cuocere mai gli alimenti direttamente sul
piano di cottura in vetroceramica.
Utilizzare sempre i recipienti di cottura adatti.
Mai utilizzare il piano di cottura come superficie di
lavoro.
Mai utilizzare il piano di cottura come tagliere.
Non appoggiare oggetti pesanti al di sopra del
piano di cottura. Se cadono sul piano possono
danneggiarlo.
Non utilizzare il piano di cottura per riporvi oggetti.
Non fare scivolare i recipienti sul piano di cottura.
Non toccare le zone riscaldanti durante il
funzionamento o per un breve periodo dopo l'uso.
Il funzonamento dell'elettrodomestco alle
frequenze nomnal non rchede alcuna
operazone o mpostazone.
Mettere sempre la pentola al centro del gruppo sul
quale si sta effettuando la cottura. Non appoggiare
nulla sul pannello di comando.

Lasciare una distanza pari a
almeno 55 mm tra il piano di
cottura e il muro posteriore e di
almeno 150 mm tra il piano di
cottura e il mobile verticale o le
pareti sul lato. Qualora venga
installato un pensile sopra il
piano cottura, la distanza
minima richiesta è pari a 700
mm.
Quando si installa una cappa
al di sopra del piano di
cottura, consultare i requisiti di
montaggio specifici per la
cappa, ma, in ogni caso, la
distanza tra cappa e piano di
cottura non deve essere
inferiore a 700 mm.
CODICE PRODOTTO T
Targhetta di identificazione (posta sotto il carter inferiore del piano di
cottura)
1. AVVERTENZE GENERALI
Apponendo il marchio su questo elettrodomestico confermiamo
la conformità a tutti i requisiti di legge europei di sicurezza, salute e
tutela ambientale applicabili a questa categoria di prodotti.
2. SALVAGUARDIA DELL'AMBIENTE
Questo elettrodomestico dispone di contrassegno ai
sensi della direttiva europea 2012/19/UE in materia di
rifiuti di apparecchiature elettriche ed elettroniche
(RAEE).
I RAEE contengono sostanze inquinanti (che
possono causare conseguenze negative per
l'ambiente) e i componenti principali che possono
essere riutilizzati. È importante che i RAEE siano
sottoposti a trattamenti specifici in modo da togliere e smaltire in
modo corretto gli inquinanti nonché recuperare e riciclare tutti i
materiali.
Spetta ai singoli individui garantire che i RAEE non diventino un
problema a livello ambientale. Esistono alcune regole specifiche da
rispettare:
• i RAEE non devono essere trattati come rifiuti domestici.
• i RAEE devono essere affidati agli speciali centri di raccolta
gestiti dai comuni o da società autorizzate. In molti stati è
disponibile anche un servizio di raccolta porta a porta per i RAEE.
In molti stati, nel caso di acquisto di nuovi elettrodomestici, quelli
vecchi possono essere affidati al venditore che li deve ritirare
gratuitamente in numero corrispondente agli elettrodomestici
acquistati, a condizione che i singoli elettrodomestici siano di tipo
simile e con le stesse funzioni di quelli acquistati.
Accertarsi che il mobile nel quale verrà inserito l'elettrodomestico e
tutti gli altri arredi nelle vicinanze siano di un materiale in grado di
resistere a temperature elevate (minimo 100°C).
Dopo avere tolto l'imballaggio, accertarsi che l'elettrodomestico non
sia danneggiato; in caso contrario contattare il rivenditore o il servizio
di assistenza post vendita del produttore.
Nel caso in cui questa precauzione non venga rispettata e il
montaggio sia effettuato da un tecnico non qualificato, il produttore
declina tutte le responsabilità per guasti tecnici dell'elettrodomestico
che possano causare o meno danni alle cose o ai beni o lesioni alle
persone o agli animali.
Il montaggio di un elettrodomestico può essere un'operazione
complicata che, se non viene effettuata correttamente, può
minacciare gravemente la sicurezza di prodotti, proprietà o persone.
Per questa ragione tale attività deve essere intrapresa da un tecnico
professionalmente qualificato che la effettuerà in accordo con le
normative tecniche in vigore.
Inoltre, tutti i laminati decorativi devono essere fissati con colla ad alta
resistenza.
L'elettrodomestico può essere installato in un mobile ad incasso in
modalità "standard" o "a filo".
700 mm 55 mm
150 mm
490 mm
+ 2
- 0
560 mm
+ 2
- 0
Mn. 70 mm
Perimetro per
installazione a filo
Nota: Le dimensioni del perimetro interno sono le stesse
dell'installazione standard
703 mm (70 cm hob)
+ 2
- 0
523 mm
+ 2
- 0
593 mm (60 cm hob)
+ 2
- 0
Profondità incavo 5 mm
Perimetro per
installazione a filo
Lo spessore del piano di lavoro deve essere compreso tra 25 e 45 mm.
Se la parte inferiore del piano di cottura è adiacente ad un'area
normalmente accessibile durante la cottura o la pulizia, inserire un
separatore 20 mm sotto alla base del piano di cottura.
mn 20 mm
3- INSTALLAZIONE
Quando si installa un forno al di sotto del piano di cottura, non è
necessario inserire un separatore e la distanza minima tra la parte
inferiore del piano di cottura ed il forno non deve essere inferiore a
10 mm. Non montare un forno non raffreddato al di sotto di questo
piano di cottura e installare il forno seguendo i relativi requisiti di
montaggio.
10 mm
min
13 IT

14 IT
Dopo avere verificato che la
posizione del piano di cottura è
corretta, riempire lo spazio fra
piano di lavoro e piano di cottura
con adesivo siliconico. Appiattire
lo strato di silicone con un
raschiatore o bagnando le dita in
acqua e sapone prima che
indurisca.Non utilizzare il piano di
cottura fino a quando lo strato di
silicone non è perfettamente
asciutto.
INSTALLAZIONE A FILO
Fissaggio normale:
- Utilizzare le fascette di
fissaggio presenti nel sacchetto
degli accessori ed avvitarle nella
posizione indicata sulla scatola
inferiore. (Non serrare le viti per
bloccare completamente le
fascette, dovrebbero muoversi
liberamente)
- Ruotare le fascette e
serrarle a fondo.
- Inserire il piano di cottura
nella posizione centrale
dell'intaglio.
Fissaggio rapido: (A seconda del
modello)
Prelevare quattro molle dal sacchetto
accessori ed avvitarle sulla scatola
inferiore come illustrato in figura.
Centrare ed inserire il
piano di cottura.
Premere i lati del piano di
cottura fino a quando non
risulta supportato sull'intero
perimetro.
4. COLLEGAMENTO ELETTRICO
DISPOSIZIONE 1
DISPOSIZIONE 2
DISPOSIZIONE 3
DISPOSIZIONE 4
DISPOSIZIONE 5
Il piano di cottura viene
fornito con una guarnizione
di tenuta. Montare la
guarnizione di tenuta
intorno alla parte inferiore
del piano di cottura ed
assicurarsi che sia inserita
correttamente per evitare
pe r d it e s u i m o bi l i d i
supporto sottostanti.
Parte inferiore
5. LED zona di cottura aggiuntiva
2. "+"
7. Bridge
1. ACCESO/SPENTO
9. Fusione
A seconda del modello
10. Bollitura
4. TIMER
3. "-"
6. Indicatore programmi zona di cottura
8. Sicurezza bambini
1000+700 W
1000+700 W
1500+900 W 1200 W
1050+900+750 W
1050+900+750 W
1200 W
1200 W
1200 W
1800 W
1200 W
1200 W
1800 W
1000+700 W
-
-
1800 W
1800 W
B
C D
BA
C
B
C
D
A
C
B
B
D
DISPOSIZIONE 1 DISPOSIZIONE 2 DISPOSIZIONE 3
DISPOSIZIONE 4 DISPOSIZIONE 5
AA
C
A
1
2
3
4
5
DISPOSIZIONE
8 8
8
8 8
8
8 8 8
8
8
8 8 8
8
8
8 8
8
8 8
8
8 8
8
8 8
8
2
2 2
23
33
3
4
5
55
5
55
7
7
6
1
8
9 10
4
4
4
4
23
23 23
23
23 23 23
23 23 23
23
23 23
23
1
8
1
8
1
8
1
8
6
6
6
6

"Il montaggio deve essere conforme alle direttive e agli
standard." Il produttore declina qualsiasi responsabilità per
danni che potrebbero essere causati da utilizzo inappropriato o
irragionevole.
Trifase 380-415 V2N
AVVERTENZA: Il Produttore non può essere ritenuto responsabile di
qualsiasi incidente o delle relative conseguenze che potessero
insorgere durante l'utilizzo di un elettrodomestico privo di messa a
terra, oppure collegato ad una terra avente una continuità difettosa.
Per qualsiasi domanda relativa al cavo di alimentazione elettrica
rivolgersi al Servizio di Assistenza post-vendita o a un tecnico
qualificato.
Trifase 220-240 V3
Il cavo giallo/verde del cavo di alimentazione elettrica deve essere
collegato alla terra dell'alimentazione elettrica ed ai morsetti
dell'elettrodomestico.
Prima di qualsiasi funzionamento elettrico, controllare sempre la
tensione di alimentazione riportata sul contatore, la regolazione del
sezionatore, la continuità del collegamento a terra rispetto
all'impianto; verificare anche che il fusibile sia appropriato.
È comunque sempre possibile collegare il piano di cottura a:
Il collegamento elettrico all'impianto deve essere effettuato
rispettando la potenza nominale dell'elettrodomestico; ciò deve
essere effettuato tramite un sezionatore multipolare.
Se l'elettrodomestico ha un'uscita a presa, deve essere installato in
modo che tale uscita sia accessibile.
Prima di effettuare il collegamento accertarsi che l'impianto sia
protetto da un fusibile appropriato e che sia dotato di cavi aventi una
sezione sufficientemente grande per alimentare normalmente
l'elettrodomestico.
Se il piano di cottura è dotato di un cavo di alimentazione,
collegarlo solo ad un'alimentazione con tensione di 220-240 V tra la
fase e il neutro.
Capovolgere il piano di cottura, con la vetroceramica rivolta verso il
piano di lavoro, prestando attenzione a proteggere la vetroceramica.
Per procedere al nuovo collegamento, rispettare le istruzioni che
seguono:
- individuare le due linguette sui lati;
- Passare il cavo di alimentazione elettrica nella fascetta;
- Spelare l'estremità di ogni conduttore del cavo di alimentazione
per circa 10 mm, tenendo in considerazione la lunghezza richiesta
del cavo per il collegamento alla morsettiera;
- Togliere le viti che fissano la morsettiera che contiene le
derivazioni e i conduttori del cavo di alimentazione;
Per staccare il cavo di alimentazione elettrica:
- Tirare verso l'esterno il cavo di alimentazione.
Operazioni da effettuare per un nuovo collegamento:
- Avvitare la fascetta per cavi.
- Secondo il tipo di montaggio, utilizzare le deviazioni recuperate
nella prima operazione, fissare il conduttore come indicato sulla
tabella;
- Scegliere il cavo di alimentazione in accordo con le indicazioni
della tabella;
Nota: accertarsi che le viti della morsettiera siano
completamente avvitate.
- togliere il coperchio.
- mettere la punta di un cacciavite piatto davanti alle linguette "2" e
"3", spingere all'interno e premere;
- Bloccare il coperchio;
- svitare la fascetta per cavi "1";
Aprire il coperchio nella seguente sequenza:
- Spelare l'estremità di ogni conduttore del cavo di alimentazione
per circa 10 mm, tenendo in considerazione la
lunghezza richiesta del cavo per il
collegamento alla morsettiera;
- Passare il cavo di alimentazione elettrica nella fascetta;
- A seconda del tipo di montaggio, utilizzare le
deviazioni recuperate nella prima operazione,
fissare il conduttore come indicato sulla
tabella;
- Bloccare il coperchio;
- Avvitare la fascetta per cavi.
- Scegliere il cavo di alimentazione in accordo con le indicazioni
della tabella;
Operazioni da effettuare per un nuovo collegamento:
nel caso in cui fosse necessario sostituire il cavo di alimentazione,
collegare i fili in accordo con i seguenti colori/codici:
ATTENZIONE:
DISPOSIZIONE
"1-3-5" DISPOSIZIONE
"2-4"
MONOFASE O BIFASES 220-240 V~
Cavo
HO5V2V2F
Cavo
HO5V2V2F
Cavo
HO5V2V2F
2
3x2,5 mm 2
3x4 mm
2
4x1,5 mm 2
4x1,5 mm
2
4x1,5 mm 2
4x1,5 mm
TRIFASE 220-240 V3~
TRIFASE 380-415 V2N~
BLU
MARRONE
GIALLO VERDE
Neutro
Fase
Terra ( )
Collegamento ai morsetti della morsettiera
15 IT
5. CONSIGLI SUI RECIPIENTI DI COTTURA
PER IL PIANO
L'utilizzo di recipienti di cottura appropriati è di fondamentale
importanza per ottenere le migliori prestazioni dal piano di cottura.
• Utilizzare sempre recipienti di cottura di buona qualità con basi
perfettamente piane e spesse: l'utilizzo di questo tipo di recipienti di
cottura evita la formazione di punti più caldi nei quali si attacca il cibo.
Padelle e pentole spesse in metallo garantiscono una distribuzione
regolare del calore.
DERIVAZIONE
N
=
Neutro PE
=
TerraL1 / L2 / L3 = Fase
220-240V 3 ~
PE L1 L2 L3
380-415V 2N ~
N
PE L1 L2
L3
PE L1
L2
220-240V ~
N
L
220-240V 2 ~
L2
PE L1
PE
2 31

16 IT
6. USO
Terracotta / fondo in rame: si consiglia di tipo pesante. Buone
prestazioni, ma il rame può lasciare residui che si possono presentare
come graffi. I residui si possono eliminare se il piano di cottura viene pulito
immediatamente. È però importante non dimenticare i recipienti vuoti sul
fornello acceso. Il metallo surriscaldato può legarsi al piano di cottura in
vetroceramica. Un recipiente di cottura in rame surriscaldato lascia residui
che macchiano permanentemente il piano di cottura.
Si sconsiglia l'utilizzo di alluminio sottile a causa del suo basso punto di
fusione.
Porcellana/smalto: Buone prestazioni solo con una base piana, sottile e
liscia.
Ghisa: utilizzabile, ma non consigliata. Scarse prestazioni. Può graffiare
la superficie.
Vetroceramica: sconsigliata. Scarse prestazioni. Può graffiare la
superficie.
Alluminio: si consiglia di tipo pesante. Buona conduttività. A volte i residui
di alluminio si presentano come graffi sul piano di cottura, ma si eliminano
se si pulisce immediatamente il piano.
Acciaio inossidabile: vivamente consigliato. Particolarmente efficace
se dotato di una base con strato doppio placcato. La base doppia
abbina i vantaggi dell'acciaio inossidabile (aspetto, durata e stabilità)
con i vantaggi di alluminio e rame (conduzione di calore, distribuzione
uniforme del calore).
• Accertarsi che la base della pentola o della padella sia asciutta:
quando si introduce liquido nelle padelle o se ne utilizza una che era stata
riposta in frigorifero, accertarsi che la base della padella sia
completamente asciutta prima di appoggiarla sul piano di cottura. In
questo modo si evita di macchiare il piano di cottura.
• Utilizzare pentole di diametro sufficientemente largo per coprire
completamente la superficie: le dimensioni della pentola non devono
essere inferiori alla zona di riscaldamento. Con una pentola leggermente
più grande l'energia viene utilizzata alla massima efficienza.
SCELTA DEI RECIPIENTI DI COTTURA - Le informazioni riportate qui di
seguito facilitano la scelta dei recipienti di cottura adatti per fornire
prestazioni ottimali.
Impostando la massma potenza desderata, l pano cottura regola
automatcamente la dstrbuzone delle vare zone d cottura n modo da
non superare ma tale lmte, con l'ulterore vantaggo d poter gestre
contemporaneamente tutte le zone senza problem d sovraccarco.
La funzone gestone della potenza è dsponble solo entro 30 second
dall'accensone del pano cottura. È possble, comunque, rpetere
questa mpostazone scollegando e rcollegando l cavo d
almentazone.
La funzone d gestone della potenza consente all'utente d mpostare
la potenza massma che può raggungere l pano cottura.
Per l pano cottura l clente può mpostare una potenza massma
compresa tra 2,5 kW e la massma potenza del pano cottura. Ad
esempo, se la potenza massma del pano cottura è d 7 kW, la potenza
massma d regolazone è compresa tra 2,5 kW e 7 kW.
Al momento dell'acqusto, l pano cottura è mpostato sulla massma
potenza.
Dopo l collegamento dell'elettrodomestco alla rete elettrca, entro 30
second è possble mpostare l lvello d potenza n base a punt sopra
ndcat:
P
8
88
8
Scelta del lvello d gestone della potenza
8 8
8
88
8
8 8
8
88
8
5.- Dopo questo ntervallo, questo messaggo apparrà sul dsplay, Po
sul dsplay del tmer. Lvello d potenza dvso per 100 ne dsplay del
rscaldatore.
6.- Utlzzando tast '+' e '-' del tmer, è possble regolare l valore d
gestone della potenza. Quando è selezonato l valore desderato,
toccare contemporaneamente tast "+" e "-" per 5 second.
7.- Al termne d questa procedura, vene emesso un lungo segnale
acustco, l sstema s azzera e la procedura rcomnca.
Come rsultato, l controllo tattle non consentrà alcuna
combnazone che super questo lmte.
b) Se questa selezone d gestone della potenza è ON, se trascorrono
pù d 90 second dall'accensone del pano cottura questo processo
sarà termnato senza che sa stato regstrato un nuovo valore d
potenza.
d) Se questa selezone d gestone della potenza è ON, se vene
premuta la combnazone d "+" e "-" del tmer, l processo sarà
termnato con la regstrazone d un nuovo valore d potenza; reset
e l comando a sforamento nzeranno a funzonare come al solto.
Note:
c) Se questa selezone d gestone della potenza è ON, se vene
premuto un tasto qualsas tranne la combnazone d "+" e "-" del tmer,
l processo sarà termnato senza regstrare nuov valor d potenza e
l comando a sforamento nzerà a funzonare come solto, senza
reset.
a) Questa gestone della potenza è dsponble solo per prm 30
second dopo l'accensone del pano d cottura.
4.- Entro 30 second dopo l'accensone del pano cottura, toccare per
5 second l tasto "-" del tmer.
P
6
00
5
P
4
00
5
8.- Dopo l processo d avvamento, sul dsplay del tmer verrà
vsualzzata la gestone della potenza.
P
4
00
5
2.-Attendere che l controllo tattle termn l processo d
nzalzzazone.
3.- Sbloccare comand.
1.- Accendere l pano cottura.
Come accendere/spegnere una zona di riscaldamento
Per accendere una zona di riscaldamento toccare il pulsante di
accensione per 400 msec. Si sentirà un bip prolungato ed il valore "0" verrà
visualizzato nella cifra della zona di destinazione, indicando il livello di
potenza.
1) Se una qualsiasi fase di cottura è in posizione 0, il display si spegne
automaticamente dopo 10 secondi e la sequenza di spegnimento zona
emette un segnale acustico.
2) Se c'è un'indicazione di calore residuo sul display acceso ma con
potenza pari a 0, lo "0" viene acceso in commutazione.
3) Se la funzione di blocco è attiva non è possibile accendere una zona.
Per spegnere una zona di riscaldamento toccare una qualsiasi zona di
riscaldamento per un periodo di 1,2 sec. Si avvertiranno tre brevi bip nella
8 8
8
88
8

1) Se una qualsiasi fase di cottura è in posizione 0, il display si spegne
automaticamente dopo 10 secondi e la sequenza di spegnimento zona
emette un segnale acustico.
2) Se c'è un'indicazione di calore residuo sul display spento, verrà
visualizzato "H".
4) Se è attiva solo una zona di riscaldamento e anche questa viene
spenta, si avvertono 4 brevi bip per indicare che il piano di cottura è spento.
cifra della zona di destinazione e non verrà visualizzato nulla oppure "H"
se è presente calore residuo. La zona sarà spenta.
3) Se la funzione di blocco è attiva è possibile spegnere una zona.
3. Con una zona accesa a livello di potenza 0, se la zona è calda, lo 0
lampeggerà alternativamente. Dopo 10 secondi, lo 0 scompare e sul
display viene visualizzata la lettera "H" in continuo.
1. Premendo a lungo i pulsanti "+" o "-" il livello di potenza aumenta /
diminuisce in continuo. Con un aumento rapido, la potenza si interrompe al
livello 9 e per potenza superiore è necessario premere ulteriormente il
tasto "+". Non si attiva alcun bip con aumento / diminuzione rapidi.
Premendo brevemente i pulsanti '+' o '-' si aumenta o diminuisce la
potenza nella cifra delle zone selezionate: 0-1-2-3...9-P
2. Una volta raggiunto il livello di potenza P, premendo nuovamente "+" il
livello di potenza non cambia a 0. Una volta arrivato al livello di potenza 0,
premendo nuovamente "-" il livello di potenza non passa a P.
Aumento/diminuzione del livello di potenza
8 8
8
88
8
Nota: Una sicurezza bambini automatica si attiva per 15 minuti dopo lo
spegnimento completo del piano di cottura. Questa funzione si attiva
automaticamente ma è necessario programmarla in precedenza. Fare
riferimento al punto Impostazioni Utente.
Per disattivare la sicurezza bambini, seguire lo stesso processo sopra
indicato. Quindi viene emesso un breve bip e il display visualizza "n". Il
piano di cottura si sblocca.
Quindi, ogni volta che viene premuto un pulsante, il display visualizza "L"
per due secondi. Il riscaldamento rimane nelle stesse condizioni.
Questa azione si svolge quando viene premuto il pulsante di blocco
Opzione Sicurezza Bambini
Per accendere l'anello di estensione doppio, la zona associata deve
essere già accesa e l'indicazione di livello di potenza deve essere
superiore a 0.
8.1- Zona a doppio riscaldamento accesa
La prima breve pressione sul pulsante dell'estensione accende l'anello di
estensione. Il LED sul pulsante di estensione si accende se l'anello di
estensione è acceso.
8.2- Zona a triplo riscaldamento accesa
La prima breve pressione sul pulsante dell'estensione accende il primo
anello di estensione. 1 LED sul pulsante di estensione si accende quando
il primo anello di estensione è acceso (il LED a sinistra nel caso di triplo
riscaldamento, quello centrale e l'unico LED nel caso di zona doppia)
La seconda breve pressione sul pulsante dell'estensione spegne l'anello
di estensione. Si avverte un breve bip ogni volta che si preme il
pulsante di estensione.
La seconda breve pressione sul pulsante dell'estensione accende il
secondo anello di estensione. 2 LED sull'anello di estensione si
accendono se il primo e il secondo anello di estensione sono accesi
La terza breve pressione sul pulsante dell'estensione spegne il primo e il
secondo anello di estensione Si avverte un breve bip ogni volta che si
preme il pulsante di estensione.
Zone a doppio / triplo riscaldamento
8 8
8
88
8
8 8
8
88
8
Funzione bridge
Quando le zone di riscaldamento sono selezionate, se il livello di potenza
non è quello desiderato, utilizzare i pulsanti "+" e "-".
Entrambi i display della zona di cottura con funzione bridge mostrano lo
stesso livello di potenza. La funzione finisce:
La funzione bridge può essere abilitata unicamente quando entrambe le
zone di riscaldamento sono spente. Una zona di riscaldamento del bridge
è stata selezionata; per attivare la funzione bridge sfiorare il pulsante
bridge.
- Se in modalità impostazione viene sfiorato il pulsante bridge
- Se l'utente seleziona il livello di potenza "0"
Entrambe le zone di riscaldamento della funzione bridge sono selezionate
contemporaneamente.
Si avverte un bip e il LED della zona si accende se la zona è abilitata.
8 8
8
88
8
Funzione fusione
- Se è selezionata ad un altro livello di potenza.
Si attiva un segnale acustico e il display della zona di riscaldamento
visualizza "U"
Quando una zona di cottura è stata selezionata, per attivare la funzion
e di fusione:
- Selezionare il pulsante fusione
La zona di cottura funziona a livello di potenza "2"
Essendo selezionata la zona di riscaldamento, la funzione fusione ha termine
- Se è spenta
Funzione bollitura
Quando una zona di cottura è stata selezionata, per attivare la f
unzione di bollitura:
Si attiva un segnale acustico e la zona di riscaldamento visualizza "P"
La zona di riscaldamento si attiva al livello di potenza massimo per 10
minuti. Dopo questi 10 minuti si avverte un segnale acustico e la zona di
riscaldamento ritorna al livello "9"
- Selezionare il pulsante Bollitura
8 8
8
88
8
8 8
8
88
8
FUNZIONE PAUSA
La funzione Pausa consente di interrompere temporaneamente il
processo di cottura, consentendo agli utenti di rispondere alla porta o al
telefono, senza il rischio che l'acqua nella pentola vada in ebollizione e
trabocchi. Questa funzione è anche utile per pulire la superficie
dell'interfaccia utente, senza modificare le impostazioni di cottura.
La funzione di Pausa viene indicata dal simbolo II. Per selezionare questa
funzione, l'utente può toccare contemporaneamente i pulsanti + e – sotto
al timer.
Nota: Non è possibile mettere in pausa una sola zona. Attivando la
funzione di Pausa si disattiva l'intero piano di cottura.
- Si interrompono tutti i conteggi dei timer.
La funzione Pausa si attiva mantenendo premuti per ½ secondo i pulsanti
+ e – sotto al timer
- La funzione Pausa è attiva e il piano di cottura è spento
Come opera la funzione Pausa?
- Vengono memorizzati i valori delle impostazioni delle zone di
riscaldamento attive, poi esse vengono portate a 0
- Si interrompe il tempo di spegnimento automatico delle zone di
riscaldamento.
8 8
8
88
8
17 IT

Indicatore del calore residuo
(in zone di riscaldamento radianti -> calcolato)
Quando la temperatura sulla superficie in vetroresina del piano di cottura è
superiore a 65°C (valore teorico), questa condizione viene visualizzata sul
relativo display, tramite la lettera "H".
Per ottenere una temperatura superiore a 65°C una zona di riscaldamento
deve essere in funzione per un certo periodo di tempo, che dipende dal
livello di potenza. Una volta trascorso questo tempo, la segnalazione di
calore residuo viene visualizzata quando la zona di riscaldamento viene
spenta.
Gli stessi indicatori possono essere utilizzati anche per l'indicazione del
"calore residuo". È necessario stabilire una tabella oraria a tale proposito:
Tempo di calore rimanente = F (livello di potenza, tempo di lavoro).
Spegnimento automatico di sicurezza
Se il livello di potenza non è variato per un tempo preimpostato, la
corrispondente zona di riscaldamento si spegne in automatico.
Il tempo massimo durante il quale una zona di riscaldamento può restare
accesa dipende dal livello di cottura selezionato.
Livello
di potenza Tempo massimo
di attivazione (ore)
1
2
3
4
5
6
7
8
9
10
5
5
4
3
2
2
2
2
NOTA: se si verifica una situazione di surriscaldamento durante il
funzionamento dei massimi livelli di potenza, il comando del piano di
cottura regola automaticamente il livello di potenza per proteggere il piano
di cottura dai surriscaldamenti.
7. PULIZIA E MANUTENZIONE
- Versare alcune gocce del detergente specifico sulla superficie del piano
di cottura.
• Evitare sgocciolamenti, in quanto qualsiasi sostanza che cade sulla
superficie del piano di cottura brucia rapidamente e ne rende più difficile la
pulizia.
ALCUNI SUGGERIMENTI:
Prima di effettuare qualsiasi attività di manutenzione sul piano di cottura,
lasciarlo raffreddare.
• Si consiglia di tenere lontano dal piano di cottura tutte le sostanze che
possono sciogliersi, quali oggetti in plastica, zucchero o prodotti a base di
zucchero.
• Utilizzare unicamente prodotti (paste detergenti e raschietti) progettati
specificatamente per superfici in vetroceramica. Sono reperibili
normalmente in commercio.
MANUTENZIONE:
- Sfregare le eventuali macchie più persistenti con un panno morbido o
carta da cucina leggermente inumidita.
- Asciugare con un panno morbido o carta da cucina asciutta fino alla
completa pulizia della superficie.
Se ci sono ancora macchie persistenti:
- Versare altre gocce di detergente specifico sulla superficie del piano di
cottura.
- Raschiare utilizzando un raschietto, mantenendolo ad un angolo di 30°
rispetto al piano di cottura, fino a quando la macchia non scompare.
- Asciugare con un panno morbido o carta da cucina asciutta fino alla
completa pulizia della superficie.
- Ripetere l'operazione se necessario.
Una pulizia frequente lascia uno strato protettivo che è fondamentale per
evitare graffi e usura. Prima di utilizzare nuovamente il piano di cottura
accertarsi che la superficie sia pulita. Per togliere segni lasciati dall'acqua,
utilizzare alcune gocce di aceto di vino bianco o di succo di limone. Quindi
asciugare con carta assorbente e alcune gocce di detergente specifico.
La superficie in vetroceramica resiste ai graffi causati da recipienti di
cottura a fondo piatto, tuttavia si consiglia sempre di sollevarli quando si
spostano da una zona all'altra.
N.B.:
Non utilizzare mai un coltello o un cacciavite.
Non utilizzare mai una spugna troppo bagnata.
Cornice metallica: per pulire in modo sicuro la cornice metallica, lavare
con acqua e sapone, risciacquare e quindi asciugare con un panno
morbido.
Non utilizzare mai prodotti abrasivi o detergenti in polvere.
Un raschietto con lametta non danneggia la superficie, a patto che
venga mantenuto ad un angolo di 30°.
Non lasciare mai un raschietto con lametta alla portata dei bambini.
18 IT
Sicurezza contro le fuoriuscite
Qualcosa (un oggetto o un liquido) sta mantenendo premuto un qualsiasi
pulsante per più di 5 secondi. 2 bip veloci + 1 bip lungo ogni 30 secondi
mentre viene premuto il pulsante. Il piano di cottura si spegne. Questo
simbolo continua a lampeggiare per tutto il tempo in cui questa situazione
persiste.
Tmer
In entrambi i casi, la zona di riscaldamento deve essere selezionata ed il
relativo livello di potenza deve essere superiore a 0.
7) È possibile regolare il tempo del timer quando il timer era già in
funzione.
Il tempo rimanente è visualizzato nelle cifre riservate al timer. Se molte zone
sono temporizzate, il tempo più basso rimanente e la virgola decimale è
visualizzata nella zona corrispondente.
5) Il tempo massimo corrisponde a 99 minuti.
6) Quando il tempo è trascorso e il piano di cottura emette dei bip, premere
un qualsiasi pulsante per terminare la sequenza di inserimento e l'allarme.
8) La potenza delle zone temporizzate può essere modificata senza
conseguenza sulla programmazione del timer.
11) Premendo il pulsante timer senza avere selezionato alcuna zona e
quando molte sono soggette a temporizzazione, il tempo visualizzato nella
cifra del tempo varia in modo rotatorio, indicando il tempo il cui display di
potenza ha la virgola decimale accesa.
4) Durante l'impostazione del tempo del timer, è possibile passare da "00"
a "99" con il pulsante "-" e da "99" a "00" con il pulsante "+".
2) Premendo contemporaneamente i pulsante il timer si azzera
(visualizzazione 00).
3) Se i pulsanti timer "+" o "-" sono mantenuti premuti durante un tempo da
determinare, si ha un'impostazione rapida.
La funzione timer può essere attivata tramite il relativo pulsante o sfiorando
allo stesso tempo i pulsanti "+" e "-".
1) Con i pulsanti "+" o "-" è possibile selezionare il tempo del timer. Ogni
volta che il tempo varia non si avverte alcun bip.
9) L'ultimo minuto verrà visualizzato in secondi (per alcune varianti visibile
solo accedendo alla programmazione del timer durante il conto alla rovescia
dell'ultimo minuto)
10) Premendo il pulsante timer senza avere selezionato alcuna zona e
quando non ci sono zone temporizzate, non accade nulla.
12) Nella zona soggetta a temporizzazione viene visualizzato in
alternanza potenza (5 s) e (0,5 s).
Selezionare la zona da temporizzare. Il livello di potenza della zona è
superiore a 0. viene visualizzato fisso nella zona da temporizzare. "0 0"
nelle cifre riservate al timer.
Nota: se il piano di cottura resta inattivo per più di 10 minuti esso si
spegnerà automaticamente.
Per disattivare la “funzione Pausa” mantenere premuta per ½ secondo la
combinazione di pulsanti + e – del timer. La funzione Pausa si disattiva, il
piano di cottura si riattiva (si sente un segnale acustico) e vengono
ripristinate le impostazioni precedenti delle zone di riscaldamento.
- Tutti i pulsanti sono bloccati ad eccezione della funzione Pausa
(combinazione + e – sotto al timer) e di Accensione/Spegnimento
- Il timer non visualizza niente, tutti i display delle zone di riscaldamento si
attivano e visualizzano “0”, accendendo i singoli segmenti verso sinistra,
quindi spegnendo i singoli segmenti verso destra, in modo continuo.
Nota: Nessun LED indica che la funzione Pausa è attiva. Premendo
nuovamente la combinazione + e – si disattiva la funzione Pausa.
Disattivazione della funzione Pausa:
30°
Maxi
Qualsiasi variazione di colore della superficie in vetroceramica non
influenza il relativo funzionamento o la stabilità della superficie. Tali
scolorimenti sono principalmente dovuti a residui di alimenti
combusti o dall'utilizzo di recipienti di cottura in materiali quali
alluminio o rame; questi tipi di macchie sono difficili da eliminare.

8. RISOLUZIONE DEL PROBLEMA
Il piano di cottura si è spento.
Display con F e numeri
L'interruttore principale (pulsante accensione/spegnimento) è stato
sfiorato involontariamente o ci sono oggetti su un qualsiasi pulsante.
Riaccendere l'elettrodomestico senza appoggiare nulla sui pulsanti.
Inserire nuovamente le impostazioni.
Se la lettera F e dei numeri compaiono sul display, l'elettrodomestico ha
rilevato un'anomalia. La seguente tabella elenca i provvedimenti correttivi
che si possono adottare per correggere il problema. viene effettuata
correttamente.
Utilizzare una lametta e seguire quanto indicato nella sezione "PULIZIA".
Segni lasciati da recipienti in alluminio o rame, ma anche depositi di
minerali, acqua o alimenti; possono essere ripuliti utilizzando la pasta
detergente.
Il fondo del recipiente di cottura deve coprire completamente il diametro
della zona selezionata.
Graffi metallici
Le deviazioni non sono posizionate correttamente sulla morsettiera.
Piccoli graffi o abrasioni sulla superficie in vetroceramica del piano
di cottura
Utilizzare solo recipienti di cottura a fondo piatto. Se tra il recipiente di
cottura ed il piano di cottura si intravede dello spazio, la zona non sta
trasmettendo correttamente il calore.
Pulizia non corretta o utilizzo di recipienti di cottura a fondo ruvido;
particelle simili a granelli di sabbia o sale tra il piano di cottura e il fondo del
recipiente. Fare riferimento alla sezione "PULIZIA"; accertarsi che i
recipienti siano puliti prima de ll'uso e utilizzare solo recipienti di cottura a
fondo liscio. I graffi si possono ridurre solo se la pulizia
Non fare scivolare i recipienti di cottura sul piano di cottura. Fare
riferimento ai suggerimenti per la pulizia.
Le zone di cottura non cuociono a fuoco lento oppure friggono solo a
bassa temperatura
La cottura è troppo lenta
Macchie scure
Si stanno utilizzando recipienti di cottura inadatti. Utilizzare solo recipienti
a fondo piatto, pesanti ed aventi un diametro che corrisponda almeno alla
zona di cottura.
Si utilizzano i materiali appositi, ma le macchie sono ancora presenti.
Utilizzare una lametta e seguire quanto indicato nella sezione "PULIZIA".
Superfici chiare sul piano di cottura
Formazione di caramello o plastica fusa sul piano di cottura.
Fare riferimento alla sezione "PULIZIA".
Il piano di cottura non funziona o alcune zone non funzionano
Verificare se il collegamento è corretto e se il pannello di comando è
bloccato. Sbloccare il piano di cottura.
Il piano di cottura non si blocca.
Il pannello comandi è bloccato. Sbloccare il piano di cottura.
Frequenza delle operazioni di accensione/spegnimento delle zone di
cottura
Il cicli di accensione/spegnimento variano a seconda del livello di calore
richiesto:
- livello basso: tempo di funzionamento breve,
- livello alto: tempo di funzionamento lungo.
Il piano di cottura non funziona.
Controllare le condizioni dei fusibili / interruttori automatici dell'abitazione.
Verificare se si tratta di una mancata alimentazione.
9. MANUTENZIONE AGGIUNTIVA
Prima di rivolgersi ad un tecnico dell'Assistenza controllare
quanto segue:
— che la spina sia inserita correttamente e dotata di fusibili;
Se non è possibile identificare il guasto spegnere l'elettrodomestico — non
manometterlo — e chiamare il Centro di Assistenza Tecnica post-vendita.
L'elettrodomestico è fornito con un certificato di garanzia che garantisce la
riparazione gratuita presso il Centro di Assistenza.
19 IT
F0
Fc
Ft
FE
Fb
FU / FJ
FA
FC / Fd
Fr
Se si è verificato un errore, scollegare e ricollegare il piano di cottura all'alimentazione elettrica. Se
l'errore persiste, contattare l'assistenza post-vendita. Se un errore si verifica improvvisamente durante il
normale funzionamento, contattare l'assistenza post-vendita.
Errore software comando
sfioramento.
Attendere che la temperatura dmnusca fno al raggungmento d un valore normale. Quando l
messaggo scompare, è possble rutlzzarlo.
La zona comandi a sfioramento
è troppo calda ed ha spento
tutte le zone di riscaldamento.
Attendere che la temperatura scenda. Se il messaggio persiste quando la temperatura raggiunge quella
ambientale, contattare l'assistenza post-vendita.
Attendere che la temperatura scenda. Se il messaggio persiste quando la temperatura raggiunge quella
ambientale, contattare l'assistenza post-vendita.
Il sensore temperatura di
comando a sfioramento può
essere danneggiato.
Verificare che il piano di cottura sia montato correttamente. Accertarsi che i pulsanti tocchino
correttamente la superficie in vetroresina.
Pulsante eccessivamente
sensibile.
Questo errore è un controllo automatico della tastiera. Scompare quando il controllo automatico ritorna ad
un valore di sicurezza. Se l'errore persiste, contattare l'assistenza post-vendita.
Errore sicurezza tastiera
Questo errore è un controllo automatico del software. Scompare quando il controllo automatico ritorna ad
un valore di sicurezza. Se l'errore persiste, contattare l'assistenza post-vendita.
Errore sicurezza tastiera
Questo errore è un controllo automatico del software. Scompare quando il controllo automatico ritorna ad
un valore di sicurezza. Se l'errore persiste, contattare l'assistenza post-vendita.
Errore sicurezza tastiera
Qualsiasi driver dei relè può presentare dei problemi. Togliere il piano di cottura dall'alimentazione,
attendere un minuto e riaccendere. Se l'errore persiste, contattare l'assistenza post-vendita.
Errore di sicurezza relè
Anomalia Azione
Display della zona
di riscaldamento
Il sensore temperatura di
comando a sfiorame+nto può
essere danneggiato.
Table of contents
Languages:
Other Candy Hob manuals

Candy
Candy HOBS User manual

Candy
Candy HOBS User manual

Candy
Candy CHG6BR User manual

Candy
Candy CFI36 User manual

Candy
Candy CPG64 User manual

Candy
Candy TRIO 501 User manual

Candy
Candy HHG7WL5WC5X NL User manual

Candy
Candy PG2D750/1 SX User manual

Candy
Candy CH64CCW User manual

Candy
Candy CDH 30 Specification sheet

Candy
Candy CHEDD30CTT/1 User manual

Candy
Candy CI640C User manual

Candy
Candy CPG 64 SPB User manual

Candy
Candy CHW6LPX User manual

Candy
Candy CIES644DC User manual

Candy
Candy CIS633DTT User manual

Candy
Candy CI642MCBB User manual

Candy
Candy CH642B User manual

Candy
Candy CTPS64MCTTWIFI User manual

Candy
Candy CIE 644 B3 User manual