manuals.online logo
Brands
  1. Home
  2. •
  3. Brands
  4. •
  5. Canon
  6. •
  7. All In One Printer
  8. •
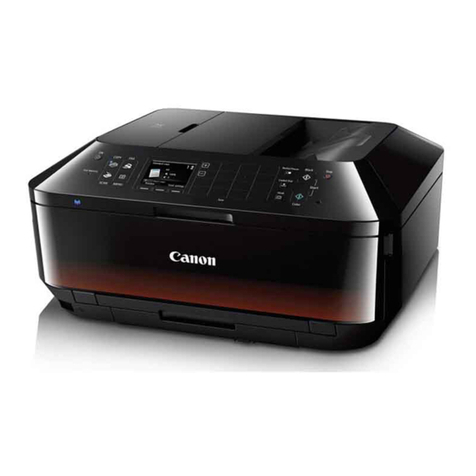
  9. Canon PIXMA MX300 User manual

Canon PIXMA MX300 User manual

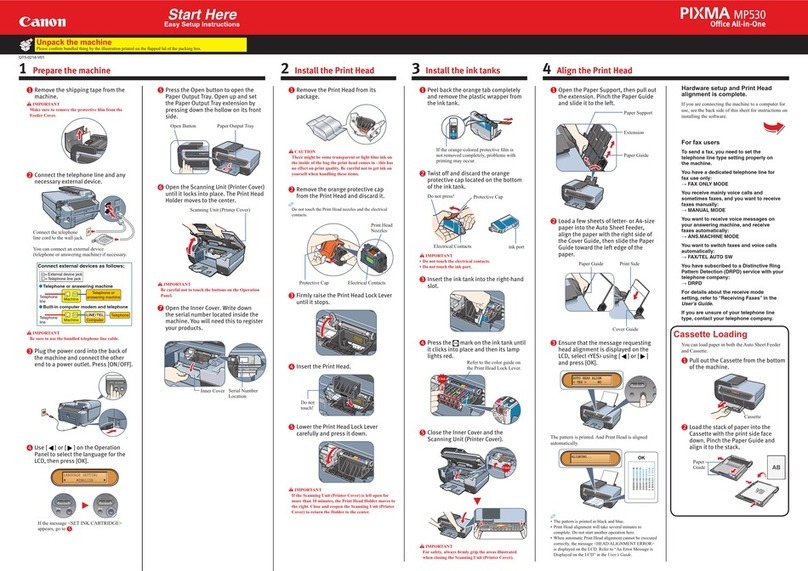
Start Here
Easy Setup Instructions
aPlacethemachineonaatandhorizontalsurface,anddonot
placeanyobjectsinfrontofthemachine.
Removealltheshippingtapesandprotectivematerialontheoutsideofthe
machine.
bLifttheScanningUnit(PrinterCover)withbothhands,andpull
theScanningUnitSupportdownintoplace.
ScanningUnit(PrinterCover)
ScanningUnit
Support
cRemovetheprotectivematerialontherightside.
ProtectiveMaterial
Caution
Before turning on the machine, remove all of the shipping tapes.
dLifttheScanningUnit(PrinterCover)slightlytosettheScanning
UnitSupportbacktoitsoriginalposition,andthengentlyclose
theScanningUnit(PrinterCover)withbothhands.
eConnectthetelephonelineandanynecessaryexternaldevice.
Youcanconnectanexternaldevice(telephoneoransweringmachine)if
necessary.
RemovetheTelephoneconnectorcaptoconnecttheexternaldevice.
Connectthetelephone
linecabletothewalljack.
Telephone
ConnectorCap
Connect external devices as follows:
Externaldevicejack
Telephone or answering machine Built-in computer modem and telephone
Telephone
line
Telephone
line
Machine Machine
Telephoneor
answeringmachine Telephone
Computer
LINETEL
Telephonelinejack
Important
Be sure to use the bundled telephone line cable.
1Prepare the Machine
fPlugthepowercordinthebackofthemachineandconnectthe
otherendtothewalloutlet.
PowerCord
DocumentCover
Important
Make sure that the Document Cover is closed.
Do NOT connect the USB cable at this stage.
gPresstheON/OFFbuttontoturnonthemachine.Themachine
willinitialize.WaituntilthePowerlampstopsashingand
remainslitgreen.
hPressthe[or]buttonontheOperationPaneltoselectthe
languagefortheLCD,thenpresstheOKbutton.
LANGUAGE SETTING
[E N GLISH]
Important
If an unintended language is displayed on the LCD, press the Back button to return
to the LANGUAGE SETTING screen.
Oncethemessage“SET INK CARTRIDGE”appears,gotoi.
iLifttheScanningUnit(PrinterCover)withbothhands,andpull
theScanningUnitSupportdownintoplace.TheFINECartridge
Holderautomaticallymovestotheleft.
j
Writedowntheserialnumberlocatedinsidethemachine.You
willneedthistoregisteryourproduct.
SerialNumber
•
•
2Install the FINE Cartridges
aRemovetheBlackFINECartridgefromitsbox.
bRemovetheprotectivetapegently.
ProtectiveTape
PrintHeadNozzles
ElectricalContacts
Important
Do not touch the electrical contacts or Print Head Nozzles on a FINE Cartridge.
The machine may not print out properly if you touch it.
Do not reattach the protective tape once you have removed it.
Be careful not to stain your hands or surrounding work area with ink on the
removed protective tape.
cInserttheBlackFINECartridgeslightlyslantedintotheleftslot
B.
Makesurethatthemessage“COVER IS OPEN”isdisplayedontheLCDand
theFINECartridgeHolderhasmovedtotheleft.
FINECartridgeHolder
dPushuptheFINECartridgeuntilitclicksintoplace.
Important
For correct machine operation, make sure the FINE Cartridge is securely inserted.
Click
•
•
•
eRepeattheprocedurefortheColorFINECartridge,insertingit
intotherightslot C.
fLifttheScanningUnit(PrinterCover)slightlytosettheScanning
UnitSupportbacktoitsoriginalposition,andthengentlyclose
theScanningUnit(PrinterCover)withbothhands.
Important
Once you have installed the FINE Cartridges, the message “CART. RETURN” is
displayed on the LCD. Wait until the following message appears before proceed-
ing. It takes about one minute.
1 0 0
%
8
. 5 x 1 1 S T D
0 1
PLAIN
If the messages “IN CASE OF MISPRINT PLEASE ALIGN HEAD” and “CHECK
THCKNESS LEVER CHECK IF THCKNESS LEVER IS SET TO LEFT” are displayed
on the LCD when you start printing after preparing the machine, press the OK
button on the machine.
For details on how to align the Print Head position and adjust the position of the
Paper Thickness Lever, refer to the Quick Start Guide.
Hardware setup is now complete.
Next, turn over and install the software.
For fax users
To use a fax, you need to set the telephone line type setting properly on
the machine.
If you are unsure of your telephone line type, contact your telephone
company.
Select the receive mode according to your needs.
•You want to receive only faxes automatically with the machine, or have a
dedicated telephone line for fax use only:
→ FAX ONLY MODE
•You are using a single telephone line for faxes and voice calls and use
voice calls more frequently:
→ TEL PRIORITY MODE
•You are using a single telephone line for faxes and voice calls and want
to receive faxes automatically:
→ FAX PRIORITY MODE
•You have subscribed to a Distinctive Ring Pattern Detection (DRPD)
service with your telephone company:
→ DRPD
For details on how to conrm and change the settings, refer to the Quick
Start Guide.
•
•
Ofce All-In-One
QT51341V02
Unpack the Machine Pleaseconrmtheincludeditemsagainsttheillustrationprintedonthelidofthepackingbox.
AUSBcableisnecessarytoconnectthemachinewithyourcomputer.
•
•
Important
When cleaning the exterior of the machine, use a soft cloth to wipe it gently. For details, refer to “Cleaning Your Machine” in the Quick Start Guide.
Windows
Macintosh
Note
ThescreensbelowrefertoWindowsVista™operatingsystemUltimateEdition
(hereafterreferredtoas“WindowsVista”)installation.
Screensmayvarydependingontheoperatingsystemyouareusing.
Logintoauseraccountwiththeadministratorprivilege.
Beforeinstallingthesoftware,disableallanti-virusprogramsandautomatically
loadingprograms.
Amessageaskingforyourconfirmationtorestartyourcomputermayappear
duringtheinstallationprocess.Ifthismessageisdisplayed,followtheon-screen
instructionsandclickOK.
Theinstallationresumesfromwhereitleftoffwhenyourcomputerhasbeen
restarted.
aBesuretoTURN THE MACHINE OFFbeforecontinuing.
(1) PresstheON/OFFbutton.
(2) MakesurethatthePowerlampstopsashing.
bTurnthecomputeronandstartWindows.
Important
If the Found New Hardware or Found New Hardware Wizard screen appears
automatically, remove the USB cable connected to your computer. Click Cancel
to quit the screen. In Windows Vista, the screen may close automatically when
the USB cable is unplugged. Then turn off the machine and proceed from step
cto install the software.
cInserttheSetupCD-ROM.Thesetupprogramshouldrun
automatically.
InWindowsVista,gotoStepd.InWindowsXPandWindows2000,goto
Stepf.
dIftheAutoPlayscreenappears,clickRun Msetup4.exe.
eIftheUser Account Controlscreenappears,clickContinue.
Ifthesamescreenreappearsinsubsequentsteps,click
Continue.
fWhenthemainmenuappears,clickEasy Install.
TheMPDrivers,On-screenManuals,andapplicationsoftwareareinstalled
automatically.
Note
Ifyouwanttoselectparticularitemstoinstall,clickCustom Installandfollowtheon-
screeninstructionstoproceedwiththeinstallation.
•
•
•
•
gWhenthelistofapplicationstoinstallappears,conrmthe
contents,thenclickInstall.
Note
Movethecursoroveritemstodisplayexplanationsofeachapplication.
hReadtheLicenseAgreementcarefullyandclickYes.The
softwareinstallationscreenmayappearduringtheinstallation
process.Followtheon-screeninstructionstoinstallthe
software.
iWhenthePrinter Connectionscreenappears,connect
oneendoftheUSBcabletothecomputer,theothertothe
machine,thenTURN THE MACHINE ON.TheMPDriverswill
beginidentifyingtheprinterportbeingused.
Important
If you cannot go to the next procedure after three minutes, refer to “Trouble-
shooting” instructions in the User’s Guide on-screen manual.
USB ToComputer
→
jWhenthePrint Head Alignment Recommendedscreen
appears,clickNext.
kWhentheSetup Completescreenappears,clickNext.
lWhentheUser Registrationscreenappears,clickNext.
Note
Toregisterlater,clickCancelandgotoStepm.Aftersoftwareinstallationiscomplete,
double-click onthedesktop.
Followon-screeninstructionstoregisteryourproduct.Youwillneedyour
productserialnumber,whichislocatedontheinsideofthemachine.See
Step1-jonthefrontpage.
mWhenthePIXMA Extended Survey Programscreen
appears,conrmthemessage.Wewouldappreciateitifyou
wouldtakepartinthisprogramregardingtheuseofCanon
printers.Ifyoucanagree,clickAgree.
nWhentheInstallation completed successfullyscreen
appears,clickExit.
IfRestartisdisplayed,makesurethattheRestart the system now
(recommended)checkboxisselected,thenclickRestart.
Note
IfstraightlinesaremisalignedorprintqualityisnotsatisfactoryafterinstallingtheMP
Drivers,youmayneedtoalignthePrintHead.Referto“Aligning the Print Head” in
the Quick Start Guide.
Software installation is now complete.
Windows®Software Installation
Note
SinceMac®OS9,MacOSXClassicenvironments,orMacOSXv.10.2.7orearlier
arenotsupported,donotconnectthemachinetothese.
ThescreensbelowrefertoMacOSXv.10.4.xinstallation.Screensmayvary
dependingontheoperatingsystemyouareusing.
LogonasanAdministrator.
Beforeinstallingthesoftware,disableallanti-virusprogramsandautomatically
loadingprograms.
aConnectoneendoftheUSBcabletothecomputerandthe
othertothemachine.
Note
Makesurethemachineisturnedon.
USB
bTurnonyourMacandinserttheSetupCD-ROM.
Note
IftheCD-ROMfolderdoesnotopenautomatically,double-clicktheCD-ROMicon
onthedesktop.
cDouble-clicktheSetupicon.
dWhentheAuthenticatescreenappears,enteryour
administratornameandpassword.ClickOK.
Ifyoudonotknowyouradministratornameorpassword,click
,thenfollowtheon-screeninstructions.
eWhenthemainmenuappears,clickEasy Install.
TheMPDrivers,On-screenManuals,andapplicationsoftwareareinstalled
automatically.
Note
Ifyouwanttoselectparticularitemstoinstall,clickCustom Installandfollowtheon-
screeninstructionstoproceedwiththeinstallation.
fWhenthelistofapplicationstoinstallappears,conrmthe
contents,thenclickInstall.
Note
Movethecursoroveritemstodisplayexplanationsofeachapplication.
gReadtheLicenseAgreementcarefullyandclickYes.The
softwareinstallationscreenmayappearduringtheinstallation
process.Followtheon-screeninstructionstoinstallthe
software.
hWhenthePrint Head Alignment Recommendedscreen
appears,clickNext.
iWhentheSetup Completescreenappears,clickNext.
•
•
•
•
Macintosh®Software Installation
jWhentheUser Registrationscreenappears,clickNext.
Note
Toregisterlater,clickCancelandgotoStepk.Aftersoftwareinstallationiscomplete,
double-click onthedesktop.
Followon-screeninstructionstoregisteryourproduct.Youwillneedyour
productserialnumber,whichislocatedontheinsideofthemachine.See
Step1-jonthefrontpage.
kWhentheInstallation completed successfullyscreen
appears,clickRestart.
Thesystemisrestartedautomatically.
When using Mac OS X v.10.2.8 to v.10.3.3:
Restartingthecomputerwhileconnectedtothemachinemaycausethemachinenot
tobedetected.Toresolvethis,eitherunplugtheUSBcablethenplugitbackinagain,
orturnthemachineoffthenbackonagain.
Note
WhenusingMacOSXv.10.2.8tov.10.3.x,beforeusingtheOperationPanelon
themachinetosaveoriginalsscannedfromthePlatenGlasstothecomputer,it
isnecessarytoselectMP Navigator EX 1.0orMP Navigator EX 1asthelaunch
applicationonImageCaptureunderApplications.Fordetails,referto“Scanning
Images” in the User’s Guide on-screenmanual.
Ifstraightlinesaremisalignedorprintqualityisnotsatisfactoryafterinstallingthe
MPDrivers,youmayneedtoalignthePrintHead.Referto“Aligning the Print
Head” in the Quick Start Guide.
XXX FAX(where“XXX”isyourmachine’sname)isshowninthePrinter Namelist
(ProductlistinMacOSXv.10.2.8tov.10.3.x),butyoucannotaddXXX FAX.You
canfaxthedocumentwiththecurrentprintsettingsappliedtoitifyourcomputeris
equippedwithaninternalmodem.Youcannotsendfaxesfromyourcomputerviathe
machine.
Software installation is now complete.
•
•
•
Partno.QT5-1341-V02©2007CanonInc.“Microsoft”isaregisteredtrademarkofMicrosoftCorporation.“Windows”isatrademarkofMicrosoftCorporation,registeredintheU.S.andothercountries.“WindowsVista”isatrademarkofMicrosoftCorporation.“Macintosh”and“Mac”aretrademarksofAppleInc.,registeredintheU.S.andothercountries. XXXXXXXXPRINTEDINTHAILAND

Other manuals for PIXMA MX300

3

Other Canon All In One Printer manuals

Canon imageRUNNER 3530 User manual

Canon

Canon imageRUNNER 3530 User manual

Canon imageRUNNER 1435i User manual

Canon

Canon imageRUNNER 1435i User manual

Canon imageRUNNER ADVANCE C5255 User manual

Canon

Canon imageRUNNER ADVANCE C5255 User manual

Canon iR3245 Installation and maintenance instructions

Canon

Canon iR3245 Installation and maintenance instructions

Canon PIXMA MX895 User manual

Canon

Canon PIXMA MX895 User manual

Canon i-SENSYS MF4150 User manual

Canon

Canon i-SENSYS MF4150 User manual

Canon PIXMA MP190 User manual

Canon

Canon PIXMA MP190 User manual

Canon imageRUNNER 2202N User manual

Canon

Canon imageRUNNER 2202N User manual

Canon MX320 User manual

Canon

Canon MX320 User manual

Canon ImageRunner C2550 Installation and maintenance instructions

Canon

Canon ImageRunner C2550 Installation and maintenance instructions

Canon imageRunner 2022 User manual

Canon

Canon imageRunner 2022 User manual

Canon MX390 series Setup guide

Canon

Canon MX390 series Setup guide

Canon MultiPASS L6000 Quick start guide

Canon

Canon MultiPASS L6000 Quick start guide

Canon imageCLASS MF6500 Series Safety guide

Canon

Canon imageCLASS MF6500 Series Safety guide

Canon LASER CLASS 2050P User manual

Canon

Canon LASER CLASS 2050P User manual

Canon 3744B002 User manual

Canon

Canon 3744B002 User manual

Canon MX390 series Setup guide

Canon

Canon MX390 series Setup guide

Canon FAXPHONE L80 User manual

Canon

Canon FAXPHONE L80 User manual

Canon PIXMA MX360 Series User manual

Canon

Canon PIXMA MX360 Series User manual

Canon imageRUNNER C3480 User manual

Canon

Canon imageRUNNER C3480 User manual

Canon Color imageCLASS 8180c Quick start guide

Canon

Canon Color imageCLASS 8180c Quick start guide

Canon Pixma MP800R User manual

Canon

Canon Pixma MP800R User manual

Canon MultiPASS F30 User manual

Canon

Canon MultiPASS F30 User manual

Canon imageRUNNER ADVANCE 615iZ III User manual

Canon

Canon imageRUNNER ADVANCE 615iZ III User manual

Popular All In One Printer manuals by other brands

Brother MFC-7225N Quick setup guide

Brother

Brother MFC-7225N Quick setup guide

Konica Minolta bizhub 223 Use guide

Konica Minolta

Konica Minolta bizhub 223 Use guide

Lexmark X6100 install guide

Lexmark

Lexmark X6100 install guide

FujiFilm 800 Specifications

FujiFilm

FujiFilm 800 Specifications

Ricoh Aficio SP C830DN Maintenance Guide

Ricoh

Ricoh Aficio SP C830DN Maintenance Guide

Xerox WorkCentre 3215 Quick use guide

Xerox

Xerox WorkCentre 3215 Quick use guide

Ricoh Aficio 1515 Facsimile Reference

Ricoh

Ricoh Aficio 1515 Facsimile Reference

Lexmark X7550 user guide

Lexmark

Lexmark X7550 user guide

Brother DCP-J140W Basic user's guide

Brother

Brother DCP-J140W Basic user's guide

Brother DCP120C - Flatbed Multifunction Photo Capture... Quick setup guide

Brother

Brother DCP120C - Flatbed Multifunction Photo Capture... Quick setup guide

Lexmark X940E Fax guide

Lexmark

Lexmark X940E Fax guide

Savin 3651 operating instructions

Savin

Savin 3651 operating instructions

Kyocera FS-C1020MFP quick guide

Kyocera

Kyocera FS-C1020MFP quick guide

Epson Expression Photo XP-8600 user guide

Epson

Epson Expression Photo XP-8600 user guide

Oce VarioLink 4522c user guide

Oce

Oce VarioLink 4522c user guide

Gestetner A265 Service manual

Gestetner

Gestetner A265 Service manual

Epson Artisan 835 Specifications

Epson

Epson Artisan 835 Specifications

Konica Minolta FS-501 Service manual

Konica Minolta

Konica Minolta FS-501 Service manual

manuals.online logo
manuals.online logoBrands
  • About & Mission
  • Contact us
  • Privacy Policy
  • Terms and Conditions

Copyright 2025 Manuals.Online. All Rights Reserved.