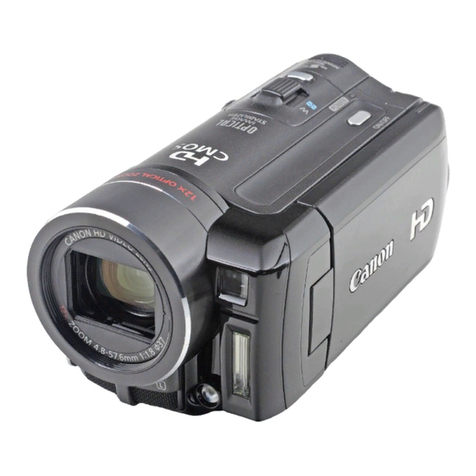
Canon VIXIA HF M40 User manual

canon
VIXIA
HFM40
VIXIA
HFM41
VIXIA
HFM400

Important Usage Instructions
---'''''''''''''''''''''''-''''''''''''''''''''''''''''-~''''''''
WARNING!
TO
REDUCE
THE
RISK
OF
FIRE
OR
ELECTRIC
SHOCK,
00
NOT
EXPOSE
THIS
PRODUCT
TO
RAIN
OR
MOISTURE.
----_
..
".""
...
"",----------
---_.,
" "
"."
..
"."
..
"
..
,.,-,
..
"
.....
"
...
".
WARNING!
----"
..
".""-,,,,-,.,
..
-
""",
..
"."
..
".""",----
TO
REDUCE
THE
RISK
OF
ELECTRIC
SHOCK
AND
TO
REDUCE
ANNOYING
INTERFERENCE,
USE
THE
RECOMMENDED
ACCESSORIES
ONLY.
""""---"""
..
".""".".,,
..
,,._---
",
..
""""....
"
..
"""."
......
_---'
----,
,,,,,
,.-._-----,
..
----.""""""""
...
,,,.-.
--'""-"",,,
...
,,,,.,,
..
----
COPYRIGHT
WARNING:
Unauthorized
recording
of
copyrighted
materials
may
infringe
on
the
rights
of
copyright
owners
and
be
contrary
to
copyright
laws.
L..-
..
,,"
"....
"",,,
"
.......
_
...
_---'
._---"""."
..
",,,".,,,,.,,,,----,,,,,,,,
....
,,,,,
.....
,,
HD
Camcorder,
VIXIA
HF
M40
AI
VIXIA
HF
M41
AI
VIXlA
HF
M400
A
systems
This
device
complies
with
Part
15
of
the
FCC
Rules.
Operation
is
subject
to
the
following
two
conditions:
(1)
This
device
may
not
cause
harmful
interference,
and
(2)
this
device
must
accept
any
interference
received,
including
interference
that
may
cause
undesired
operation.
Note:
This
equipment
has
been
tested
and
found
to
comply
with
the
limits
for
class
8
digital
device,
pursuant
to
Part
15
of
the
FCC
Rules.
These
limits
are
designed
to
provide
reasonable
protection
against
harmful
interference
in
a
residential
installation.
This
equipment
generates,
uses
and
can
radiate
radio
frequency
energy
and,
if
not
installed
and
use
in
accordance
with
the
instructions,
may
cause
harmful
interference
to
radio
communications.
However,
there
is
no
guarantee
that
interference
will
not
occur
in
a
particular
installation.
If
this
equipment
does
cause
harmful
interference
to
radio
or
television
reception,
which
can
be
determined
by
turning
the
equipment
off
and
on,
the
user
is
encouraged
to
try
to
correct
the
interference
by
one
or
more
of
the
following
measures:
•
Reorient
or
relocate
the
receiving
antenna.
•
Increase
the
separation
between
the
equipment
and
receiver.
•
Connect
the
equipment
into
an
outlet
on
a
circuit
different
from
that
to
which
the
receiver
is
connected.
•
Consult
the
dealer
or
an
experienced
radiollV
technician
for
help.
Use
of
shielded
cable
is
required
to
comply
with
class
8
limits
in
Subpart
B
of
Part
15
of
FCC
Rules.
Do
not
make
any
changes
or
modifications
to
the
equipment
unless
otherwise
specified
in
the
manual.
If
such
changes
or
modifications
should
be
made,
you
could
be
required
to
stop
operation
of
the
equipment.
Canon
U.S.A.,
Inc.
One
Canon
Plaza,
Lake
Success,
NY
11042,
U.S.A.
Tel
No.
(516)328-5600
2
"""
...
""
,---
......
--_
..
-----._-_
......"
.....
'--
"""
,,
..
---

U
~~~~~~
E~ECTRIC
SH~CK,
MATC~:IDE
BLADEOF
PLUG
TO
WI~E
SLOT,FULL:]
INSERT.
..
_~~
..
_-
....
_,
...
__
....
-..
....
..~_._...
.-
.~.
I
~:r:~~::
the
risk
O;~~~:hOck,~~n:p~s=~roduct~~ng
or::nJ
Q
h;Mains
PI'~g
j~-uSed
as
th~~i~·~onnect
d~vjce.
The
'Mains
Plu'g
shall
re~ain
rea~i1Y
'J
operable
to
disconnect
the
plug
in
case
of
an
accident
.....
.
...
__
....
'
-""-"'-"'-"'~~"""
.....
.,-
..
.
..
CAUTION:
•
Danger
of
explosion
if
the
wrong
type
of
batteries
are
attached.
Use
only
the
same
type
of
batteries.
•
Do
not
expose
batteries
or
product
to
excessive
heat
such
as
the
inside
of
a
car
under
direct
sunlight,
fire,
etc.
-~-----"'--'''--'''-'-''
Important
Warning
CAUTION
RI$1\
OF
el-£CTRIC SHOCK
OON010PEN
r-:-:-"'-""
......
_
.....
__
...
_
....
_._
......
_
.....
__
...
_
...
__
....
__
..
_--
---"l
•
CAUTION:
]
TO
REDUCE
THE
RISK
OF
ELECTRIC
SHOCK,
DO
NOT
REMOVE
COVER
(OR
BACK).
NO
)
:1
USER-SERVICEABLE
PARTS
INSIDE.
REFER
SERVICING
TO
QUALIFIED
SERVICE
i
I
PERSONNEl.
'-.
__
,_
....
..
_.,.
_
...
__
..
",
, J
The
lightning
flash
with
arrowhead
symbol,
within
an
equilateral
triangle,
is
intended
to
alert
the
user
to
the
presence
of
uninsulated
"dangerous
voltage"
within
the
product's
enclosure,
that
may
be
of
sufficient
magnitude
to
constitute
a
risk
of
electric
shock
to
persons.
The
exclamation
point,
within
an
equilateral
triangle,
is
intended
to
alert
the
user
to
the
presence
of
important
operating
and
maintenance
(servicing)
instructions
in
the
literature
accompanying
the
product.
3

4
In
these
safety
instructions
the
word
"product"
refers
to
the
Canon
HO
Camcorder
VIXIA
HF
M40
A/
VIXIA
HF
M41
A/
VIXIA
HF
M400
A
and
all
its
accessories.
1
Read
these
instructions.
2
Keep
these
instructions.
3
Heed
all
warnings.
4
Follow
all
instructions.
5
Do
not
use
this
apparatus
near
water.
6
Clean
only
with
dry
cloth.
7
Do
not
install
near
any
heat
sources
such
as
radiators,
heat
registers,
stoves,
or
other
apparatus
(including
amplifiers)
that
produce
heat.
8
Do
not
defeat
the
safety
purpose
of
the
polarized
or
grounding-type
plug.
A
polarized
plug
has
two
blades
with
one
wider
than
the
other.
A
grounding
type
plug
has
two
blades
and
a
third
grounding
prong.
The
wide
blade
or
the
third
prong
are
provided
for
your
safety.
If
the
provided
plug
does
not
fit
into
your
outlet,
consult
an
electrician
for
replacement
of
the
obsolete
outlet.
9
Protect
the
power
cord
from
being
walked
on
or
pinched
particularly
at
plugs,
convenience
receptacles,
and
the
point
where
they
exit
from
the
apparatus.
10
Only
use
attachments/accessories
specified
by
the
manufacturer.
11
Unplug
this
apparatus
during
lightning
storms
or
when
unused
for
long
periods
of
time.
12
Refer
all
servicing
to
qualified
service
personnel.
Servicing
is
reqUired
when
the
apparatus
has
been
damaged
in
any
way,
such
as
power-supply
cord
or
plug
is
damaged,
liqUid
has
been
spilled
or
objects
have
fallen
into
the
apparatus,
the
apparatus
has
been
exposed
to
rain
or
moisture,
does
not
operate
normally,
or
has
been
dropped.
13
Read
Instructions
-
All
the
safety
and
operating
instructions
should
be
read
before
the
product
is
operated.
14
Retain
Instructions
-
The
safety
and
operating
instructions
should
be
retained
for
future
referen~~,
15
Heed
Warnings
-
All
warnings
on
the
product
and
in
the
operating
instructions
should
be
adhered
to.
16
Follow
Instructions
-
All
operating
and
maintenance
instructions
should
be
followed.
17
Cleaning
-
Unplug
this
product
from
the
wall
outlet
before
cleaning.
00
not
use
liquid
or
aerosol
cleaners.
The
product
should
be
cleaned
only
as
recommended
in
this
manual.
18
Accessories
-
Do
not
use
accessories
not
recommended
in
this
manual
as
they
may
be
hazardous.
19
Avoid
magnetic
or
electric
fields
-
Do
not
use
the
camera
close
to
TV
transmitters,
portable
communication
devices
or
other
sources
of
electric
or
magnetic
radiation.
They
may
cause
picture
interference, or
permanently
damage
the
camera.
20
Water
and
Moisture
-
Hazard
of
electric
shock
-00
not
use
this
product
near
water
or
in
rainy/moist
situations.

ANTENNA
LEAD
IN
WIRE
GROUNDING
CONDUCTORS
(NEC
SECTION
810-21)
ANTENNA
DISCHARGE
UNIT
(NEC
SECTION
810-20)
~~
GROUND
CLAMPS
POWER
SERVICE
GROUNDING
ELECTRODE
SYSTEM
(NEC
ART
250.
PART
H)
NEG
-
NATIONAL
ELECTRICAL
CODE
ELECTRIC
SERVICE
EaUIPMENT
Fig. 1
EXAMPLE
OF
ANTENNA
GROUNDING
AS
PER
NATIONAL
ELECTRICAL
CODE
28
26
25
Placing
or
Moving
-
Do
not
place
on
an
unstable
cart,
stand,
tripod,
bracket
or
table.
The
product
may
fall,
causing
serious
injury
to
a
child
or
adult,
and
serious
damage
to
the
product.
A
product
and
cart
combination
should
be
moved
with
care.
Quick
stops,
excessive
force,
and
uneven
surfaces
may
cause
the
product
and
cart
combination
to
overturn.
22
Power
Sources
-
The
CA-570
Compact
Power
Adapter
should
be
operated
only
from
the
type
of
power
source
indicated
on
the
marking
label.
If
you
are
not
sure
of
the
type
of
powar
supply
to
your
home,
consult
your
product
dealer
or
local
power
company.
Regarding
other
power
sources
such
as
battery
power,
refer
to
instructions
in
this
manual.
Polarization
-
The
CA-570
Compact
Power
Adapter
is
equipped
with
a
polarized
2-prong
plug
(a
plug
having
one
blade
wider
than
the
other).
The
2-prong
polarized
plug
will
fit
into
the
power
outlet
only
one
way.
This
is
a
safety
feature.
If
you
are
unable
to
insert
the
plug
fully
into
the
outlet,
try
reversing
the
plug.
If
the
plug
still
fails
to
fit,
contact
your
electrician
to
replace
your
obsolete
outlet.
Do
not
defeat
the
safety
purpose
of
the
polarized
plug.
24
Power
Cord
Protection
-
Power
cords
should
be
routed
so
that
they
are
not
likely
to
be
walked
on
or
pinched
by
items
placed
upon
or
against
them.
Pay
particular
attention
to
plugs
and
the
point
from
which
the
cords
exit
the
product.
Outdoor
Antenna
Grounding
-
If
an
outside
antenna
is
connected
to
the
product,
be
sure
the
antenna
is
grounded
so
as
to
provide
some
protection
against
voltage
surges
and
built-up
static
charges.
Section
810
of
the
National
Electrical
Code,
ANSI
I
NFPA
No.
70-1984,
provides
information
with
respect
to
proper
grounding
of
the
mast
and
supporting
structure,
grounding
of
the
lead-in
wire
to
an
antenna
discharge
unit,
size
of
grounding
conductors,
location
of
antenna
discharge
unit,
connection
to
grounding
electrodes,
and
requirements
for
the
grounding
electrode.
See
figure
1.
Lightning
-
For
added
protection
of
this
product
during
a
lightning
storm,
or
when
it
is
left
unattended
and
unused
for
long
periods
of
time,
disconnect
it
from
the
wall
outlet
and
disconnect
the
antenna.
This
will
prevent
damage
to
the
product
due
to
lightning
and
power-line
surges.
27
Overloading
-
Do
not
overload
wall
outlets
and
extension
cords
as
this
can
result
in
a
risk
of
fire
or
electric
shock.
Objects
and
Liquid
Entry
-
Never
push
objects
of
any
kind
into
this
product
through
openings
as
they
may
touch
dangerous
voltage
points
or
short
out
parts
that
could
result
in
a
fire
or
electric
shock.
Be
careful
not
to
spill
liquid
of
any
kind
onto
the
product.
29
Servicing
-
Do
not
attempt
to
service
this
product
yourself
as
opening
or
removing
covers
may
expose
you
to
dangerous
voltage
or
other
hazards.
Refer
all
servicing
to
qualified
service
personnel.
21
23
5

6
30
Damage
Requiring
Service
-
Disconnect
this
product
from
the
wall
outlet
and
all
power
sources
including
battery,
and
refer
servicing
to
qualified
service
personnel
under
the
following
conditions:
a.
When
the
power-supply
cord
or
plug
is
damaged.
b.
If
any
liquid
has
been
spilled
onto,
or
objects
have
fallen
into,
the
product.
c.
If
the
product
has
been
exposed
to
rain
or
water.
d.
If
the
product
does
not
operate
normally
even
if
you
follow
the
operating
instructions.
Adjust
only
those
controls
that
are
covered
by
the
operation
instructions.
Improper
adjustment
of
other
controls
may
result
in
damage
and
will
often
require
extensive
work
by
a
qualified
technician
to
restore
the
product
to
its
normal
operation.
e.
If
the
product
has
been
dropped
or
the
cabinet
has
been
damaged.
f.
When
the
product
exhibits
a
distinct
change
in
performance.
This
indicates
a
need
for
service.
31
Replacement
Parts
-
When
replacement
parts
are
required,
be
sure
the
service
technician
has
used
replacement
parts
that
are
specified
by
Canon
or
that
have
the
same
characteristics
as
the
original
part.
Unauthorized
substitutions
may
result
in
fire,
electric
shock
or
other
hazards.
32
Safety
Check
-
Upon
completion
of
any
service
or
repairs
to
this
product,
ask
the
service
technician
to
perform
safety
checks
to
determine
that
the
product
is
in
safe
operating
order.
33
Heat
-
The
product
should
be
situated
away
from
heat
sources
such
as
radiators,
heat
registers,
stoves,
or
other
products
(including
amplifiers)
that
produce
heat.
When
replacement
of
the
power
supply
is
required,
please
return
it
to
the
responsible
nearest
Canon
Service
Center
and
please
replace
it
with
the
same
type
number
CA-570.
--
-_
....
--_
.....
_,_
...
_.._
......
-~
.....
_--
fCA-570
identification
Plate"is
located-o-n
t-he'b~-tt-om-.
"'-'-"
.""
-J
....
l
..
~_"
..
_"'
__
,_
..
_"
..
_
...
__
..
_
....
_
....
_,
,_."_
...
_
..
,,.
__
...
_
.....
_
--_.
---
--
----,,---,--_._-
The
Adapter
can
be
used
with
a
power
supply
between
100
and
240
V
AC.
For
areas
where
120
V
AG
power
is
not
used,
you
will
neeo
a
~pecial
plug
adapter.
Contact
your
nearest
Canon
Service
Center
for
further
information.
~
....
_'_
..
""-_
..
"_
..
,--"
..
_
..
_"_
....
"-_
....
_
...
,_
...
__
...
_,,
....
_
...
_."
..
_
...
_
...
,."-"'-~
..
,
This
Class
B
digital
apparatus
complies
with
Canadian
ICES-DD3
.
.
_-_...
~
...
~
...
_
..
,._
..
,
..
---.,-_...
.
..
_-,_
...
,._
..
~
..
_--,_
..

[I]
DOlBV
DIGITAL I
STEREO
CREATOR
Trademark
Acknowledgements
•
SD,
SDHC
and
SDXC
Logos
are
trademarks
of
SD-3C,
LLC.
•
Microsoft
and
Windows
are
trademarks
or
registered
trademarks
of
Microsoft
Corporation
in
the
United
States
and/or
other
countries.
•
Macintosh
and
Mac
OS
are
trademarks
of
Apple
Inc.,
registered
in
the
U.S.
and
other
countries.
•
"x.v.Color"
and
the
"x.v.Color"
logo
are
trademarks.
•
HDMI,
the
HDMIIogo
and
High-Definition
Multimedia
Interface
are
trademarks
or
registered
trademarks
of
HDMllicensing
LLC
in
the
United
States
and
other
countries.
•
"AVCHD"
and
the
"AVCHD"
logo
are
trademarks
of
Panasonic
Corporation
and
Sony
Corporation.
•
Manufactured
under
license
from
Dolby
Laboratories.
"Dolby"
and
the
double-D
symbol
are
trademarks
of
Dolby
Laboratories.
•
YouTube
is
a
trademark
of
Google
Inc.
•
Other
names
and
products
not
mentioned
above
may
be
trademarks
or
registered
trademarks
of
their
respective
companie5,
•
This
device
incorporates
exFAT
technology
licensed
from
Microsoft.
•
ANY
USE
OF
THIS
PRODUCT
OTHER
THAN
CONSUMER
PERSONAL
USE
IN
ANY
MANNER
THAT
COMPLIES
WITH
THE
MPEG-2
STANDARD
FOR
ENCODING
VIDEO
INFORMATION
FOR
PACKAGED
MEDIA
IS
EXPRESSLY
PROHIBITED
WITHOUT
A
LICENSE
UNDER
APPLICABLE
PATENTS
IN
THE
MPEG-2
PATENT
PORTFOLIO,
WHICH
LICENSE
IS
AVAILABLE
FROM
MPEG
LA,
1.1.C.,
250
STEELE
STREET,
SUITE
300,
DENVER,
COLORADO
80206.
•
This
product
is
licensed
under
AT&T
patents
for
the
MPEG-4
standard
and
may
be
used
for
encoding
MPEG-4
compliant
video
and/or
decoding
MPEG-4
compliant
video
that
was
encoded
only
(1)
for
a
personal
and
non-commercial
purpose
or
(2)
by
a
video
provider
licensed
under
the
AT&T
patents
to
provide
MPEG-4
compliant
video.
No
license
is
granted
or
implied
for
any
other
use
for
MPEG-4
standard.
7

Package content
•
CA-570
Compact
Power
Adapter
(inc!.
power
cord)
[G)]
•
BP-808
Battery
Pack
•
WL
-089
Wireless Controller (inc!.
CR2025
lithium button battery)
•Stylus pen
[(g)]
•
S1V-250N
Stereo Video Cable [@]
•
HTC-100/S
HDMI Cable [@]
.IFC-300PCU/S
USB
Cable
• 3 Software
CD-ROMs
-PIXELA's Transfer Utility
CD-ROM*
-PIXELA's VideoBrowser
CD-ROM*
-
~
Instruction Manual/Photo Applications Ver.35**/Music Datal
Image Mix Data CD-ROM. (Referred to as
"Camcorder
Supplemental
Disc".)
Contains
the
full-version Instruction Manual of the
camcorder
(PDF file).
See
the
explanation on next page.
*The CD-ROM includes the instruction manual of the software
(PDF
file).
A
printed Installation Guide for PIXELA's software is also supplied. Refer
to
this
Installation Guide for details about the supplied software.
** The CD-ROM includes the Photo Application instruction manual
(PDF
file).
See
also Saving Photos
(~.r.Pf>
135) for details.
8
CD
®®

Table of Contents
08 Package Content
11
Names
of
Parts and Onscreen Displays
19 Charging the Battery Pack
22 Operating Modes of the Camcorder
27 Getting Ready
to
Start Recording
30 Basic Recording: Shooting Video and Taking Photos
37 Basic Playback: Playing Back Movies and Viewing Photos
40
Saving and Sharing Your Recordings
41
Playback on aTV Screen
44
Abridged Specifications
About
the
Camcorder's
PDF
Instruction
Manual
This guide will get you started and show you how to use the most basic
functions ofyour camcorder to shoot video, take photos and play back your
recordings (using the camcorder or connecting it to your
TV).
To learn more
about the more advanced functions
of
your camcorder, to read important
handling precautions and
to
consult the troubleshooting section if
an
error
message
is
displayed, be sure to read the full-version Instruction Manual
(PDF
file*).
In
this Quick Guide, the
~PDF)
mark indicates reference page
numbers
in
the PDF
file.
*
Adobe®
Reader® 6or later
is
required
to
view the
PDF
Instruction Manual.
9

10
Table of Contents
Installing
the
camcorder's
Instruction
Manual
(PDF
file)
1Turn
on
the computer.
2Insert the Camcorder Supplemental Disc into the computer's
disc drive.
3Windows: Open the drive into which you inserted the
CD-ROM
using Windows Explorer.
Mac
OS: Click the
CD-ROM
icon
on
the desktop.
4Click/Double-click the Disc_Setup.exe icon.
5
In
the installer panel, click [Instruction Manual of the
Camcorder] and select your language.
6When the installation
is
complete, click [OK], then [Exit].
The installer will save the camcorder's Instruction Manual (PDF
file)
on
the computer and will create ashortcut icon on the desktop for easy
access.

roduction
ames
of
Parts
Left
side
view
CD
®@
@)
®
®CV
®
CD
'''!;[E]
(camera/play) button
(CO
24)
®
VIDEO
SNAP
(video
snapshot)
button:
Shoot
short videos
(a
few seconds
in
length) and
arrange them
intO'
avideo clip set to your
favorite background music.
(~
PDF) 68)
@
~
..
(Story
Creator
button):
Transform your
movies into compelling video stories by
recording following simple scripts for
various scenarios.
(~PDF)
65)
@
DlSP.
(onscreen
display)
button:
Change the
camcorder's onscreen displays
(~PDF)
116) and turn the LCD screen's
backlight on and off
(~_fDI)
30)./
BATT.
INFO
button:
Press when the
camcorder
is
off to check the battery
pack's charge status and its remaining
usage time.
(~PDF)
164)
®
USB
terminal:
Connectthe camcorderto a
computer or digital video recorder.
(~PDF)
126, 129, 138)
@
AV
OUT
terminal:
Connectthecamcorderto
astandard definition
TV.
(CO
41)/
o(headphones) terminal (
~
PDF) 109)
(j)
COMPONENT
OUT
terminal:
Connect the
camcorder to an
HOW
with component
video inputs.
((IJ
41)
®
HDMI
OUTterminal:
Connectthe camcorder
to
an
HOW
with
an
HOMI™
input for the
best
all·digital
quality.
OIl
41)
11

Names of Parts
®ACCESS (memory access) indicator
(CD
30)
®Mode switch
(OJ
23)
@
Grip
belt:
Adjust for acomfortable and
secure grip.
(~PD.E)
27)
©Speaker
@
Strap
mount:
Attach
an
optional shoulder
strap for convenience and portability.
(~P.P£.)
27)
@Double memory card slot cover
(CD
27)
@Memory card slot m
([IJ
27)
@Memory card slot m
(OJ
27)
@
MIC
terminal:
Connect
an
external
microphone.
(~PDF)
112, 112)
@Stereo microphone
®Instant AF sensor
(~
PDF)
151)
®
Mini
advanced
shoe:
Canon offers arange
of optional accessories, especially
designed for the mini advanced shoe, to
extend your camcorder's functionality.
(~P.Qf..)
11
0)
@Zoom lever
(CO
31)
@POWER button
@ON/OFF (CHG) (charge) indicator:
@
Grssn
-
ON
Orange -Standby
(OJ
34)
Red -Charging
(CO
19)
Right
side
view
® ® @ @
7-~
~
_~c"'~
____
Front
view
Top
view
12

Names of
Parts
HFM41/M40
*
IDImI
only.
@Remote sensor (
~
PDF)
26)
@LCD touch screen
(Q]
22, 29)
@
POWERED
IS
button:
Produce stable shots
even when you zoom
in
on distant
subjects
(full
telephoto).
(~PDF)
91)/
WEB
button:
Convert your HD
movies
to
standard-definition videos
ready
to
be easily shared on the Web.
(.~
PDF.)
139)
@Dioptric adjustment lever* (
~
PDF)
31)
@Battery attachment unit
(CO
19) .
@Viewfinder*: Use the viewfinderwhen it
is
difficult
to
use the LCD screen outdoors.
(~PDF)
31)
®START/STOP button
(Q]
30)
®VIEWFINDER button*
@DC
IN
terminal
(CO
19)
@
RESET
button:
Reset
all
the camcorder
settings
to
initial values.
(~
PDF)
169)
@BA
TIERY
RELEASE switch (
~
PDF)
25)
®
Tripod
socket:
Mount the camcorder on a
tripod for steadier shots.
(~
PDF)
180)
@
Serial
number
Bottom
view
Back
view
13

nscreen Icons and Displays
1AiJtt):1
Recording
movies
(using
Story
Creator)
®
cv®
I
D
FUlIC
*'
,f·
QJ'/~Tl
:11
II
II
AUTO
/j-O-il
IE
II
"IX?
W
IE
RII]
PHOTO
I:
>
••
'
'i
I'
:.
ill
®
..
·m_
.•
__
•
CD
Control button [FUNC.] -Open the FUNC. panel
(~PDF)
34)
@Smart AUTO
(OJ
31)
@Face detection frame (
~
PDF) 93)
@)
Touch
&
Track
frame:
Touch
amoving subject
on
the
screen
to
keep it
clearly
in
focus
at all times.
(_~.P.l)F)
94)
®Control
button
[PHOTO] -Take a
photo
(CO
30)
@Control button
[I~]
-Return
to
the list
of
story scenes (
~
PDF)
65)
o
Memory
operation (
~
PJIE>
164)
®
Image
stabilizer:
The stabilizer will
compensate
for varying degrees
of
camcorder
shake
so
you can get beautiful, steady recordings.
(~PDF>
90)
®
Remaining
battery
time
- •
in
red: Battery
pack
is
afmost empty.
Repl~c~
with afully charged battery
pack.
-When the
camcorder
is off, press [BATT.INFO]
to
display the charge
status
of
abattery pack. The Intelligent System will display the charge
status (as apercentage) and the remaining recording time
(in
minutes)
for
5seconds.
If
the battery
pack
is exhausted,
the
battery information
may
not
be
displayed.
@
Zoom
(OJ
31)
@
Recording
mode
(CO
36)
©Current story scene
(~
PDF)
65)
@
Recommended
scene length
(~
PDF>
65)
14

Onscreen Icons and Displays
@
Decoration:
Add
afun personal touch using stamps, drawings, image mix
and more.
(~
PQE)
69)
~;;.il
,t_i~
Recording
movies
M
Manual
mode
CD
@
@-,
@
@
@
@
®
CD-
@)-
@
@
@
CINEMA
mode
@@@
®
Recording
program:
Recording programs allow you
to
change various
picture-related settings
to
your preference,
or
to
use aspecial scene
recording program
to
apply the camcorder settings most appropriate for
avariety of situations.
(~
PDF) 87, 96)
®
Manual
exposure:
Correct the exposure manually for apicture darker/
brighter than the one obtained using the automatic exposure set by the
camcorder.
(~PDF)
98)
@II.AFllnstant AF/IAFI Normal AF
(~PDF)
151); MF Manual focus
(~PDF>
99)
@
Face
detection:
You can have the camcorderautomatically detect people's
faces and use this information
to
adjust the focus and set the best
exposure and color control settings for beautiful videos and photos.
(~PDF>
93)
@
White
balance:
Change the setting so different lighting conditions
do
not
affect the colors
in
your recordings and white objects look truly white.
(~PDF)
102)
@
Audio
level
indicator:
Manually adjust the audio recording level.
(~PDF)
105)
®
x.v.Color:
The camcorder uses acolor space with an 'extended gamut
to
achieve deeper colors, closer
to
real life.
(.~'p"QE)
155)
15

Onscreen Icons
and
Displays
HF
M41/M40
@While recording/during playback: Scene counter (hours:
minutes:
seconds)
@Remote sensor off (
~J~PF)
158)
@Fader (
~
PDF)
95)
@Frame rate (
~
PDF)
87)
@Remaining recording time
0/00
On the memory card; @
In
the built-in memory*
~
*/(9
Relay recording
C~_.PQE)
43)
-When there
is
no more free space on the memory,
[@
End] (built-in
memory*) or
[0
End] (memory card
rI)
or
[W
End] (memory card II)
will be displayed
in
red and recording will stop.
*
only.
@Tele macro
(~PDF)
101)
@
Image
effects:
Fine-tune the brightness, sharpness, color and contrast of
your recordings.
(~PDF)
103)
@
Microphone
attenuator:
Use the attenuator
to
avoid audio distortions when
the sound
is
too
loud.
(~PDF)
152)
@External audio input
(~
PDF)
108)
®Headphone output
(~
PJl.I)
109)
@Control button -Last function used ([ZOOM]
in
this case)
. @
Level
marker:
Display onscreen markers
to
check your composition and
make sure horizontal
or
vertical lines
do
not appear crooked
in
your
recordings.
(~
PDF)
152)
@Conversion lens
(T
ele-converter shown)
(~e_D.f)
151)
@
Wind
~creen
off:
Wind
scr88n
r8moves
the
background
Bound
OT
wind
when
recording outdoors. You may want
to
turn it off when recording indoors
in
very quiet surroundings.
(~
PDF)
152)
®Directionality
of
the optional SM-
V1
Surround Microphone (
~
PDF->
111)
@Mini advanced shoe
(~PDF)
110)
®AGC (automatic gain control) limit
@Control button [FILTER
1]
-
Cinema-look
filters:
Use cinema-look filters
to
create unique movies with distinctive looks.
(~
PDF)
67)
@
In
record pause mode: Total number
of
scenes
®Self timer (
~
PDF)
104)
16

Onscreen Icons and Displays
@
Pre-recording:
The camcorder will start recording video 3seconds before
you press [START/STOP1, so you
do
not miss important shooting
opportunities.
(~
PDF) 92)
til]]
Playing
movies
(during
playback)
CZ)@@
@Playback control buttons
(CD
38)
@
External
audio
input:
Connect your portable audio player to useyour favorite
music as background music during playback.
(~
PDF) 79)
@
Eye-Fi
Wireless
Communication:
Using
an
Eye-Fi card you can upload you
recordings wirelessly. Important restrictions apply so be sure to refer to
Using
an
Eye-A
card
(
~
PDF) 144).
@Scene number
@
Data
code:
In
addition
to
the date and time of recording, you can choose
to display information related to the camcorder settings like the shutter
speed
or
aperture value used.
(~
PDF) 116, 153)
@Volume and background music balance controls
(~PDF)
57,
78)
17

18
Onscreen Icons and Displays
ED]
Viewing
photos
@)
I
.~--_._@
~
@
@Control button [MENU] -Open the setup menus
(~
PDF)
149)
®Control button [Edit] -Open the Edit panel
(.~._e.p.I)
149)
®Current photo /Total number of photos
@Photo number
(~
Pj)£} 155)
@Control button [!b] -Photo jump
(~
PQf) 122)
~
Control button
[~]
-
Slideshow:
Play back aslideshow
of
your photos and
use your favorite background music.
(.~_p'DF)
124)
®Control button
[~]
-Return to the [Photos] index screen
(~PDF)
121)

~
/
tting
started
·harging the Battery Pack
The camcorder can be powered with abattery pack or directly using the
compact power adapter. When you use the compact power adapter, the
power
of
the battery pack will not be consumed. Charge the battery pack
before
use.
mConnect the camcorder.
r:I
Plug into the
DC
IN
terminal.
Bl,nsert
the battery pack.
CD
Press softly intothe batteryattachment
unit.
®Slide
up
until it clicks
in
place.
Charging will start when the
camcorder is turned off.
-------.
({POWERP
ON/OFFiCHGJ
CJ
Lamp off
~
~
(camcorder turned off)
~
Red
lamp flashes •
-.
:
.-
(charging)
"."
..
-:
...
~mp~
•
(battery packfully charged)
~
~
DConnect the
compact
power
oadapter.
CD
Connect
to
the adapter.
®Plug into a
power
outlet.
19

Charging the Battery Pack
I
Charging
times
Charging
the
supplied
BP-808
Battery
Pack
will take
approximately
2hours 30 minutes. Afully
charged
battery
pack
will
allow
for
the
following operations (movies in FXP mode).
3
hr.
10
min.
1
hr.
15
min.
HF
M41
/M40
Built-in
memory
All given
times
are
approximate
and vary
according
to
recording
mode
and charging, recording
or
playback
conditions.
See Charging, Recording
and
Playback Times (
~
PDF)
188)
for
details.
o
IMPORTANT
•The battery
pack
will be charged only when the camcorder
is
off.
•Do notconnect
to
the camcorder's DC
IN
terminal or
to
the
compact
power
adapter any electrical equipment that
is
not expressly recommended for
use with this camcorder.
•Do not connect the supplied
compact
power
adapter
to
voltage converters
or
special
power
sources such as those on aircraft, DC-AC inverters, etc.
CD
NOTES
•We recommend charging the battery
pack
in
temperatures between
10°C
and
30
°C (50
of
and
86
OF).
If either the ambient temperature
or
the
battery
pack's
temperature is outside the range
of
approx. DoC
to
40°C
(32
of
to
104
oF),
charging will
not
start.
•If remaining battery time
is
an issue, you can
power
the camcorder using
the
compact
power
adapter so the battery
pack
will not be consumed.
•
Charged
battery
packs
continue
to
discharge
naturally. Therefore, charge
them on the day
of
use,
or
the day before,
to
ensure afull charge.
20
Other manuals for VIXIA HF M40
1
This manual suits for next models
2
Table of contents
Other Canon Camcorder manuals

Canon
Canon DC330 User manual

Canon
Canon Vixia HF R800 User manual

Canon
Canon DC10 - TC Converter User manual

Canon
Canon VC 20 User manual

Canon
Canon ZR960 User manual

Canon
Canon XF605 User manual

Canon
Canon MVX25i User manual

Canon
Canon 1188B001 User manual

Canon
Canon VIXIA HF R32 User manual

Canon
Canon 3235B001 User manual

Canon
Canon XF400 User manual

Canon
Canon XA20 User manual

Canon
Canon DC420 User manual

Canon
Canon 310 XL User manual

Canon
Canon ZR-850 - Camcorder - 1.07 MP User manual

Canon
Canon E 600 User manual

Canon
Canon ES8600 User manual

Canon
Canon XF300 Manual

Canon
Canon optura300 User manual

Canon
Canon 2691B001 User manual