manuals.online logo
Brands
  1. Home
  2. •
  3. Brands
  4. •
  5. Canon
  6. •
  7. Security Camera
  8. •
  9. Canon DU10-H-VB User manual

Canon DU10-H-VB User manual

FR
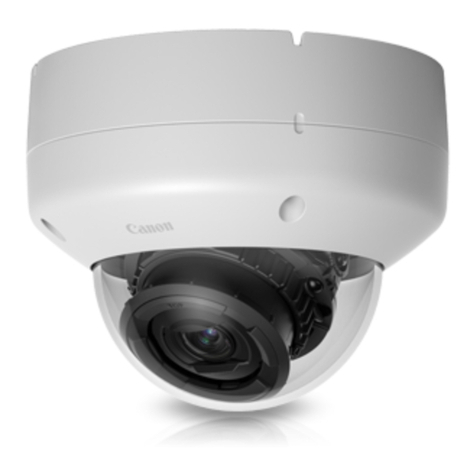
Unité dôme DU10-H-VB / DU652-H-VB / DU640-H-VB Manuel d’installation
Ce Manuel d’installation est composé des pages[1/2] (cette feuille)
et [2/2]. Les procédures d’installation sont décrites à la page[2/2]. Les
illustrations ne comportant pas de noms de modèle sont communes
à tous les modèles. Lorsque des procédures ou des illustrations sont
relatives à des modèles spéciques, ces modèles sont indiqués.
Les sections marquées avec cette icône à la page[2/2] détaillent
des procédures particulièrement importantes. Assurez-vous donc
d’eectuer ces procédures.
Pour une bonne utilisation, assurez-vous de lire la section
«Précautions de sécurité». Après lecture du «Manuel d’installation»,
conservez-le dans un endroit facilement accessible pour référence
ultérieure. En plus de ce «Manuel d’installation», lisez également le
«Manuel d’installation» fourni avec la caméra.
Prudence
Faites appel à un professionnel pour tous
les travaux d’installation. Ne tentez jamais
d’installer la caméra vous-même. Agir de
la sorte peut vous exposer à des accidents
imprévisibles tels que la chute de la caméra
ou un choc électrique.
À propos du revêtement hydrophile
Ce produit possède un revêtement hydrophile. Une manipulation
incorrecte peut entraîner une diminution des performances du
revêtement hydrophile. Veillez à lire les avertissements suivants avant
de manipuler la caméra.
⿟Soyez prudent lors de la manipulation de la surface
recouverte.
⿠Ne xez rien sur la surface recouverte.
Ne xez en particulier aucune matière adhésive sur la surface
recouverte.
⿠Ne touchez pas la surface recouverte.
Si vous touchez accidentellement la surface recouverte,
eectuez rapidement la procédure de la section «Nettoyage
du cache de dôme».
⿠Lorsque vous remballez la caméra, veillez à ne pas endommager
la surface recouverte. En particulier, ne tentez pas de rembourrer
la surface recouverte. Conservez un espace autour de la surface
recouverte.
⿟N’installez pas la caméra à un emplacement situé près d’eau de
mer ou de piscine.
⿟La surface recouverte peut apparaître décolorée ou salie, mais
ceci n’affecte en rien la qualité de l’image.
⿟Il est probable que des gouttes d’eau et de la neige fixées au
cache de dôme en raison de l’effet du revêtement hydrophile
s’accumulent sous le cache de dôme, ce qui affecte les images.
L’eet du revêtement hydrophile peut diminuer avec le temps ou les
rayures. An de le restaurer, vous devez remplacer l’unité dôme. (Ce
service est payant.)
Précautions de sécurité
Avertissement
Le non-respect de toute instruction
accompagnée de ce symbole peut
entraîner la mort ou des blessures
graves.
⿠Ne désassemblez pas et ne modiez pas la caméra.
Le non-respect de cette instruction peut provoquer un
incendie ou un choc électrique.
Prudence
Le non-respect de toute instruction
accompagnée de ce symbole peut entraîner
des blessures.
⿠Assurez-vous que les vis sont bien xées au moment de l’installation.
⿠Utilisez ce produit uniquement avec des caméras compatibles.
Le non-respect de ces instructions peut provoquer la chute
de la caméra ou d’autres accidents.
⿠Faites attention de ne pas vous coincer les doigts pendant l’installation.
Si vous ne respectez pas ces précautions, vous vous exposez à
des risques de blessure.
Prudence Le non-respect de toute instruction accompagnée
de ce symbole peut entraîner des dommages
matériels.
⿠Ne bougez pas le rotateur de la caméra ni l’objectif à la main.
(Uniquement pour la caméra avec fonctions de panoramique et
d’inclinaison électriques)
⿠Prenez des mesures pour éliminer l’électricité statique avant
d’eectuer toute procédure.
Le non-respect de ces instructions peut provoquer un
mauvais fonctionnement.
Nettoyage du cache de dôme
1. Enlevez la poussière et les saletés à l’eau claire.
2. Si le cache de dôme est taché par une matière non lavable à
l’eau, par exemple des traces de doigts ou de l’huile, frottez-le
doucement avec le chiffon doux fourni imprégné de détergent
neutre dilué avec de l’eau à environ 1%.
3. Rincez le détergent à l’eau, puis laissez le cache de dôme sécher à
l’air libre.
⿠Le cache de dôme recouvert de revêtement hydrophile
est différent du cache conventionnel pour la procédure
de nettoyage. L’utilisation d’un chiffon sec pour le nettoyage
est mentionnée dans le «Guide d’utilisation» de la caméra,
mais veillez à ne pas frotter le cache de dôme recouvert de
revêtement hydrophile avec un chiffon sec.
⿠La pulvérisation d’eau peut provoquer la détérioration de l’effet
du revêtement à cause des impuretés, dont les lubrifiants. Elle
est donc déconseillée.
Dimensions: DU10-H-VB ( xH) 179x108mm ( 7,05x4,25po)
DU652-H-VB ( xH) 144x74mm ( 5,67x2,91po)
DU640-H-VB ( xH) 115x65mm ( 4,53x2,56po)
Poids: DU10-H-VB Environ 145g (5,2oz.)
DU652-H-VB Environ 130g (4,6oz.)
DU640-H-VB Environ 90g (3,2oz.)
Vous trouverez ci-dessous les caractéristiques des vis utilisées pour
le l de sécurité et le support du cache de dôme de la caméra.
Diamètre
nominal Longueur Forme de tête
DU10-H-VB M3 6mm (0,24po) tête cylindrique
DU652-H-VB/
DU640-H-VB M3 6mm (0,24po) tête d’attache
Le contenu de ce guide peut être modié sans préavis.
BIM-7121-000
© CANON INC. 2017 Printed in Japan
EN Dome Unit DU10-H-VB / DU652-H-VB / DU640-H-VB Installation Guide
This Installation Guide is comprised of pages [1/2] (this sheet) and
[2/2], and the installation procedures are described on page [2/2]. The
illustrations not accompanied with model names are common for all
models. Procedures and illustrations for specific models include the
related model names.
Sections marked with this icon in page [2/2] are intended to
describe procedures of special importance. Therefore, be sure to
perform the procedures.
Be sure to read the “Safety Precautions” section for correct use. After
reading this “Installation Guide”, keep it in a readily accessible location
for future reference. In addition to this “Installation Guide”, also read the
“Installation Guide”included with the camera.
Caution
Request a professional installer for all installation
work. Never try to install the camera yourself.
Doing so may result in unforeseen accidents
such as dropping the camera or electric shock.
About the Hydrophilic Coating
This product has a hydrophilic coating. Incorrect handling can result
in diminished performance of the hydrophilic coating. Make sure to
read the following notice before handling the camera.
⿟Take care when handling the coated surface.
⿠Do not attach anything to the coated surface.
In particular, never attach anything adhesive to the coated
surface.
⿠Do not touch the coated surface.
If you accidentally touch the coated surface, quickly perform
the procedure indicated in the “Cleaning the dome cover”
section.
⿠When repackaging is required, take care not to damage the
coated surface. In particular, do not attach cushioning to the
coated surface. Maintain space around the coated surface.
⿟Do not install the camera in a location subject to seawater or
pool water.
⿟The coated surface may become discolored or smeared, but this
will not affect the image quality.
⿟Water droplet and snow attached to the dome cover due to
the effect of hydrophilic coating are likely to be accumulated
beneath the dome cover, thereby affecting the images.
The eect of the hydrophilic coating may diminish due to aging and
scratches, etc. In order to restore the eect of the hydrophilic coating,
the dome unit must be replaced with a new one. (This service will
incur a cost.)
Safety Precautions
Warning
Failure to follow the instructions accompanied
by this symbol may result in death or serious
injury.
⿠Do not disassemble or modify the camera.
Failure to do so may result in re or electric shock.
Caution Failure to follow the instructions accompanied
by this symbol may result in injury.
⿠Make sure the screws are rmly screwed in place when installing.
⿠Use only with compatible cameras.
Failure to do so may result in the camera falling or other
accidents.
⿠Be careful not to get your ngers caught when installing.
Failure to do so may result in injuries.
Caution Failure to follow the instructions accompanied by
this symbol may result in property damage.
⿠Do not move the camera rotator or lens by hand. (Only for the
camera with electric pan and tilt functions)
⿠Take measures to remove static electricity before performing any
procedures.
Failure to do so may result in malfunctions.
Cleaning the Dome Cover
1. Wash o any dust and dirt with clean water.
2. If the dome cover is dirty with something that cannot be removed
with water, such as fingerprints or oil, wipe the dome cover
clean with an included cleaning cloth dampened with a neutral
detergent diluted to approximately 1% with water.
3. Wash off the detergent with clean water, and allow the dome
cover to dry naturally.
The hydrophilically coated dome cover is different from
conventional one in cleaning method. Using a dry cloth for
wipe-cleaning is described in the camera's "Operation Guide",
but be careful not to wipe the hydrophilically coated dome
cover with the dry cloth.
Spraying water could cause impurities, including lubricants, to
deteriorate the coating effect, so we recommend against the
spraying water.
Dimensions: DU10-H-VB ( x H) 179 x 108 mm ( 7.05 x 4.25 in.)
DU652-H-VB ( x H) 144 x 74 mm ( 5.67 x 2.91 in.)
DU640-H-VB ( x H) 115 x 65 mm ( 4.53 x 2.56 in.)
Weight: DU10-H-VB Approx. 145 g (5.2 oz.)
DU652-H-VB Approx. 130 g (4.6 oz.)
DU640-H-VB Approx. 90 g (3.2 oz.)
Specifications of screws used for camera's safety wire and dome
cover holder are as follows.
Nominal
diameter Length Head shape
DU10-H-VB M3 6 mm (0.24 in.) pan head
DU652-H-VB /
DU640-H-VB M3 6 mm (0.24 in.) binding head
The contents of this guide are subject to change without any prior notice.
1
2
IT
Unità a cupola DU10-H-VB / DU652-H-VB / DU640-H-VB Guida all'installazione
La presente Guida all'installazione è composta dalle pagine [1/2]
(questo foglio) e [2/2] e le procedure di installazione sono descritte a
pagina [2/2]. Le illustrazioni non accompagnate dai nomi dei modelli
sono comuni a tutti i modelli. Le procedure e le illustrazioni per modelli
specici includono i nomi dei modelli correlati.
Le sezioni contrassegnate con questa icona nella pagina [2/2] sono
destinate alla descrizione di procedure di particolare importanza.
È quindi necessario accertarsi di applicare le procedure.
Accertarsi di leggere la sezione "Precauzioni di sicurezza" per un
corretto utilizzo. Dopo aver letto la "Guida all’installazione", conservarla
in un posto facilmente accessibile per poterla utilizzare come
riferimento futuro. Oltre alla presente "Guida all’installazione" leggere
anche la "Guida all’installazione" fornita con la telecamera.
Attenzione
Rivolgersi a un tecnico professionista per
tutti i lavori di installazione. Non eettuare
mai le operazioni di installazione della
telecamera autonomamente per evitare
incidenti imprevisti come la caduta della
telecamera o scosse elettriche.
Informazioni sul rivestimento idrofilo
Questo prodotto dispone di un rivestimento idrolo. L'uso improprio
può causare ridotta ecienza del rivestimento idrolo. Accertarsi di
leggere il seguente avviso prima di utilizzare la telecamera.
⿟Fare attenzione durante l'utilizzo della superficie rivestita.
⿠Non ssare nulla sulla supercie rivestita.
In particolare, non ssare mai nulla di adesivo sulla supercie
rivestita.
⿠Non toccare la supercie rivestita.
Se si tocca inavvertitamente la superficie rivestita, eseguire
rapidamente la procedura indicata nella sezione "Pulizia
dell'involucro a cupola".
⿠Quando è richiesto il riconfezionamento, fare attenzione a
non danneggiare la superficie rivestita. In particolare, non
fissare alcuna imbottitura sulla superficie rivestita. Lasciare
spazio libero intorno alla supercie rivestita.
⿟Non installare la telecamera in una posizione esposta all'acqua
di mare o di piscina.
⿟La superficie rivestita può scolorirsi o macchiarsi, senza per
questo influenzare la qualità dell'immagine.
⿟Le gocce d'acqua e i fiocchi di neve che aderiscono all'involucro
a cupola per effetto del rivestimento idrofilo possono
accumularsi sotto all'involucro, con un impatto conseguente
sulle immagini.
L'eetto del rivestimento idrolo può diminuire a causa di
invecchiamento, gra e così via. Per ripristinare l'eetto del
rivestimento idrolo, sostituire l'unità a cupola con una nuova.
(Questo servizio implica dei costi.)
Precauzioni di sicurezza
Avviso
Un utilizzo inappropriato non conforme alle
indicazioni che accompagnano questo simbolo
potrebbe provocare morte o lesioni gravi.
⿠Non smontare né modicare la telecamera.
In caso contrario, sussiste il rischio di incendio o scosse elettriche.
Attenzione
Un utilizzo inappropriato non conforme
alle istruzioni che presentano questo
segno potrebbe provocare lesioni.
⿠Assicurarsi che le viti siano serrate saldamente in posizione durante
l'installazione.
⿠Utilizzare solamente con telecamere compatibili.
Il mancato rispetto di queste precauzioni potrebbe causare
la caduta della telecamera o altri incidenti.
⿠Prestare attenzione a non incastrare le dita durante l'installazione.
In caso contrario, sussiste il rischio di lesioni.
Attenzione Un utilizzo inappropriato non conforme
alle istruzioni che presentano questo segno
potrebbe provocare danni alla proprietà.
⿠Non spostare manualmente il dispositivo di rotazione o
l'obiettivo della telecamera. (Solo per telecamere con funzionalità
elettriche di panoramica e inclinazione)
⿠Adottare le dovute misure per eliminare l'elettricità statica prima
di ogni procedura.
In caso contrario, potrebbero vericarsi dei malfunzionamenti.
Pulizia dell'involucro a cupola
1. Rimuovere eventuale polvere e sporco lavando con acqua pulita.
2. Se lo sporco della cupola non può essere rimosso con acqua, come nel
caso di impronte o olio, pulire l'involucro a cupola con il panno incluso
inumidito con un detergente neutro diluito per circa l'1% con acqua.
3. Rimuovere il detergente con acqua pulita e lasciare asciugare
l'involucro a cupola naturalmente.
⿠L'involucro a cupola con rivestimento idrofilo è diverso
da quello convenzionale per quanto riguarda la pulizia.
Nella "Guida operativa" della telecamera è descritto come
utilizzare un panno asciutto per eseguire la pulizia. Tuttavia,
fare attenzione a non strofinare l'involucro a cupola dotato di
rivestimento idrofilo con il panno asciutto.
⿠Gli spruzzi d'acqua possono deteriorare l'effetto del
rivestimento a causa delle impurità, inclusi i lubrificanti.
Pertanto, si consiglia di evitare gli spruzzi d'acqua.
Dimensioni: DU10-H-VB ( x H) 179 x 108 mm
DU652-H-VB ( x H) 144 x 74 mm
DU640-H-VB ( x H) 115 x 65 mm
Peso: DU10-H-VB Circa 145 g
DU652-H-VB Circa 130 g
DU640-H-VB Circa 90 g
Di seguito sono riportate le speciche delle viti utilizzate per il cavo
di sicurezza e il supporto per involucro a cupola della telecamera.
Diametro
nominale Lunghezza Forma della
testina
DU10-H-VB M3 6 mm supporto per
panoramica
DU652-H-VB/
DU640-H-VB M3 6 mm supporto
girevole
I contenuti di questa guida sono soggetti a modica senza preavviso.
ES
Unidad cúpula DU10-H-VB / DU652-H-VB / DU640-H-VB Guía de instalación
Esta Guía de instalación consta de las páginas [1/2] (esta hoja) y [2/2], y
los procedimientos de instalación se describen en la página [2/2]. Las
ilustraciones que no vienen acompañadas de nombres de modelo son
comunes para todos los modelos. Los procedimientos y las ilustraciones
para los modelos especícos incluyen los nombres de modelo
correspondientes.
Las secciones marcadas con este icono en la página [2/2] están
destinadas a describir procedimientos de especial importancia.
Por lo tanto, debe asegurarse de llevar a cabo los procedimientos.
Lea atentamente la sección “Precauciones de seguridad” para utilizarla
correctamente. Una vez que haya leído esta“Guía de instalación”,
guárdela en un lugar accesible como referencia de consulta en el
futuro. Además de esta “Guía de instalación”, lea también la“Guía de
instalación” que se incluye con la cámara.
Precaución
Solicite a un instalador profesional que
realice todo el trabajo de instalación.
No intente nunca instalar la cámara por
sí mismo. En caso contrario, se podrían
producir accidentes imprevistos, como la
caída de la cámara o descargas eléctricas.
Acerca del recubrimiento hidrólo
Este producto tiene un revestimiento hidrólo. Una manipulación
incorrecta puede resultar en un menor rendimiento del revestimiento
hidrólo. Asegúrese de leer el siguiente aviso antes de manejar la cámara.
⿟Tenga cuidado al manipular la superficie recubierta.
⿠No coloque nada sobre la supercie recubierta.
En particular, nunca coloque nada adhesivo sobre la supercie
recubierta.
⿠No toque la supercie recubierta.
Si accidentalmente toca la superficie recubierta, realice
rápidamente el procedimiento indicado en la sección
“Limpieza de la cubierta de la cúpula”.
⿠Cuando se requiera el reembalaje, tenga cuidado de no dañar
la supercie recubierta. En particular, no coloque acolchado
sobre la supercie recubierta. Mantenga la distancia alrededor
de la supercie recubierta.
⿟No instale la cámara en un lugar expuesto al agua de mar o al
agua de la piscina.
⿟La superficie revestida puede descolorarse o mancharse, pero
esto no afectará a la calidad de la imagen.
⿟Es probable que las gotas de agua y la nieve adheridas a la
cubierta de la cúpula debido al efecto del recubrimiento
hidrófilo se acumulen debajo de dicha cubierta, eso sí que
puede afectar a la calidad de las imágenes.
El efecto del recubrimiento hidrólo puede disminuir debido al
envejecimiento y a los arañazos, etc. Para restaurar el efecto del
recubrimiento hidrólo, la unidad cúpula debe sustituirse por una
nueva. (Este servicio supondrá un coste).
Precauciones de seguridad
Advertencia
Si no se siguen las instrucciones que
vienen acompañadas por este símbolo,
se podrían producir lesiones graves o
incluso la muerte.
⿠No desmonte ni modique la cámara.
En caso contrario, se podrían producir descargas eléctricas
o un incendio.
Precaución Si no se siguen las instrucciones que
vienen acompañadas por este símbolo,
se podrían producir lesiones.
⿠Asegúrese de que los tornillos están correctamente atornillados
al realizar la instalación.
⿠Utilícelo solamente con cámaras compatibles.
En caso contrario, la cámara podría caerse o se podrían
producir otros accidentes.
⿠Tenga cuidado de no pillarse los dedos durante la instalación.
En caso contrario, se podrían producir lesiones.
Precaución Si no se siguen las instrucciones que vienen
acompañadas por este símbolo, se podrían
producir daños en el producto.
⿠No mueva manualmente el rotador o el objetivo de la cámara. (Solo
para la cámara con funciones eléctricas de giro e inclinación)
⿠Tome medidas para retirar la electricidad estática antes de realizar
cualquiera de los procedimientos.
En caso contrario, se podrían producir fallos en el funcionamiento.
Limpieza de la cubierta de la cúpula
1. Lave el polvo y la suciedad con agua limpia.
2. Si la cubierta de la cúpula está sucia con una sustancia que no se
puede eliminar con agua, como huellas dactilares o aceite, limpie
la cubierta de la cúpula con el paño de limpieza que se incluye
humedecido con un detergente neutro diluido aproximadamente
al 1% con agua.
3. Lave el detergente con agua limpia y deje que la cubierta de la
cúpula se seque al aire.
⿠La cubierta de la cúpula recubierta con hidrófilo
requiere un método de limpieza diferente que el de
la cubierta convencional. El uso de un paño seco para
el secado se describe en la “Guía de funcionamiento” de la
cámara, pero tenga cuidado de no limpiar la cubierta de la
cúpula recubierta con hidrófilo con el paño seco.
⿠No recomendamos la pulverización con agua, incluyendo
lubricantes, ya que podría causar impurezas que deteriorarían
el efecto de recubrimiento.
Dimensiones: DU10-H-VB ( x Al.) 179 x 108 mm ( 7,05 x 4,25 pulg.)
DU652-H-VB ( x Al.) 144 x 74 mm ( 5,67 x 2,91 pulg.)
DU640-H-VB ( x Al.) 115 x 65 mm ( 4,53 x 2,56 pulg.)
Peso: DU10-H-VB Aprox. 145 g (5,2 oz)
DU652-H-VB Aprox. 130 g (4,6 oz)
DU640-H-VB Aprox. 90 g (3,2 oz)
Las especicaciones de los tornillos utilizados para el cable de seguridad
de la cámara y el soporte de la cubierta de la cúpula son los siguientes.
Diámetro
nominal Longitud Forma del
cabezal
DU10-H-VB M3 6 mm (0,24 pulg.) cabezal plano
DU652-H-VB /
DU640-H-VB M3 6 mm (0,24 pulg.) cabezal ciego
El contenido de esta guía está sujeto a cambios sin previo aviso.
ドームユニット DU10-H-VB / DU652-H-VB / DU640-H-VB 設置ガイド
Dome Unit DU10-H-VB / DU652-H-VB / DU640-H-VB Installation Guide
Dome-Einheit DU10-H-VB / DU652-H-VB / DU640-H-VB Installationshandbuch
Guía de instalación de la Unidad cúpula DU10-H-VB / DU652-H-VB / DU640-H-VB
Unité dôme DU10-H-VB / DU652-H-VB / DU640-H-VB Manuel d’installation
Unità a cupola DU10-H-VB / DU652-H-VB / DU640-H-VB Guida all'installazione
Купольный блок DU10-H-VB / DU652-H-VB / DU640-H-VB Руководство по установке
Kubbe Ünitesi DU10-H-VB / DU652-H-VB / DU640-H-VB Kurulum Kılavuzu
Moduł kopułki DU10-H-VB / DU652-H-VB / DU640-H-VB Instrukcja instalacji
คู่มือการติดตั้งชุดโดม DU10-H-VB / DU652-H-VB / DU640-H-VB
돔 유닛 DU10-H-VB / DU652-H-VB / DU640-H-VB 설치가이드
球罩组件 DU10-H-VB,DU652-H-VB,DU640-H-VB安装指南
2
2
BIM-7126-000
初版 :2017.11.1
© CANON INC. 2017 Printed in Japan
JA ドームの表面には親水コーティングが施されていますので、触らないでく
ださい。もし触ってしまったときは、[1/2] の「ドームカバーの清掃手順」
に従って速やかに清掃してください。特に乾いた布では絶対に拭かないで
ください。
EN The surface of the dome has a hydrophilic coating, so be careful not to
touch the surface. If you accidentally touch the surface, immediately
clean it according to the "Procedures for cleaning the dome cover" on
page [1/2]. In particular, be careful not to wipe the dome with a dry
cloth.
DE Die Oberäche der Kuppel hat eine hydrophile Beschichtung. Berühren
Sie diese nicht. Berühren Sie versehentlich die beschichtete Oberäche,
befolgenSie sofort die aufSeite [1/2]unter„Reinigender Kuppelabdeckung“
beschriebene Vorgehensweise. Achten Sie insbesondere darauf, niemals
mit einem trockenen Tuch über die Kuppel zu reiben.
ES La supercie de la cúpula tiene un recubrimiento hidrólo, así que tenga
cuidado de no tocar la supercie. Si accidentalmente toca la supercie,
limpie inmediatamente siguiendo los "Procedimientos para limpiar la
cubierta de la cúpula" en la página [1/2]. En particular, tenga cuidado de
no limpiar la cúpula con un paño seco.
FR La surface du dôme possède un revêtement hydrophile. Veillez à ne
pas toucher la surface. Si vous touchez accidentellement la surface,
nettoyez-la immédiatement en suivant les «Procédures de nettoyage
du cache de dôme» de la page[1/2]. Veillez particulièrement à ne pas
frotter le dôme avec un chion sec.
IT Sullasupercie dellacupola è presenteunrivestimento idrolo.Pertanto,
fare attenzione a non toccare la supercie. Se si tocca inavvertitamente
la supercie, pulirla immediatamente secondo le "Procedure di pulizia
dell'involucro a cupola" a pagina [1/2]. In particolare, fare attenzione a
non stronare la cupola con un panno asciutto.
RU Поверхность купола имеет гидрофильное покрытие, поэтому
старайтесь не прикасаться к его поверхности. Случайно
прикоснувшись к поверхности, немедленно выполните ее чистку в
соответствии с разделом «Процедуры чистки купольной крышки»
на странице [1/2]. В частности, не протирайте купол сухой тканью.
TR Kubbe yüzeyinde hidrolik kaplama olduğundan yüzeye dokunmamaya
özen gösterin. Yüzeye yanlışlıkla dokunulması durumunda yüzeyi sayfa
[1/2]’deki “Kubbe kapağını temizlemeyle ilgili yordamlar” bölümünde
belirtildiği şekilde temizleyin. Kubbeyi kuru bezle silerken dikkatli olun.
PL Powierzchniakopułkijestpokrytapowłoką hydrolową,dlategonienależy
jej dotykać. Jeśli powierzchnia pokryta powłoką zostanie przypadkowo
dotknięta, należy natychmiast przeprowadzić procedurę opisaną w sekcji
„Czyszczenie osłony kopułki” na stronie [1/2]. W szczególności należy
pamiętać, aby nie wycierać kopułki suchą szmatką.
TH 
   
 
 
 
KO 돔의표면에는친수코팅이되어있기때문에,만지지마십시오.만일만졌
을때는,[1/2]의"돔커버청소순서"에따라서신속하게청소해주십시오.
특히마른천으로는절대닦지마십시오.
ZH 球形外罩表面具备亲水涂层,因此请小心不要触摸表面。
如果意外触摸到表面,请根据[1/2]页中的“清洁球形外罩
步骤”立即进行清洁。特别注意,请小心不要使用干布擦
拭球形外罩。
同梱品の確認 / Check Included Items / Überprüfen des Lieferinhalts / Compruebe los
artículos incluidos / Vérication des éléments fournis / Verica dei componenti inclusi /
Проверка комлектности / Dahili Parçaların Kontrolü / Sprawdź kompletność zestawu /
 / 동봉품 확인 / 检查随附的项目
1
456
23
1
M4 x 2
DU652-H-VB /
DU640-H-VB
1DU652-H-VB / DU640-H-VB
❶
❷
DU10-H-VB
❶
❷
2
32
4
3
DU652-H-VB / DU640-H-VB
5
61/2
4
7
8
1JA 保護段ボールと保護シートは設置時に利用しますので捨てないでくだ
さい。
EN The protective cardboard and sheet are used when installing the device, so
be careful not to throw them away.
DE Die Schutzpappe und die Schutzabdeckung werden bei der Geräteinstalla-
tion benötigt. Bewahren Sie sie sorgfältig auf.
ES El cartón protector y la hoja se utilizan al instalar el dispositivo, así que tenga
cuidado de no tirarlos.
FR La feuille et le carton de protection sont utilisés lors de l’installation du
périphérique. Veillez à ne pas les jeter.
IT Il cartone e il foglio di protezione sono utilizzati durante l’installazione del
dispositivo, pertanto non gettarli via.
RU Защитный картон и лист используются при установке устройства,
поэтому не выбрасывайте их.
TR Koruyucu karton ve levha cihazı kurarken kullanıldığından bunları atmayın.
PL Ochronny karton i arkusz są używane podczas montażu, dlatego nie należy
ich wyrzucać.
TH  


KO 보호 골판지와 보호 시트는 설치시에 사용하므로 버리지 마십시오.
ZH 在安装设备时会利用到保护纸板和保护膜,因此请小心不要将
其丢弃。
2JA サ ン シ ェ ー ド カ バ ー( オ プ シ ョ ン )を 付 け て 使 う と き は 、① 上 側 2 本のネジ
と②下側のどちらか 1 本のネジを取り外します。
EN When attaching the sunshade cover (sold separately), remove the two top-
side screws and one of the bottom-side screws .
DE Entfernen Sie beim Anbringen der Sonnenschutzabdeckung (separat
erhältlich) die zwei Schrauben oben und eine der Schrauben unten .
ES Al fijar la cubierta del parasol (se vende por separado), retire los dos tornillos
de la parte superior y uno de los tornillos de la parte inferior .
FR Lors de la fixation du pare-soleil (vendu séparément), retirez les deuxvis
latérales supérieures et l’une des vis latérales inférieures .
IT Quando si fissa la copertura parasole (venduta separatamente), rimuovere le
due viti del lato superiore e una delle viti del lato inferiore .
RU Устанавливая солнцезащитную крышку (продается отдельно), вывинтите
два винта с верхней и один из винтов с нижней стороны .
TR Güneşlik kapağını (ayrı satılır) takarken üst kısımdaki iki vidayı ve alt
kısımdaki vidalardan birini çıkarın .
PL Podczas mocowania osłony przeciwsłonecznej (sprzedawanej oddzielnie)
należy wykręcić dwie śruby u góry i jedną z dolnych śrub .
TH    
 
KO 햇빛 가리개 커버(옵션)를 붙여 사용할 때는, 두 개의 상단 나사 과
하단 나사 중 하나를 제거합니다.
ZH 当安装遮阳罩(另购)时,移除顶部的两颗螺钉 以及底部的其
中一颗螺钉 。
②
①
DU10-H-VB B
DU652-H-VB / DU640-H-VB A
B
DU652-H-VB / DU640-H-VB DU10-H-VB
9
10
2
11
6
12
9
10
❷
❶
11
2
12
❷
❸
❶
5
3
13
❶
❸
❷
14
❷
4
❶
15
❶
❷
❶
6
16
5
5
33JA カメラに同梱の『設置ガイド』を参照して、カメラを設置します。
EN With reference to the “Installation Guide”included with the camera, install
the camera.
DE Installieren Sie die Kamera unter Beachtung des beiliegenden „Installation-
shandbuchs“.
ES Con la ayuda de la“Guía de instalación”incluida con la cámara, instale la cámara.
FR En respectant le «Manuel d’installation» inclus, installez la caméra.
IT Installare la telecamera facendo riferimento alla “Guida all’installazione”
inclusa con la stessa.
RU Выполните установку камеры, следуя указаниям входящего в комплект
камеры «Руководства по установке».
TR Kamerayı, ürünle birlikte sunulan “Kurulum Kılavuzu”na başvurarak kurun.
PL Zainstalować kamerę zgodnie z„Instrukcją instalacji” dołączoną do kamery.
TH     
KO 카메라에 동봉된 “설치가이드”를 참조하여, 카메라를 설치합니다.
ZH 参阅摄像机随附的“安装指南”,对摄像机进行安装。
4JA サ ン シ ェ ー ド カ バ ー( オ プ シ ョ ン )を 付 け て 使 う と き は 、手 順 3 で外さなか
ったネジ 1 本を締めます。
EN When attaching the sunshade cover (sold separately), tighten the screw that
was not removed in Step 3.
DE Ziehen Sie beim Anbringen der Sonnenschutzabdeckung (separat erhältlich)
die Schraube fest, die in Schritt 3 nicht entfernt wurde.
ES Al fijar la cubierta del parasol (se vende por separado), apriete el tornillo que
no se retiró en el paso 3.
FR Lors de la fixation du pare-soleil (vendu séparément), serrez la vis qui n’a pas
été retirée lors de l’étape3.
IT Quando si fissa la copertura parasole (venduta separatamente), serrare la vite
che era stata rimossa nel passo 3.
RU Устанавливая солнцезащитную крышку (продается отдельно), затяните
винт, который не был вывинчен на шаге3.
TR Güneşlik kapağını (ayrı satılır) takarken 3. Adımda çıkarılmayan vidayı sıkılaştırın.
PL Podczas mocowania osłony przeciwsłonecznej (sprzedawanej oddzielnie)
należy dokręcić śrubę, która nie została wykręcona w kroku 3.
TH  

KO 햇빛 가리개 커버(옵션)를 붙여 사용할 때는, 순서3에서 제거하지 않
았던 나사를 조입니다.
ZH 当安装遮阳罩(另购)时,拧紧在步骤3中未移除的那颗螺钉。
5JA サ ン シ ェ ー ド カ バ ー( オ プ シ ョ ン )を 付 け て 使 う と き は 、下 側 の ネ ジ 1 本を
取り付けます。
EN When attaching the sunshade cover (sold separately), insert a screw on the
bottom side.
DE Setzen Sie beim Anbringen der Sonnenschutzabdeckung (separat erhältlich)
eine Schraube an der Unterseite ein.
ES Al fijar la cubierta del parasol (se vende por separado), inserte un tornillo en
la parte inferior.
FR Lors de la fixation du pare-soleil (vendu séparément), insérez une vis sur le
côté inférieur.
IT Quando si fissa la copertura parasole (venduta separatamente), inserire una
vite sul lato inferiore.
RU Устанавливая солнцезащитную крышку (продается отдельно), вставьте
винт на нижней стороне.
TR Güneşlik kapağını (ayrı satılır) takarken alt kısma bir vida takın.
PL W przypadku mocowania osłony przeciwsłonecznej (sprzedawanej
oddzielnie) należy włożyć śrubę na dole.
TH   
KO
햇빛 가리개 커버(옵션)를 붙여 사용할 때는, 아래쪽에 나사를 삽입합니다.
ZH 当安装遮阳罩(另购)时,在底部插入一颗螺钉。
A

This manual suits for next models

2

Other Canon Security Camera manuals

Canon VB-M740E User manual

Canon

Canon VB-M740E User manual

Canon VB-R11VE User manual

Canon

Canon VB-R11VE User manual

Canon VB-S910F User manual

Canon

Canon VB-S910F User manual

Canon VB-S30D MKII User manual

Canon

Canon VB-S30D MKII User manual

Canon Vb-C60 - Ptz Network Camera Guide

Canon

Canon Vb-C60 - Ptz Network Camera Guide

Canon VB-H45 User manual

Canon

Canon VB-H45 User manual

Canon ME20F-SHN User manual

Canon

Canon ME20F-SHN User manual

Canon VB-S800VE User manual

Canon

Canon VB-S800VE User manual

Canon DR41-C-VB User manual

Canon

Canon DR41-C-VB User manual

Canon ME20F-SHN User manual

Canon

Canon ME20F-SHN User manual

Canon VB-M40 User manual

Canon

Canon VB-M40 User manual

Canon VB-R13VE User manual

Canon

Canon VB-R13VE User manual

Canon Vb-C60 - Ptz Network Camera User manual

Canon

Canon Vb-C60 - Ptz Network Camera User manual

Canon VB-H651V User manual

Canon

Canon VB-H651V User manual

Canon VB-C500D User manual

Canon

Canon VB-C500D User manual

Canon VB-M50B User manual

Canon

Canon VB-M50B User manual

Canon VB-S32VE User manual

Canon

Canon VB-S32VE User manual

Canon VB-S910F User manual

Canon

Canon VB-S910F User manual

Canon Vb-C60 - Ptz Network Camera User manual

Canon

Canon Vb-C60 - Ptz Network Camera User manual

Canon VB-M700F User manual

Canon

Canon VB-M700F User manual

Canon VB-M600VE User manual

Canon

Canon VB-M600VE User manual

Canon XU-80 User manual

Canon

Canon XU-80 User manual

Canon VB-M40 User manual

Canon

Canon VB-M40 User manual

Canon BU-51H User manual

Canon

Canon BU-51H User manual

Popular Security Camera manuals by other brands

Idis DC-S6 81HRX Series installation manual

Idis

Idis DC-S6 81HRX Series installation manual

Samsung Z6806-0796-01A Manuale istruzione

Samsung

Samsung Z6806-0796-01A Manuale istruzione

Lorex NTSC Instruction guide

Lorex

Lorex NTSC Instruction guide

Vimar 46822.036D user guide

Vimar

Vimar 46822.036D user guide

Hi-view HD-1022 user manual

Hi-view

Hi-view HD-1022 user manual

Arecont Vision MicroDome AV1455DN-F installation manual

Arecont Vision

Arecont Vision MicroDome AV1455DN-F installation manual

Vicon i-onyx MP-980DN Installation & operating instructions

Vicon

Vicon i-onyx MP-980DN Installation & operating instructions

Vimar ELVOX 46822.036C user manual

Vimar

Vimar ELVOX 46822.036C user manual

Zavio B8210 Quick installation guide

Zavio

Zavio B8210 Quick installation guide

Ezviz CSC3W1H2 manual

Ezviz

Ezviz CSC3W1H2 manual

Novus NVIP-2H-6601 user manual

Novus

Novus NVIP-2H-6601 user manual

Safety Basement SB-CC8434 instruction manual

Safety Basement

Safety Basement SB-CC8434 instruction manual

Novus NVIP-4VE-6501/F user manual

Novus

Novus NVIP-4VE-6501/F user manual

VIEVU LE5 LITE instruction manual

VIEVU

VIEVU LE5 LITE instruction manual

EverFocus EQ700 Operation instructions

EverFocus

EverFocus EQ700 Operation instructions

Toshiba IK-65WDA instruction manual

Toshiba

Toshiba IK-65WDA instruction manual

Panasonic WV-X2251L BASIC INFORMATION

Panasonic

Panasonic WV-X2251L BASIC INFORMATION

Novus NVAHD-2DN3202MV/IR-1 user manual

Novus

Novus NVAHD-2DN3202MV/IR-1 user manual

manuals.online logo
manuals.online logoBrands
  • About & Mission
  • Contact us
  • Privacy Policy
  • Terms and Conditions

Copyright 2025 Manuals.Online. All Rights Reserved.