Cantel ENDODRY User manual

ADVANTAGE PLUS™ and ENDODRY™ are registered trademarks of Medivators Inc.
All registered trademarks are the property of their respective owners.
LIT-00429 Rev A
© 2021Cantel
All rights reserved.
This publication is protected by copyright. Copying, disclosure to others, or the use of this publication is
prohibited without the express written consent of Cantel.
Cantel reserves the right to make changes in the specifications shown herein without notice or obligation.
Contact your Cantel representative or Cantel customer service for more information.
Medical Device Regulation 2017/745 as amended.
Cantel Medical (Italy) S.r.l.
Via Laurentina, 169, 00071 Pomezia (RM) Italia
Tel: +39 06 9145399 | Fax: +39 06 9146099

page 3 of 28
Index of contents
1 SERVICE, REPAIRS AND MODIFICATIONS...................................................................................... 4
1.1 In General .......................................................................................................................... 4
1.2 Information........................................................................................................................ 4
1.3 General Maintenance and Repair Information ................................................................. 4
1.4 Service Interval .................................................................................................................. 4
............................................................................ 6
2.4 Replacing the filter ............................................................................................................ 6
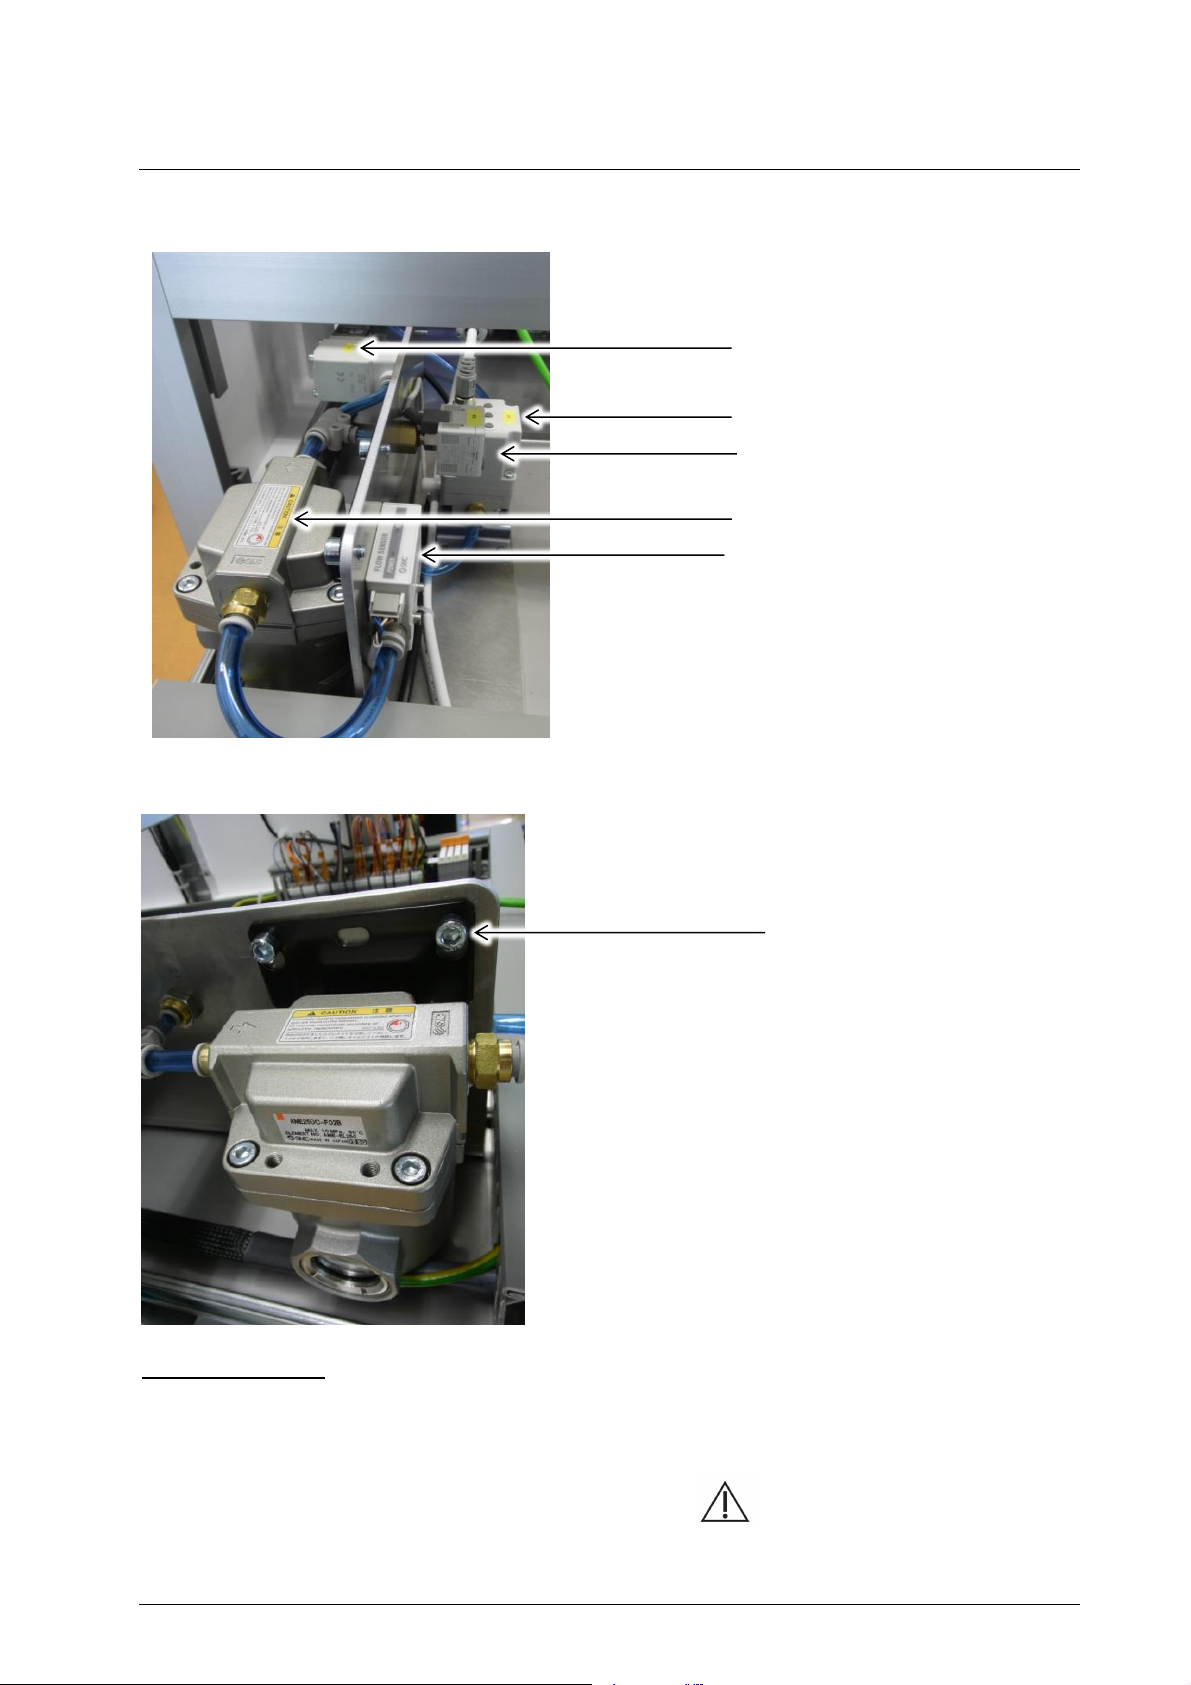
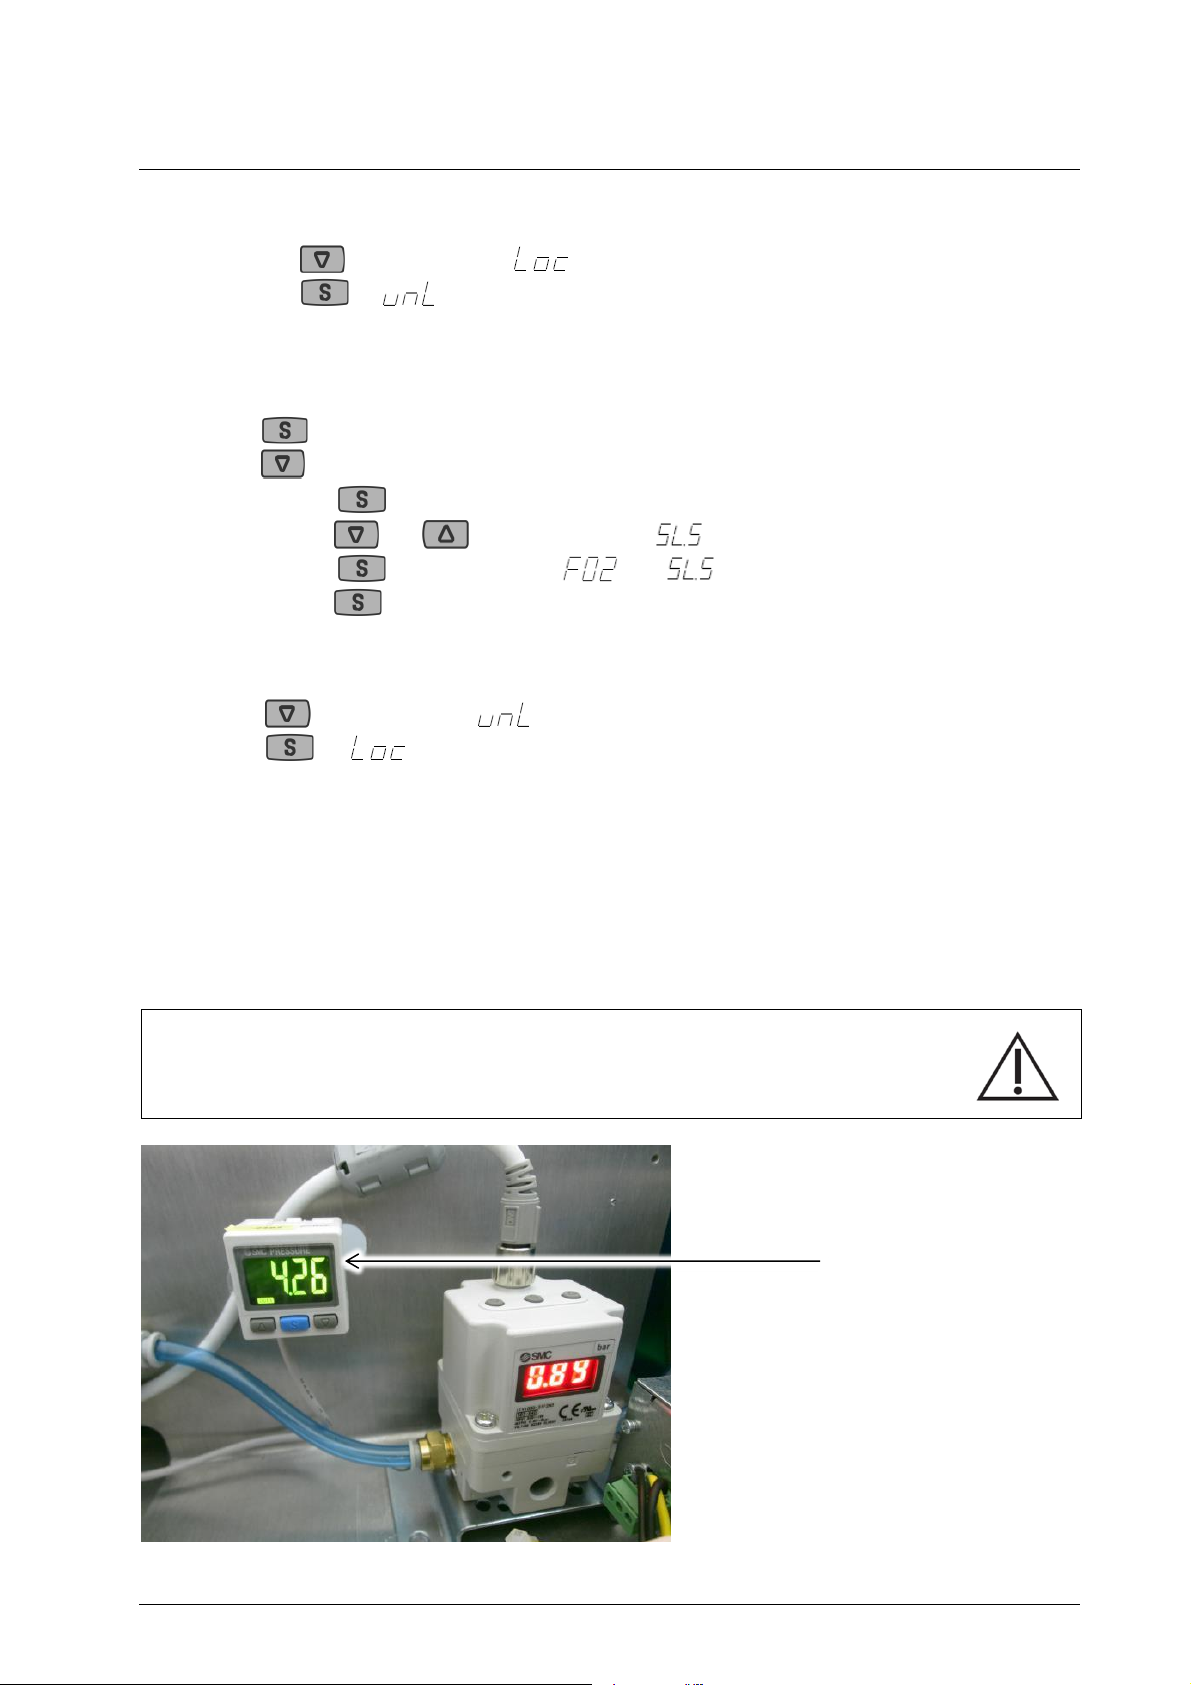
2.5 Setting of Pneumatic Components.................................................................................... 7
2.5.1 Factory Settings of Parameters ........................................................................... 7
2.5.2 Pressure regulator............................................................................................... 7
2.5.3 Pressure controller .............................................................................................. 8
3 CABINET TESTS ............................................................................................................................ 11
3.1 Check the Drawer Function ............................................................................................. 11
3.2 Check the Tube Connections ........................................................................................... 11
3.3 Check the air outlet of all nozzles (only model neo) ....................................................... 12
3.4 Check the o-rings of the nozzles...................................................................................... 12
3.5 Check the flow of the nozzles (only model neo and ENDODRY™) .................................. 13
3.6 Changing air circulation filter .......................................................................................... 14
3.7 Test function of the fan ................................................................................................... 15
3.8 Check the Door(s) ............................................................................................................ 15
3.9 Check Bar Code Reader ................................................................................................... 16
3.10Check Touch Display........................................................................................................ 16
4 OPERATING SOFTWARE .............................................................................................................. 17
4.1 License settings................................................................................................................ 17
4.2 Standard settings............................................................................................................. 17
4.3 Process settings ............................................................................................................... 18
4.4 Service settings................................................................................................................ 19
4.5 Software Update.............................................................................................................. 20
2 MAINTENANCE OF THE CONTROL DRAWER ................................................................................. 5
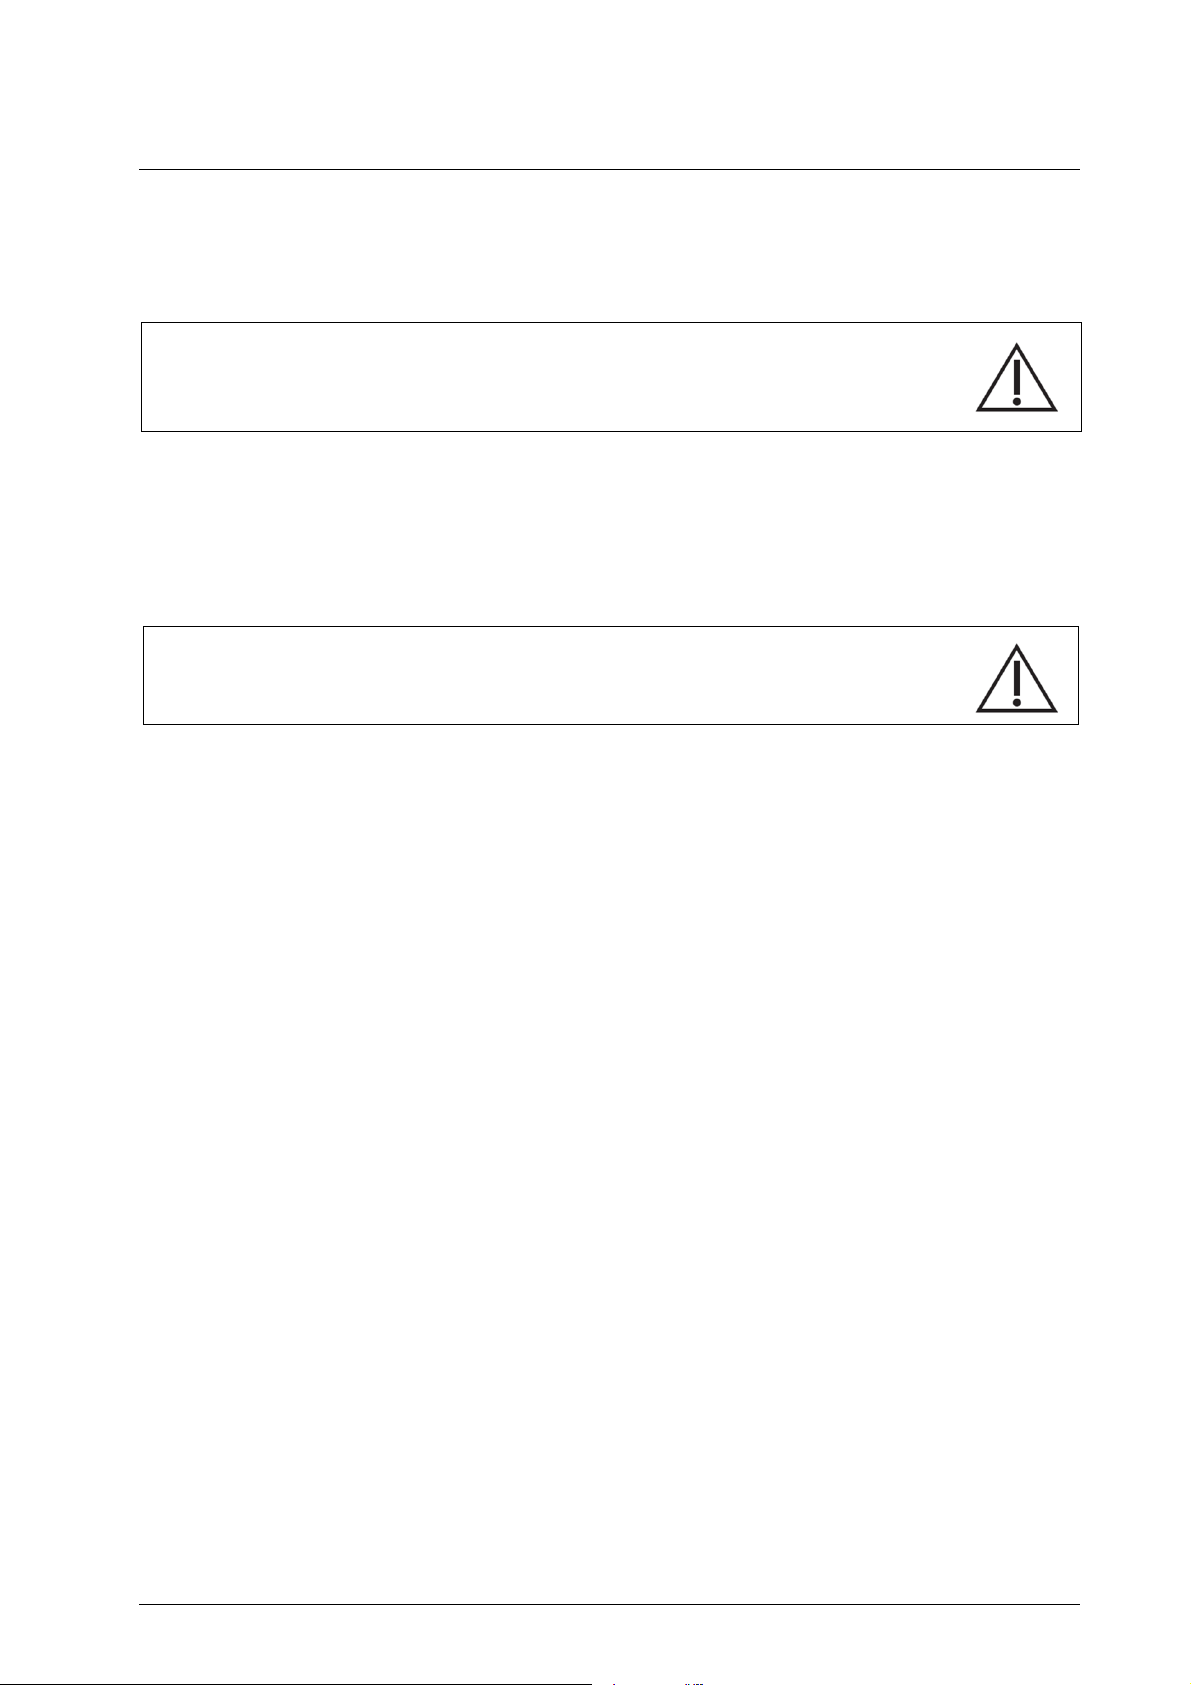
2.1 Accessible connections on the top of cabinet .............................................................. 5
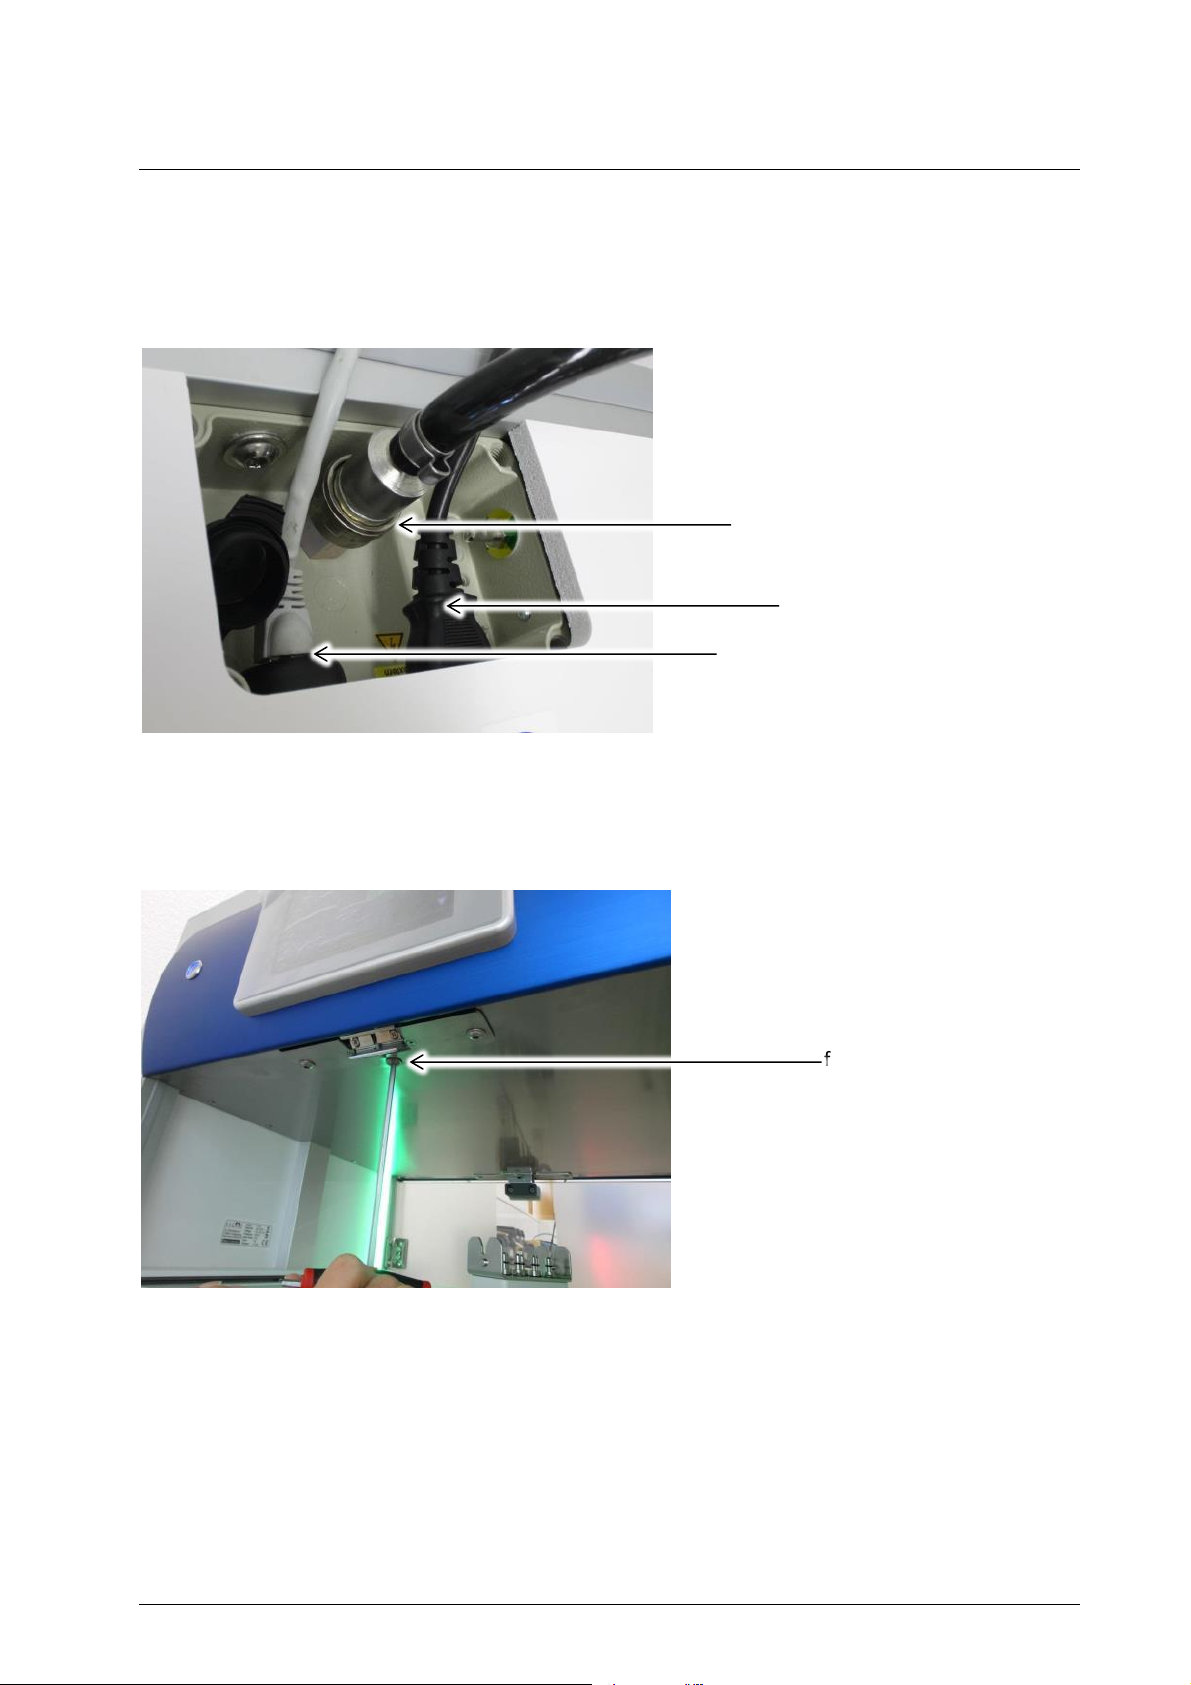
2.2 Opening of the control system ....................................................................................... 5
2.3 Construction of the Pneumatic Module
5 TECHNICAL DATA ........................................................................................................................ 25
6 CHECKLIST FOR MAINTENANCE OF THE CABINET...................................................................... 27
7 TECHNICAL SERVICE INFORMATION .......................................................................................... 28
ENDODRY™ and endoSTORE™are used interchangeably and are referred to as cabinet in this manual.
For service or service-related questions, contact Cantel Technical Supportoryour
local Cantel Distributor.

page 4 of 28
1Service, Repairs and Modifications
1.1 In General
1.2 Information
Due to the special safety regulations for medical-technical appliances any servicing such as regular
check-ups, repairs, modifications, calibrations etc. must only be conducted by the manufacturer or by
persons explicitly authorized by the manufacturer.
1.3 General Maintenance and Repair Information
Information contained in this manual is only for trained staff, who masters the required skills and safety
measures for the repair of electronic equipment.
The manufacturer does not assume any liability for maintenance work, repairs and modifications carried
out by unauthorized staff.
To be in possession of the technical documentation of the device does not provide any authorization by
the manufacturer to technically trained staff to open or repair the device. In this manual described
interventions are excluded from this regulation.
1.4 Service Interval
The equipment must be checked at least once a year for a secure mode of operation by
authorized service staff or by Cantel Medical (Italy) S.r.l.
Caution!
Cantel Medical (Italy) S.r.l. does not assume liability for injuries or damages as a
result of repairs conducted by non-authorized staff.
Caution!
While maintenance work function of cabinet is not guaranteed. For safety reasons all
endoscopes should be stored in another cabinet during period of maintenance.

page 5 of 28
2Maintenance of the Control Drawer
Check power cable and connection for damage. Replace them if necessary.
Check LAN cable and connection for damage. Replace them if necessary.
2.2 Opening of the control system
To open the control system, first open the front door after that you can loosen fixing screw.
Air connection
Power cable connection
LAN connection
fixing screw
2.1 Accessible connections on the top of the cabinet

page 6 of 28
2.3 Construction of the Pneumatic Module
2.4 Replacing the filter
Loosen screws
Inlet valve
Pressure regulator
Pressure controller
Filter
Flow sensor
procedural method:
1. switch off the cabinet
2. remove the tubes (by pressing the unlocking ring towards the housing)
3. loosen the screws
4. replace the filter
Caution: Observe the direction of installation (arrow)!
5. reconnect the tubes, tighten the screws
6. switch on the cabinet and check that the tubes are connected tightly

page 7 of 28
2.5 Setting of Pneumatic Components
In the pneumatic module of the endoSTORE® it is possible to configure pressure controller and pressure
regulator. Duration and operating phases can be adjusted in the operator software. (see chapter 4.3).
2.5.1 Factory Settings of Parameters
Parameter ENDODRYTM
endoSTORE® neo
discrepancy
endoSTORE® one-click
ENDODRYTM one-click
Drying phase 1:
0,5 bar, 20 min
0,5 bar, 30 min
Drying phase 2:
0,3 bar
0,3 bar, 60 min
Fan phase
180 min
180 min
Storage phase:
0,1 bar
0,1 bar
Pressure controller:
min. 2 bar
max. 10 bar
min. 2 bar
max. 10 bar
Pressure regulator:
SL.5
SL.5
2.5.2 Pressure regulator
The electric-pneumatic air pressure regulator regulates pressure of the particular phase.
Caution!
Attention should be paid to operation manual of the pressure regulator.
Pressure regulator

page 8 of 28
2.5.2.1 Deactivate key lock
Press min. 2 seconds is displayed and indicates.
Press is displayed for ca. 1 second.
Now button lock is deactivated, current pressure is displayed
2.5.2.2 Adjust sensitivity
Press min. 2 seconds Changing to settingsmode (F01)
Press F02 (sensitivity)
Press
With and adjust sensitivity to
Press switch between and
Press min. 2 seconds leave settingsmode
2.5.2.3 Activate key lock
Press min. 2 seconds is displayed and indicates.
Press is displayed for ca. 1 second.
Now key lock is activated, current pressure is displayed
2.5.3 Pressure controller
The pressure controller monitors the set minimum and maximum pressures (see 2.5.1). If the pressure
exceeds or falls below the set pressures, the current pressure is displayed in red on the pressure
control’s display. In addition, a signal is sent to the control system, which indicates the error on the
touch display. Pressure values within the specified range will be displayed in green.
Caution!
Attention should be paid to operation manual of the pressure controller.
Pressure controller

Service Manual –endoSTORE® neo & one-click page 9 of 28 Version 01 Revision 06
2.5.3.1 Displaying of the adjusted pressure threshold
1. Press displaying of the current pressure.
2. Press 2nd time“P1L” appears (lower threshold)
3. Press 3rd time“P1H” appears (upper threshold)
4. Press 4th timecurrent pressure is displayed
2.5.3.2 Adjust Pressure of threshold
1. Press current pressure is displayed
2. Press 2nd time“P1L” appears
3. Adjust lower threshold with and ,
or continue to step 4
4. Press 3rd time“P1H” appears
5. Adjust upper threshold with and ,
or finish with Step 6
6. Press 4th timecurrent pressure is displayed
2.5.3.3 Completing adjustment of the pressure regulator
In case that the pressure regulator needs to be exchanged or restored to factory settings, the following
steps will adjust the settings of the pressure regulator:
Press for a long time F0 (adjustment of the entity)
Press change between and
Or take and to change to
Confirm with and go back to menu
Press F1 (adjustment of the ouput)
Press change between and
Press or until is displayed.
Press for change between and
Press or until is displayed.
Press for change between [P1L] and 3.00
Press or until the desired number (e. g. 2.00)
Press for change between [P1H] and 6.00
Press or until the desired number (e. g. 10.00)
Press change between and
Press until 0.00 is displayed

page 10 of 28
Press change between and
Or take and to change to
Confirm and go back to menu
Press 2 times F3 (adjustment of response time)
Press change between and
Press until is displayed
Confirm with and go beck to menu
Press 2 times F7 (adjustment of power saving mode)
Press change between and
Press until is displayed
Confirm with and go back to menu
Press for a long time normal display indication

page 11 of 28
3Cabinet Tests
At the yearly maintenance the following functions need to be tested.
3.1 Check the Drawer Function
- free movement (in/out)
- distortion
3.2 Check the Tube Connections
- tightness
- free movement of the rotatable connectors

page 12 of 28
3.3 Check the air outlet of all nozzles (not for one-click models)
- deformation
- mechanical influences
- spring function
3.4 Check the o-rings of the nozzles
- damage
- pinch
- porosity
- missing o-rings
o-rings

page 13 of 28
3.5 Check the flow of the nozzles (not for one-cklick models)
Before the first operation and during maintenance every seven nozzles of each drawer need to be checked for
correct air flow.
Therefore the drying phase of 0.5 bars has to be activated in the diagnostic menu.
For the test an air flow tester is put on to every nozzle while air pressure pin is pushed.
The float of the air flow tester needs to reach the red marked range completely.
To check the airflow of the air inlet nozzle just put the flowmeter on this nozzle. The pin has to be pushed.
Caution!
Nozzles with low air flow deteriorate the drying results of
endoscopes.
It is recommended to change these parts with replacement
equipment of the manufacturer.

page 14 of 28
3.6 Changing air circulation filter
- Loosen screws of the cover.
- Remove cover
Change filter
- Change filter
- Fasten Cover

page 15 of 28
3.7 Test function of the fan
If required change fan:
- Loosen screws of the cover.
- Take filter of the fastening pin
- Loosen plug
- Pin and fasten on new fan
3.8 Check the Door(s)
- retighten all screws (door handle, locking tab)
- check the locking unit (retighten screws)
- check the hinges (retighten screws with a screwdriver PH2)
- check the sealing lips
- check also backside, if two-sided version

page 16 of 28
3.9 Check Bar Code Reader
- damage to cable, connector or reader
- check function via Diagnostic Scanner
- if two-sided version repeat
3.10Check Touch Display
- pixel errors
- check touch functionality and calibrate if necessary
Menu > Standard Settings > Calibrate display
- check also backside, if two-sided version

page 17 of 28
4Operating Software
The following chapter indicates essential functions of the control-software, which only a service
technician should perform.
4.1 License settings
Login as admin. Within license settings (site 2 menu) it is possible to activate further addons. The license
key is provided by the manufacturer.
4.2 Standard settings
Login as service technician
E. g. in case of a hardware change it is possible to set a new serial number.

page 18 of 28
4.3 Process settings
Login as service technician
It is possible to change several process settings. The maximum air pressure which can be set is 1 bar.
Caution!
Change of process settings has a major influence on drying result.
It is highly recommended not to reduce the process settings.
If the customer wants a change in this setting, this will happen on his own responsibility and
need to be noted in the admission protocol.
At page 3 of process settings, warnings for door closing time can be adjusted

page 19 of 28
Caution!
If the door is open for a longer time, this will lead to increase of the humidity in the cabinet,
which will lead to longer drying times.
It is also possible to change error air pressure malfunction (relative). Factory settings are adjusted to
50%. This means if an endoscope has more than 50% of air pressure malfunction, it will be displayed
with status . Then it is recommended to reprocess the endoscope again.
Caution!
A change of error air pressure malfunction (relative) could lead to displaying a successfully
completed process, even if endoscopes have had insufficient air pressure.
4.4 Service settings
After successful completion of maintenance the service technician has to enter the next inspection date.
The next maintenance should be performed after a maximum of 12 month. Over service settings it is
also possible to change admin- and service- password.
Caution!
A change of admin- and service- password could cause problems.
Only staff with knowledge of the password can change service settings.

page 20 of 28
4.5 Software Update
1. Connect a USB memory stick with the installer file (Endodry-Endostore_setup3.X.XXXX.exe) to
one of the available USB ports on the cabinet.
2. On the USB memory stick, double-click on the installer file (Endodry-
Endostore_setup3.X.XXXX.exe).
3. Enter the password of Admin and press the Yes button to continue.
This manual suits for next models
1
Table of contents
Other Cantel Medical Equipment manuals
Popular Medical Equipment manuals by other brands

KLARITY
KLARITY SBRT System Instructions for use

AirSep
AirSep NewLife instructions

Kodak
Kodak Miniloader 1 Service manual

medi
medi circaid juxtalite lower leg inelastic compression... Instructions for use

Boston Scientific
Boston Scientific rezum Directions for use

Bertec
Bertec Balance Advantage Spark Systems user manual

bort medical
bort medical HerniaFix quick guide

bellot
bellot VOG210 Using instructions

Teeter Hang Ups
Teeter Hang Ups ComforTrak Series Assembly instructions

Arkray
Arkray SiLL-Ha ST-4910 Quick reference guide

Welch Allyn
Welch Allyn TM 262 Operating instructions manual

Therabody
Therabody RecoveryAir manual