4
Il prodotto è conforme alla direttiva 99/05/CE
Attenzione! Le batterie esauste devono essere smaltite secondo le
norme vigenti. Ulteriori informazioni sono riportate nelle istruzioni
allegate ai ricevitori della stessa serie: le istruzioni devono essere
conservate.
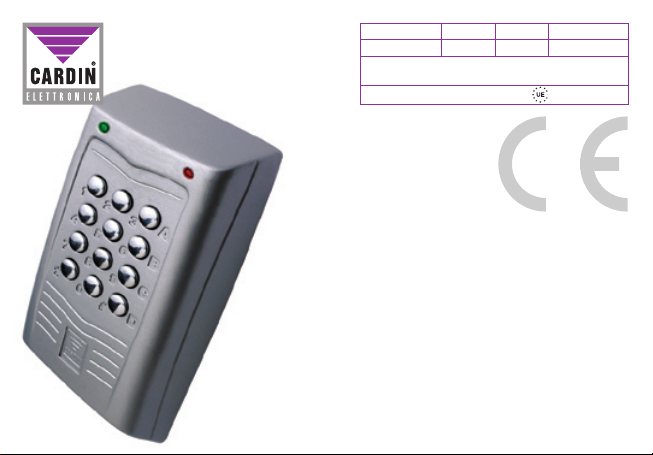
Dotata inoltre di:
- LED rosso segnalazione
- LED verde segnalazione
- 10 tasti numerici (0-9)
- un tasto di conferma
*
- un tasto di annullamento operazione #
- 4 funzioni di canale (A, B, C, D)
- buzzer segnalazione sonora.
A
1
2
5
8
0
3
6
9
4
7
*
B
C
D
28
72
115
#
Dimensioni d'ingombro SSB
SSB-T9K4
01-07-2003
DM0717 Description :
Product Code :
Date :
Drawing number :
P.J.Heath
CARDIN ELETTRONICA S.p.A - 31020 San Vendemiano (TV) Italy - via Raffaello, 36 Tel: 0438/401818 Fax: 0438/401831
Draft :
All rights reserved. Unauthorised copying or use of the information contained in this document is punishable by law
DATI TECNICI
- frequenza di trasmissione 433,92MHz
- modulazione FM/FSK
- alimentazione (batteria litio) 6 V (2 x CR2032) modello KITSSB-T9K4-1
- assorbimento in trasmissione 25mA
- temperatura di esercizio -10°…+55°C
- umidità relativa <95%
- grado di protezione IP 57
- tipo di codifica rolling code
- numero di combinazioni complessive (66 bit): 266
- numero delle funzioni (canali) 4
- autospegnimento: - dopo 5 sec. in stand-by
- dopo 20 sec. in programmazione
CODICI DI ABILITAZIONE
- Numero di codici utente memorizzabili
(max 6 cifre ciascuno) 250
- Numero di combinazioni di codici disponibili 1 milione
Possibilità di impiego
La tastiera SSB-T9K4 abbinata ai ricevitori della serie
S449permettel’attivazioneviaradiodiapparecchiature
elettriche ed elettroniche che richiedano un elevato
gradodisicurezzaall’accessocome:sistemid’allarme,
sistemi automatici di apertura, controllo accessi ecc.
DIMENSIONI D'INGOMBRO
1