manuals.online logo
Brands
  1. Home
  2. •
  3. Brands
  4. •
  5. Cardinal Gates
  6. •
  7. Indoor Furnishing
  8. •
  9. Cardinal Gates SS30 User manual

Cardinal Gates SS30 User manual

CEF
G
J
I
1
6 ”
A
C or J
2
C or J
3
2X
E4B
F
I
5
REPEAT AT TOP AND
BOTTOM OF GATE TO
SET GATE WIDTH
2X
G
6
K
H
ONE-WAY
STOP BRACKET
OPTION
ASSEMBLY INSTRUCTIONS
2. Install second
screw (C) in
top of hinge
bracket
securing it to
the wall.
NOTE: THIS SIDE OF GATE HAS
THREE (3) HOLES - ONLY USE TOP AND
BOTTOM HOLES FOR THIS STEP
3. Insert eye bolts with nut and washer (E)
into top and bottom of hinge side gate
(side with three holes). Be sure nuts are
tight. Do not use middle hole for this step.
4. Hang gate by inserting hinge rod (B), through top
of mounted hinge bracket (A), through upper plastic
shoulder washer (F), through both eye bolts, through
lower plastic shoulder washer (F), and finally through
bottom of hinge bracket. To secure hinge, insert
key ring (I) through hole in end of hinge rod. Gate
can be mounted at angles up to 30 degrees.
6. Keep gate closed and latched. Use
Allenwrench (G) to insert set screws
(L) in the upper and lower brackets
of the gate. Tighten the setscrews
to set the width of the gate.
5. Mount latch assembly (K) to gate using 3/4” bolts with serrated
washers (D). Attach wall mount for latch assembly (H) up
into part (K) that is now secure on gate. Slide gate out to
mark holes for (H) on attaching wall. (*OPTIONAL ONE WAY
BRACKET INSTALLED HERE) Then attach the wall mount of
latch assembly to wall using Phillips head screws (C). Optional
long screws (J) maybe be used to attach gate to stud through
dry wall.
STAIRWAY SPECIAL - MODEL SS30
D
H
KM
ONE-WAY
STOP BRACKET
OPTION
D
D
ONE-WAY
STOP BRACKET
OPTION
M
IF GATE IS INSTALLED AT TOP OF STAIRCASE:
Install one-way stop bracket (M) on one side of
wall mount latch to have gate open in only one
direction for maximum safety.
FOR OPENINGS 27” (68cm) - 42.5” (108cm)
FOR MAXIMUM SAFETY,
ALWAYS KEEP GATE
LATCHED AND CLOSED.
1. Install hinge bracket
(A) to wall (stationary
side of gate) using
Phillips screw (C) drill
pilot hole 6 ” above
floor surface. (Use
ruler on left edge of
this sheet to measure
from floor).
OPTION: Long
screws (J) maybe be
used to attach gate to
stud through dry wall.
L
L
*
Need help installing your SS-30?
Use your smartphone to scan the QR code on
right for “How to” video.
*IMPORTANT:
Make sure this
side of bracket
is UP when
installed to the
wall!
DEC 2019
A
B
GATE IS RECOMMENDED FOR CHILDREN BETWEEEN 6 AND 24 MONTHS.
IF INSTALLING AT TOP OF STAIRS,INSTALL A MINIMUM OF THREE INCHES FROM END OF FIRST STEP.
GATE MAINTENANCE
GATE CARE & REMINDERS
GATE WARRANTY
Your Cardinal Gate is warranted to be free of manufacturing defects for a period of one year
from the date of purchase when used in homes, and according to manufacturers instructions.
When used commercially, such as day care centers, the warranty is 90 days.
Cardinal Gates, lnc. will either repair or replace, at our option, any parts necessary to correct
defects in material or workmanship during the warranty period. The warranty disclaims liabilty
for incidental, special and consequential damages of any nature.
TO EXERCISE WARRANTY:
Ship your gate in a protective carton, freight prepaid to:
CARDINAL GATES, INC.
79 Amlajack Way
Newnan, GA 30265
You must include the following:
1. Proof of purchase (store receipt, etc.).
2. Brief note describing problem with gate.
3. Full return address along with phone number.
FOR FURTHER ASSISTANCE
Call 1-800-318-3380
79 Amlajack Way
Newnan, GA 30265
770-252-4200
www.cardinalgates.com
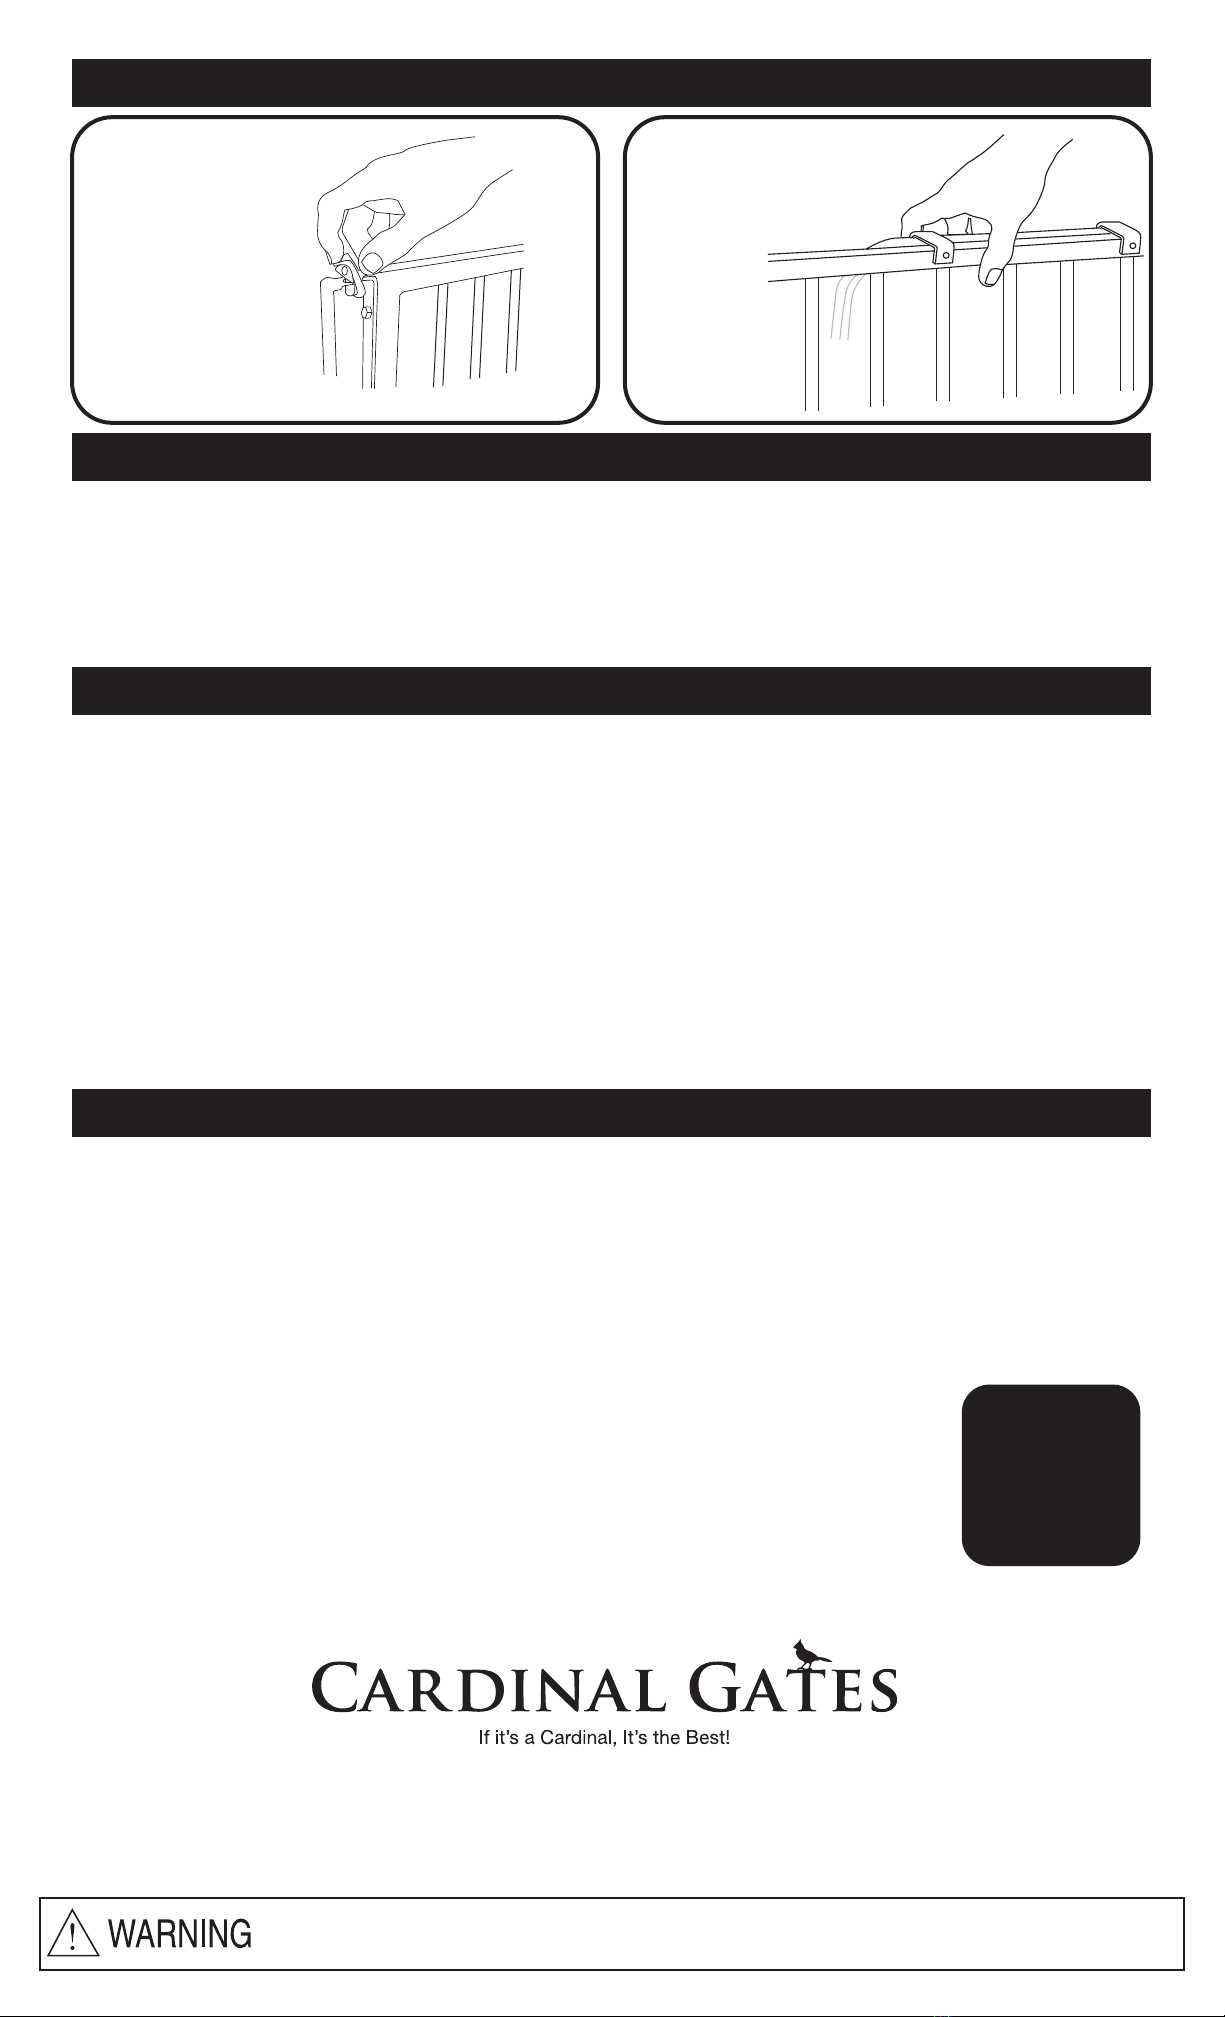
GATE OPERATION
FOR OPENING: FOR CLOSING:
When approaching
gate, if latch is to your
left, use right hand.
Depress flip latches
simultaneously with
thumb and index
finger while lifting
gate with remaining
fingers of hand.
REMEMBER: Latch to right, use left hand; latch to left, use right hand
Grasp gate in
middle. Lift
gate and align
latch pins with
bracket holes.
Drop in place.
There is no
need to close
gate using flip
latches.
When used outdoors we suggest spraying hinge and latch parts with a marine corrosion inhibitor
by CRC or equivalent. This can be obtained normally at marinas or auto parts stores. Remove
set screws when separating frames for cleaning. An external hardware set is available. Please
call for information.
To clean, rinse with lukewarm water, wash gently with mild soap or detergent and lukewarm water,
using a soft cloth or sponge. Rinse again. Dry with a soft cloth or sponge to prevent water spotting.
DO NOT SCRUB or use brushes or squeegees.
At CARDINAL GATES, INC., we design what we believe to be the very best, and most user
friendly gates available. Our gates are built to last many years with proper use and care. Here
are a few suggestions...
• Close gates gently - do not slam - to prevent damage to latch mechanism.
• When closing, be sure safety bracket on gate frame engages as depicted in instructions.
• Children should not be allowed to swing on an open gate as this can damage hinge mount.
• Keep allen wrench in a secure place. We suggest removing set screws when separating sections
for cleaning. Periodically check all screws, bolts, etc. for security and proper adjustment.
CARDINAL GATES, INC., offers many accessories such as extensions, stair kits, and other
safety products. Check with your dealer or call CARDINAL GATES, INC. at 1-800-318-3380.
We sincerely hope that you thoroughly enjoy many years of service from your CARDINAL GATE.
Children have died or been seriously injured when gates are not securely installed.
· ALWAYS install and use gates as directed using all required parts.
· STOP using when a child can climb over or dislodge the gate.
· Use only with the latching mechanism securely engaged.
· NEVER use to keep child away from pool.
ALWAYS
DISCONTINUE
USE IF GATE
BECOMES
DAMAGED,
BROKEN OR
DISASSEMBLED.

Other Cardinal Gates Indoor Furnishing manuals

Cardinal Gates MG15 User manual

Cardinal Gates

Cardinal Gates MG15 User manual

Cardinal Gates MG25 DuraGate User manual

Cardinal Gates

Cardinal Gates MG25 DuraGate User manual

Cardinal Gates EX-5 User manual

Cardinal Gates

Cardinal Gates EX-5 User manual

Cardinal Gates STAIRWAY SPECIAL User manual

Cardinal Gates

Cardinal Gates STAIRWAY SPECIAL User manual

Cardinal Gates CP30 User manual

Cardinal Gates

Cardinal Gates CP30 User manual

Cardinal Gates WI-30 User manual

Cardinal Gates

Cardinal Gates WI-30 User manual

Cardinal Gates PG-35 User manual

Cardinal Gates

Cardinal Gates PG-35 User manual

Popular Indoor Furnishing manuals by other brands

Heath Zenith SL-5670 installation instructions

Heath Zenith

Heath Zenith SL-5670 installation instructions

ECR 4 Kids ELR-0453-B Assembly instructions

ECR 4 Kids

ECR 4 Kids ELR-0453-B Assembly instructions

PotteryBarn APOTHECARY SINK Assembly instructions

PotteryBarn

PotteryBarn APOTHECARY SINK Assembly instructions

Open Plan Systems e-table90-j Troubleshooting tips

Open Plan Systems

Open Plan Systems e-table90-j Troubleshooting tips

C.R. Plastic Products St. Tropez C34 manual

C.R. Plastic Products

C.R. Plastic Products St. Tropez C34 manual

Simpli Home WyndenHall brooklyn+max 3AXCADABEN-ALB Instruction booklet

Simpli Home

Simpli Home WyndenHall brooklyn+max 3AXCADABEN-ALB Instruction booklet

Polywood RCT38 manual

Polywood

Polywood RCT38 manual

DaVinci 0598 Assembly and operation manual

DaVinci

DaVinci 0598 Assembly and operation manual

HOMEDEPOT Farmhouse Coffee Table manual

HOMEDEPOT

HOMEDEPOT Farmhouse Coffee Table manual

Little Seeds 6829321COM Assembly manual

Little Seeds

Little Seeds 6829321COM Assembly manual

Simpli Home 3AXCCRL-11GR manual

Simpli Home

Simpli Home 3AXCCRL-11GR manual

P'kolino Quadra Full Bed quick start guide

P'kolino

P'kolino Quadra Full Bed quick start guide

LOWE'S RCWST Assembly instructions

LOWE'S

LOWE'S RCWST Assembly instructions

Crown Mark Emily B4285 Assembly Installation Guide

Crown Mark

Crown Mark Emily B4285 Assembly Installation Guide

HunterDouglas Provenance Installation/Care

HunterDouglas

HunterDouglas Provenance Installation/Care

HAMPTON BAY D12237-TT Use and care guide

HAMPTON BAY

HAMPTON BAY D12237-TT Use and care guide

West Elm 4436101 quick start guide

West Elm

West Elm 4436101 quick start guide

Home Styles Hutch 20 05507 0164 quick start guide

Home Styles

Home Styles Hutch 20 05507 0164 quick start guide

manuals.online logo
manuals.online logoBrands
  • About & Mission
  • Contact us
  • Privacy Policy
  • Terms and Conditions

Copyright 2025 Manuals.Online. All Rights Reserved.