Carlisle BINKS DE-05 User manual

EN
Service Manual
IMPORTANT! DO NOT DESTRO
Y
READ ALL INSTRUCTIONS BEFORE OPERATING THIS PRODUCT
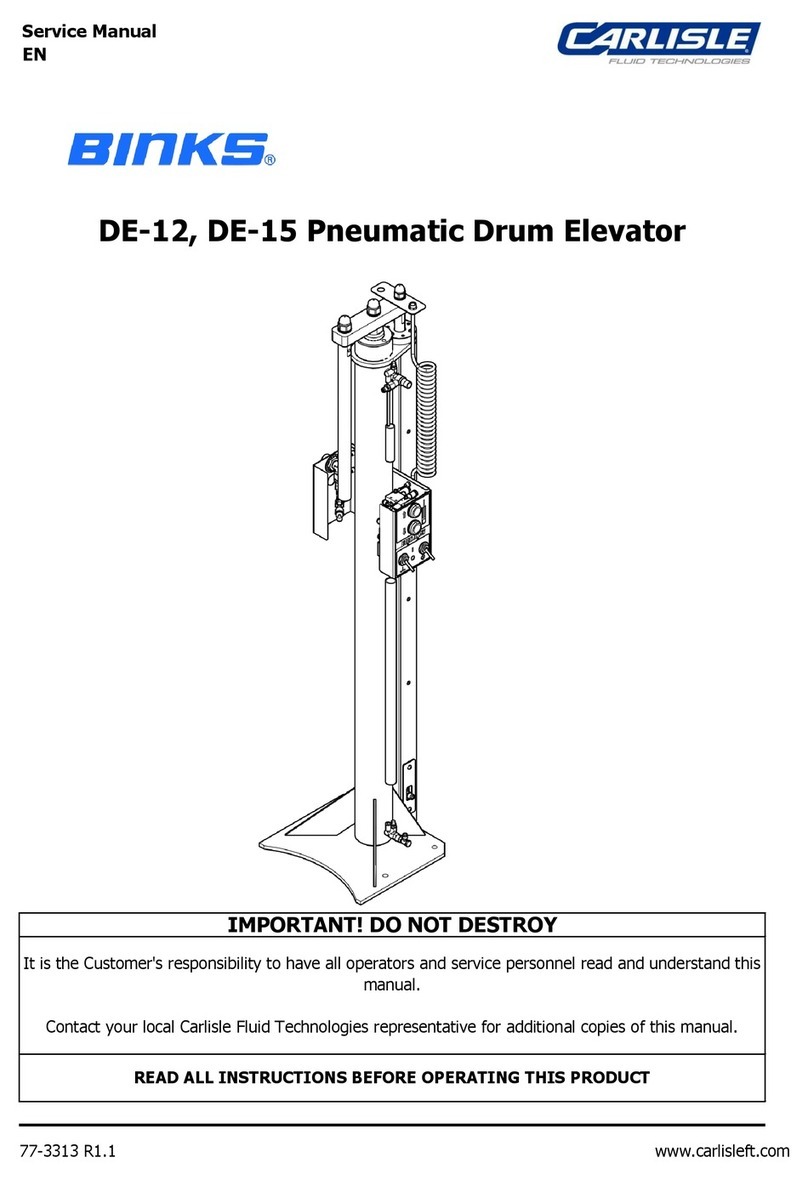
DE-05, DE-10 Pneumatic Drum Elevator
It is the Customer's responsibility to have all operators and service personnel read and understand this
manual.
Contact your local Carlisle Fluid Technologies representative for additional copies of this manual.
77-3312 R1.3 1/24 www.carlisleft.com

EN
6/12/17
Bournemouth,BH11 9LH,UK
This Product is designed for use with: Solvent and Water based materials
Suitable for use in hazardous area: Zone 1 / Zone 2
Notified body details and role: Element Materials Technology (0891)
Lodging of Technical file
EU Declaration of Conformity
This Declaration of conformity / incorporation is issued under the sole responsibility of the
manufacturer:
Machinery Directive 2006/42/EC
ATEX Directive 2014/34/EU
by complying with the following statutory documents and harmonized standards:
EN ISO 12100:2010 Safety of Machinery - General Principles for Design
EN ISO 4414:2010 Pneumatic Fluid Power - General Rules and safety requirements
EN 1127-1:2011 Explosive atmospheres - Explosion prevention - Basic concepts
EN 13463-1:2009 Non electrical equipment for use in potentially explosive atmospheres - Basic methods and
requirements
EN 13463-5:2011 Non electrical equipment for use in potentially explosive atmospheres - Protection by
constructional safety "c"
Providing all conditions of safe use / installation stated within the product manuals have been complied with and
also installed in accordance with any applicable local codes of practice.
Product Description / Object of Declaration:
Director of Sales (EMEA)
Pneumatic Elevator 104112, 104153, 104154,
104155, DE-05, DE-10, DE-12, DE-15.
Protection Level:
II 2 G X T4
This Declaration of conformity / incorporation
is issued under the sole responsibility of the
manufacturer:
Carlisle Fluid Technologies UK Ltd,
Ringwood Road,
Bournemouth, BH11 9LH. UK
Si
g
ned for and on behalf of Carlisle Fluid
Technologies UK Ltd:
D Smith
77-3312 R1.3 2/24 www.carlisleft.com

EN
WARNING
Read the following warnings before using this equipment.
OPERATOR TRAINING. All personnel
must be trained before operating
finishing equipment.
EQUIPMENT MISUSE HAZARD. Equipment misuse can cause the
equipment to rupture, malfunction or start unexpectedly and result in
serious injury.
STATIC CHARGE. Fluid may develop a static charge that must be
dissipated through proper grounding of the equipment, objects to be
sprayed and alll other electrically conductive objects in the dispensing
area. Improper
g
roundin
g
or sparks can cause a hazardous condition
and result in fire, explosion or electric shock and other serious injury.
NEVER MODIFY THE EQUIPMENT. Do
not modify the equipment unless the
manufacturer provides written
approval.
Hazards or unsafe practices which could result in
severe personal injury, death or substantial property
damage.
Hazards or unsafe practices which could result in
minor personal injury, product or property
damage
In this part sheet, the words WARNING, CAUTION and NOTE are used to emphasize important safety information as
follows:
WARNING
KEEP EQUIPMENT GUARDS IN PLACE.
Do not operate the equipment if the
safety devices have been removed.
INSPECT THE EQUIPMENT DAILY. Inspect the equipment for worn or
broken parts on a daily basis. Do not operate the equipment if you
are uncertain about its condition.
READ THE MANUAL. Before operating finishing equipment, read and
understand all safety, operation and maintenance information
provided in the operation manual.
AUTOMATIC EQUIPMENT. Automatic
equipment may start suddenly without
warning.
PROP 65 WARNING. WARNING: This product contains chemicals
known to the state of California to cause cancer and birth defects or
other reproductive harm.
CAUTION
PACEMAKER WARNING. You are in the
presence of magnetic fields which may
interfere with the operation of certain
pacemakers.
HIGH PRESSURE CONSIDERATION. High pressure can cause serious
injury. Relieve all pressure before servicing. Spray from the gun,
hose leaks or ruptured components can inject fluid into your body
and cause extremely serious injury.
Important installation, operation or maintenance
information.
PINCH POINT HAZARD. Moving parts
can crush and cut. Pinch points are
any areas where ther are moving
parts.
IT IS THE RESPONSIBILITY OF THE EMPLOYER TO PROVIDE THIS INFORMATION TO THE
OPERATOR OF THE EQUIPMENT.
NOISE LEVELS. The A-weighted sound level of pumping and spray
equipment may exceed 85 dB(A) depending on equipment settings.
Actual noise levels are available on request. It is recommended that
ear protection is worn at all times while equipment is in use.
PRESSURE RELIEF PROCEDURE.
Always follow the pressure relief
procedure in the equipment instruction
manual.
PROJECTILE HAZARD. You may be
injured by venting liquids or gases that
are released under pressure, or flying
debris.
DE-ENERGIZE, DE-PRESSURISE, DISCONNECT AND LOCK OUT ALL
POWER SOURCES DURING MAINTENANCE. Failure to de-energize,
disconnect and lock out all power supplies before performing
equipment maintenance could cause serious injury or death. KNOW WHERE AND HOW TO SHUT
OFF THE EQUIPMENT IN CASE OF AN
EMERGENCY.
WEAR SAFETY GLASSES. Failure to wear safety glasses with side
shields could result in serious eye injury or blindness.
NOTE
77-3312 R1.3 3/24 www.carlisleft.com

EN
D
SPECIFICATION
2380 93.7
2857 112.5
4.7
V8.9
Inches Inches
686
Y - RAISED
1000 39.4
with cable carrier
Z
Z - RAISED
51.7878 34.6
1378
Pump controls:
X
Y
DE-10
210 8.3
90 3.5
N
Noise Level @ 7 bar [100 psi]:
P
R
S
T
U
227
210
27.0
120
230 9.1 165 6.5
363 14.3
290
Base elevator
<70 dBA Leq
11.4
363 14.3
Weight:
Earth connection resistance:
X - RAISED 1000 39.4 1955
Dimension mm
1313
2268 89.354.3
500
Stroke
<1Ω
AAir inlet connection:
Non Lubricated
0.1m/s [4"/s]
Maximum drum diameter:
7 bar [100 psi]
DE-05 = 500mm [19.7"]
Minimum air inlet pressure: 3 bar [44 psi]
Maximum operating speed:
B
Maximum air inlet pressure:
Optional
Recommended air quality ISO 8573.1 Class
3.3.2 #:
77.0
1694 66.7
162 6.4
DE-05
366 14.4
6.7
8.3
170
19.7
1944 76.5
Agitator controls:
C
DE-10 = 955mm [37.6"]
Temperature range: 0 - 40 °C [32 - 104 °F]
Optional
Maximum Load Distance:
Up/Down controls: Included
mm
Maximum Load (including lid \ lid support):
G1/2'' BSPP Female
Oil: 0.1mg/m³
Water: -20ºC@7 bar [940 ppm]
Dirt: 5 µm
DE-05 = 300mm [11.8"]
DE-10 = 75 kg [165 lb's]
DE-10 = 375mm [14.8"]
DE-05 = 50 kg [110 lb's]
DE-10 = Ø640mm [25.2"]
DE-05 = Ø340mm [13.4"]
DE-10DK = 80 kg [154 lb's]
DE-05DB = 51 kg [112 lb's]
77-3312 R1.3 4/24 www.carlisleft.com

EN
INSTALLATION
RH Controls shown
Dimensions in mm [inches]
77-3312 R1.3 5/24 www.carlisleft.com

EN
Attach the elevator base securely to a flat and level concrete floor, using 4 x M12 anchor bolts, each with an
applied tensile load of 6.1kN minimum.
For further fixing advice, please refer to the following documents:
BS 8539:2012 - Code of practice for the selection and installation of post-installed anchors in concrete and
masonry
BS EN 206:2013 - Concrete - specification, performance, production and conformity
EN 1992-4:2016 - Design of fastening for use in concrete
CEO Guidance Note - ETAs for anchors used in construction
PRIOR TO USE
WARNING
WARNING
INTENDED USE
ATEX SPECIAL CONDITIONS FOR SAFE USE
The pneumatic elevator is designed for raising and lowering a drum/tank cover which has equipment mounted to
it, such as a pump, agitator or suction tube, generally for use in the painting industry.
This allows the drum/tank to be changed in the raised position. It is for professional trained users only.
Attach flexible hoses to all connections.
Connect a filtered and regulated air supply to the air connection.
Include a pressure relieving isolation valve.
Locate within 2m [80"].
Operate the elevator at a low pressure for the first time and adjust speed of operation as specified.
Ensure maximum load and position are not exceeded.
Ensure the drum can be located in the correct position consistently, preferably with a location fixture.
The drum/tank cover position should be set with the elevator fully down.
Set the positon on the Ø32 mounting bar so there is a small clearance with the top of the drum/tank.
The elevator must be earthed at all times.
A resistance <1Ωwhen measuring with an ohm-meter at the earth point
Earth connection, Binks Part No. DEK-22
Metallic parts maintain earth continuity by either direct contact, toothed washers or earth cables.
After maintenance, ensure continuity is present to earth of <1 Ohm
77-3312 R1.3 6/24 www.carlisleft.com

EN
Up speed controller, check valve and pressure relief switch6
FToPump
E
Agitator interlock valve
DESCRIPTION
If fitted
4
5
To Agitator
Pump on/off valve
9
10
If fitted
7
COMMENTS
2
3
Up pushbutton valve
Double acting cylinder
Down speed controller and check valve
ITEM
If fitted
If fitted
Air supply
8
If fitted
Agitator on/off valve
Manifold
Up/Down speed controller
PNEUMATIC DIAGRAM
Down pushbutton valve
1
11
CONTROL PANEL
77-3312 R1.3 7/24 www.carlisleft.com

EN
NOTE
The valve '7' prevents downwards movement, unless it receives a signal from valve '5', preventing the elevator
dropping even if the hoses are disconnected accidentally.
The elevator should not be used as a permanent support.
Ensure personnel are clear of the elevator and operator has a clear view before operating.
Toggle the valve '11' in the up position to turn air onto the agitator, the down position turns the air off.
Up/Down position:
Agitator air control:
Up/Down speed:
CAUTION
OPERATION AND ADJUSTMENT - (REFER TO DIAGRAM ON P7)
WARNING
Pump air control:
Initial speed -
The startin
g
speed of up/down can be ad
j
usted usin
g
valve '3' (located on inlet manifold), to increase or decrease
the speed.
See speed recommendation P4.
The remaining stroke speed is set using:
Up stroke - valve '6'
Down stroke - valve '7'.
The unit should be in the fully down position when equipment mounted to it is in use.
To raise the elevator, press the top control panel pushbutton '4', the position can be stopped at any point.
To lower the elevator, press the bottom control panel pushbutton '5', the position can be stopped at any point.
Toggle the valve '10' in the up position to turn air onto the agitator, valve '9' will only allow air to flow if the
elevator is in the down position.
The down position turns the air off.
Valves '6' & '7' lock air pressure in the upper and lower sections of the cylinder.
Before undertaking any maintenance, drive the elevator down with pushbutton '5' and press pressure relief
switch on valve '6' until all air has been exhausted from the cylinder.
77-3312 R1.3 8/24 www.carlisleft.com

EN
2
DEK-10
DESCRIPTIONITEM PART NO.
DE-05 DE-10
DEK-11
DEK-03 Mounting bar kit
3
SPARE PARTS
1
DEK-02 DEK-04
Seal and bearing kit
Cylinder cap - Complete kit
4Piston rod - Complete kit
DEK-14 DEK-15
5Anti-rotation - Complete kit
DEK-01 DEK-05
77-3312 R1.3 9/24 www.carlisleft.com

EN
Adjusting screw
8
DEK-32
9
7
10
DEK-31
ensure smooth operation and adjust
accordingly.
2
DEK-36
5
SPARE PARTS
ITEM
3
1
4
DEK-37
DEK-21
DEK-33
Mounting brackets
Agitator valve (pneumatic)
Agitator switch (electric)
Cover plates
Earth cable
PART NO.
6
DEK-30
DEK-22
DEK-34
DEK-20
DESCRIPTION
Valve & fittings (up/green)
Valve & fittings (down/red)
Valve & fittings (agitator or pump)
Cylinder speed controllers
Inlet manifold & speed controller
77-3312 R1.3 10/24 www.carlisleft.com

EN
Follow the procedure below.
Isolate and exhaust air supply.
=
(Reverse for assembly)
MAINTENANCE
Key - Maintenance symbols
= refer to figure
= Spanner or socket size
=Torque
Grease
(AGMD-010)
Order for dis-assembly
=
Prior to carrying out any maintenance;
ensure the elevator is in the down position and all air is exhausted from the cylinder, prior to the air supply being
isolated and pressure relieved.
77-3312 R1.3 11/24 www.carlisleft.com

EN
Agitator switch setting
MAINTENANCE
77-3312 R1.3 12/24 www.carlisleft.com

EN
SYMPTOM
6 Months
- Lubricate piston rod
- Lubricate anti-rotation rod
- Check for any excessive mechanical noise
- Inspect bearings and seals, replace as required
- Lubricate all bearings and seals
- Check tightness of mounting bar fasteners
- Check rods for scoring
b) Worn bearings and/or seals
POSSIBLE CAUSE REMEDY
Up stroke speed
incorrect/erratic
Excessive movement
of elevator/items
FAULT FINDING
- Check for air leaks
- check all parts are fixed securely
- ensure smooth operation and adjust accordingly.
12 Months
MAINTENANCE SCHEDULE
TYPICAL PERIOD
Monthly
Down stroke speed
incorrect/erratic
b) Cylinder top speed controller incorrectly
set
a) Inlet manifold speed controller incorrectly
set
a) Loose fastenings
b) Replace worn parts
a) Tighten all fastenings
b) Adjust to set remaining stroke
a) Adjust to set initial speed
b) Cylinder bottom speed controller
incorrectly set
a) Inlet manifold speed controller incorrectly
set
b) Adjust to set remaining stroke
a) Adjust to set initial speed
RECOMMENDED OPERATION
77-3312 R1.3 13/24 www.carlisleft.com

EN
DEK-50
DEK-51
Lid lock
Lid fasteners
DEK-52
DESCRIPTION WEIGHT
7.2 kg [16 lbs]
4.6 kg [10 lbs]
2.5 kg [5.5 lbs]
Lid & Support
MATERIALS OF CONSTRUCTION
Lid Support
Lid
Suction Tube
Lids
ITEM
Frame & Brackets
Lid hole cap LDPE
300 Series - Stainless Steel
Steel - Powder Coated
Steel - Plated
Agitator shaft/impeller
Lid plates
1
2
3
PART NO.
LID ACCESSORIES - DE-05 (25/30 l [5 gal])
77-3312 R1.3 14/24 www.carlisleft.com

EN
7 DEK-90 0.15 kg [0.33 lbs]
LID ACCESSORIES - DE-05 (25/30 l [5 gal])
0.01 kg [0.02 lbs]
2
6
9 DEK-91 0.15 kg [0.33 lbs]
10
11 DEK-92
DEK-81 0.6 kg [1.3 lbs]
3/4'' Suction Tube
DEK-55
1 0115-010337 Hole Cap
DEK-83
13 DEK-56
8DEK-82
Lid & Support 7.4 kg [16.3 lbs]
3 DX200A
2.76 kg [6.1 lbs]
Blank Plate 0.16 kg [0.35 lbs]
12
0.67 kg [1.5 lbs]
-
40.9 kg [2 lbs]DEK-80
1/2'' Suction Tube
3/4'' Adapter Plate
3/4'' Suction Tube
-
WEIGHTPART NO.ITEM
5 DX200S
1.82 kg [4 lbs]
1/2'' Adapter Plate
1/2'' Suction Tube
Diaphragm Pump - Stainless Steel
Diaphragm Pump - Aluminium
Lid
41-3312X
0.95 kg [2.1 lbs]
DESCRIPTION
Pneumatic Agitator
77-3312 R1.3 15/24 www.carlisleft.com
EN
LID ACCESSORIES - DE-05 (25/30 l [5 gal])
Dimensions in mm [inches]
77-3312 R1.3 16/24 www.carlisleft.com

EN
LID ACCESSORIES - DE-10 (205/210 l [55 gal])
ITEM PART NO. DESCRIPTION WEIGHT
1 DEK-65 Lid & Support 13.7 kg [30.1 lbs]
2 DEK-66 Lid Support 6.3 kg [13.9 lbs]
3LidDEK-67 7.5 kg [16.5 lbs]
77-3312 R1.3 17/24 www.carlisleft.com

EN
LID ACCESSORIES - DE-10 (205/210 l [55 gal])
3/4'' Suction Tube
3/4'' Adapter Plate
1'' Suction Tube
DEK-90 0.15 kg [0.33 lbs]
11
Lid & Support
1.1 kg [2.4 lbs]
9 DEK-87 2.8 kg [6.2 lbs]
14
DEK-86 1.8 kg [4 lbs]
12 DEK-92
8DEK-85
DEK-93 Agitator Support 1.71 kg [3.8 lbs]
3 QS-57X Pneumatic Agitator
0.2 kg [0.44 lbs]
3/4'' Suction Tube
DEK-93 - must be earthed with a resistance of <1Ohm
1/2'' Suction Tube
Diaphragm Pump - Stainless Steel
13.9 kg [31 lbs]
4 DEK-94 Mounting Plate
5 DX200A Diaphragm Pump - Aluminium
5.6 kg [12.3 lbs]
6 DEK-84 1.64 kg [3.6 lbs]
Blank Plate 0.16 kg [0.35 lbs]
13
CAUTION
WEIGHTDESCRIPTIONPART NO.ITEM
-DX200S7
1 10XXXX Electric/Pneumatic Agitator -
2
7.7 kg [17 lbs]DEK-69 Lid
DEK-68
10
-
77-3312 R1.3 18/24 www.carlisleft.com

EN
LID ACCESSORIES - DE-10 (205/210 l [55 gal])
77-3312 R1.3 19/24 www.carlisleft.com

EN
See agitator manual for combinations and sizes.
Dimension
Dimensions in mm [inches]
LID ACCESSORIES - DE-10 (205/210 l [55 gal])
G
H
77-3312 R1.3 20/24 www.carlisleft.com
This manual suits for next models
1
Table of contents
Other Carlisle Lifting System manuals
Popular Lifting System manuals by other brands

CMP
CMP Panther 55-0045 Installation and operating instruction

iXBlue
iXBlue OCEANO HD-55 PULL AND LIFT user guide

Harmar Mobility
Harmar Mobility AL001 Installation & owner's manual

stellar labs
stellar labs Slider34 owner's manual

ABACO MACHINES
ABACO MACHINES ASB056M3 Operation manual

Braun Corporation
Braun Corporation Century Series Installation & service manual