CARLOTTI KMC Series Manual

INDEX
1. WARNINGS
1.1. Safety rules
1.2. Graphic signs, standardised symbols on the machine KMC
1.3. Documentation of conformity
2. INFORMATION
2.1. Data plate
2.2. Technical data
2.3. Target of the machine
2.4. Functioning
2.5. Workers
2.6. Transport
3. INSTALLATION AND USE
3.1. Preparation of the digger
3.2. Connection to the tractor: 3 points hitch
3.3. Cardan shaft
4. ASSEMBLY –DISASSEMBLY –ADJUSTMENT
4.1. Main belt assembly and disassembly
4.2. Front disk adjustment
4.3. Rear oscillating grid assembly
4.4. Second web structure
5. MAINTENANCE
5.1. Maintenance
5.2. Lubrication
5.3. Oil refilling
5.4. Greasing
5.5. Checking driving belt tension
5.6. Storage
6. REPAIRS
6.1. To order spare parts
7. SAFETY DEVICES

1WARNINGS
The target of this handbook is to provide the operator useful information on how
safety use and maintain the implement.
Before using the potato digger KMC, it is necessary to read carefully this use and
maintenance handbook.
After having read this handbook, please keep it and consult it each time any doubt
should arise.
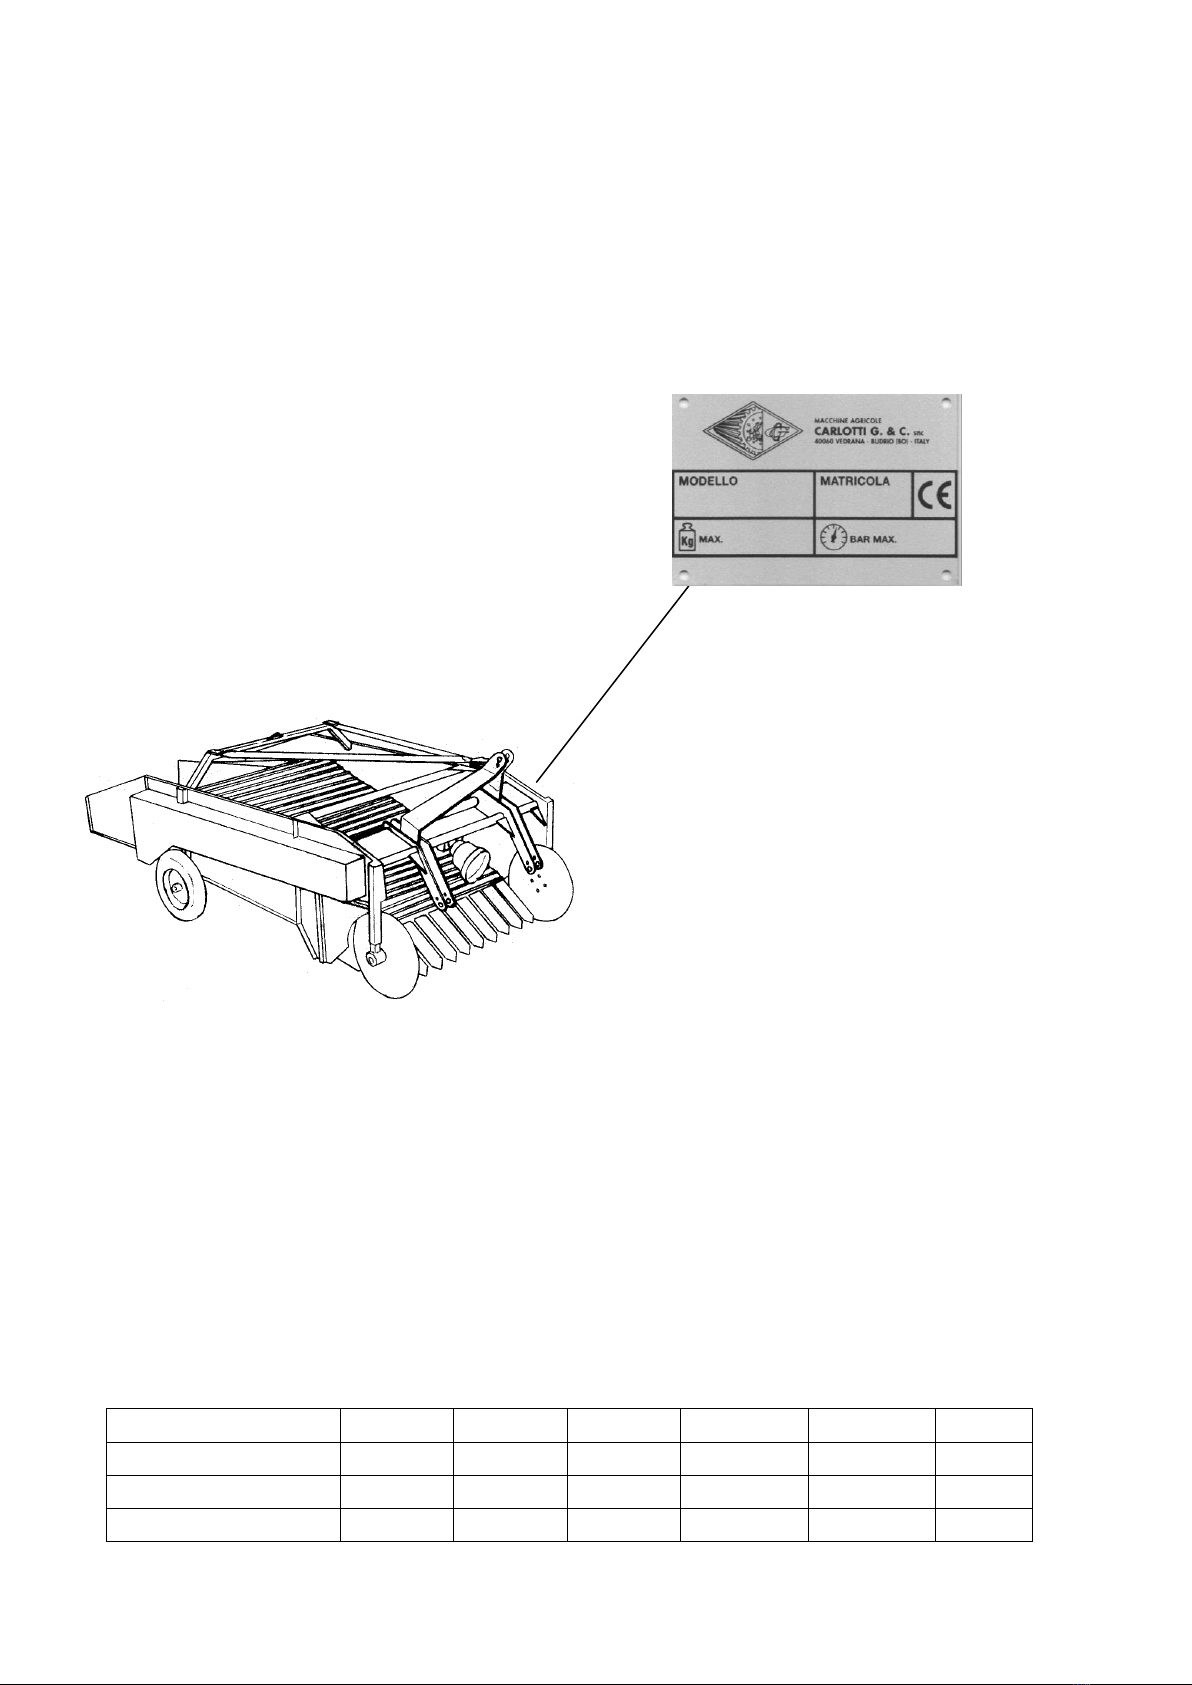
All documents are considered as an essential part to the machine and have to
be carefully kept during its service life. Should the documentation get lost,
please apply directly to the Manufacturer for an additional copy.
1.1 Safety rules
To avoid an accident, it is important to recognise and understand possible dangerous
situations!
1- It is recommended to familiarise with this handbook as well as the digger itself,
before manipulating and using it. While doing it, special attention should be paid to
the working of particular mechanisms, their regulation and proper adjustment.
2- Before and while working it is recommended to NOT have any alcoholic drink,
medicine or other, which could alter physical and mental capabilities.
3- Before getting to work, the digger and the tractor efficiency should be checked out.
Before setting the digger in motion, it should be also checked if there is any people
around.
4- Speed should be adequately limited and precautions taken while turning and going
up.
5- Soon after having finished the work and during breaks, the digger should be
lowered to the ground and detached from the tractor.
6- Connection to the tractor should be done with extreme caution.
7- Repairs, regulations, cleaning, maintenance, technological disturbances removal
ought to be made with the digger and the tractor NOT connected.
Most of the accidents at work are due to non-observance of the basic
precautions of safety.
Many accidents happen while moving the group tractor-machine on the road
and in the farm.
It is forbidden:
To use the digger without having read this handbook attentively.
To lubricate, adjust or repair the digger while it is connected to the tractor.
To use the digger or a tractor which are not efficient.

To allow unauthorised people to use the digger.
To make sudden turns.
To transport people.
To leave the digger in the transport or working position.
To work on slopes without proper precautions.
Every time the group tractor-machine has to be moved, it is necessary to
comply with the rules of the Highway Code.
In order to improve traffic and circulation in the farm, it is necessary to:
put road notices in the practicable ways
put road notices to mark the vehicles ways from the pedestrian ones.
The Manufacturer CARLOTTI G.&C. S.n.c. shall not be held liable for any
damage to people or things caused by improper use, negligence, lack of skill,
and/or non-observance of these instructions.
The staff operating (see paragraph 2.5 –Workers) the machine has to be trained,
specialised and informed for all the operations of use and maintenance of the
implement. Moreover it has to be in perfect physical and mental conditions.
All the other people are considered unauthorised.
While using, and especially repairing the implement, it is essential that the operator
should wear the following clothes:
Working overalls and/or comfortable clothes but not too large to avoid that they
get entangled in gears and moving parts.
Safety gloves.
Safety glasses or mask.
1.2 Graphic signs, standardised symbols, on the machine KMC
It is forbidden to remove, conceal or get illegible the plates and stickers indicating use
of drives and dangerous parts.

Symbol
Description
Before starting work, read carefully the use
handbook.
Cutting devices! Keep safety distance.
Warning! Moving devices. Keep safety distance.
Danger! Keep safety distance.
It is forbidden to clean or grease moving parts.
Danger! Keep safety distance.
Fixing points for lifting the implement.
Greasing points.
ATTENTION
-Never remove safety devices.
-Never check or service the machine when it is connected to the tractor.
1.3 Documentation of conformity
This manual has been drawn up in conformity with EEC directives to standardise
safety norms and to ensure that industrial products can freely circulate within the EEC
(EEC Council directives 2006/42 and subsequent amendments known as “machine
directives”).

SIGNS
In this handbook have been used particular symbols to draw reader’s attention to
situations that could endanger the safety of people and things:
2 INFORMATION
2.1 Data plate
On the front part of the frame it is placed the data plate (Pict. 1), indicating the
following information:
Manufacturer’s name and address
Potato digger model
DANGER
ATTENTION
WARNING

CE symbol certifying that the potato digger complies with the European
Economic Community directive EEC 2006/42
Serial number for in-house identification
Weight
Year
Pict.1
2.2 Technical data
The machine KMC is manufactured, according to customers needs, in 3 different
models with 3 different working widths.
KMC
650
1000
1300
1450
1600
1800
Length mm
2400
2400
2400
2400
2400
2400
Width mm
800
1150
1450
1600
1750
1950
Height mm
960
960
960
960
960
960

Weight Kg
270
420
470
520
570
620
Working width mm
650
1000
1300
1450
1600
1800
Power required HP
40
40
40
50
70
70
Opening shoes No.
3
5
7
8
9
10
2.3 Target of the machine
The potato digger KMC has been projected to dig one, two or more rows of potatoes
(depending on model and working width) and to unload products to the ground in a
central windrow.
It is forbidden to modify the machine or parts of it, addressing it to a use
which is different from the foreseen and here specified one.
The machine must be connected to the 3-points hitch of the tractor, and gets its
movements from the tractor PTO, through the cardan shaft.
Any other connection is considered unauthorised.
2.4 Functioning
Thanks to its features it can be used to dig both early and ready products.
The front digging part is made of 70/80/90 “V” shaped opening shoes (according to
the model) and 2 disks for cutting grass.
After being dug, the product is cleaned from exceeding soil on the main web and then
unloaded to the ground at the rear part of the machine in a central windrow.
The web is placed on rollers and supports, and it is equipped with triangular shakers
that help cleaning potatoes from soil.
The web is moved by means of two driving belts, protected by a plate fasten to the
frame.
The implement can be equipped with further cleaning devices: second web or rear
oscillating grid.
2.5 Workers
The machine KMC has been projected to have NO workers on board.
It is so forbidden to people to stand around or on the machine while it is working
(minimum distance=mt. 3).
Staff:
N. 1 Tractor driver. He must be trained and informed on how safely and
meticulously run the group tractor –machine.
N. 1 Qualified technician. He provides the operations of adjustment, repair,
installation and use. He must be qualified, trained and informed in all these
operations.
All the other people are considered unauthorised
2.6 Transport
Thanks to its dimension (see table at paragraph 2.2) the machine KMC can be
transported on trucks, trailers, ….

Only operating staff which has been trained in the use of a forklift, a crane
or any other lifting equipment, is allowed to lift and load the machine.
Hook the 3 lifting points (see table at paragraph 1.2) with a chain or a rope, then lift
the implement
3 INSTALLATION AND USE
All the operation of installation, connection, adjustment,…must be carried on when the
machine and the tractor are not connected.
Never do these operations on slopes and / or hills, or in any other place
which do not assure the complete steadiness of the machine.
Proceed as follows:
wear working gloves, glasses and shoes
follow all safety rules presented in chapter 1 of this handbook.
3.1 Preparation of the digger
The qualified technician, in order to prepare the machine for its first activation,
should:
Make a general overhaul of the implement.
Check tyres’ pressure.
Check web functioning.
Check oil level
Check that all safety devices, removed for transport exigencies, have been
replaced.
3.2 Connection to the tractor: 3-points hitch
Proceed as follows:
Get the tractor close to the machine and lower its lifting arms
Switch off the tractor engine and remove keys
Connect the first and second point to the tractor lifting arms
Connect the third point (Pict. 2, point 2)
Connect the cardan shaft to the tractor PTO (see paragraph 3.3 Cardan shaft).
Pict. 2

After having connected the digger to the tractor, make it running at slow speed.
During this first activation, special attention should be paid to proper working of the
driving elements and the carrying web.
Safe working rules presented in the handbook (chapter 1), should be obeyed
during the first activation of the implement.
ATTENTION !!
Make sure that pins are correctly inserted and locked by snap slip pins.
Tractor must have a PTO running at 540 rpm with a clockwise rotation .
While working the PTO has to be settled at 350 rpm.
The potato digger KMC should not be connected to a PTO rotating at 1000
rpm, otherwise the reducer could be seriously damaged.
3.3 Cardan shaft
The potato digger KMC is supplied to the customer with a cardan shaft and its use and
maintenance handbook.
Before connecting the cardan shaft to the machine and the tractor, carefully
read its use and maintenance handbook.
Check cardan shaft length as soon as you receive the digger and every time you have
to change tractor.
Pict. 3 cardan shaft in closed position
Connection of cardan shaft with snap split pin:
Check that cardan shaft split pins can freely slide. If not, properly clean and
lubricate.
Connect the cardan shaft, first to the digger and then to the tractor.
Check that pin 1 is housed in seat 2 (Pict. 4)
Vigorously pull cardan shaft to make sure it is locked.
Repeat this operation from tractor side.

Side machine Side tractor
Pict. 4
A cardan shaft incorrectly connected can be very dangerous to both tractor and
digger, and to people.
4ASSEMBLY –DISASSEMBLY –ADJUSTMENT
All the operation of assembly, disassembly and adjustment must be carried on when
the machine and the tractor are not connected.
Never do these operations on slopes and / or hills, or in any other place
which do not assure the complete steadiness of the machine.
Proceed as follows:
wear working gloves, glasses and shoes
follow all safety rules presented in chapter 1 of this handbook.
4.1 Main web assembly and disassembly
Disassembly:
Rotate the web until the coupling bar (point 3 - Pict. 5) reaches the slowest position.
Draw both ends near to one another using a string (Pict. 5), take out the coupling bar
using an iron rod and hammering on one side; once the bar is freed from one side, it
can be completely pull out and free the web.
Pict. 5 Main web KMC

Assembly:
Draw both ends near one to another using a string and start inserting the coupling bar
from one side.
Start the implement and run it at slow speed to check if the web rolling is correct.
4.2 Front disk adjustment
DANGER: Never adjust disks when the machine is connecting to the tractor!!
To adjust depth of front disks, work on the fixing screws . Unscrew nuts, loosen
screws, adjust disk depth, and lock them by fastening nuts again.
Disk depth into the soil must be as low as possible, to allow disk rotation.
If disks sink too deeply, grass is not cut and, consequently, the machine inlet gets
clogged.
The average sinking depth of disks into the ground depends on the kind of soil: less
deep on hard soils and deeper on soft soils. Basically it is essential that the disks can
freely rotate.
4.3 Rear oscillating grid assembly
The machine KMC can be equipped at the rear part, with a vibrating grid instead of
rear unloading fixed devices, in order to clean more potatoes from soil.
The rear oscillating grid gets its movement from 2 articulated bars , which are
controlled by a main lever , that in turn is operated by a rotary cam connected to the
reducer shaft.
WARNING !

The rear oscillating grid is supplied to the customer under request on a
contractual phase, so it is already assembled to the main frame of the
machine.
If the rear grid is ordered after the delivery of the machine, proceed as follow to
assemble it to the main frame:
Points 4 and 5, Pict. 6, show where the rear oscillating grid frame shall be fastened to
the machine at its rear part (symmetrically on the opposite side too). Fix the screws
and fasten the nuts.
Connect the main lever (point 3) to the rotary cam (point 2) connected to the reducer.
Pict. 6
Moving devices!!
Keep a minimum distance of 3 mt from the machine.
Disassembly:
Proceed doing backwards the same operations as above depicted.
4.4 Second web structure
The machine KMC can be equipped at the rear part, with a second web structure
(complete with web, pinions and driving chains) instead of rear unloading fixed
devices, in order to better clean the potatoes from soil.
The second web structure is fastened to the rear part of the machine, on its whole
vertical part (see point 1, Pict. 7).
The second web is supplied to the customer under request on a contractual
phase, so it is already assembled to the main frame of the machine (while
delivered).
DANGER

It is supplied directly to the customer, already assembled and with the second web
(point 2, Pict. 7), the pinions (point 3, Pict. 7) and the driving chain (point 4, Pict. 7).
Pict. 7
Disassembly:
In order to disassemble the second web, it is necessary to detach also its frame from
the machine:
Machine and tractor shall not be connected
Always comply with safety rules explained at chapter 1 of this use and
maintenance handbook
Detach the rear driving chain (see point 4, Pict. 7), unscrew completely the second
web structure from the machine (see point 1, Pict. 7).
Disassemble the second web, following up instructions explained at paragraph 4.1
(Web assembly and disassembly)
If the rear grid is ordered after the delivery of the machine, proceed as follow to
assemble it to the main frame:
Assembly:
Do backwards the same operations as above depicted.

MAINTENANCE
All the operation of cleaning, greasing, repairs, maintenance,…. must be carried on
when the machine and the tractor are not connected.
Never do these operations on slopes and / or hills, or in any other place
which do not assure the complete steadiness of the machine.
Proceed as follows:
wear working gloves, glasses and shoes
follow all safety rules presented in chapter 1 of this handbook.
5.1 Maintenance
Everyday, after working, the qualified technician shall:
Clean the implement from soil and weeds.
Make a general overhaul of the whole implement, paying special attention to
the state of rollers’ raceway, web and front opening shoes.
Replace damaged parts.
Check oil level and if necessary, refill
4.2 Lubrication
Always read warning and caution labels on lubricant cans/packages.
Wear always gloves
Avoid contact with skin.
Clean the greasers from dust and other impurities, to avoid that their presence
gets useless the effects of lubrication.
Wash hands thoroughly after use.
Use recommended products only:
OIL SAE 80W/90 for refilling reducer
GREASE GRIS 30 for greasing rollers, supports,….
4.3 Oil refilling
Oil refilling must be carried out indoor, in a place with a totally impermeable
floor
Oil refilling must be carried out in conditions of safety and hygiene, to avoid any
spilling and shedding on the ground or in the waters
Oil must be stored in proper cans, before bringing them to specialised collecting
centres
Before refilling the reducer (Pict. 8), the operator shall:

Lay the implement on the ground.
Turn off the tractor engine.
Disengage the PTO
Refill with oil until the reducer is half full.
Never exceed recommended level
Pict. 8
Remember that if oil level is too high, oil could flow out of the fill plug or oil seals, and
output shaft could get damaged.
Do not waste exhausted oil: it is a very bad form of pollution!
Collect the exhausted oil in canes and bring them to centres specialised in oil waste
disposal.
4.4 Greasing
When the machine in on standstill:
Daily grease, during working periods, both connection rollers (Pict. 9)
WARNING !!

Daily grease the supports (Pict. 10)
Slightly grease universal joints and the extension tube of cardan shaft.
Daily grease web’s shakers (Pict. 11).
Check efficiency of safety protections.
Slightly grease, during working periods, reducer’s support (Pict. 12)
Pict. 9 Pict. 10
Pict. 11 Pict. 12
5.5 Checking driving belt tension
If web speed slows down when the machine is running, then tighten the relevant
pulley (see picture 14), by moving both reducer and reducer shaft support.
Before adjusting, stop the tractor and detach completely the machine.
Remove protection frame and adjust the belt.
Before connecting again the machine to the tractor, replace the protection
frame.

After working season, the web and the pulleys have to be loosen.
Pict. 13 Belt transmission KMC
4.6 Storage
The potato digger KMC should be stored in a room, protected from weathering. It
should be located in such a way that none of its parts are dangerous to surroundings:
it is suggested to place the front opening shoes towards a wall to avoid accidents and
cutting.
Place it in such a way that it does not overturn, and it can be easily connected to the
tractor.
When the working season is finished, the qualified technician should:
Clean the implement from dust, soil and other impurities.
Do technical overhaul and repair any noticed damage.
Lubricate according to paragraph 5.2, 5.3 and 5.4
Clean unpainted metal parts, wash them with kerosene and cover with
anticorrosive grease warmed up, or with other protective agents.
Ease web and belts tension
Place the digger on supports
Reduce tyres pressure
After storing period, it is recommended to:
Do the technical overhaul of the digger
Stretch web and belts tension
Check oil level and refill if necessary (see paragraph 5.4)
6 REPAIRS

It is forbidden to repair the digger KMC when the machine is working and/or
it is connected to the tractor through the cardan shaft and the 3 points hitch.
Every time some parts are to be repaired or replaced, proceed as follows:
Safely lay the machine on the ground
Always comply with all safety rules and wear overalls, safety gloves and shoes
to protect from any accidental crushing
Replace or repair damaged parts, using only original spare parts, supplied
by the manufacturer, dealer or authorised assistance point.
Before starting working again, run slowly the digger to check if it has been
properly repaired and assembled.
FOR ANY DOUBTS PLEASE CONTACT THE DEALER, THE ASSISTANCE POINT OR
DIRECTLY THE MANUFACTURER, CARLOTTI G.&C. S.n.c.
6.1 To order spare parts
To order spare parts, please read spare parts catalogue and always specify:
Model of the implement
Serial number.
Code number of the part required. Lacking this number, specify table number in
which the part is depicted.
Description of the part
Quantity required.
USE ONLY ORIGINAL SPARE PARTS
Orders must be written and sent to the dealer, assistance point or manufacturer by
fax, letter, e-mail,..
The Manufacturer Carlotti G&C snc shall not be held liable for orders made only by
phone and not carried out.
7 SAFETY DEVICES
The machine is equipped with different safety devices, in order to make its use and
maintenance as safer as possible
IT IS FORBIDDEN TO REMOVE AND/OR TAMPER ANY SAFETY DEVICE.
Safety devices:
Protection of the taking of power of the machine, that overlaps to that some
tree cardan shaft
DANGER !

Telescopic of protection of the cardan shaft
Two protection seed-cover of the joints of attack of the cardan shaft, equipped
with chains to avoid its rotation
Pin with safety cotter pin for block cardan shaft
Protection frame of the transmission belt, in both the sides of the machine
It is forbidden to modify and/or alter any parts, devices, elements,….of the
machine KMC without having previously contacted the manufacturer and
without having received a written notice of approval.
Any modifications/alterations, made without authorisation, and the use of
not original spare parts cancel any existing warranty on the machine and
exonerate the manufacturer Carlotti G&C snc from any responsibility in case
of accidents and/or damages to things and/or people.
This manual suits for next models
6
Table of contents
Other CARLOTTI Farm Equipment manuals
Popular Farm Equipment manuals by other brands

Gaspardo
Gaspardo PA1 Use and maintenance

AEC
AEC GP1200 Series Operation and installation manual

horsch
horsch Maestro RX operating instructions

APV
APV RH 600 M1 operating manual

Malone
Malone PROCUT 3000 MP Operator's manual

Battistotti Macchine Agricole
Battistotti Macchine Agricole BMA INTER-ROW CLASSIC instruction manual