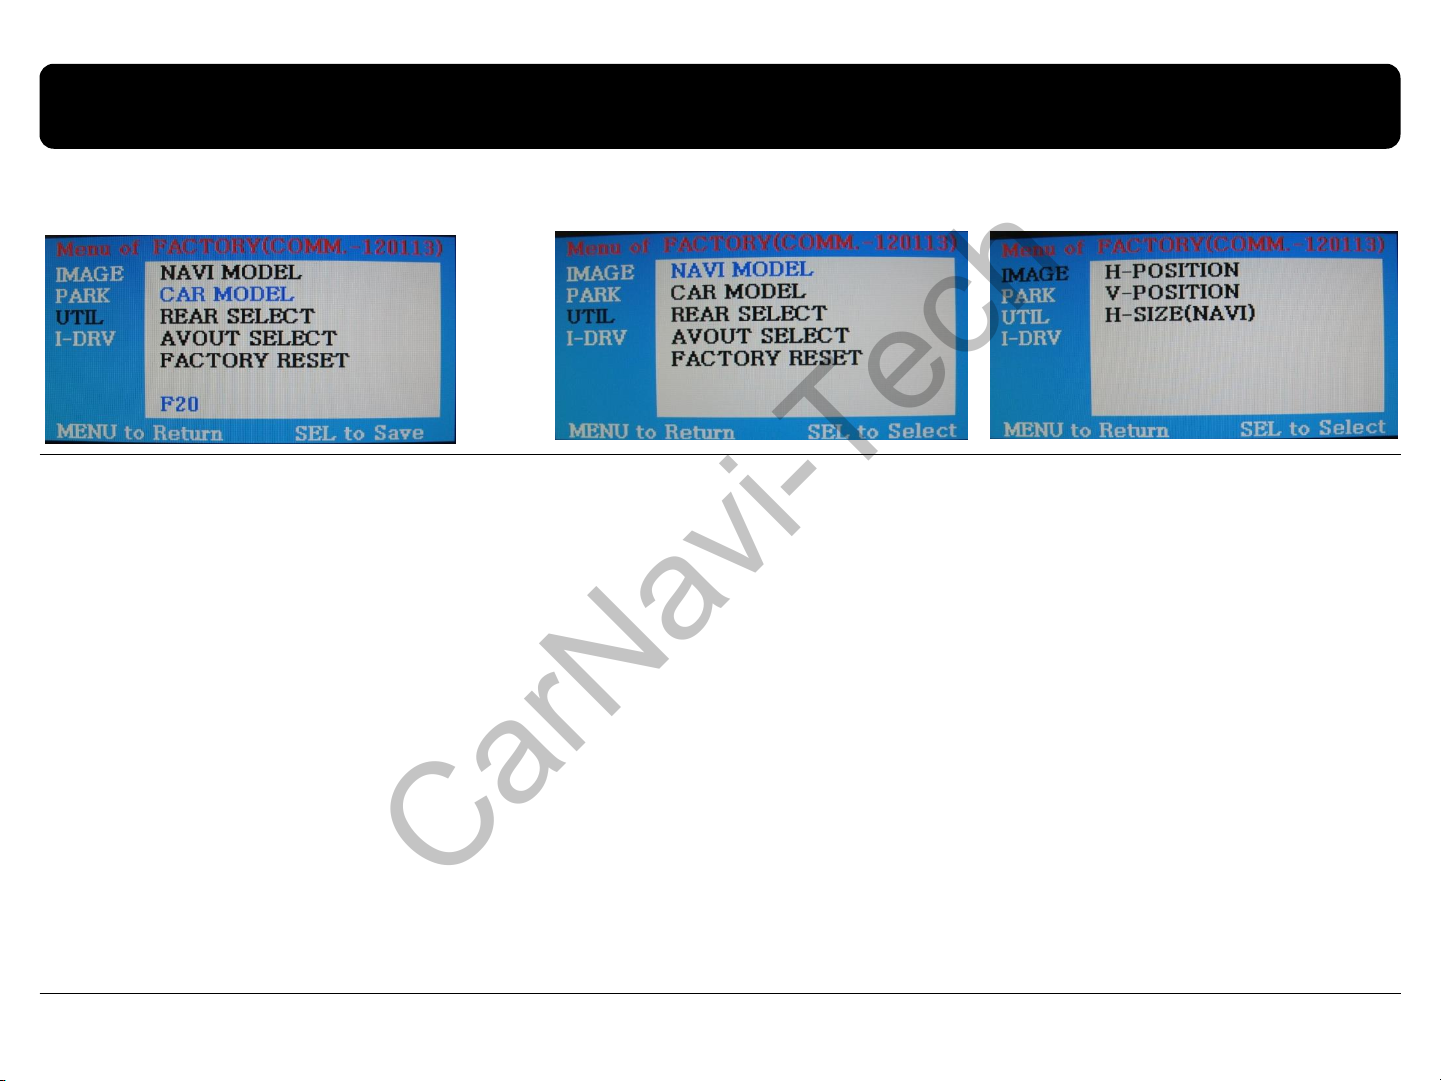
2.2 Setup for car model & navigation
10
FACTORY mode –Press ◀button 2 seconds long on the remote control.
UTIL - CAR MODEL
Selecting model of the car
F20 : 1,3,5,7 series 6.5”, 8.8”
F20-7 : New UI 8.8”, 10.2
* Set pin#5 of DIP switch to the right size
of the monitor after selecting model of
the car. (Refer to page 8.)
UTIL –NAVI MODEL
Definition of the navigation
DEFAULT : default, 400X234, low definition
KD-900(WVGA) : 800x480 in high definition,
for Chinese
MYVI(WVGA) : 800x480 in high definition, for
Domestic
MD7000(WVGA) : 800x480 in high definition,
for Domestic
GI8000(WVGA) : 800x480 in high definition,
for Domestic
GI5000(WVGA) : 800x480 in high definition, for
Domestic
I-ONE(WVGA) : 800x480 in high definition, for
Domestic
WP9200(WVGA) : 800x480 in high definition,
for Israel
HDMI(When SMI is installed)
: 800x480 in high definition
IMAGE
Adjusting the position and the
size of navigation
H-POSITION : moving in horizontal
Direction
V-POSITION : moving in vertical
direction
H-SIZE : adjusting the horizontal
size of the navigation
Setup for car model Setup for navigation
* Go into FACTORY/ IMAGE (as shown right) and adjust the position and the size of
the navigation after setting the definition of the navigation.