www.machineryhouse.com.au [Type here] www.machineryhouse.co.nz
1 INFORMATION ABOUT THE APPLIANCE
1.1 GENERAL WARNINGS
The appliance must only be used by a competent person who has carefully read this manual and
understood all the safety information described herein.
In the event of an inexperienced operator, it is necessary that this manual is carefully read by the
new operator before using the appliance & training by an experienced & competent operator is given.
Although safety devices are installed on the appliance, avoid touching the moving parts with your
hands and avoid touching the appliance with wet hands.
Before cleaning or servicing the appliance it must be disconnected from the electricity power
supply.
When cleaning or servicing the MM-12/MM-22 take into consideration all hazards including
residual risks & always concentrate on what you are doing and avoid any possible distractions.
WARNING – If a fault with the machine is detected the machine should only be repaired by the
manufacturer or authorized repair agent.
If the power cord is damaged, it must be replaced by the manufacturer, an authorized service
agent or qualified electrician.
Prior to operation always check the electricity power cable to ensure there are no twists in the
cable, always completely unwind. A worn or damaged cable poses a dangerous electrical hazard & the
machine should not be used until it is replaced by a qualified electrician. Keep the power lead away
from heated or sharp cutting surfaces and avoid pulling the cable to remove the plug from the socket.
Should the MM-12/MM-22 have a presumed malfunction or does not work correctly, do not use it
or repair it yourself. First contact the place of purchase with your proof of purchase to confirm if the
machine should be returned or repaired by an authorized service agent.
This appliance is designed for only mincing meat. Do not use this appliance for frozen food or
non-food products and do not insert any metallic objects into the mincer.
Do not mince without using the pestle
The manufacturer cannot be held responsible for the following situations:
If the appliance or safety devices are tampered with by unauthorized personnel.
If non-original spare parts are used.
If the instructions given in this manual are not carefully followed or respected.
If unsuitable cleaning products (inflammable, corrosive or toxic) are used to clean the appliance.
1.2 SAFETY FEATURES INSTALLED
Safety features against electrical hazards conform to standards IEC/EN60335-2-64, whereas
mechanical safety features conform to EN/IEC60335-2-64.
The MM-12/MM-22 is fitted with electrical and mechanical safety protections that conform to the
standards in within Australia & New Zealand. However, there are RESIDUAL RISKS that cannot be
completely eliminated, these risks are referred to in the risk assessment. For the appropriate
management of the risks involved including while operating & cleaning the MM-12/MM-22 please refer
to this document.
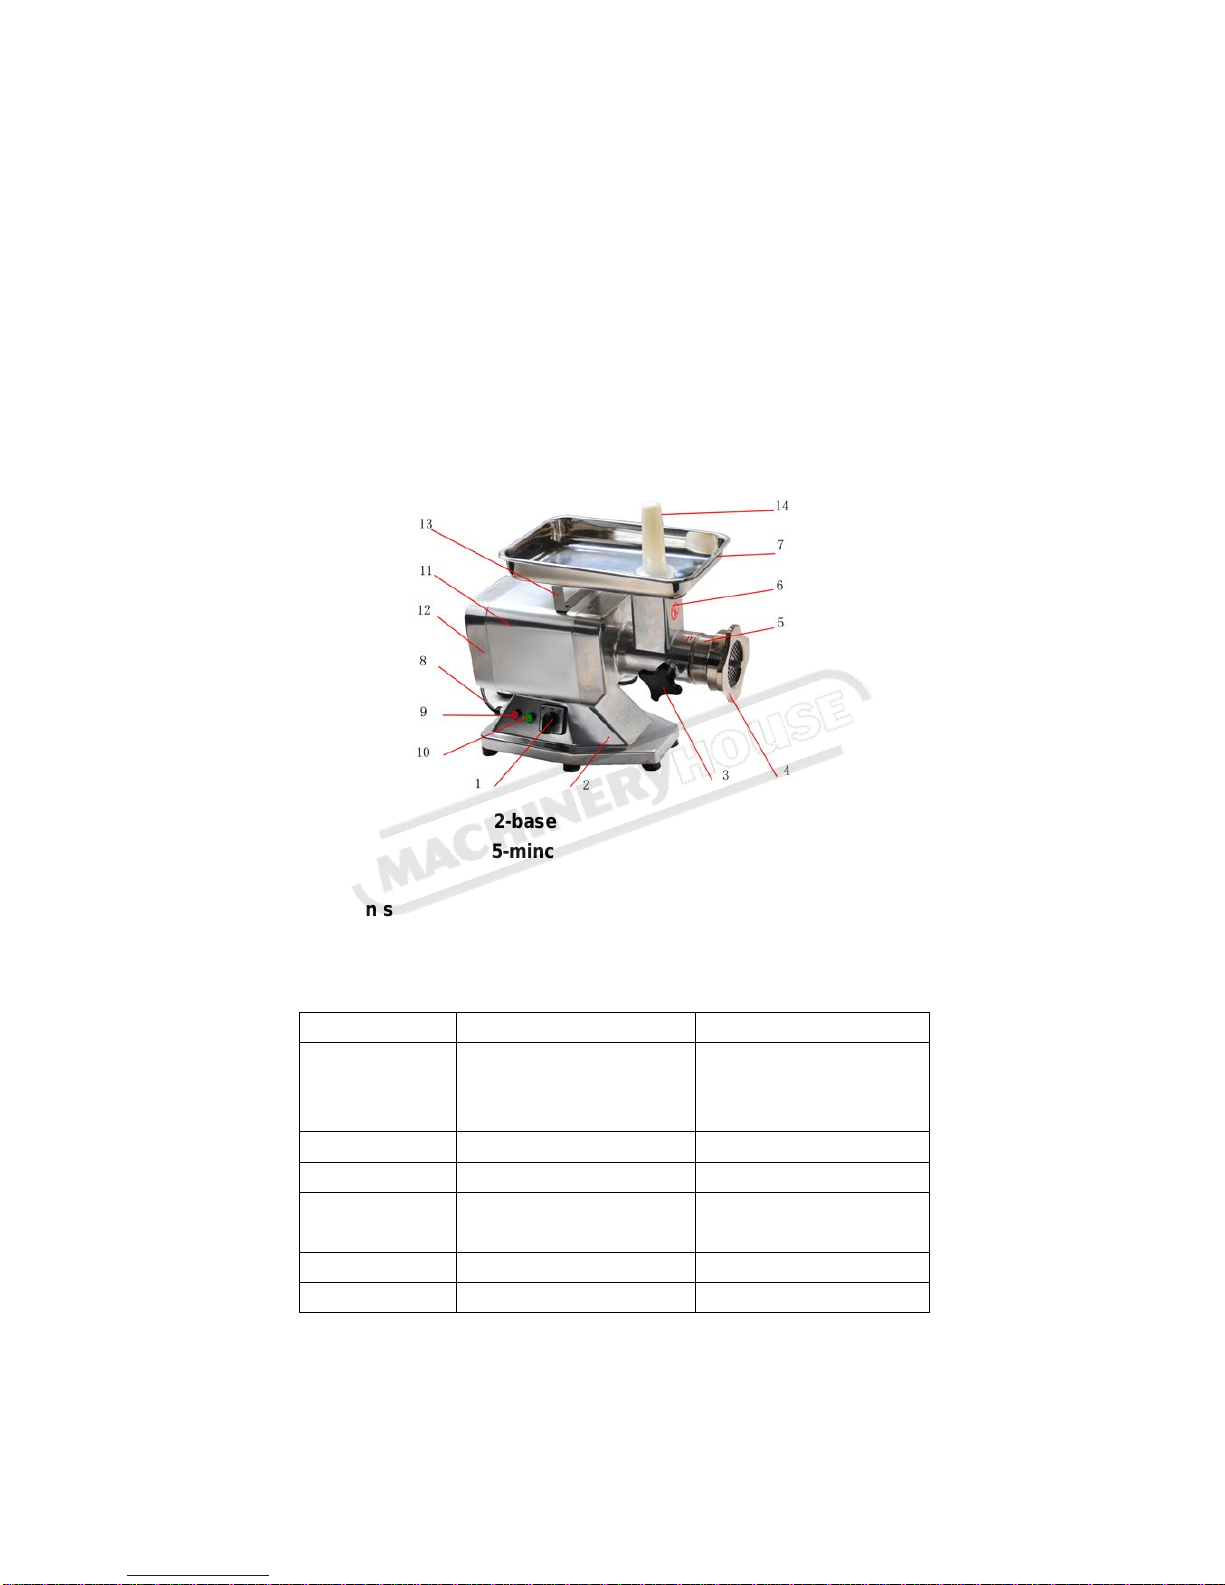
1.3 APPLIANCE DESCRIPTION
1.3.1 GENERAL DESCRIPTION
We have designed and manufactured the MM-12/MM-22 with
A high level of safety when using, cleaning and servicing
A high level of hygiene thanks to a meticulous selection of the materials that come in contact with