8
How to Assemble and Operate the Vacuum
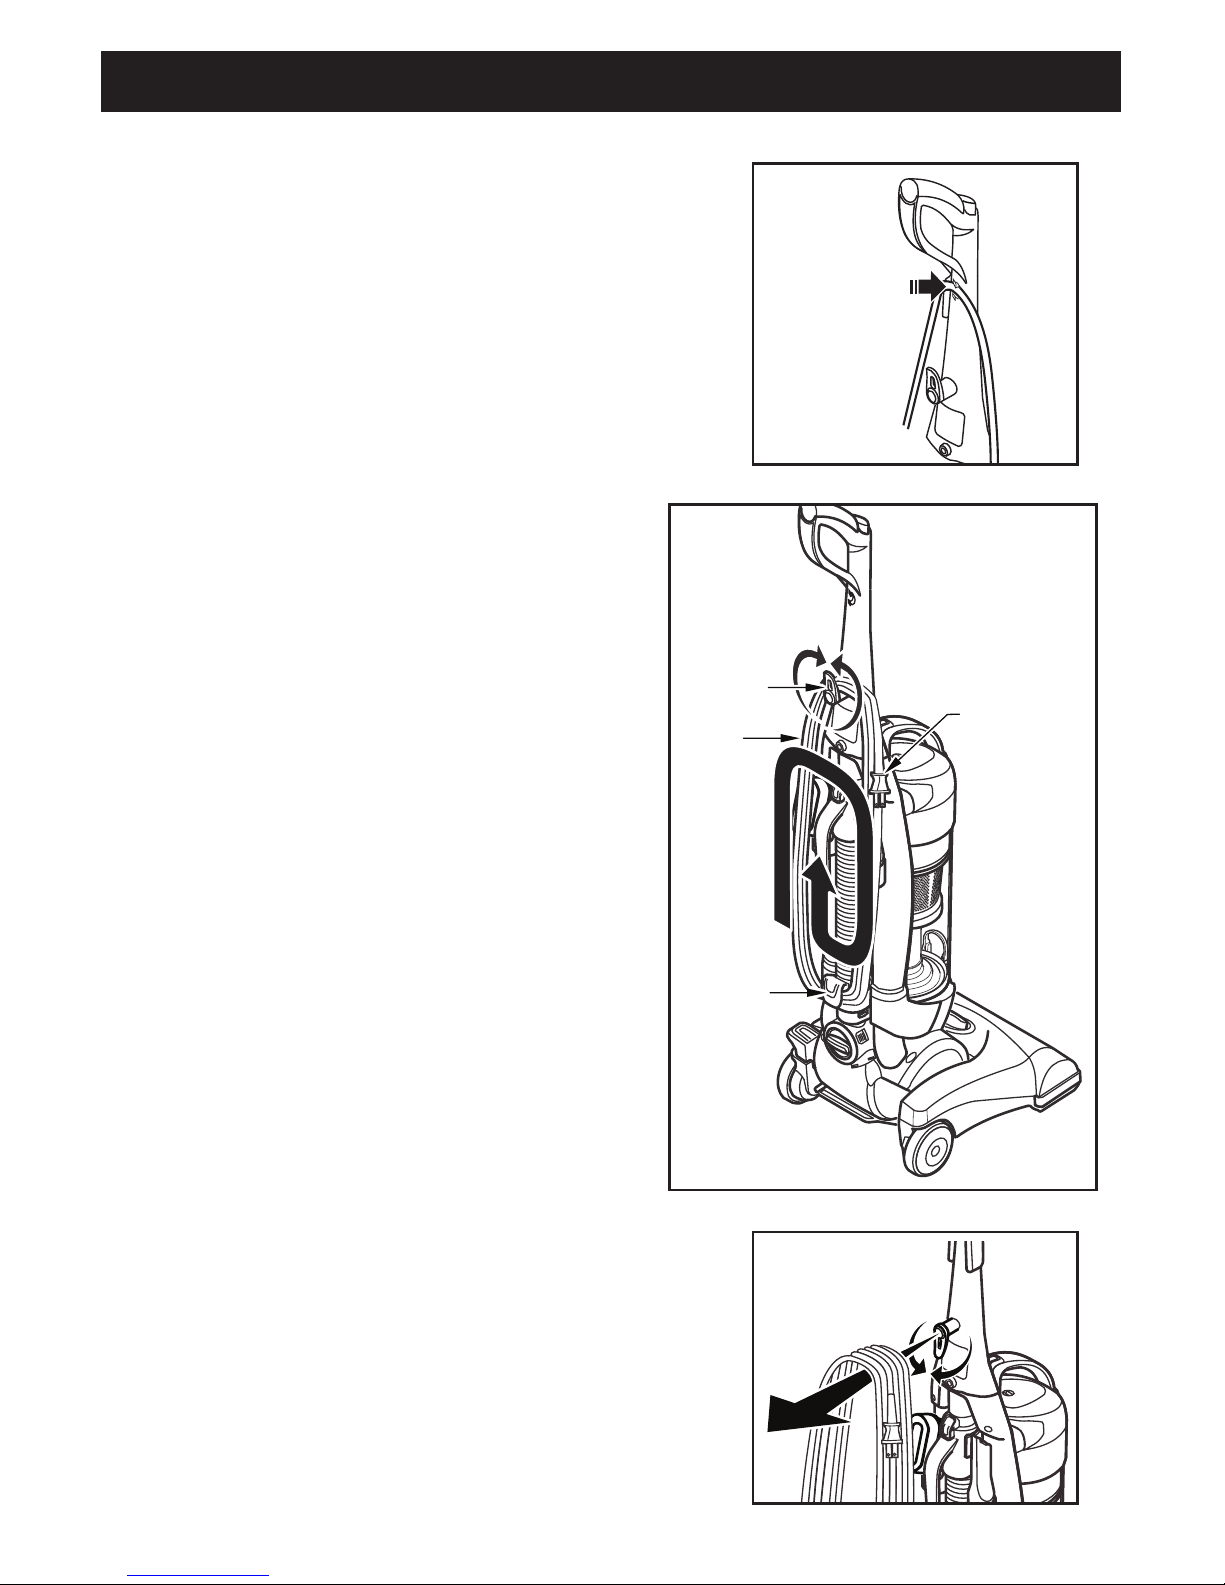
Fig. 2
Fig. 3
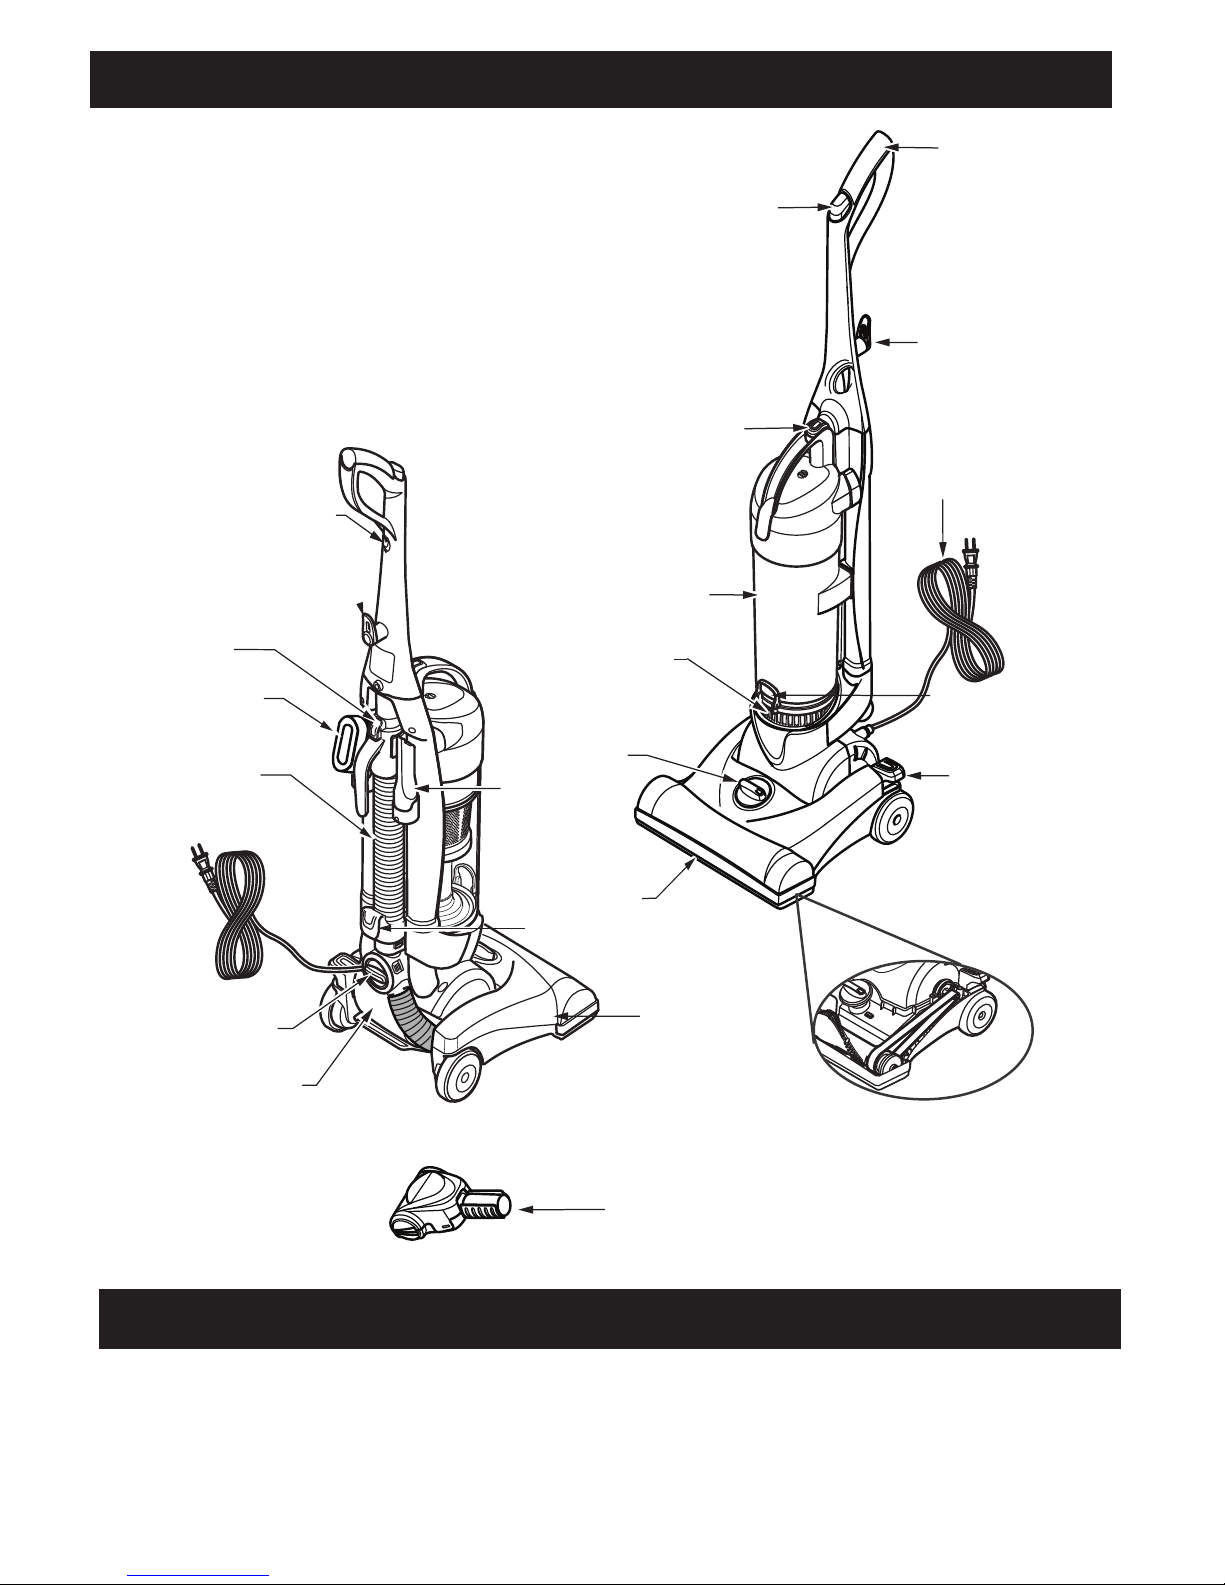
Carpet Height Adjustment
Tool Activation Dial
– Floor Position
Reclining the Handle
IMPORTANT: The height adjustment must be set while the vacuum is in the upright position.
The nozzle will not engage into the selected position until the handle is reclined to the operation
position.
When vacuuming floors, turn the tool
activation dial to the FLOOR position as
shown in (Fig. 2).
Locate the height adjustment dial on the top of the
vacuum nozzle (Fig. 1). There are five carpet height
settings designed for numerous flooring surfaces.
High Plush carpet
Med-High Medium pile carpet
Med General setting
Med-Low Hard floors
Low Low pile carpet
If it becomes difficult to push the vacuum across the
carpet, adjust the dial to a higher carpet setting.
Press the handle release pedal with your foot
to recline the handle (Fig. 3).
To select carpet height setting:
Select a height setting by turning the
HEIGHT ADJUST knob located on the
nozzle.
Attention: Refer to your carpet
manufacturer’s cleaning
recommendations. Some more delicate
carpets may require that they be
vacuumed with the brushroll turned off to
prevent carpet damage.
SUGGESTED HEIGHT SETTINGS:
There are five (5) height settings on
the vacuum cleaner. You may need to
raise the height to make some jobs easier,
such as scatter rugs and some deep pile
carpets, and to prevent the vacuum
cleaner from shutting off.
CARPET HEIGHT SELECTION AND SETTINGS
Release the handle by pressing down on
the handle release pedal with your foot
and pulling back and down on the handle
with your hand.
RELEASING THE HANDLE
-9-
NOTE: The nozzle will not engage into the
selected position until the vacuum cleaner
handle is lowered to the operating position.
When vacuuming floors, verify that the
Floor/Tools Selector Valveis in the Floor
position as shown in (Fig. 1).
(Figure 1)
F
L
O
O
R
T
O
O
L
S
FLOOR
TOOLS
FLOOR/TOOLS SELECTOR VALVE - FLOOR POSITION
To select carpet height setting:
Select a height setting by turning the
HEIGHT ADJUST knob located on the
nozzle.
Attention: Refer to your carpet
manufacturer’s cleaning
recommendations. Some more delicate
carpets may require that they be
vacuumed with the brushroll turned off to
prevent carpet damage.
SUGGESTED HEIGHT SETTINGS:
There are five (5) height settings on
the vacuum cleaner. You may need to
raise the height to make some jobs easier,
such as scatter rugs and some deep pile
carpets, and to prevent the vacuum
cleaner from shutting off.
CARPET HEIGHT SELECTION AND SETTINGS
Release the handle by pressing down on
the handle release pedal with your foot
and pulling back and down on the handle
with your hand.
RELEASING THE HANDLE
-9-
NOTE: The nozzle will not engage into the
selected position until the vacuum cleaner
handle is lowered to the operating position.
When vacuuming floors, verify that the
Floor/Tools Selector Valveis in the Floor
position as shown in (Fig. 1).
(Figure 1)
FLOOR/TOOLS SELECTOR VALVE - FLOOR POSITION
-11-
WARNING
Personal Injury Hazard
Use care if vacuum cleaner is placed
on stairs. If it falls, personal injury or
property damage could result. Edge
Cleaning
* Always clean attachments before using on fabrics.
= Applicable
ATTACHMENT
CREVICE TOOL
DUSTING BRUSH
HANDHELD TURBO BRUSH
Between
Furniture* Cushions* Drapes* Stairs
CLEANING AREA
(Figure 2)
Edge Cleaning
Guide the right side of the nozzle from the user’s
perspective along the wall or stationary furniture for
the best edge cleaning (Fig. 4).
Fig. 4