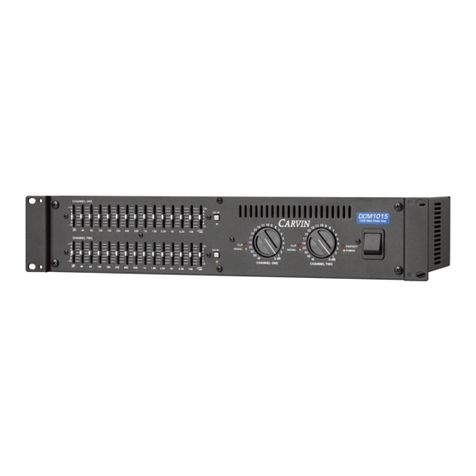
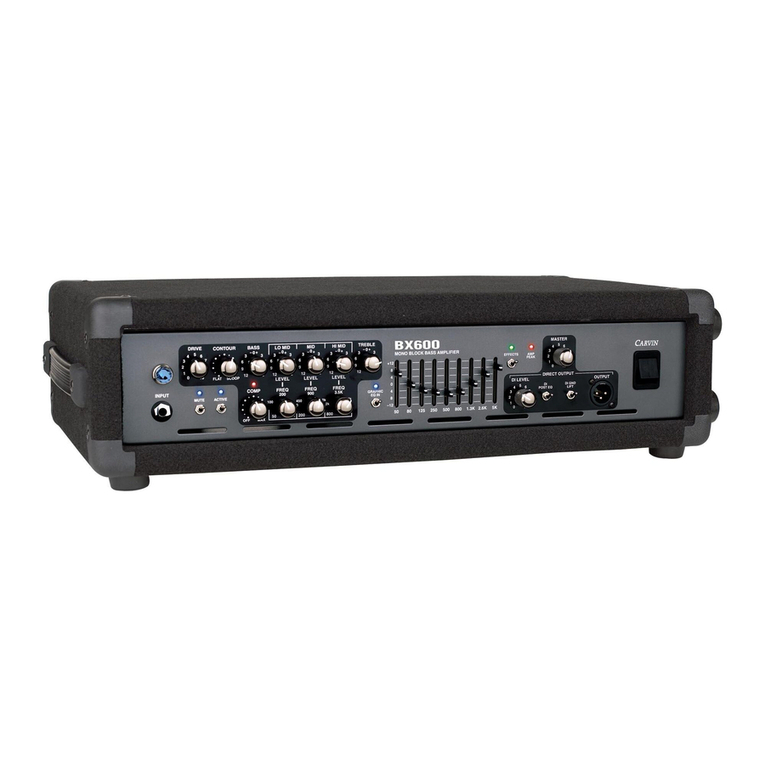
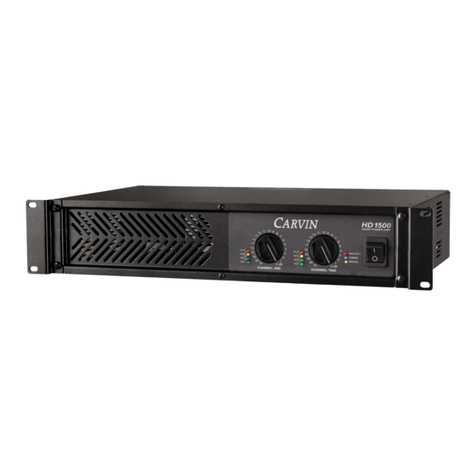
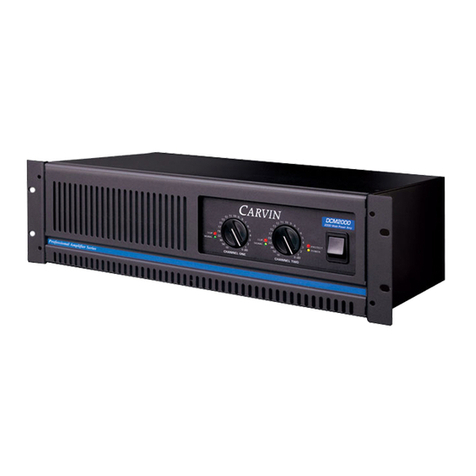
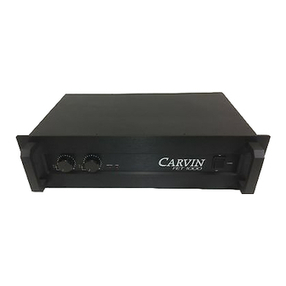
Parts list for HT760M Power Amplifier Carvin P/N
Binding Post, 2-way, Red/Black.................................................03-10450
Cover, Black 18GA Steel ............................................................10-82005
Chassis......................................................................................10-07509
Fan, 24VDC 80mm.....................................................................70-02408
Fan Guard, 80x80mm................................................................03-90080
Handle, 2-space rack.................................................................10-11120
Knob, Black, 1.25” DIA..............................................................07-09001
Stand-off, Al, 1.5” Hex, 6-32......................................................03-63315
Toroid insulator pad 3.8” OD.....................................................03-15004
Front cover.............................................................................10-07501-2
Rear label ..................................................................................77-07508
Power cord (120V)....................................................................05-01603
Power cord (230V)....................................................................05-01903
10 Amp Circuit breaker (120V)..................................................70-28110
6 Amp Circuit breaker (230V)....................................................70-28106
Toroid (120V) ............................................................................15-75160
Toroid (230V) ............................................................................15-75260
C1, Capacitor 10KµF 63V, Poly 20%.........................................42-10363
C2B, Capacitor 10KµF 63V, Poly 20%.......................................42-10363
R30, 1/4W Resistor 47K, .35” prep. 5% Carbon......................50-47045
Parts list for Printed Cicuit Card
Ref. Des. Description Carvin P/N
A1 IC Op Amp NE5532 Linear Output 60-55320
A2 IC Op Amp MC4558 CP1 Dual HFREQ 60-45580
A3 IC Op Amp NE5532 Linear Output 60-55320
A4 IC Op Amp NE5532 Linear Output 60-55320
A5 IC Op Amp MC4558 CP1 Dual HFREQ 60-45580
A6 IC Op Amp MC4558 CP1 Dual HFREQ 60-45580
A7 IC Op Amp MC4558 CP1 Dual HFREQ 60-45580
A8 IC Op Amp NE5532 Linear Output 60-55320
BP1 Binding Post Red/Black Combo 03-10400
BP2 Binding Post Red/Black Combo 03-10400
BR1 Diode Bridge AC/DC PCB MTG 60-35041
C3 Capacitor 1000µF 35V Electrolytic 20% 47-10235
C4 Capacitor 1000µF 35V Electrolytic 20% 47-10235
C5 Capacitor 0.047µF 100V Poly 10% 46-47312
C6 Capacitor 0.047µF 100V Poly 10% 46-47312
C7 Capacitor 220µF 50V Electrolytic 20% 47-22151
C8 Capacitor 10µF 50V Electrolytic 20% 47-10051
C9 Capacitor 0.047µF 100V Poly 10% 46-47312
C10 Capacitor 0.047µF 100V Poly 10% 46-47312
C11 Capacitor 0.047µF 100V Poly 10% 46-47312
C15 Capacitor 0.047µF 100V Poly 10% 46-47312
C16 Capacitor 0.047µF 100V Poly 10% 46-47312
C17 Capacitor 0.047µF 100V Poly 10% 46-47312
C18 Capacitor 470µF 25V Electrolytic 20% 47-47125
C100 Capacitor 27PF 500V Ceramic 5% 45-27052
C101 Capacitor 27PF 500V Ceramic 5% 45-27052
C102 Capacitor 22µF 50V Electrolytic 20% 47-22051
C104 Capacitor 27PF 500V Ceramic 5% 45-27052
C105 Capacitor 0.047µF 100V Poly 10% 46-47312
C110 Capacitor 0.001µF 100V Poly 10% 46-10212
C111 Capacitor 22µF 50V Electrolytic 20% 47-22051
C115 Capacitor 27PF 500V Ceramic 5% 45-27052
C116 Capacitor 56PF 500V Ceramic 5% 45-56052
C117 Capacitor 120PF 500V Ceramic 5% 45-12052
C118 Capacitor 10µF 63V Electrolytic 20% 47-10061
C119 Capacitor 0.047µF 100V Poly 10% 46-47312
C120 Capacitor 0.001µF 100V Poly 10% 46-10212
C121 Capacitor 0.068µF 100V Poly 10% 46-68312
C200 Capacitor 27PF 500V Ceramic 5% 45-27052
C201 Capacitor 27PF 500V Ceramic 5% 45-27052
C202 Capacitor 22µF 50V Electrolytic 20% 47-22051
C204 Capacitor 27PF 500V Ceramic 5% 45-27052
C205 Capacitor 0.047µF 100V Poly 10% 46-47312
C210 Capacitor 0.001µF 100V Poly 10% 46-10212
C211 Capacitor 22µF 50V Electrolytic 20% 47-22051
C215 Capacitor 27PF 500V Ceramic 5% 45-27052
C216 Capacitor 56PF 500V Ceramic 5% 45-56052
C217 Capacitor 120PF 500V Ceramic 5% 45-12052
C218 Capacitor 0.047µF 100V Poly 10% 46-47312
C219 Capacitor 0.047µF 100V Poly 10% 46-47312
C220 Capacitor 0.001µF 100V Poly 10% 46-10212
C221 Capacitor 0.068µF 100V Poly 10% 46-68312
Ref. Des. Description Carvin P/N
D1 Diode 1N4003 Rect Gen 1A 200V 60-40030
D2 Diode 1N4003 Rect Gen 1A 200V 60-40030
D3 Diode 1N4003 Rect Gen 1A 200V 60-40030
D4 Diode 1N4003 Rect Gen 1A 200V 60-40030
D5 Diode 1N4003 Rect Gen 1A 200V 60-40030
D6 Diode 1N4003 Rect Gen 1A 200V 60-40030
D7 Diode 1N4003 Rect Gen 1A 200V 60-40030
D8 LED Red small #204HD 3mm T-1.0 60-75320
D9 LED Yellow small #204YD 3mm T-1.0 60-75340
D10 Diode 1N4003 Rect Gen 1A 200V 60-40030
D11 Diode 1N4003 Rect Gen 1A 200V 60-40030
D12 Diode 1N4003 Rect Gen 1A 200V 60-40030
D13 Diode 1N4003 Rect Gen 1A 200V 60-40030
D100 Diode 1N4003 Rect Gen 1A 200V 60-40030
D101 Diode 1N4003 Rect Gen 1A 200V 60-40030
D102 LED Green small #204GD 3mm T-1.0 60-75330
D103 LED Red small #204HD 3mm T-1.0 60-75320
D104 LED Red small #204HD 3mm T-1.0 60-75320
D106 Diode 1N4003 Rect Gen 1A 200V 60-40030
D107 Diode 1N4003 Rect Gen 1A 200V 60-40030
D108 Diode 1N4003 Rect Gen 1A 200V 60-40030
D109 Diode 1N4003 Rect Gen 1A 200V 60-40030
D200 Diode 1N4003 Rect Gen 1A 200V 60-40030
D201 Diode 1N4003 Rect Gen 1A 200V 60-40030
D202 LED Green small #204GD 3mm T-1.0 60-75330
D203 LED Red small #204HD 3mm T-1.0 60-75320
D204 LED Red small #204HD 3mm T-1.0 60-75320
D205 Diode 1N4003 Rect Gen 1A 200V 60-40030
D206 Diode 1N4003 Rect Gen 1A 200V 60-40030
D207 Diode 1N4003 Rect Gen 1A 200V 60-40030
D208 Diode 1N4003 Rect Gen 1A 200V 60-40030
D209 Diode 1N4003 Rect Gen 1A 200V 60-40030
H1-A Header 4 Pin AMP 9A 600V PCB MTG 23-08604
H1-B Header 4 Pin AMP 9A 600V PCB MTG 23-08604
H2 Header 2 Pin Vert Panduit PCB MTG 23-10002
H2-A Header 4 Pin Vert SHS 2.5mm PCB MTG 23-11004
H2-B Header 4 Pin Vert SHS 2.5mm PCB MTG 23-11004
H3-A Header 10 Pin Vert SHS 2.5mm PCB MTG 23-11010
H3-B Header 10 Pin Vert SHS 2.5mm PCB MTG 23-11010
H4-A Header 10 Pin Vert SHS 2.5mm PCB MTG 23-11010
H4-B Header 10 Pin Vert SHS 2.5mm PCB MTG 23-11010
H5 Header 2 Pin Vert Panduit PCB MTG 23-10002
H6-A Header 4 Pin AMP 9A 600V PCB MTG 23-08604
H6-B Header 4 Pin AMP 9A 600V PCB MTG 23-08604
H7 Header 9 Pin AMP 9A 600V PCB MTG 23-08609
J100 XLR Jack Female Neutrik Vert PCB MTG 21-40000
J101 Phone Jack, 1/4” 7 Pin Plastic, 24mm Tall 21-06457
J102 Phone Jack, 1/4” 3 Pin Plastic, 24mm Tall 21-06453
J200 XLR Jack Female Neutrik Vert PCB MTG 21-40000
J201 Phone Jack, 1/4” 7 Pin Plastic, 24mm Tall 21-06457
J202 Phone Jack, 1/4” 3 Pin Plastic, 24mm Tall 21-06453
K100 Relay 24V12A SPDT SIEMENS PCB MGT 70-05712
K200 Relay 24V12A SPDT SIEMENS PCB MGT 70-05712
L100 Inductor 3.3µH Air Core Spool 15-00165
L200 Inductor 3.3µH Air CoreSpool 15-00165
OP1 Opto Isolator VTL5C2 60-50253
OP2 Opto Isolator VTL5C2 60-50253
P100 Pot. B10Kx2 41Clk Brkt Rot Knurled 90° 71-10301
P101 Pot. Trimmer 5K Vert PCB MTG 71-25000
P200 Pot. B10Kx2 41Clk Brkt Rot Knurled 90° 71-10301
P201 Pot. Trimmer 5K Vert PCB MTG 71-25000
Q1 Transistor Darlington NPN MPSA14 60-00014
Q2 Transistor 2N5400 PNP AMP TO-92 60-54000
Q100 Transistor Darlington NPN MPSA14 60-00014
Q101 Transistor TIP31C 3A 100V NPN TO-220 60-31000
Q102 Transistor MPSW42 HV 1.0W NPN T0-237 60-00042
Q103 Transistor CENW92 HV PNP 1.0W TO-92 60-00092
Q104 Transistor TIP32C 3A 100V PNP TO-220 60-32000
Q105 Transistor TIP31C 3A 100V NPN TO-220 60-31000
Q106 Transistor TIP31C 3A 100V NPN TO-220 60-31000
Q107 Transistor MJL21194 NPN 16A 250V 200W 60-21194
Q108 Transistor MJL21194 NPN 16A 250V 200W 60-21194
Q109 Transistor MJL21193 PNP 16A 250V 200W 60-21193
Q110 Transistor MJL21193 PNP 16A 250V 200W 60-21193
Ref. Des. Description Carvin P/N
Q200 Transistor Darlington NPN MPSA14 60-00014
Q202 Transistor MPSW42 HV 1.0W NPN T0-237 60-00042
Q203 Transistor CENW92 HV PNP 1.0W TO-92 60-00092
Q204 Transistor TIP32C 3A 100V PNP TO-220 60-32000
Q205 Transistor TIP31C 3A 100V NPN TO-220 60-31000
Q206 Transistor TIP31C 3A 100V NPN TO-220 60-31000
Q207 Transistor MJL21194 NPN 16A 250V 200W 60-21194
Q208 Transistor MJL21194 NPN 16A 250V 200W 60-21194
Q209 Transistor MJL21193 PNP 16A 250V 200W 60-21193
Q210 Transistor MJL21193 PNP 16A 250V 200W 60-21193
R1 1/4W Resistor 2.2K .35” prep. 5% Carbon 50-22035
R2 1/4W Resistor 3.3K .35” prep. 5% Carbon 50-33035
R3 1/4W Resistor 100K .35” prep. 5% Carbon 50-10055
R4 1/4W Resistor 150Ω.35” prep. 5% Carbon 50-15025
R5 1/4W Resistor 39K .35” prep. 5% Carbon 50-39045
R6 1/4W Resistor 39K .35” prep. 5% Carbon 50-39045
R7 1/4W Resistor 470K .35” prep. 5% Carbon 50-47055
R8 1/4W Resistor 470K .35” prep. 5% Carbon 50-47055
R9 1/4W Resistor 22K .35” prep. 5% Carbon 50-22045
R10 1/4W Resistor 22K .35” prep. 5% Carbon 50-22045
R11 1/4W Resistor 20K .35” prep. 5% Carbon 50-20045
R12 1/4W Resistor 6.8K .35” prep. 5% Carbon 50-68035
R13 1/4W Resistor 2.2M .35” prep. 5% Carbon 50-22065
R14 1/4W Resistor 20K .35” prep. 5% Carbon 50-20045
R15 1/4W Resistor 10K .35” prep. 5% Carbon 50-10045
R16 Not Used
R17 1/4W Resistor 22K .35” prep. 5% Carbon 50-22045
R18 1/4W Resistor 1K .35” prep. 5% Carbon 50-10035
R19 1/4W Resistor 10K .35” prep. 5% Carbon 50-10045
R20 1/4W Resistor 10K .35” prep. 5% Carbon 50-10045
R22 1/4W Resistor 5.6K .35” prep. 5% Carbon 50-56035
R23 1/4W Resistor 470K .35” prep. 5% Carbon 50-47055
R24 1/4W Resistor 10K .35” prep. 5% Carbon 50-10045
R25 1/4W Resistor 1K .35” prep. 5% Carbon 50-10035
R26 1/4W Resistor 4.7K .35” prep. 5% Carbon 50-47035
R28 1/4W Resistor 220Ω.35” prep. 5% Carbon 50-22025
R31 1/4W Resistor 100K .35” prep. 5% Carbon 50-10055
R100 1/4W Resistor 10K .35” prep. 5% Carbon 50-10045
R101 1/4W Resistor 10K .35” prep. 5% Carbon 50-10045
R102 1/4W Resistor 22K .35” prep. 5% Carbon 50-22045
R103 1/4W Resistor 22K .35” prep. 5% Carbon 50-22045
R104 1/4W Resistor 2.2K .35” prep. 5% Carbon 50-22035
R105 1/4W Resistor 220Ω.35” prep. 5% Carbon 50-22025
R106 1/4W Resistor 470K .35” prep. 5% Carbon 50-47055
R107 1/4W Resistor 470K .35” prep. 5% Carbon 50-47055
R108 1/4W Resistor 1K .35” prep. 5% Carbon 50-10035
R109 Not Used
R110 1/4W Resistor 470K .35” prep. 5% Carbon 50-47055
R111 1/4W Resistor 470Ω.35” prep. 5% Carbon 50-47025
R112 1/4W Resistor 1.5K .35” prep. 5% Carbon 50-15035
R115 1/4W Resistor 10K .35” prep. 5% Carbon 50-10045
R116 1/4W Resistor 10K .35” prep. 5% Carbon 50-10045
R117 1/4W Resistor 2.2K .35” prep. 5% Carbon 50-22035
R118 1/4W Resistor 47K .35” prep. 5% Carbon 50-47045
R119 1/4W Resistor 4.7K .35” prep. 5% Carbon 50-47035
R120 1/4W Resistor 100Ω.35” prep. 5% Carbon 50-10025
R121 1/4W Resistor 100Ω.35” prep. 5% Carbon 50-10025
R122 1/4W Resistor 4.7K .35” prep. 5% Carbon 50-47035
R123 1/4W Resistor 680Ω.35” prep. 5% Carbon 50-68025
R124 1/4W Resistor 4.7K .35” prep. 5% Carbon 50-47035
R125 1/4W Resistor 2.2K .35” prep. 5% Carbon 50-22035
R126 1/4W Resistor 1K .35” prep. 5% Carbon 50-10035
R127 1/4W Resistor 680Ω.35” prep. 5% Carbon 50-68025
R128 1/4W Resistor 2.2K .35” prep. 5% Carbon 50-22035
R129 1/2W Resistor 4.7Ω0.5 prep. 5% Carbon 52-47005
R130 1/4W Resistor 150Ω.35” prep. 5% Carbon 50-15025
R131 1/2W Resistor 4.7Ω0.5 prep. 5% Carbon 52-47005
R132 5W Resistor 0.22ΩVert 5% Sand Bar 55-02205
R133 5W Resistor 0.22ΩVert 5% Sand Bar 55-02205
R134 5W Resistor 0.22ΩVert 5% Sand Bar 55-02205
R135 5W Resistor 0.22ΩVert 5% Sand Bar 55-02205
R136 1/4W Resistor 1K .35” prep. 5% Carbon 50-10035
R137 1/4W Resistor 10K .35” prep. 5% Carbon 50-10045
R138 1/4W Resistor 100K .35” prep. 5% Carbon 50-10055
Ref. Des. Description Carvin P/N
R139 1/4W Resistor 100K .35” prep. 5% Carbon 50-10055
R140 1/4W Resistor 33K .35” prep. 5% Carbon 50-33045
R144 2W Resistor 10Ω0.8 prep. 5% Metal 54-10015
R150 2W Resistor 10Ω0.8 prep. 5% Metal 54-10015
R200 1/4W Resistor 10K .35” prep. 5% Carbon 50-10045
R201 1/4W Resistor 10K .35” prep. 5% Carbon 50-10045
R202 1/4W Resistor 22K .35” prep. 5% Carbon 50-22045
R203 1/4W Resistor 22K .35” prep. 5% Carbon 50-22045
R204 1/4W Resistor 2.2K .35” prep. 5% Carbon 50-22035
R205 1/4W Resistor 220Ω.35” prep. 5% Carbon 50-22025
R206 1/4W Resistor 470K .35” prep. 5% Carbon 50-47055
R207 1/4W Resistor 470K .35” prep. 5% Carbon 50-47055
R208 1/4W Resistor 1K .35” prep. 5% Carbon 50-10035
R209 Not Used
R210 1/4W Resistor 470K .35” prep. 5% Carbon 50-47055
R212 1/4W Resistor 470Ω.35” prep. 5% Carbon 50-47025
R215 1/4W Resistor 10K .35” prep. 5% Carbon 50-10045
R216 1/4W Resistor 10K .35” prep. 5% Carbon 50-10045
R217 1/4W Resistor 2.2K .35” prep. 5% Carbon 50-22035
R218 1/4W Resistor 47K .35” prep. 5% Carbon 50-47045
R219 1/4W Resistor 4.7K .35” prep. 5% Carbon 50-47035
R220 1/4W Resistor 100Ω.35” prep. 5% Carbon 50-10025
R221 1/4W Resistor 100Ω.35” prep. 5% Carbon 50-10025
R222 1/4W Resistor 4.7K .35” prep. 5% Carbon 50-47035
R223 1/4W Resistor 680Ω.35” prep. 5% Carbon 50-68025
R224 1/4W Resistor 4.7K .35” prep. 5% Carbon 50-47035
R225 1/4W Resistor 2.2K .35” prep. 5% Carbon 50-22035
R226 1/4W Resistor 1K .35” prep. 5% Carbon 50-10035
R227 1/4W Resistor 680Ω.35” prep. 5% Carbon 50-68025
R228 1/4W Resistor 2.2K .35” prep. 5% Carbon 50-22035
R229 1/2W Resistor 4.7Ω0.5 prep. 5% Carbon 52-47005
R230 1/4W Resistor 150Ω.35” prep. 5% Carbon 50-15025
R231 1/2W Resistor 4.7Ω0.5 prep. 5% Carbon 52-47005
R232 5W Resistor 0.22ΩVert 5% Sand Bar 55-02205
R233 5W Resistor 0.22ΩVert 5% Sand Bar 55-02205
R234 5W Resistor 0.22ΩVert 5% Sand Bar 55-02205
R235 5W Resistor 0.22ΩVert 5% Sand Bar 55-02205
R236 1/4W Resistor 1K .35” prep. 5% Carbon 50-10035
R237 1/4W Resistor 10K .35” prep. 5% Carbon 50-10045
R238 1/4W Resistor 100K .35” prep. 5% Carbon 50-10055
R239 1/4W Resistor 100K .35” prep. 5% Carbon 50-10055
R240 1/4W Resistor 33K .35” prep. 5% Carbon 50-33045
R244 2W Resistor 10Ω0.8 prep. 5% Metal 54-10015
R250 2W Resistor 10Ω0.8 prep. 5% Metal 54-10015
S1 Switch DPDT Push, Vert Small PCB MTG 25-02201
S2 Switch DPDT Push, Vert Small PCB MTG 25-02201
S3 Switch DPDT Push, Vert Small PCB MTG 25-02201
S4 Switch DPDT Push, Vert Small PCB MTG 25-02201
VR1 Voltage Regulator 7815 +15V 2A 60-78150
VR2 Voltage Regulator 7915 -15V 2A 60-79150
VR3 Voltage Regulator 7915 -15V 2A 60-79150
CAUTION
RISK OF ELECTRIC SHOCK
DO NOT OPEN
SAFETY INSTRUCTIONS (EUROPEAN)
The conductors in the AC power cord are colored in accordance with the following code.
GREEN & YELLOW—Earth BLUE—Neutral BROWN—Live
U.K. MAIN PLUG WARNING: A molded main plug that has been cut off from the cord is
unsafe. NEVERUNDERANYCIRCUMSTANCESSHOULD YOUINSERTADAMAGED
OR CUT MAIN PLUG INTOA POWER SOCKET.
IMPORTANT! FOR YOUR PROTECTION, PLEASE READ THE FOLLOWING:
WATER AND MOISTURE: Appliance should not be used near water (near a bathtub, washbowl,
kitchen sink, laundry tub, in a wet basement, or near a swimming pool, etc). Care should be taken
so that objects do not fall and liquids are not spilled into the enclosure through openings.
POWERSOURCES: Theproductshouldbe connectedtoa powersupplyonly ofthetype described
in the operating instructions or as marked on the appliance.
GROUNDING OR POLARIZATION: Precautions should be taken so that the grounding or polar-
ization is not defeated.
POWER CORD PROTECTION: Power supply cords should be routed so that they are not likely
to be walked on or pinched by items placed upon or against them, paying particular attention
to cords at plugs, convenience receptacles, and the point where they exit from the appliance.
SERVICING: The user should not attempt to service the appliance beyond that described in the
operating instructions. All other servicing should be referred to qualified service personnel.
FUSING: If your unit is equipped with a fuse receptacle, replace only with the same type fuse.
Refer to replacement text on the unit for correct fuse type.
REFER SERVICING TO QUALIFIED SER-
VICE PERSONNEL! THIS UNIT CON-
TAINS HIGH VOLTAGE INSIDE!
CAUTION
RISK OF ELECTRIC SHOCK
REPLACEMENT PARTS LIST
This symbol is intended to
alert the user to the pres-
ence of uninsulated “dan-
gerous voltage” within the
product’s enclosure that may be of suf-
ficient magnitude to constitute a risk of
electric shock to persons.
This symbol is
intended to alert the
user to the presence of
important operating
and maintenance (servicing) instruc-
tions in the literature accompanying
the appliance.
LIMITED WARRANTY
Your Carvin product is guaranteed against failure for ONE YEAR unless otherwise stated. Carvin
will service and supply all parts at no charge to the customer providing the unit is under warranty.
Shippingcostsaretheresponsibilityofthecustomer. CARVINDOESNOTPAYFORPARTSORSER-
VICING OTHER THAN OUR OWN. A COPY OF THE ORIGINAL INVOICE IS REQUIRED TO VERIFY
YOURWARRANTY. Carvin assumesno responsibilityfor horndrivers or speakers damaged by this
unit.This warranty does not cover, andno liability is assumed, for damage due to: natural disasters,
accidents, abuse, loss of parts, lack of reasonable care, incorrect use, or failure to follow instruc-
tions. Thiswarrantyisinlieuofallotherwarranties,expressedorimplied.Norepresentativeorperson
is authorized to represent or assume for Carvin any liability in connection with the sale or servicing
ofCarvinproducts.
CARVINSHALLNOTBELIABLEFORINCIDENTALORCONSEQUENTIALDAMAGES.
When RETURNING merchandise to the factory, you may call for a return authorization number.
Describe in writing each problem. If your unit is out of warranty, you will be charged the current
FLAT RATE for parts and labor to bring your unit up to factory specifications.
HELP SECTION
1) WILL NOT TURN ON
Check the power to the unit. Check for tripped main circuit breakers, unplugged extension cords
or power-strip switches that may be turned off. Check the amps circuit breaker on the rear panel.
If the black curved center button is in the out position, push it in to reset. If the breaker contin-
ues to trip, check your speaker cables and total speaker impedance. If the amps circuit breaker
will not reset, then the amp will require servicing.
2) MAINTAINING YOUR EQUIPMENT
Avoidspilling liquids or allowing any other foreign matter inside the unit. Thepanelofyourunitcan
be wiped from time to time with a dry or slightly damp cloth in order to remove dust and bring back
the new look.
As with all pro gear, avoid prolonged use in caustic environments (salt air). When
used in such an environment, be sure the amplifier is adequately protected by rack, covers, etc..
