SHENZHEN FLYING INDUSTRY DEVELOPMENT CO.,LTD
Http://www.carymart.com E-Mail: sale@carymart.com
1) Setting control mode Toggle: Turn on the first bit of the dip switch.
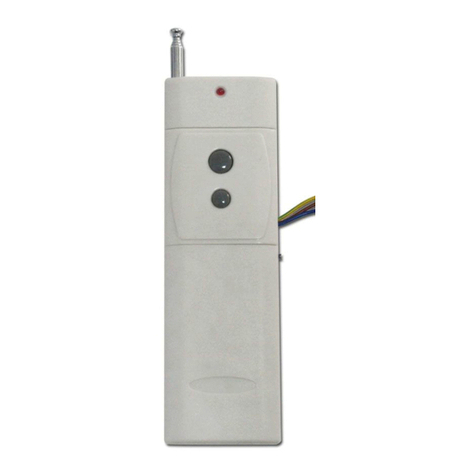
Control mode Toggle (with transmitter CC-4): Press -> On; Press again -> Off.
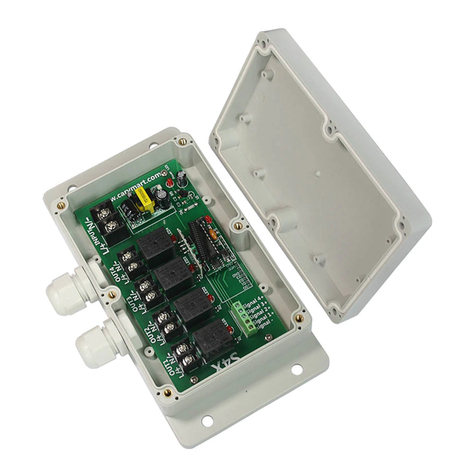
Press button A of the transmitter: Terminals OUT1 outputs DC power, the lamp1 is turned on.
Press button A again: Terminals OUT1 stops outputting, the lamp1 is turned off.
…
Press button D of the transmitter: Terminals OUT4 outputs DC power, the lamp 4 is turned on.
Press button D again: Terminals OUT4 stops outputting, the lamp 4 is turned off.
2) Setting control mode Momentary: Turn on the first and the second bits of the dip switch.
Control mode Momentary (with transmitter CC-4): Press and hold -> On; Release -> Off.
Press and hold button Aof the transmitter: Terminals OUT1 outputs DC power, the lamp 1 is turned on.
Release button A of the transmitter: Terminals OUT1 stops outputting, the lamp 1 is turned off.
….
Press and hold button D of the transmitter: Terminals OUT4 outputs DC power, the lamp 4 is turned on.
Release button D of the transmitter: Terminals OUT4 stops outputting, the lamp 4 is turned off.
3) Setting control mode Latched: Turn on the second bit of the dip switch.
Control mode Latched (with transmitter CC-4): Press -> On, Press another button -> Off.
Press button A of the transmitter: Terminals OUT1 outputs DC power, the lamp 1 is turned on. Other three terminals stop outputting, other three
lamps are turned off.
Press button B of the transmitter: Terminals OUT2 outputs DC power, the lamp 2 is turned on. Other three terminals stop outputting, other three
lamps are turned off.
Press button C of the transmitter: Terminals OUT3 outputs DC power, the lamp 3 is turned on. Other three terminals stop outputting, other three
lamps are turned off.
Press button D of the transmitter: Terminals OUT4 outputs DC power, the lamp 4 is turned on. Other three terminals stop outputting, other three
lamps are turned off.
Wired control terminals:
The receiver has wired control terminals, you can connect external devices, sensors, limit switches or manual switches to trigger the receiver.
1) By low level signal:
You can connect external devices (with low level output signal) to trigger the receiver.
When the external device outputs low level signal to terminal “Signal –” and terminal “Signal 1+”, Terminals OUT1 outputs DC power, the lamp 1 is
turned on.
When the external device stops to output signal, Terminals OUT1 stops outputting, the lamp 1 is turned off.
When the external device outputs low level signal to manual terminal “Signal –” and terminal “Signal 2+”, Terminals OUT2 outputs DC power, the
lamp 2 is turned on.
When the external device stops to output signal, Terminals OUT2 stops outputting, the lamp 2 is turned off.
When the external device outputs low level signal to manual terminal “Signal –” and terminal “Signal 3+”, Terminals OUT3 outputs DC power, the
lamp 3 is turned on.
When the external device stops to output signal, Terminals OUT3 stops outputting, the lamp 3 is turned off.
When the external device outputs low level signal to manual terminal “Signal –” and terminal “Signal 4+”, Terminals OUT4 outputs DC power, the
lamp 4 is turned on.
When the external device stops to output signal, Terminals OUT4 stops outputting, the lamp 4 is turned off.
2) By NO/NC contact:
You can connect manual switches (with NO/NC contact) to trigger the receiver.
When connect terminal “Signal –” and terminal “Signal 1+”, Terminals OUT1 outputs DC power, the lamp 1 is turned on.
And when disconnect terminals “Signal –” and terminal “Signal 1+”, Terminals OUT1 stops outputting, the lamp 1 is turned off.
When connect terminal “Signal –” and terminal “Signal 2+”, Terminals OUT2 outputs DC power, the lamp 2 is turned on.
And when disconnect terminals “Signal –” and terminal “Signal 2+”, Terminals OUT2 stops outputting, the lamp 2 is turned off.
When connect terminal “Signal –” and terminal “Signal 3+”, Terminals OUT3 outputs DC power, the lamp 3 is turned on.
And when disconnect terminals “Signal –” and terminal “Signal 3+”, Terminals OUT3 stops outputting, the lamp 3 is turned off.
When connect terminal “Signal –” and terminal “Signal 4+”, Terminals OUT4 outputs DC power, the lamp 4 is turned on.
And when disconnect terminals “Signal –” and terminal “Signal 4+”, Terminals OUT4 stops outputting, the lamp 4 is turned off.
Setting feedback function:
If you want to switch on a feedback function, you need to turn on the third bit of the dip switch.
When the receiver gets the signal of transmitter, it will immediately send a return signal to the transmitter. When the transmitter receive the feedback
signal of the receiver, the transmitter will exude a buzzing sound like “D~”which means it receive the feedback signal successfully.
How to pair the transmitter to the receiver:
1) Press the learning button of receiver for 1- 2 seconds; signal LED on the receiver is turned on. The receiver starts the LEARNING procedure.
2) Press any one button on transmitter, if signal LED flashes twice, it means learning is successful.
3) The receiver can learn several transmitters with different codes.
Delete all transmitters:
We have learned remote control to the receiver. If you don’t want the receiver to work with the remote control, you can delete all codes of remote
controls, which are stored in the receiver.
