649-5000513 Rev.1
ENGLISH
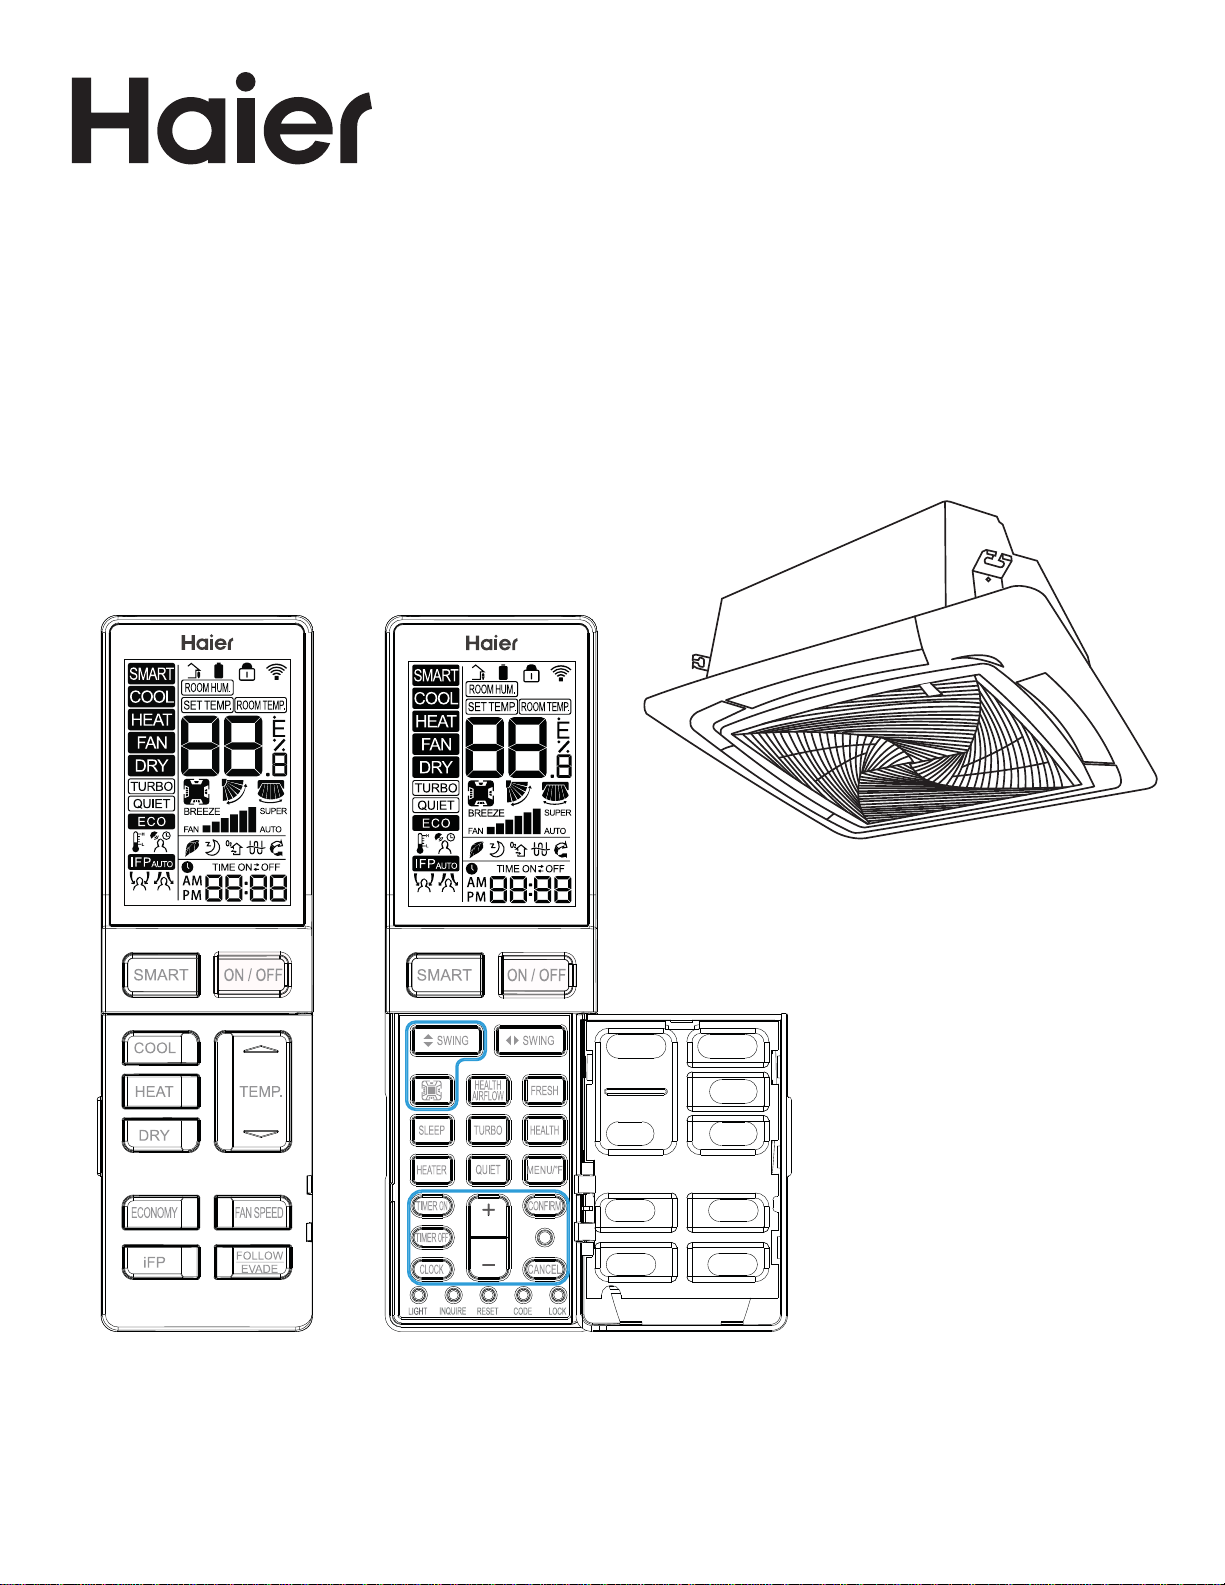
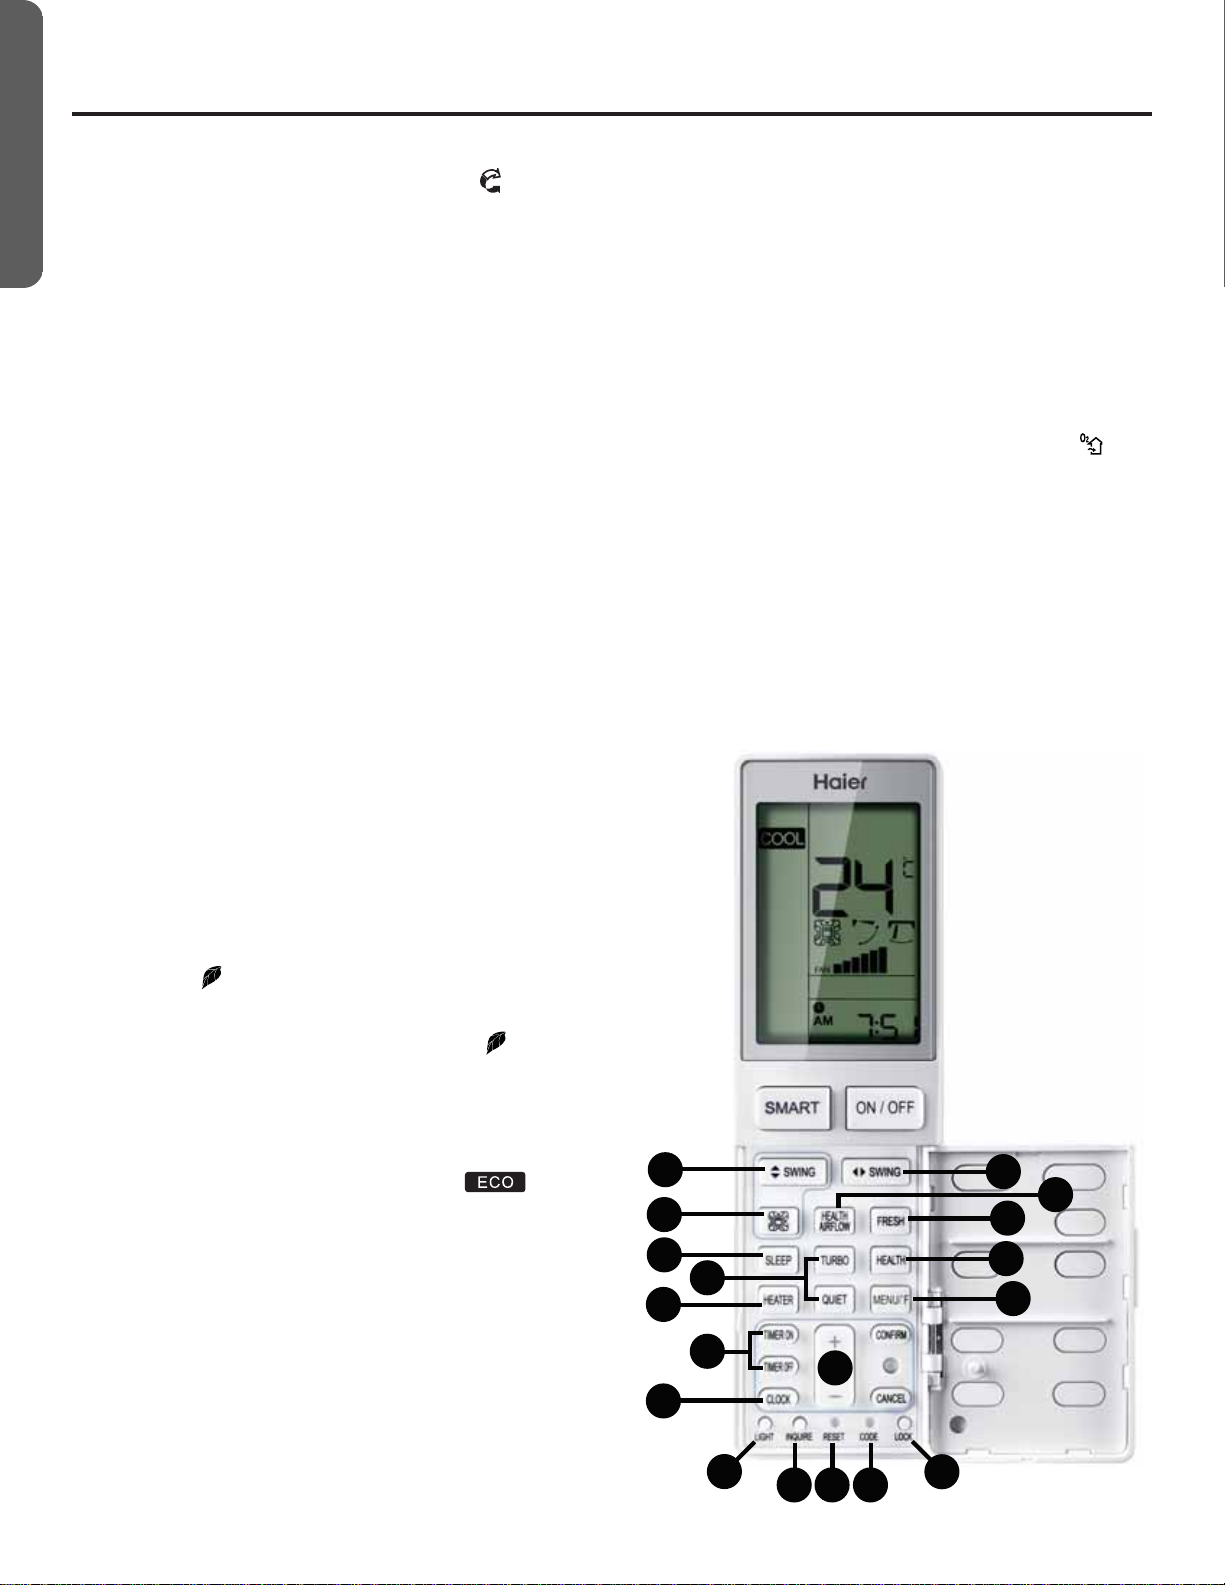
RemoteControlFeaturesandSettings
10. HEALTH AIRFLOW(Onlyavailableforsomeparticularmodel):
HealthAirflowfunctionwillstirtheairintheroom
(1)PresstheHEALTH AIRFLOWbuttontoshow icononLCD
display.
(2)TheQuadranticonwillcycletoeachquadrant.
(3)Horizontalswingdefaultisoscillate.Itcanbeadjustedwith
eachpressoftheHorizontalSWINGButtonbetweennarrow,
mid,wideandlefttoright.
(4)Verticalswingisnotadjustable.
(5)Fanspeeddefaultisvariable.Itcanbeadjustedbypressing
FANSPEEDButtonbetweenlow,mediumandhigh.
11. SleepOrperation Mode:
(1)SLEEPmodeduringCOOL,DRYmodes
OnehourafterSLEEPmodestarts,thetemperaturewillrise
2°Fabovesettemperature,afteranotherhour,thetemperature
risesanadditional2°F.Theunitwillrunforanadditionalsix
hours,thenturnsoff.Thefinaltemperatureis4°Fhigherthan
theinitialsettemperature.Usingthisfeaturewillhelpwith
achievingmaximumefficiencyandcomfortfromyourunitwhile
yousleep.
(2)SLEEPmodeduringHEATmode
OnehourafterSLEEPmodestarts,thetemperaturewill
decrease4°Fbelowsettemperature,afteranotherhour,the
temperaturewilldecreaseanadditional4°F.Afteranadditional
threehours,thetemperaturewillriseby2°F.Theunitwillrunfor
anadditionalthreehours,thenturnsoff.Thefinaltemperature
is6°Flowerthantheinitialsettemperature.Usingthisfeature
willhelpwithachievingmaximumefficiencyandcomfortfrom
yourunitwhileyousleep.
(3)InSMARTMode
Theunitoperatesincorrespondingsleepmodeadaptedtothe
automaticallyselectedoperationmode.
NOTE:WhentheTIMERONfunctionisset,thesleeping
functioncannotbeset.Ifthesleepingfunctionhasbeenset,
andtheusersetstheTIMERONfunction,thesleepingfunction
willbecanceled,andtheunitwillbesettothetimerfunction.
12. HEALTH (Onlyavailableforsomeparticularmodel):
(1)Duringpower-onorpower-OFF,pressHEALTHbuttonto
displayicon onLCDdisplay,andpressHEALTHbuttonagain
tocancel.
(2)Duringpower-OFF,pressHEALTHbuttontoenterFanmode,
startlowwindandHEALTHfunction,displayicon .
(3)Switchamongmodes,andkeepHEALTHfunction.
(4)IfHEALTHfunctionisset,powerOFFandthenontostayin
HEALTHmode.
(5)HEALTHfunctionisnotavailableforsomeunits.
13. ECO:
(1)PressECO buttonandthedisplaywillshow
(2)ECOisvalidunderallmodes,itismemorizedamongswitch
ofallmodes.
(3)ECOfunctionpower-onorpower-OFFismemorized.
(4)ECOfunctionisnotavailableforsomeunits.
14.Turbo/Quiet:
TheTURBOfunctionisusedforfastheatingorcooling.Press
TURBObutton,theremotecontrolwilldisplaytheTURBOand
switchthefantoSUPERhigh.PressTURBObuttonagainto
cancelfunction.
PressQUIETbutton,theremotecontrolwilldisplaytheQUIET
andswitchfantoBREEZE.PressQUIET buttonagaintocancel
function.
NOTE:TURBO/QUIETmodesareonlyavailablewhentheunitis
undercoolingorheatingmode(notforsmartordrymode).
RunningtheunitinQUIETmodeforalongperiodoftimemay
causetheroomtemperaturetonotreachthesettemperature.If
thisoccurs,cancelQUIETmodeandsetthefanspeedtoahigher
setting.
15.Requiresoptional motionsensorpart(Onlyavailableforsome
particular model):
SmartFocalPoint(iFP)willoperatetheunitatsetpointonly
whentheroomisoccupied.
16.Evade/Follow(Only availableforsome particular model):
WhentheiFPsensorisinstalledtheairflowcanbesettofollow
occupantsorevadethem.
17.FRESH(Onlyavailableforsomeparticularmodel):
(1)FRESHfunctionisvalidunderthestateofONorOFF.When
airconditionerisOFF,pressFRESHbutton,displayicon on
LCDdisplaytoenterFanmodeandlowspeed.PressFRESH
buttonagain,thisfunctioniscancelled.
(2)AfterFRESHfunctionisset,ONorOFFfunctionsarekept.
(3)AfterFRESHfunctionisset,modeswitchfunctioniskept.
(4)FRESHfunctionisnotavailableforsomeunits.
18.°C/°FFunction:
PressMENU/°Ftotogglebetween[settemp]°F;[settemp]°C;
and10°C/50°FLowTemperatureHeatingmode.Low
TemperatureHeatingisonlyavailablewhensettoHEAT.When
settoLowTemperatureHeating,thesetpointisdroppedto
aminimumtemperaturetopreventdamagefromfreezing
temperatures.
9
17
12
18
10
8
7
11 14
19
20
22 21
23 25
262427