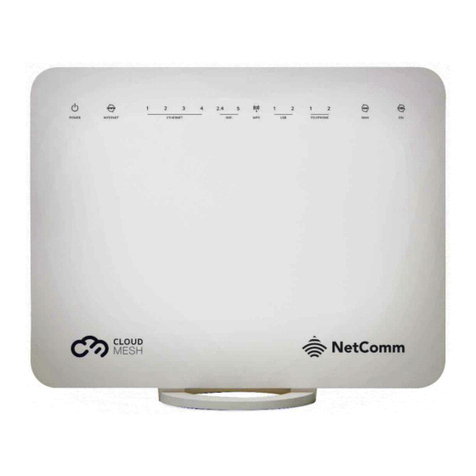
Casa Systems NetComm CloudMesh NF18MESH User manual

NF18MESH
QUICK START GUIDE
CloudMesh Gateway

WHAT’S
IN THE BOX
2
1 x RJ11
Telephone Cable
1 x RJ45
Ethernet Cable
1 x NF18MESH
CloudMesh Gateway

3
1 x Warranty Card
1 x End User Licence Agreement
1 x Quick Start Guide1 x Power Supply
(12V/2A)

SAFETY INFORMATION
PLEASE READ BEFORE USE
4

AIRFLOW
Do not restrict airow around the gateway.
The gateway is air cooled and may overheat where airow has been restricted.
Always allow minimum clearance of 5cm around all sides and the top of the gateway.
The gateway may become warm during normal use. Do not cover, do not put
in an enclosed space, do not put under or behind large items of furniture.
LOCATION
The gateway is designed for indoor use only.
Place the gateway in a central location for the best WiFi performance.
ENVIRONMENT
Do not place the gateway in direct sunlight or any hot areas.
Safe operating temperature of the gateway is between 0° and 40°C
Do not allow the gateway to come in contact with any liquid or moisture.
Do not place the gateway in any wet or humid areas such
as kitchen, bathroom or laundry rooms.
5

SMALL CHILDREN
Do not leave the gateway and its accessories within the reach of small children or
allow them to play with it. The gateway contains small parts with sharp edges that
may cause an injury or which could become detached and create a choking hazard.
SERVICE
There are no user-serviceable components in the gateway.
Do not attempt to disassemble, repair, or modify the gateway.
POWER SUPPLY
Always use only the power supply unit that came with the gateway.
You should immediately stop using the power supply unit
if the cable or power supply unit is damaged.
6

RF EXPOSURE
The gateway contains a transmitter and a receiver. When it is on, it receives
and transmits RF energy. The gateway conforms with the radio frequency
(RF) exposure limits adopted by the Australian Communications and Media
Authority Radiocommunications (Electromagnetic Radiation - Human Exposure)
Standard 2014, when used at a distance of not less than 20 cm from the body.
PRODUCT HANDLING
- Always treat the gateway and its accessories with care
and keep it in a clean and dust-free place.
- Do not expose the gateway or its accessories to open ames.
- Do not drop, throw or try to bend the gateway or its accessories.
- Do not use harsh chemicals, cleaning solvents, or aerosols
to clean the gateway or its accessories.
- Do not paint the gateway or its accessories.
- Please check local regulations for disposal of electronic products.
- Arrange power and Ethernet cables in a manner such that they are
not likely to be stepped on or have items placed on them.
7

8
GETTING STARTED
PRE-CONFIGURED?
If you received the gateway from your service provider (ISP/RSP) please
follow the instructions they have provided with the gateway.

9
BEFORE YOU BEGIN
Ensure that you have the following information from your service provider:
- How your INTERNET SERVICE will physically connect to the gateway, see below.
- The Settings specic to your type of service.
There are two ways to connect the gateway to the internet service:
Refer to page 10
Refer to page 12
Ethernet WAN
This is the most common access type in Australia and New Zealand and covers xed line techonologies
such as nbn™FTTP, HFC, FTTC as well as nbn™Fixed Wireless and Sky Master satellite services.
This type of internet service uses the blue WAN port on the back of the gateway to connect
to the dedicated connection box installed by your access network provider.
ADSL or VDSL
These access types are provided by nbn™FTTB,FTTN or ADSL/VDSL over a traditional telephone line.
This connection uses the grey DSL port on the back of the gateway.

Ovitas nam accus aut
ad quas volupta tatio.
Nam nis is pos alique
eaquam unduciisqui
utempor ehendip issitem
vollesed moloribus et
Ovitas nam accus aut
ad quas volupta tatio.
Nam nis is pos alique
eaquam unduciisqui
utempor ehendip issitem
vollesed moloribus et
Ovitas nam accus aut
ad quas volupta tatio.
Nam nis is pos alique
eaquam unduciisqui
utempor ehendip issitem
vollesed moloribus et
123
HEADING
GOES HERE INTERNET TYPE
1010
Connect the included power
adapter to the power jack of
the gateway and then plug it
into an available wall socket.
Press the ON/OFF button
to power the gateway
on. The POWER light
initially will turn red.
When the gateway has
nished starting up, the
POWER light will turn green.
To connect using WiFi, use your
computer to scan for wireless
networks and select the WiFi
Network Name and use the WiFi
Password (both are printed on the
back of the gateway) to log on.
Alternatively, connect the supplied
yellow RJ45 Ethernet cable
from your computer to one of
the yellow Ethernet ports (1-4)
on the back of the gateway.
Once the connection is established,
go to the LOG IN TO THE
WEB INTERFACE section of
this guide on page 14.
INSTALLING THE GATEWAY
VIA ETHERNET CONNECTIONS
1 2 3
Connect the Ethernet cable
supplied by your network carrier
to the blue WAN port on the
back of the gateway and then
connect the other end to your
network carrier’s upstream
device, for example an FTTP
gateway or HFC cable modem.

11
Go to page 14

To connect using WiFi, use your computer
to scan for wireless networks, select
the WiFi Network Name and use the
WiFi Password (both are printed on
the back of the gateway) to log on.
Alternatively, connect the supplied yellow
RJ45 Ethernet cable from your computer
to one of the yellow ETHERNET ports
(1-4) on the back of the gateway.
Once the connection is established,
go to the LOG IN TO THE
WEB INTERFACE section of
this guide on page 14.
12
INSTALLING THE GATEWAY
VIA DSL CONNECTIONS
1 2 3
Connect the supplied grey
RJ11 cable from the grey
DSL port of the gateway to
the wall telephone socket.
If you have a VoIP service,
connect your telephone
handset to one of the grey
TELEPHONE ports on the
back of the gateway.
OPTIONAL CONNECTION
WITH SPLITTER
If your telephone line delivers both
your internet as well as traditional
telephone service, you will require
an In-line DSL Splitter/Filter.
In this case, your installation will
follow the dotted lines on the
diagram on the next page.
Connect the included power
supply to the POWER jack of
the gateway and then plug it
into an available wall socket.
Press the ON/OFF button
to power the gateway
on. The POWER light
initially will turn red.
When the gateway has
nished starting up, the
POWER light will turn green.

13
Go to page 14

14
LOGGING IN
TO THE WEB INTERFACE
Open a web browser (such as Mozilla Firefox® or Google Chrome™), type
http://cloudmesh.net into the address bar and press Enter.
If you encounter difculties connecting, type ht tp://192.168.20.1 and press Enter.
At the login screen, type admin into the Username eld. In the Password eld, enter the password
printed on the gateway label (afxed to the back panel of the gateway) then click the Login > button.
1
2
Note – The graphics that appear in this section represent the display from a Windows browser.
The same graphics will display differently when viewed on a hand held device.

15
USING THE FIRST-TIME
SETUP WIZARD
Upon rst login, the gateway displays the rst-time setup wizard.
We recommend using the wizard to congure your internet connection.
Click the Yes, start the setup wizard button.
NEXT STEPS
If your INTERNET SERVICE is:
-ADSL go to page 16
-VDSL go to page 20
-Ethernet WAN go to page 23

1
16
USING THE FIRST-TIME
SETUP WIZARD
Under INTERNET SERVICE,
select ADSL.
If you are unsure of
your service type,
contact your ISP.
Under CONNECTION
TYPE, select the type of
connection your ISP has
congured for you, i.e.
PPPoE, PPPoA, Dynamic
IP, Static IP or Bridge.
Enter the details required for
your specic Connection Type.
See pages 17-19 for details
of the respective connection
settings for each type.
2 3
INTERNET ADSL

17
PPPoE
Enter the VPI and VCI values and the username
and password required by your ISP. If you
are unsure of these, contact your ISP.
When you have nished, click the Next > button
to go to the WIRELESS settings, see page 26.
PPPoA
Enter the VPI and VCI values and the username
and password required by your ISP. If you
are unsure of these, contact your ISP.
When you have nished, click the Next > button
to go to the WIRELESS settings, see page 26.
OR

18
USING THE FIRST-TIME
SETUP WIZARD INTERNET ADSL
DYNAMIC IP
Enter the VPI and VCI values required by your
ISP. If you are unsure of these, contact your ISP.
When you have nished, click the Next > button
to go to the WIRELESS settings, see page 26.
STATIC IP
Enter the VPI and VCI values, WAN IP Address, WAN
Subnet Mask, WAN Gateway IP Address, Primary
DNS server and Secondary DNS server required by
your ISP. If you are unsure of these, contact your ISP.
When you have nished, click the Next > button
to go to the WIRELESS settings, see page 26.
OROR

19
BRIDGE
Enter the VPI and VCI values required by your
ISP. If you are unsure of these, contact your ISP.
When you have nished, click the Next >
button to go DIRECTLY to the GATEWAY
SECURITY settings, see page 28.
OR

20
Under Internet Service,
select VDSL.
If you are unsure of
your service type,
contact your ISP.
Under Connection
Type, select the type
of connection your ISP
has congured for you,
i.e. PPPoE, Dynamic IP,
Static IP or Bridge.
Enter the details required for
your specic Connection Type.
See pages 21-22 for details
of the respective connection
settings for each type.
123
USING THE FIRST-TIME
SETUP WIZARD INTERNET VDSL
Other manuals for NetComm CloudMesh NF18MESH
2
Table of contents
Other Casa Systems Gateway manuals
Popular Gateway manuals by other brands

NETGEAR
NETGEAR DEVG2020 DOT user guide

Brocade Communications Systems
Brocade Communications Systems Gateway Administrator's guide

Orchid Telecom
Orchid Telecom GSM200 user guide

Juniper
Juniper SRX550 Hardware guide

Lantronix
Lantronix PremierWave 2050 user guide

Phytec
Phytec phyGATE Tauri-L Hardware manual