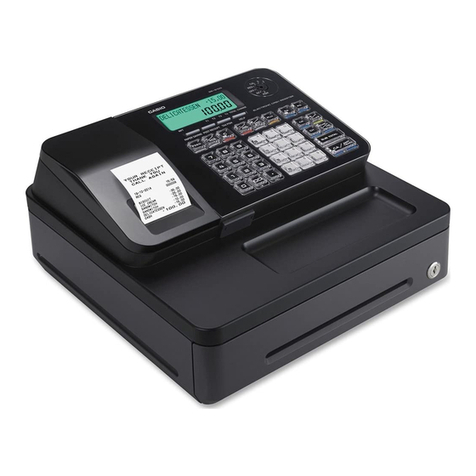
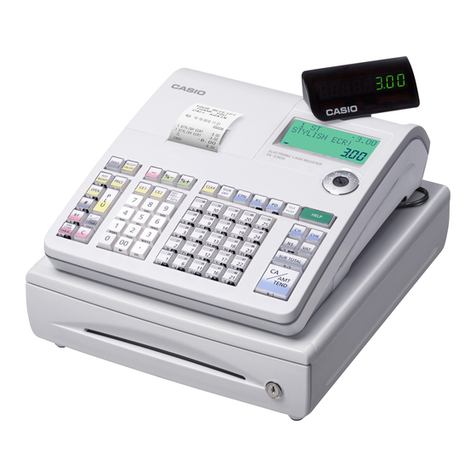
Casio SR-C4500 User manual

ECR SR-C4500
QUICK REFERENCE GUIDE
24-HOUR SUPPORT: 800-632-1888
PLEASE NOTE: This Casio electronic cash register must be manually settled by following the SETTLE TERMINAL steps provided in
this Quick Reference Guide. If the ECR is not settled, transactions will remain in the ECR until settled. If you have any questions,
you can reach our 24/7 support department at 800-632-1888.
STOP
HT3722_10142019 1
IMPORTANT: Do not use decimal points while entering cash amounts (i.e. $15.00 = 1500)
INITIALIZE PAYMENT DEVICE
1. Turn MGR key to X mode.
2. Using the Numeric Keypad, enter 4311.
3. Press the Cash Amount Tendered key.
SALE - CREDIT CARD
1. Turn key to REG.
2. If quantity of product being sold is one, skip to step #4.
3. If quantity of product being sold is greater than one, enter
quantity using the Numeric Keypad and then press the
X For/Date Time key.
4. Press the Product/Department key corresponding to all of the
products purchased or enter price using the Numeric Keypad
followed by the appropriate Product/Department key.
5. Press Subtotal to display amount of sale.
6. Press the Credit Card Sale button.
7. Screen will display “Processing Credit”, external device will ask
to “Insert/Tap/Swipe Your Card/Device”.
8. Insert/tap/swipe your card/device.
9. Amount will display as well as asking to confirm or cancel.
10. Device will connect and process card.
11. Drawer will open and receipt will print.
SALE - CREDIT CARD MANUAL ENTRY
1. Turn key to REG.
2. If quantity of product being sold is one, skip to step #4.
3. If quantity of product being sold is greater than one, enter
quantity using the Numeric Keypad and then press the
X For/Date Time key.
4. Press the Product/Department key corresponding to all of the
products purchased or enter price using the Numeric Keypad
followed by the appropriate Product/Department key.
5. Press Subtotal to display amount of sale.
6. Press the Credit Card Sale button.
7. The screen on the external device will say “Insert/Tap/Swipe
Your Card/Device”. On the external device, input the credit card
number and press Enter.
SALE - CREDIT CARD MANUAL ENTRY (continued)
8. The screen on the external device will say “Exp. Date: MMYY”.
Enter expiration date and press Enter.
9. Continue to follow the external device prompts and input
the CVV2, Address and Zip Code pressing Enter after each.
10. Device will connect and process card, then drawer will open
and a receipt will print.
CASH IN
When replenishing the cash drawer, use the Numeric Keypad to enter
the amount of cash being added and then press the CASH IN key.
A receipt will print confirming the cash amount.
CASH OUT
When paying out or removing cash from drawer, use the Numeric
Keypad to enter the deduction amount, and then press the CASH OUT
key. A receipt will print confirming the amount of cash removed.
SALE - DEBIT CARD
1. Turn key to REG.
2. If quantity of product being sold is one, skip to step #4.
3. If quantity of product being sold is greater than one, enter
quantity using the Numeric Keypad and then press the
X For/Date Time key.
4. Press the Product/Department key corresponding to all of the
products purchased or enter price using the Numeric Keypad
followed by the appropriate Product/Department key.
5. Press Subtotal to display amount of sale.
6. Press the Debit Card Sale key.
7. Hand external device to customer for them to swipe their
debit card.
8. After swiping, the customer will be prompted to select a cash
back amount or choose “No thanks”. The customer will be
prompted to enter their PIN and press Enter.
9. Device will connect and process card, then drawer will open and
a receipt will print.
A SHIFT4 COMPANY

IMPORTANT: Do not use decimal points while entering cash amounts (i.e. $15.00 = 1500)
2
HOSPITALITY APPLICATION FUNCTIONS
SALE - CASH
SALE - EBT CASH BENEFITS CARD
1. Turn key to REG.
2. If quantity of product being sold is one, skip to step #4.
3. If quantity of product being sold is greater than one, enter quantity
using the Numeric Keypad and then press the X For/Date Time
key.
4. Press the Product/Department key corresponding to the product
being purchased or enter price using the Numeric Keypad
followed by the appropriate Product/Department key.
5. Press Subtotal to display amount of sale.
6. Press the EBT Cash key.
7. Hand external device to customer for them to swipe their EBT card.
8. After swiping, the customer will be prompted to select a cash back
amount or choose "No thanks". The customer will be prompted to
enter their PIN and press Enter.
9. Device will connect and process card, then drawer will open and
receipt will print.
SALE - EBT FOOD STAMPS CARD
1. Turn key to REG.
2. If quantity of product being sold is one, skip to step #4.
3. If quantity of product being sold is greater than one, enter
quantity using the Numeric Keypad and then press the
X For/Date Time key.
4. Press the Product/Department key corresponding to the
product being purchased or enter price using the Numeric
Keypad followed by the appropriate Product/Department key.
5. Press Subtotal to display amount of sale.
6. Press the EBT FS key.
1. Turn key to REG.
2. If quantity of product being sold is one, skip to step #4.
3. If quantity of product being sold is greater than one, enter
quantity using the Numeric Keypad and then press the
X For/Date Time key.
4. Press the Product/Department key corresponding to the
product being purchased or enter price using the Numeric
Keypad followed by the appropriate Product/Department key.
5. Press Subtotal to display amount of sale.
6. Using the Numeric Keypad enter amount of cash received.
7. Press the Cash Amount Tendered key to complete sale.
USING THE DISCOUNT KEY
To discount a particular item:
1. Enter the item.
2. Press the Discount key to deduct the preset percentage.
To discount the entire transaction:
1. Once all items have been entered, press Subtotal.
2. Press the Discount key to deduct the preset percentage.
SALE - EBT FOOD STAMPS CARD (continued)
7. Hand external device to customer for them to swipe their EBT
card.
8. After swiping, the customer will be prompted to enter their
PIN and press Enter.
9. Device will connect and process card, then drawer will open
and receipt will print.
TIP ADJUST
1. Using the Numeric Keypad, enter amount of tip.
2. Press the Tip Adjust key.
3. Display will ask for the Trans. Number. Using the Numeric Keypad,
enter Trans. Number for the transaction you wish to add a tip. The
Trans. Number is found on original transaction receipt.
4. Press the Enter key.
SETTLE TERMINAL
1. Turn MGR key to X mode.
2. Using the Numeric Keypad, enter 4315.
3. Press the Cash Amount Tendered key.
TIP DETAIL REPORT
1. Turn MGR key to X mode.
2. Using the Numeric Keypad, enter 4319.
3. Press the Cash Amount Tendered key.
SIGN ON SERVER
1. Using the Numeric Keypad, enter the Server Number.
2. Press the Clerk/Server Sign On key.
SIGN OFF SERVER
1. Press the Sign Off Key.
OPEN A TAB OR ADD BALANCE TO EXISTING TAB
1. Using the Numeric Keypad, enter tab button.
2. Press the Open/Close Tab button.
3. Proceed to enter appropriate sales.
4. Once complete, press the Update Tab button.

IMPORTANT: Do not use decimal points while entering cash amounts (i.e. $15.00 = 1500)
3
CLOSE TAB
1. Using the Numeric Keypad, enter tab button.
2. Press the Open/Close Tab button.
3. The current total of the selected tab will display.
4. Enter the amount of payment received and press the Cash
Amount Tendered key.
5. The tab is now closed.
REFUND
1. Using Managers key, turn key to RF.
2. Enter dollar amount using Numeric Keypad.
3. Choose corresponding Product/Department key.
4. Press the Cash Amount Tendered key to complete.
*Only one refund can be performed at a time. In order to refund further items, the manager key
must be switched back to REG and back to RF.
REFUND - CREDIT CARD
1. Using Managers key, turn key to RF.
2. Enter dollar amount using Numeric Keypad.
3. Choose corresponding Product/Department key.
4. Press Subtotal to total sale.
5. Press Credit Card Sale key.
6. Insert/tap/swipe card or mobile device to issue refund.
7. Refund will process and receipt will print.
*Only one refund can be performed at a time. In order to refund further items, the manager key
must be switched back to REG and back to RF.
CORRECT AN ITEM DURING A TRANSACTION
During a transaction, if an item previously submitted needs to be
voided, you can do this by pressing the Item Correct key and then
selecting the Product/Department key that corresponds to that item.
The receipt will display "- $$" with the designated Product/Depart-
ment label.
CANCEL ENTIRE TRANSACTION
If an entire transaction needs to be canceled before Cash Amount
Tendered is pressed, follow the steps below. If the sale has already
been completed, refer to Refund instructions.
1. Press Subtotal key.
2. Total amount will display.
3. Press the ERR CORR/Cancel key.
4. Display shows “CANCEL OPERATION”.
5. Press Cash Amount Tendered to confirm cancellation of
transaction or press Clear Entry to return to the sale.
PROGRAMMING TAX TABLES
1. Using managers key, turn key to PGM.
2. Use the Down Arrow to highlight "Tax Setting".
3. Press Cash Amount Tendered.
4. The screen will have the "rate" selection highlighted.
5. Press Cash Amount Tendered.
6. Using the Down Arrow, highlight the Tax Table Rate that needs to
be changed.
7. Use the numeric keypad to type the new tax rate and press Cash
Amount Tendered.
8. When programming is complete, press Subtotal to return to the
previous screen or press Subtotal twice to exit to the main PGM
screen.
9. When the main PGM screen is displayed, the manager key can
be returned to REG mode.
Note: To adjust Rounding or Calculation of a particular Tax Table,
follow the same steps above but at step 4 select "Round" or “Cal
Type".
CORRECT A TRANSACTION/SALE
If an error is made while entering a transaction, you can void it only
immediately after the mistake has been made by pressing the ERROR
CORR / CANCEL key. Transaction will then be documented on the
receipt with “ERROR CORR” along with a negative price amount.
Once the sale is voided, you may enter in the correct transaction
amount/type.
PROGRAMMING DEPARTMENT KEYS
1. Using managers key, turn key to PGM.
2. The screen will have the "DEPT Setting" selection highlighted.
3. Press Cash Amount Tendered.
4. "Input DEPT No." will be displayed.
5. Press Cash Amount Tendered.
6. Use the Down Arrow to highlight the department in need of
programming and press Cash Amount Tendered.
7. The display shows the program input screen. From this screen,
input the name and price of the key by highlighting each and
using the numeric keypad to enter the appropriate values.
Selecting “Taxable Status” by highlighting it and pressing Cash
Amount Tendered will give you options to change the Tax Table
assigned to the department.
8. When programming is complete, press Subtotal to return to the
previous screen to edit more departments or press Subtotal
twice to exit to the main PGM screen.
9. When the main PGM screen is displayed, the manager key
can be returned to REG mode.
24-Hour Technical Support: 888-632-1888
4
IMPORTANT: Do not use decimal points while entering cash amounts (i.e. $15.00 = 1500)
REPORTS
GIFT CARD FUNCTIONS
X REPORT
Daily sales read report: print report without affecting data stored.
Using Manager’s key, turn key to X, press Cash Amount Tendered,
report of daily status will print.
Z REPORT
Print reset report: used to end day and clear sales totals.
Using Manager’s key, turn key to Z, press Cash Amount Tendered,
report will print and sales cleared.
TOTAL REPORT
1. Turn MGR key to X mode.
2. Using the Numeric Keypad, enter 4318.
3. Press the Cash Amount Tendered key.
ISSUE OR ACTIVATE A GIFT CARD
1. Turn key to REG.
2. Enter amount of gift card on Numeric Keypad.
3. Press Issue Gift Card button.
4. Tender transaction on register (cash, credit, debit).
NOTE: If customer is paying by card, this will require a swipe of the credit card or
debit card; not doing so will result in a timeout error.
5. Screen will display “Swipe Gift” then “Processing Giftcard...” and
the external device will prompt “Enter/Swipe Card”.
6. Swipe gift card or enter gift card number located on the back of
the card on the external device and then press Enter.
7. Device will connect and process.
8. Drawer will open and receipt will print.
NOTE: If a card is already active, the transaction will be cancelled and the cash
register will automatically begin to process a refund for the original sale.
ADD VALUE TO A GIFT CARD
1. Turn key to REG.
2. Enter amount of value to add to gift card on Numeric Keypad.
3. Press Add Gift Value button.
4. Tender transaction on register (cash, credit, debit).
NOTE: If customer is paying by card, this will require a swipe of the credit card or
debit card; not doing so will result in a timeout error.
5. Screen will display “Swipe Gift” then “Processing Giftcard...” and
the external device will prompt “Enter/Swipe Card”.
6. Swipe gift card or enter gift card number located on the back of
the card on the external device and then press Enter.
7. Device will connect and process.
8. Drawer will open and receipt will print.
GIFT CARD SALE
1. Turn key to REG.
2. If quantity of product being sold is one, skip to step 4.
3. If quantity of product being sold is greater than one, enter
quantity using the Numeric Keypad then press the X For/Date
Time key.
4. Press the Product/Department key corresponding to the product
being purchased or enter price using the Numeric Keypad
followed by the appropriate Product/Department key.
5. Press Subtotal to display current amount owed.
6. Press Gift Card Sale button.
7. Screen will display “Swipe Gift...” then “Processing” and the
screen on the external device will display “Enter/Swipe Card”.
8. Swipe gift card or enter gift card number located on the back
of the card on the external device and then press Enter.
9. Device will connect and process card.
10. Drawer will open and receipt will print.
BALANCE INQUIRY
1. Turn key to X-Mode.
2. Enter 4312 and press Cash Amount Tender.
3. Screen will display “EDC Type”.
4. Press 4for Gift Card and press Enter.
5. The screen will display “Swipe Gift” and the screen on the
external device will display “Enter/Swipe Card”.
6. Swipe gift card or enter gift card number located on the back of
the card on the external device and then press Enter.
7. The payment device will process card.
8. The screen will display “Balance: xx.xx” and receipt will print.

5
INSTALLING RECEIPT/JOURNAL PAPER
Take away the head protection sheet from the printer and close the platen arm
Never touch the printer head and platen
Unpack the thermal paper just before use
Avoid heat/direct sunlight
Avoid dusty and humid places for storage
Do not scratch the paper
Do not keep the printed paper under the following circumstances:
High humidity and temperature, direct sunlight, and contact with glue, thinner or a rubber eraser.
CAUTION! (WHEN HANDLING THERMAL PAPER)
IMPORTANT!
INSTALLING THE RECEIPT PAPER
STEP ONE:
Remove the printer cover.
STEP TWO:
Open the platen arm.
STEP THREE:
Ensuring the paper is being fed
from the bottom of the roll,
lower the roll into the space
behind the printer.
STEP FOUR:
Put the leading end of the paper
over the printer.
STEP FIVE:
Close the platen arm slowly
until it locks
STEP SIX:
Replace the printer cover.
Passing the leading end of the
paper through the cutter slot.
Tear off the excess paper.

6
INSTALLING THE JOURNAL PAPER
STEP ONE:
Remove the printer cover.
STEP TWO:
Open the platen arm.
STEP THREE:
Ensuring the paper is being fed
from the bottom of the roll,
lower the roll into the space
behind the printer.
STEP FIVE:
Close the platen arm slowly
until it locks.
STEP SIX:
Remove the paper guide of
the take-up reel.
STEP FOUR:
Put the leading end of the paper
over the paper cutter.
STEP SEVEN:
Slide the leading end of the
paper into the groove on the
spindle of the take-up reel and
wind it onto the reel two or
three times.
Place the take-up reel into place
behind the printer, above the
roll paper.
STEP NINE:
Press the "JOURNAL FEED" key
to take up any slack in the paper.
During the installation, press
the "JOURNAL FEED" key after
power on.
STEP TEN:
Replace the printer cover.
STEP EIGHT:
Replace the paper guide of the
take-up reel.

7
BLUETOOTH SETTINGS
BLUETOOTH SETTING
Top menu
[Bluetooth] System Setting To stop sending X or Z data to a smartphone, set “X data
mobile” and “Z data mobile” of “Function” “NO”.
Turns off when not using Bluetooth pairing.
Sub menu What is to be set
OFF
ON
Functions Set YES when sending X data to a smartphone.
Pairing with mobile
Clear paired mobile
X data mobile
Pairs with a smartphone.
Clears pairing settings.
This setting connects the register and a smartphone by means of Bluetooth.
YES
NO
Z data mobile YES
YES with Backup
NO
Set YES when sending Z data to a smartphone. Set YES with
Backup if you wish to back up the data in an SD card when
data transmission is performed incorrectly.
SETTING BLUETOOTH PAIRING
The following procedures pair your cash register with your smartphone by Bluetooth connection.
STEP ONE:
Turn the Mode switch to PGM
position and select Bluetooth.
STEP TWO:
Press CA/AMT TEND key and
select System Setting.
STEP FOUR:
Press CA/AMT TEND key and
select Pairing with mobile.
STEP THREE:
Press CA/AMT TEND key. The
display shows “System Setting”
[OFF]. Press “CA/AMT TEND” key
again and select ON by key.

SETTING BLUETOOTH PAIRING (continued)
8
STEP FIVE:
Press CA/AMT TEND key then
activate Bluetooth on your smart-
phone. On the smartphone, find
and select the device code of the
cash register shown on the display.
In this example, 12345678901234.
Note that the device code differs
depending on each cash register.
Make sure to select the same code
shown on the cash register display.
STEP SIX:
After you select the device code on
the smartphone, the cash register
then shows a pass key on the
display. Enter the pass key (in this
example, 123456) on the smart-
phone. Pass key differs depending
on each cash register.
STEP SEVEN:
Now your cash register and
your smartphone are paired by
Bluetooth connection.
You can perform detail settings or data exchange using Bluetooth connection.
Please refer to the website http://web.casio.com/ecr/app/

9
TROUBLESHOOTING
ERROR MESSAGES
Error Code
E001 Wrong mode Mode switch position changed before finalization Return the mode switch to its original setting and
finalize the operation
Message Meaning Action
E003 Wrong operator The signed on clerk differs from the clerk
performing the tracking check registration
Input correct check clerk number
E004 Error INIT/FC Initialization or unit lock. Clear operation in progress Complete operation
E008 Please sign on Registration without entering clerk number Enter a clerk number
E010 Close the drawer The drawer is left open longer than the program
time
Close the drawer
E011 Close the drawer Attempt to register while drawer is open Close the drawer
E016 Change back to
REG Mode
Two consecutive transactions attempted in the
refund mode
Switch to another mode and then back to the RF
mode for the next transaction
E017 Enter CHK/TBL
number
Attempt made to register an item without inputting
a check number
Input a check number
E018 Enter table number Attempt made to register an item without inputting
a table number
Input a table number
E019 Enter number of
customers
Finalize operation attempted without entering the
number of customers
Enter the number of customers
E021 NO dept link No department linked PLU is registered Correct the program
E026 Enter condiment/
preparation PLU
No condiment/preparation PLU is registered Register condiment/preparation PLU
E029 In the tender
operation
Item registration is prohibited while partial tender Finalize the transaction
E031 Press St key Finalization of a transaction attempted without
confirming the subtotal
Press <Subtotal>
E033 Enter tendered
Amount
Finalize operation attempted without entering
amount tender
Enter the amount tendered
E035 Enter tendered
Amount
Change amount exceeds limit Input amount tendered again
E036 Remove money
from the drawer
Contents of the drawer exceed programmed limit Perform paid out operation
E037 Digit or amount
limitation over
High amount lock out/low digit lock out error Enter correct amount
E038 Perform money
declaration
Read/Reset operation without declaring cash in
drawer. This error appears only when this function
is activated
Perform money declaration
E040 Issue guest receipt Attempt to register new transaction without issuing
a guest receipt
Issue a guest receipt
E046 REG buffer full Registration buffer full Finalize the transaction

ERROR MESSAGES (continued)
Error Code
E049 CHECK memory full Check tracking index memory full Finalize and close the check number currently
used
noitcAgninaeMegasseM
E050 Detail memory full Check tracking index memory full Finalize and close the check number currently
used
E051 CHK/TBL No. is not
occupied
Attempt made to use <New Check> to open a
new check using a number that is already used for
an existing check in check tracking memory
Finalize and close the check that is currently
under the number that you want to use or use a
different check number
E053 CHK/TBL No. is not
opening
Attempt to use <Old Check> reopen a new check
using a number that is not used for an existing
check in check tracking memory
Use the correct check number (if you want to
reopen a check that already exists in check
tracking memory) or use <New Check> to
open a new check
E075 Negative balance
cannot be finalized
Attempt to finalize a transaction when balance is
less than or equal to zero
Register item(s) until the balance becomes
positive amount.
E101 PLU maintenace
file full. Press
<#2> to exit
Scanning PLU direct maintenance/batch
maintenance
Terminate the maintenance
E103 PLU code does not
exist input the PLU
code
PLU code does not exist in the file
E105 PLU file full Scanning PLU does not exist in the file Enter proper PLU code
E106 Item exists in the
PLU FILE
The designated item already exists in the
scanning PLU file
Modify the designated item
E112 Close the journal
platen arm
The journal platen arm is open Close the journal platen arm
E114 Close the receipt
platen arm
The receipt platen arm is open
E139 Negative balance is
not allowed
Attempt to register <-> or <CPN> when the
balance becomes negative
Enter proper minus/coupon amount
E146 ylreporptnemegnarraehtteSllufsieliftnemegnarrAllufeliftnemegnarrA
E200 ylreporptnemegnarraehtteStessiCARCARtresnI
E201 CARehttamroFCARdettamrofyllagellItamroflagellI
E202 File not found The designated file is not found in the RAC Enter proper file name
E205 File already exists Cannot write, because designated file has already
been in the RAC
Check the operation and retry
10
Close the receipt platen arm
Modify the designated item
Other manuals for SR-C4500
1
Table of contents
Other Casio Cash Register manuals

Casio
Casio PCR 272 - Cabinet Design Cash Register User manual

Casio
Casio PCR-T280 Owner's manual

Casio
Casio CE-7000 User manual

Casio
Casio QT-2100 User manual

Casio
Casio SE-S100 User manual

Casio
Casio CE-250 Assembly instructions

Casio
Casio TK-7000 User manual

Casio
Casio PCR-408 Assembly instructions

Casio
Casio SE-C300 User manual

Casio
Casio V-R100 User manual

Casio
Casio TE-4000F Series User manual

Casio
Casio 130CR User manual

Casio
Casio TE-2200 User manual

Casio
Casio TE-2200 User manual

Casio
Casio TK-T200 User manual

Casio
Casio SE-S3000 User manual

Casio
Casio EX-843 User manual

Casio
Casio TK-1550 User manual

Casio
Casio SR-S820 User manual

Casio
Casio CE-250 Assembly instructions