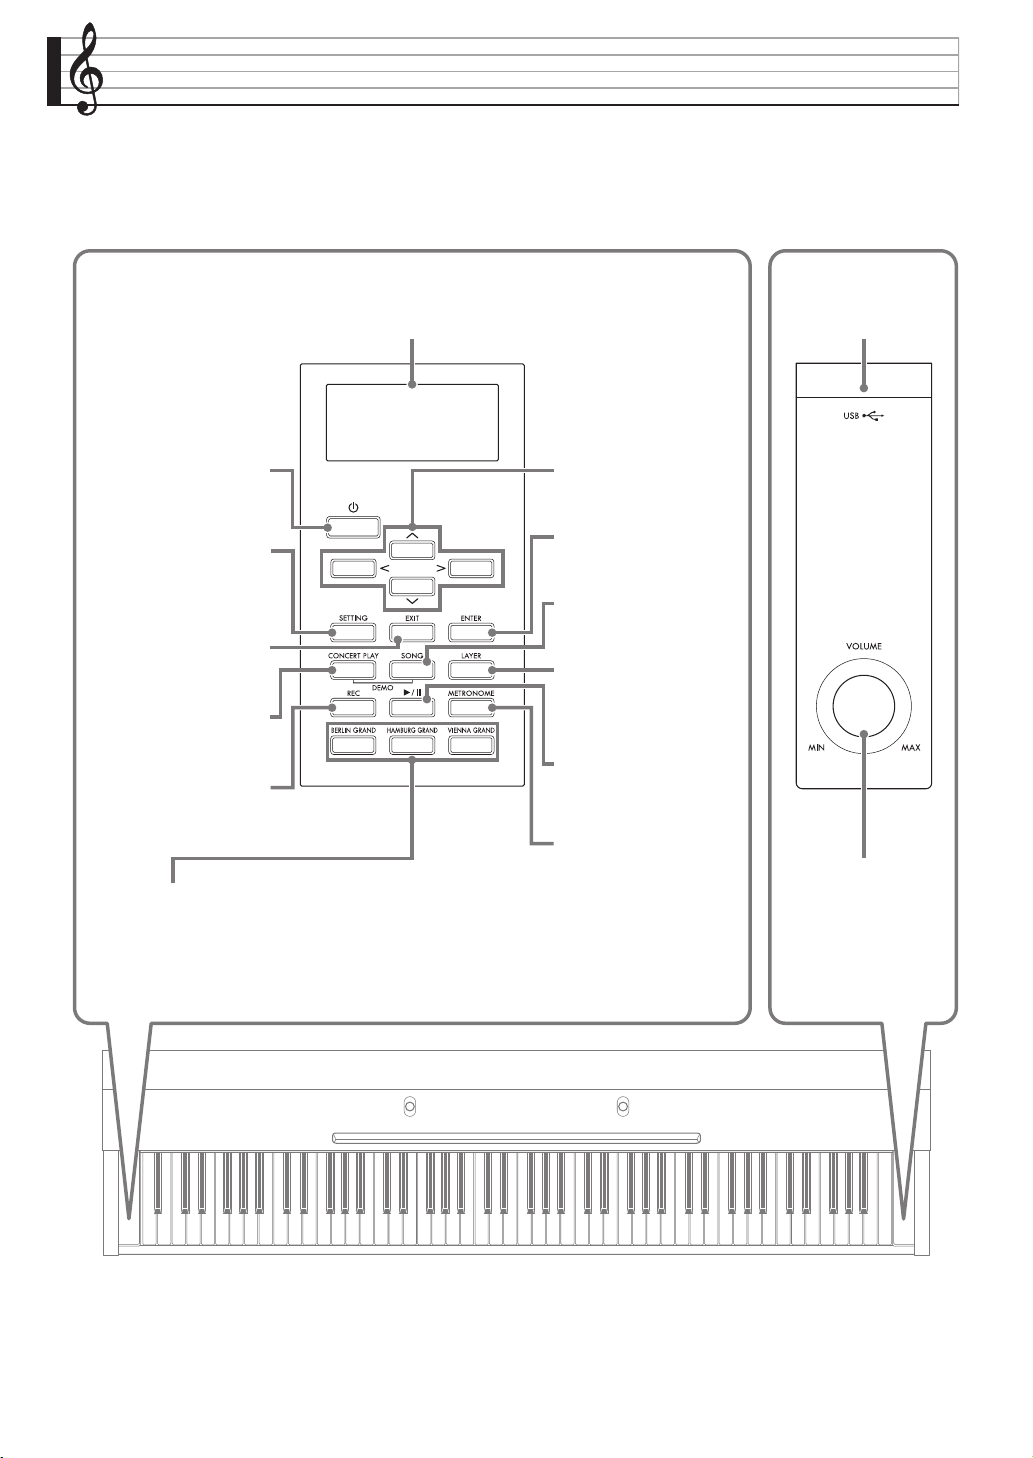
Casio Celviano GP-300 User manual

GP300-ES-1A
EN/ES
USER’S GUIDE
GUÍA DEL USUARIO
Please keep all information for future reference.
Guarde toda información para tener como referencia futura.
Safety Precautions
Before trying to use the piano, be sure to read
the separate “Safety Precautions”.
Precauciones de seguridad
Antes de intentar usar el piano, asegúrese de
leer las “Precauciones de seguridad” separadas.
EnglishEspañol
GP-300
This recycle mark indicates that the packaging conforms to
the environmental protection legislation in Germany.
Esta marca de reciclaje indica que el empaquetado se
ajusta a la legislación de protección ambiental en Alemania.
MA1504-A Printed in China
C
GP300-ES-1A.indd 1 2015/04/24 13:38:04

TO REDUCE THE RISK OF FIRE OR ELECTRIC SHOCK, REFER SERVICING TO QUALIFIED SERVICE PERSONNEL.
Important!
Please note the following important information before using this product.
• Before using the AD-E24500LW Adaptor to power the unit, be sure to check the AC Adaptor for any damage first. Carefully check the power
cord for breakage, cuts, exposed wire and other serious damage. Never let children use an AC adaptor that is seriously damaged.
• The product is not intended for children under 3 years.
• Use only CASIO AD-E24500LW adaptor.
• The AC adaptor is not a toy.
• Be sure to disconnect the AC adaptor before cleaning the product.
IMPORTANT SAFETY INSTRUCTIONS
1. Read these instructions.
2. Keep these instructions.
3. Heed all warnings.
4. Follow all instructions.
5. Do not use this apparatus near water.
6. Clean only with dry cloth.
7. Do not block any ventilation openings. Install in accordance with the manufacturer’s instructions.
8. Do not install near any heat sources such as radiators, heat registers, stoves, or other apparatus (including amplifiers) that produce heat.
9. Do not defeat the safety purpose of the polarized or grounding-type plug. A polarized plug has two blades with one wider than the other.
A grounding type plug has two blades and a third grounding prong. The wide blade or the third prong are provided for your safety. If the
provided plug does not fit into your outlet, consult an electrician for replacement of the obsolete outlet.
10. Protect the power cord from being walked on or pinched particularly at plugs, convenience receptacles, and the point where they exit
from the apparatus.
11. Only use attachments/accessories specified by the manufacturer.
12. Use only with the cart, stand, tripod, bracket, or table specified by the manufacturer, or sold with the
apparatus. When a cart is used, use caution when moving the cart/apparatus combination to avoid injury
from tip-over.
13. Unplug this apparatus during lightning storms or when unused for long periods of time.
14. Refer all servicing to qualified service personnel. Servicing is required when the apparatus has been damaged in any way, such as
power-supply cord or plug is damaged, liquid has been spilled or objects have fallen into the apparatus, the apparatus has been
exposed to rain or moisture, does not operate normally, or has been dropped.
The apparatus shall not be exposed to dripping or splashing and that no objects filled with liquids, such as vases, shall be placed on the
apparatus.
The power indicator being unlit does not mean the apparatus is completely disconnected from the MAINS.
When you need to have the apparatus completely disconnected from the MAINS, you must unplug the power cord. For that purpose, locate
the apparatus in a way that secures easy access to the power cord.
NOTICE
This equipment has been tested and found to comply with the limits for a Class B digital device, pursuant to Part 15 of the FCC Rules.
These limits are designed to provide reasonable protection against harmful interference in a residential installation. This equipment
generates, uses and can radiate radio frequency energy and, if not installed and used in accordance with the instructions, may cause
harmful interference to radio communications. However, there is no guarantee that interference will not occur in a particular installation. If
this equipment does cause harmful interference to radio or television reception, which can be determined by turning the equipment off and
on, the user is encouraged to try to correct the interference by one or more of the following measures:
• Reorient or relocate the receiving antenna.
• Increase the separation between the equipment and receiver.
• Connect the equipment into an outlet on a circuit different from that to which the receiver is connected.
• Consult the dealer or an experienced radio/TV technician for help.
FCC CAUTION
Changes or modifications not expressly approved by the party responsible for compliance could void the user’s authority to operate the
equipment.
Declaration of Conformity
Model Number: GP-300
Trade Name: CASIO COMPUTER CO., LTD.
Responsible party: CASIO AMERICA, INC.
Address: 570 MT. PLEASANT AVENUE, DOVER, NEW JERSEY 07801
Telephone number: 973-361-5400
This device complies with Part 15 of the FCC Rules, Operation is subject to the following two conditions:
(1) This device may not cause harmful interference, and (2) this device must accept any interference received, including interference that
may cause undesired operation.
Manufacturer:
CASIO COMPUTER CO., LTD.
6-2, Hon-machi 1-chome, Shibuya-ku, Tokyo 151-8543, Japan
Responsible within the European Union:
Casio Europe GmbH
Casio-Platz 1, 22848 Norderstedt, Germany
www.casio-europe.com
Declaration of Conformity According to EU Directive
EN-1
GP300-ES-1A.indd 3 2015/04/24 13:38:04

EN-2
Contents
General Guide EN-4
Keyboard Cover . . . . . . . . . . . . . . . . . . . . . . . . EN-5
To open the keyboard cover . . . . . . . . . . . . . . . . . EN-5
To close the keyboard cover . . . . . . . . . . . . . . . . . EN-5
Power Outlet EN-6
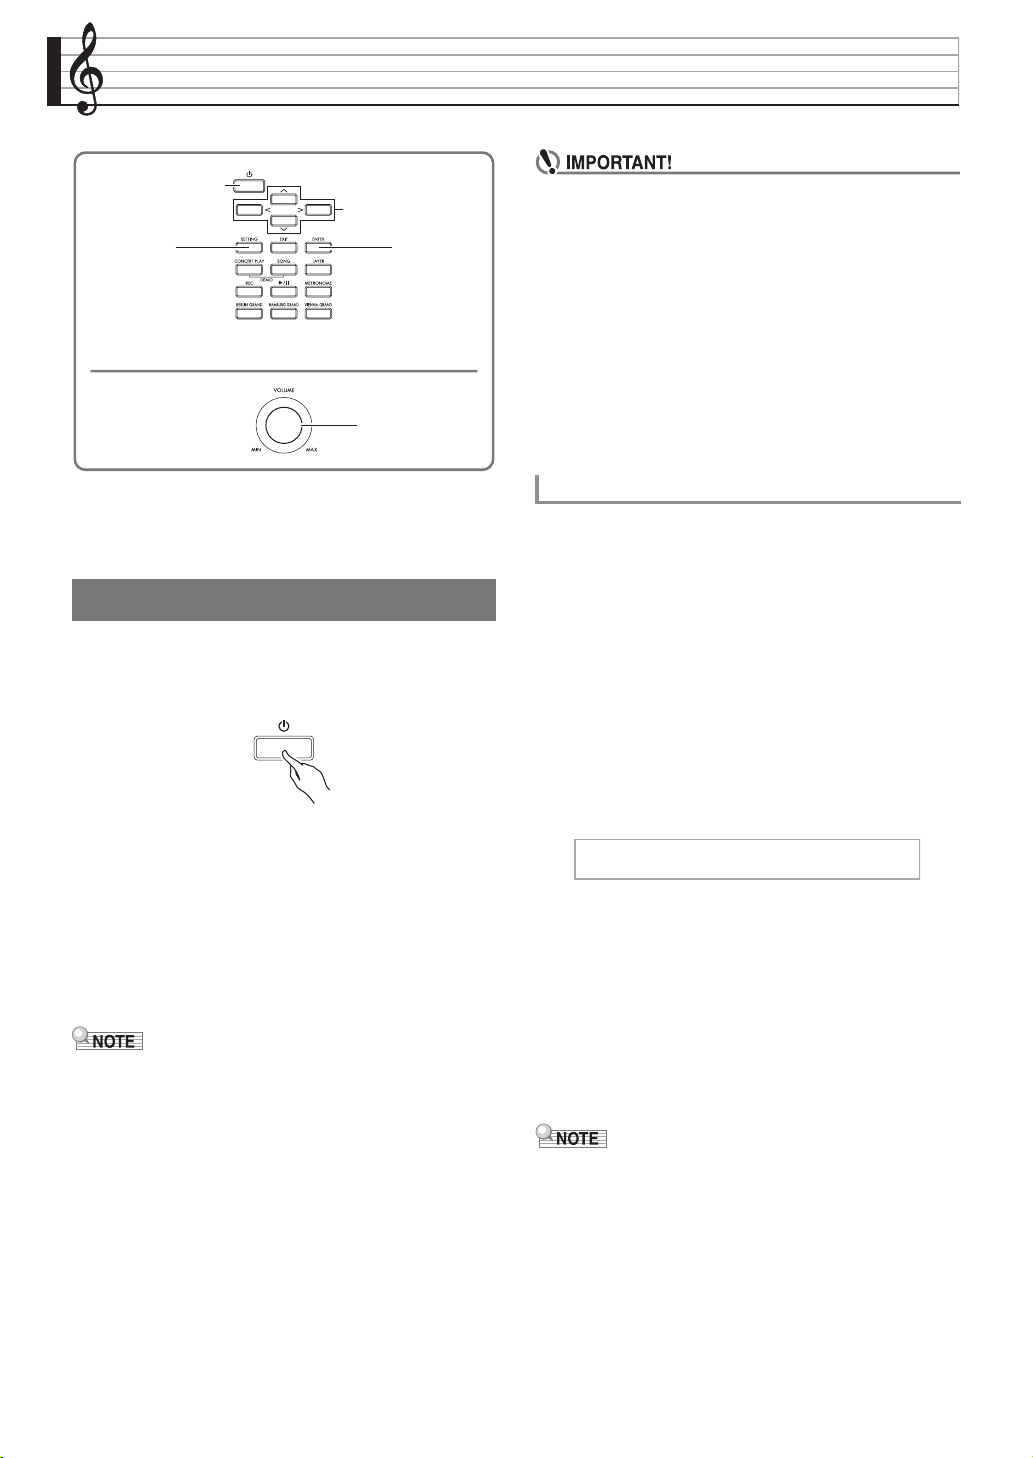
Turning Power On or Off. . . . . . . . . . . . . . . . . . EN-6
Auto Power Off . . . . . . . . . . . . . . . . . . . . . . . . . . . EN-6
Adjusting the Volume Level. . . . . . . . . . . . . . . . EN-7
Adjusting Display Contrast . . . . . . . . . . . . . . . . EN-7
Returning the Digital Piano to Its
Factory Default Settings. . . . . . . . . . . . . . . . . EN-7
Operation Lock . . . . . . . . . . . . . . . . . . . . . . . . . EN-7
Operations Common to All Modes EN-8
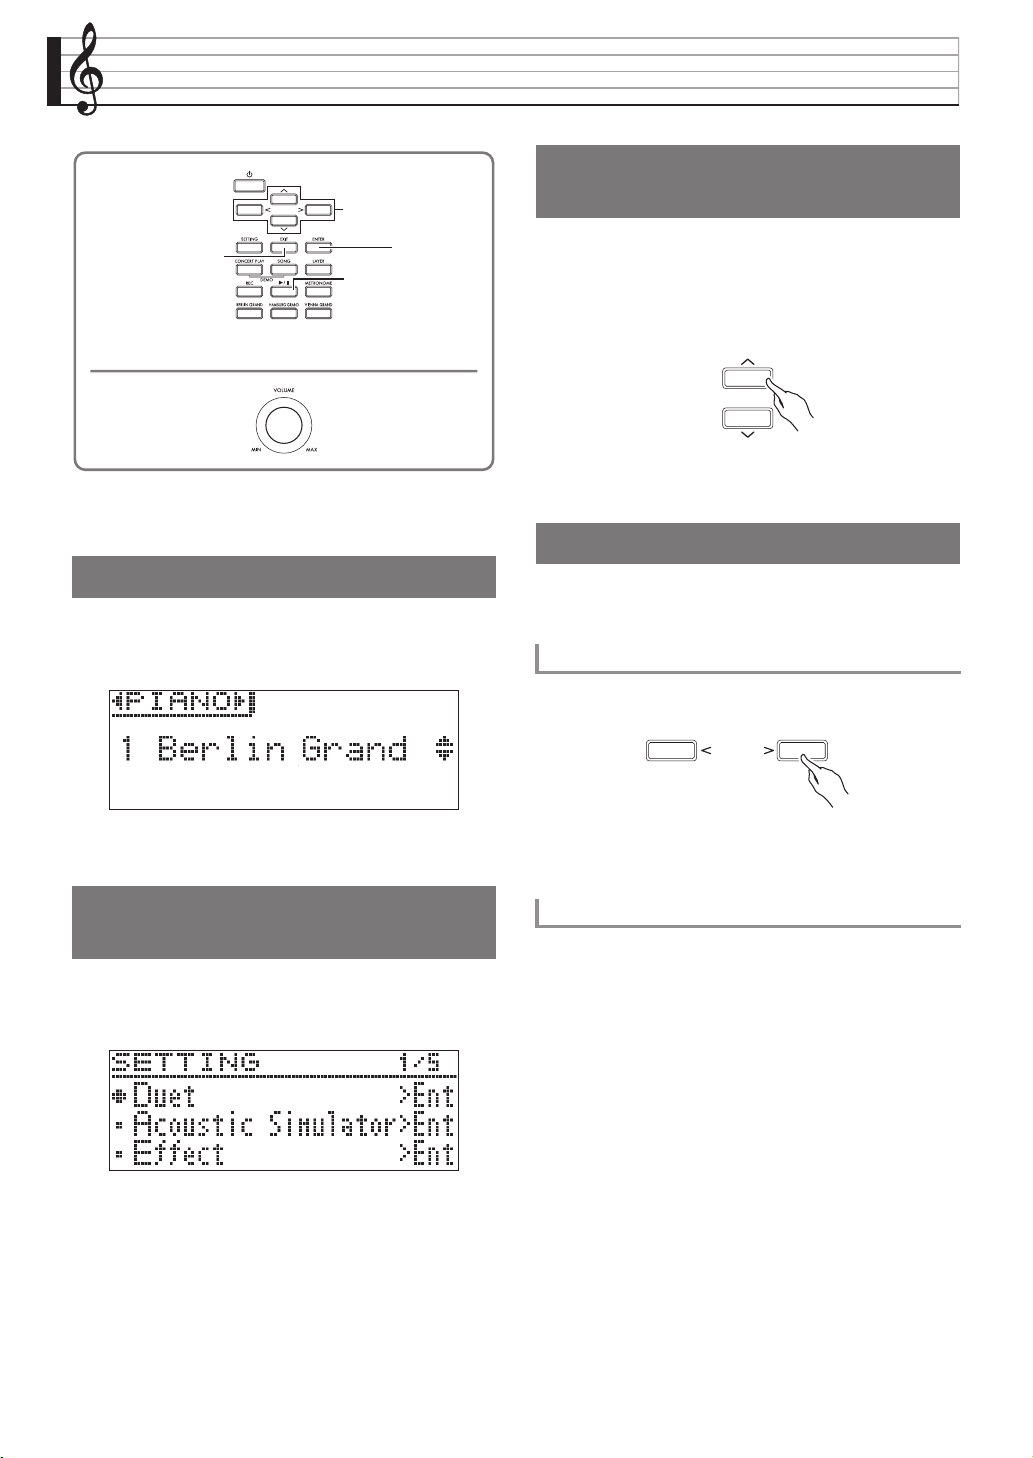
About the Home Screen . . . . . . . . . . . . . . . . . . EN-8
Navigating Between Setting Screens . . . . . . . . EN-8
Selecting an Item (Parameter) to
Change Its Setting . . . . . . . . . . . . . . . . . . . . . EN-8
Changing a Number or a Value. . . . . . . . . . . . . EN-8
To scroll a number sequentially . . . . . . . . . . . . . . . EN-8
To fast scroll a number . . . . . . . . . . . . . . . . . . . . . EN-8
Setting Shortcut Menus. . . . . . . . . . . . . . . . . . . EN-9
Starting and Stopping Playback . . . . . . . . . . . . EN-9
To repeat play a specific section of a song . . . . . . EN-9
Playing with Different Tones EN-10
Selecting and Playing a Tone . . . . . . . . . . . . . EN-10
To press a tone group button to select a
grand piano tone . . . . . . . . . . . . . . . . . . . . . . . EN-10
To use the tone group button to select
other tones . . . . . . . . . . . . . . . . . . . . . . . . . . . EN-10
To use the tone list to select a tone . . . . . . . . . . . EN-11
Using the Digital Piano’s Pedals . . . . . . . . . . . EN-11
To adjust the half pedal trigger position . . . . . . . . EN-12
Adjusting Acoustic Piano Sound
Characteristics . . . . . . . . . . . . . . . . . . . . . . . EN-13
Using Effects. . . . . . . . . . . . . . . . . . . . . . . . . . EN-14
To apply a hall simulator . . . . . . . . . . . . . . . . . . . EN-14
To apply chorus to a tone . . . . . . . . . . . . . . . . . .EN-15
To adjust brilliance. . . . . . . . . . . . . . . . . . . . . . . . EN-16
About DSP . . . . . . . . . . . . . . . . . . . . . . . . . . . . . EN-16
Splitting the Keyboard for Duet Play . . . . . . . . EN-16
To change the octaves of the duet keyboards . . .EN-17
Layering Two Tones . . . . . . . . . . . . . . . . . . . . EN-18
To adjust the volume balance between
two layered tones . . . . . . . . . . . . . . . . . . . . . . EN-18
To change the octave of each layer . . . . . . . . . . . EN-19
Splitting the Keyboard between
Two Different Tones. . . . . . . . . . . . . . . . . . . EN-19
To modify split settings . . . . . . . . . . . . . . . . . . . . EN-20
Using the Metronome . . . . . . . . . . . . . . . . . . . EN-21
To start and stop . . . . . . . . . . . . . . . . . . . . . . . . EN-21
To configure metronome settings . . . . . . . . . . . . EN-21
Changing Keyboard Response to
Touch Pressure (Touch Response) . . . . . . . EN-22
To change touch response sensitivity . . . . . . . . . EN-22
Changing the Pitch
(Transpose, Tuning, Octave Shift) . . . . . . . . EN-22
To change the pitch in semitone steps
(Transpose) . . . . . . . . . . . . . . . . . . . . . . . . . . . EN-22
Fine Tuning (Tuning) . . . . . . . . . . . . . . . . . . . . . . EN-23
To change the tuning curve
(Stretch Tuning). . . . . . . . . . . . . . . . . . . . . . . . EN-23
Octave Shift . . . . . . . . . . . . . . . . . . . . . . . . . . . . EN-24
Changing the Temperament of
the Keyboard . . . . . . . . . . . . . . . . . . . . . . . . EN-24
Using Built-in Songs
(Concert Play, Music Library) EN-25
Concert Play . . . . . . . . . . . . . . . . . . . . . . . . . . EN-25
To listen to a Concert Play Song (Listen Mode). . EN-25
To play along with an orchestra using
Concert Play (Play Mode) . . . . . . . . . . . . . . . . EN-26
To adjust the playback volume level of a
Concert Play song. . . . . . . . . . . . . . . . . . . . . . EN-27
Concert Play Songs Obtained
with a Computer, etc. . . . . . . . . . . . . . . . . . . EN-27
To save Concert Play songs obtained
with a computer, etc. to a USB flash drive. . . . EN-27
To play back Concert Play songs obtained
with a computer, etc. . . . . . . . . . . . . . . . . . . . EN-27
Music Library. . . . . . . . . . . . . . . . . . . . . . . . . . EN-27
To play back a specific music library song . . . . . EN-28
To practice with a music library song . . . . . . . . . EN-28
Playing Back Song Data Stored on a
USB Flash Drive. . . . . . . . . . . . . . . . . . . . . . EN-29
To adjust the playback volume level of
song data . . . . . . . . . . . . . . . . . . . . . . . . . . . . EN-29
Demo Song EN-30
Performing Demo Play . . . . . . . . . . . . . . . . . . EN-30
Comparing Grand Piano Tones . . . . . . . . . . . EN-31
Getting Ready EN-57
Assembling the Stand . . . . . . . . . . . . . . . . . EN-57
To connect the cables . . . . . . . . . . . . . . . . . EN-60
To install the music stand and
headphones hook . . . . . . . . . . . . . . . . . . . EN-61
Opening and Closing the Piano Lid . . . . . . . EN-62
Removing the Protective Tape from
the Keyboard
. . . . . . . . . . . . . . . . . . . . . . . EN-63
Power Outlet . . . . . . . . . . . . . . . . . . . . . . . . . EN-63
Connecting Headphones. . . . . . . . . . . . . . . . EN-64
Connecting Audio Equipment or
an Amplifier . . . . . . . . . . . . . . . . . . . . . . . . EN-64
Bundled and Optional Accessories . . . . . . . . EN-65
GP300-ES-1A.indd 4 2015/04/24 13:38:04

Contents
EN-3
English
Recording and Playback EN-32
MIDI Recorder
(Recording to Digital Piano Memory) . . . . . . EN-34
To record to a specific song track . . . . . . . . . . . .EN-34
To record the other track of a song . . . . . . . . . . . EN-35
To configure precount settings . . . . . . . . . . . . . . EN-35
To play back from Digital Piano memory . . . . . . . EN-36
To adjust the playback volume level of a
MIDI Recorder song. . . . . . . . . . . . . . . . . . . . .EN-36
To delete recorded data . . . . . . . . . . . . . . . . . . . EN-36
Audio Recorder
(Recording to a USB Flash Drive) . . . . . . . . EN-37
To record keyboard play to a USB flash drive . . . EN-37
To record keyboard play while playing back a
MIDI Recorder song or song data . . . . . . . . . .EN-38
To play back data recorded on a
USB flash drive . . . . . . . . . . . . . . . . . . . . . . . . EN-38
To adjust the Audio Recorder volume level . . . . . EN-38
To delete the currently selected
Audio Recorder song data . . . . . . . . . . . . . . . . EN-39
Configuring Digital Piano Settings EN-40
Configuring Settings . . . . . . . . . . . . . . . . . . . . EN-40
Parameter List. . . . . . . . . . . . . . . . . . . . . . . . . EN-41
USB Flash Drive EN-46
Preparing a USB Flash Drive . . . . . . . . . . . . . EN-47
Supported USB Flash Drives . . . . . . . . . . . . . . . . EN-47
Data Types Supported by the Digital Piano . . . . . EN-48
To connect a USB flash drive to and
to detach it from the Digital Piano . . . . . . . . . .EN-49
To format a USB flash drive. . . . . . . . . . . . . . . . . EN-50
Saving Standard Song Data to a
USB Flash Drive . . . . . . . . . . . . . . . . . . . . . EN-50
Saving Digital Piano Data to a
USB Flash Drive . . . . . . . . . . . . . . . . . . . . . EN-51
Loading USB Flash Drive Data into
Digital Piano Memory. . . . . . . . . . . . . . . . . . EN-52
Deleting USB Flash Drive File. . . . . . . . . . . . . EN-53
Renaming a USB Flash Drive File . . . . . . . . . EN-53
Error Indicators . . . . . . . . . . . . . . . . . . . . . . . . EN-54
Connecting to a Computer EN-55
Minimum Computer System Requirements . . EN-55
Connecting the Digital Piano to
Your Computer. . . . . . . . . . . . . . . . . . . . . . . EN-55
Using MIDI . . . . . . . . . . . . . . . . . . . . . . . . . . . EN-56
What is MIDI? . . . . . . . . . . . . . . . . . . . . . . . . . . . EN-56
Troubleshooting EN-66
Reference EN-68
Product Specifications. . . . . . . . . . . . . . . . . . . EN-68
Operating Precautions . . . . . . . . . . . . . . . . . . EN-70
Appendix A-1
Tone List ..............................................................A-1
Concert Play List .................................................. A-2
Music Library List .................................................A-3
Grand Piano Demo Song List ..............................A-3
MIDI Implementation Chart
•Any reproduction of the contents of this manual, either in part or its entirety, is prohibited. Except for your
own, personal use, any other use of the contents of this manual without the consent of CASIO is prohibited
under copyright laws.
•IN NO EVENT SHALL CASIO BE LIABLE FOR ANY DAMAGES WHATSOEVER (INCLUDING,
WITHOUT LIMITATION, DAMAGES FOR LOSS OF PROFITS, BUSINESS INTERRUPTION, LOSS OF
INFORMATION) ARISING OUT OF THE USE OF OR INABILITY TO USE THIS MANUAL OR PRODUCT,
EVEN IF CASIO HAS BEEN ADVISED OF THE POSSIBILITY OF SUCH DAMAGES.
•The contents of this manual are subject to change without notice.
•The actual appearance of the product may be different from that shown in the illustrations in this User’s
Guide.
•Company and product names used in this manual may be registered trademarks of others.
GP300-ES-1A.indd 5 2015/04/24 13:38:04

EN-4
General Guide
•The following explains the meaning of the $symbol that appears on the product console and with the key
names below.
•The names shown here are always indicated in bold when they appear within the text of this manual.
$:Indicates a function that is enabled by holding down the button for some time.
LCD display
P(Power) button
Tone group button
(BERLIN GRAND button, HAMBURG GRAND button, VIENNA GRAND
button)
USB flash drive port
SETTING button
EXIT button
CONCERTPLAY
button
REC button
Arrow buttons
ENTER button
SONG button
LAYER button
X/k(Start/stop)
button
METRONOME button
VOLUME controller
GP300-ES-1A.indd 6 2015/04/24 13:38:04

General Guide
EN-5
English
Bottom
Rear
Pedal connector
DC 24V terminal
USB port
LINE OUT R, L/MONO jacks
LINE IN R, L/MONO jacks MIDI OUT/IN
terminals
Power lamp
PHONES jacks
Front
When playing the Digital Piano, make sure that the
cover is fully opened.
*CAUTION
•Note the points below whenever opening or closing
the keyboard cover to avoid pinching your fingers or
the fingers of others between the cover and
keyboard. Particular care is required when children
are present.
–Do not let go of the cover while opening or closing
it.
–When closing the cover, do not press down on its
top with your hand. (Doing so creates the risk of
pinching your hand between the folding panels.)
–Do not play on the keyboard while the cover
incompletely opened.
1.
Holding the handles on the front of the cover
with both hands, carefully lift it upwards.
2.
Carefully push the cover into back towards
the piano so it folds completely out of the
way.
1.
Holding the handles on the front of the cover
with both hands, carefully pull it towards you.
2.
Carefully lower the cover into place.
Keyboard Cover To open the keyboard cover
To close the keyboard cover
GP300-ES-1A.indd 7 2015/04/24 13:38:05

EN-6
Power Outlet
After you finish assembling the stand, turn on the
Digital Piano. For details, see “Getting Ready” on page
EN-57.
1.
Press the P(Power) button to turn on Digital
Piano power.
•If you press P(Power) button only lightly, the
display will light up momentarily but power will not
turn on. This does not indicate malfunction. Press P
(Power) button firmly and completely to turn on
power.
2.
To turn off the Digital Piano, hold down the
P(Power) button until the Digital Piano’s
display goes blank.
•You can configure the Digital Piano to save its setup
when power is turned off. For details, see
“Configuring Digital Piano Settings” on page EN-40,
and “General” 3“Auto Resume” in the “Parameter
List” on page EN-41.
• Pressing the P(Power) button to turn off power
actually puts the Digital Piano into a standby state.
Minute amounts of current continue to flow within the
Digital Piano in the standby state. If you do not plan
to use the Digital Piano for a long time or if there is a
lightning storm in your area, be sure to unplug the
AC adaptor from the power outlet.
• The message “Please Wait...” will remain on the
display while a data save operation is in progress.
Do not perform any other operation while it is
displayed. Turning off the Digital Piano can cause
Digital Piano data to be deleted or become
corrupted.
This Digital Piano is designed to turn off automatically
to avoid wasting power after no operation is
performed for a preset amount of time. The Auto
Power Off trigger time is about four hours.
•You also can use the procedure below to temporarily
suspend Auto Power Off.
■To disable Auto Power Off
1.
Press the SETTING button to display the
setting screen.
2.
Use the qand warrow buttons to select
“General” and then press the ENTER button.
3.
Use the qand warrow buttons to select
“Auto Power Off”.
4.
Use the uand iarrow buttons to select
“Off”.
5.
Press the SETTING button to exit the setting
screen.
•To re-enable Auto Power Off, perform the above
procedure and select “On” in step 4.
Turning Power On or Off
u,q,w,i
ENTER
VOLUME
P
SETTING
Auto Power Off
zG e n e r a l > E n t
GP300-ES-1A.indd 8 2015/04/24 13:38:05

Power Outlet
EN-7
English
1.
Use the VOLUME controller to adjust the
volume.
•Your Digital Piano has a Volume Sync Equalizer
feature that automatically enhances tone quality in
accordance with the volume level. This feature
ensures that low range and/or high range sounds
are easier to hear, even at low volume levels. For
details, see “General”3”Volume Sync EQ” in the
“Parameter List” (page EN-41).
1.
Press the SETTING button to display the
setting screen.
2.
Use the qand warrow buttons to select
“General” and then press the ENTER button.
3.
Use the qand warrow buttons to select
“LCD Contrast”.
4.
Use the u(–) and i(+) arrow buttons to
adjust display contrast.
•The contrast setting range is 0 to 26.
5.
Press the SETTING button to exit the setting
screen.
Perform the following procedure when you want to
return the Digital Piano’s stored data and settings to
their initial factory defaults.
1.
Press the SETTING button to display the
setting screen.
2.
Use the qand warrow buttons to select
“General” and then press the ENTER button.
3.
Use the qand warrow buttons to select
“Factory Reset” and then press the ENTER
button.
•This causes the confirmation message “Initialize
All?” to appear.
4.
Press the ENTER button.
•This will cause the confirmation message “Sure?” to
appear.
5.
Press the iarrow button to execute the
initialize operation.
•To cancel the initialize operation, press the uarrow
button.
•The message “Please Wait...” will remain on the
display while the operation is being performed. Do
not perform any operation while this message is on
the display. “Complete!” appears on the display after
the operation is complete.
Your Digital Piano lets you lock its buttons to protect
against operation errors. For details, see “Configuring
Settings” on page EN-40, and “General” 3
“Operation Lock” in the “Parameter List” on page
EN-41.
Adjusting the Volume Level
Adjusting Display Contrast
Returning the Digital Piano to
Its Factory Default Settings
Operation Lock
GP300-ES-1A.indd 9 2015/04/24 13:38:05

EN-8
Operations Common to All Modes
The operations described in this section are common to
all modes and functions.
Turning on the Digital Piano displays a screen that
shows the name of the current selected tone. This is the
Home Screen.
•After performing operations, you can navigate back
to the home screen by pressing the EXIT button.
If a display item has “>Ent” to the right of it, it means
that pressing the ENTER button will display a
submenu.
•To navigate back to a previous screen, press the
EXIT button.
A dot (0) or arrow (X) mark to the left of a parameter
name indicates that the parameter is selected.
1.
Use the qand warrow buttons to move
the mark up or down.
•Holding down either button moves the mark at high
speed.
Use the operations in this section to specify a number
or to change a value.
1.
Press the u(–) or i(+) arrow button.
•To return a setting to its initial default, press the u
and iarrow buttons at the same time.
1.
Hold down the u(–) or i(+) arrow button.
About the Home Screen
Navigating Between Setting
Screens
/k
EXIT
u,q,w,i
ENTER
Selecting an Item (Parameter)
to Change Its Setting
Changing a Number or a Value
To scroll a number sequentially
To fast scroll a number
GP300-ES-1A.indd 10 2015/04/24 13:38:05

Operations Common to All Modes
EN-9
English
Holding down a button displays a menu of functions and/or tones like the one shown below to appear. The content
of the menu depends on the button that is held down.
Setting Shortcut Menus
Button Name Shortcut Menu Contents More Information
CONCERT PLAY Concert Play volume level setting “To adjust the playback volume level of a Concert Play
song”, page EN-27
SONG Song data settings “Song >Ent” in the “Parameter List”, page EN-41
LAYER Layer settings “Layering Two Tones”, page EN-18
REC MIDI Recorder and Audio Recorder settings “Recording and Playback”, page EN-32
METRONOME Metronome settings “To configure metronome settings”, page EN-21
BERLIN GRAND BERLIN GRAND tone demo songs “Performing Demo Play”, page EN-30
HAMBURG GRAND HAMBURG GRAND tone demo songs
VIENNA GRAND VIENNA GRAND tone demo songs
Use the procedure below with functions that allow
playback of data.
PREPARATION
•Select the song you want to play back.
–Concert Play: “To listen to a Concert Play Song
(Listen Mode)” (page EN-25)
–Music Library: “To play back a specific music
library song” (page EN-28)
–MIDI Recorder: “To play back from Digital Piano
memory” (page EN-36)
–SMF: “Playing Back Song Data Stored on a USB
Flash Drive” (page EN-29)
–Audio Recorder: ”To play back data recorded on a
USB flash drive” (page EN-38)
1.
Press the X/kbutton to start playback.
•Holding down the uarrow button during playback
fast reverses the track.
•Holding down the iarrow button during playback
fast forwards the track.
•Press and releasing the uarrow button causes
playback to jump to the beginning of the track.
2.
Press the X/kbutton to pause playback.
•Press the X/kbutton again to resume playback.
•You can use the procedure in the next section to
repeat play a specific section of a song.
•This procedure is not supported during demo song
play (page EN-30).
1.
While a tune is playing, press the ENTER
button at when the beginning of the section
you want to repeat (Point A) is reached.
•This causes “A” to flash on the display.
2.
Press the ENTER button again at when the
end of the section you want to repeat (Point
B) is reached.
•This causes “B” to flash on the display along with
“A”.
•Repeat playback of the section from Point A to Point
B starts automatically.
•Holding down the uarrow button during repeat
playback jumps to Point A. Holding down the i
arrow button during playback jumps to Point B.
3.
To exit repeat playback, press the ENTER
button.
•This will cause “A” and “B” to stop flashing on the
display.
•In the case of music library, MIDI recorder, and SMF
songs, Point A and Point B can be specified in
measure units.
Starting and Stopping
Playback
To repeat play a specific section of a song
GP300-ES-1A.indd 11 2015/04/24 13:38:05

EN-10
Playing with Different Tones
Your Digital Piano has 26 built-in tones, which include
those of the world-renowned grand pianos. It also has
a Hall Simulator and other features (page EN-14) that
let you add effects that give you the feel of playing in
one of the world’s famous concert halls.
Use one of the three procedures below to select the tone
you want.
–Press a tone group button to select a grand piano
tone
–Use the tone group button to select other tones
–Use the tone list to select a tone
•For information about tone group names and the
names of the tones in each group, see the “Tone List”
(page A-1).
Tone List
1.
Press one of the buttons below.
BERLIN GRAND (Berlin grand piano)
HAMBURG GRAND (Hamburg grand piano)
VIENNA GRAND (Vienna grand piano)
•The name of the tone assigned to the button you
pressed will appear on the display.
•Pressing the button of the tone group that is currently
selected scrolls through the group tones without
leaving the group.
1.
While holding down the SETTING button,
press the button of the tone group you want.
•To select a tone, hold down the SETTING button
while pressing the group button of the currently
selected group. This will cycle through the tones
included in the group.
Selecting and Playing a Tone
EXIT
u,q,w,i
LAYER
ENTER
METRONOME
SETTING
Tone group button
Tone List/
Lista de tonos
Tone Group/
Grupo de
tonos
No./
Nº
Tone Name/
Nombre de tonos
To press a tone group button to select a
grand piano tone
To use the tone group button to select
other tones
Tone Group Button
ELECTRIC PIANO BERLIN GRAND
STRINGS HAMBURG GRAND
ORGAN VIENNA GRAND
GP300-ES-1A.indd 12 2015/04/24 13:38:05

Playing with Different Tones
EN-11
English
With this method, all of the Digital Piano’s tones are
included in the list, including those not assigned to a
tone group button.
1.
On the home screen (page EN-8), use the w
and qarrow buttons to select the tone
name you want.
•The pointer (X) indicates the name of the currently
selected tone. Pressing a keyboard key plays the
selected tone.
•The pointer (X) does not stay in any particular tone
group.
•Holding down the qor warrow button scrolls
through tone names at high speed.
•You can use the uand iarrow buttons to select a
tone group.
•To return to tone number 01 (Berlin Grand), press the
qand warrow buttons at the same time.
2.
Press the ENTER button to apply the
currently selected tone.
•The currently selected tone will also be applied
automatically if you do not perform any button
operation for about ten seconds in step 1.
Your Digital Piano comes equipped with three pedals:
damper, soft, and sostenuto
Pedal Functions
Damper Pedal
Pressing the damper pedal while playing will cause the
notes you play to reverberate.
•When grand piano is selected as the tone, using this
pedal generates harmonic and other resonance, just
like the damper pedal on an acoustic grand piano.
Half-pedal operation (pressing the pedal part way)
is also supported.
Soft Pedal
Pressing this pedal while playing suppresses notes
played on the keyboard after the pedal was pressed,
and makes them sound softer.
Sostenuto Pedal
Only the notes of the keys that are depressed when this
pedal is pressed are sustained, even if the keyboard
keys are released, until the pedal is released.
•If pressing the pedal does not produce the desired
effect, it could mean that the pedal cord is not
connected properly. Refer to step 2 under “To
connect the cables” (page EN-60).
To use the tone list to select a tone Using the Digital Piano’s
Pedals
Soft pedal Damper pedal
Sostenuto pedal
GP300-ES-1A.indd 13 2015/04/24 13:38:06

EN-12
Playing with Different Tones
1.
Press the SETTING button to display the
setting screen.
2.
Use the qand warrow buttons to select
“General” and then press the ENTER button.
3.
Use the qand warrow buttons to select
“Half Pedal Pos.”.
4.
Use the u(–) and i(+) arrow buttons to
change the setting value and adjust the half
pedal trigger position.
•+1 or greater: Deeper trigger position
–1 or less: Shallower trigger position
•The setting range is –2 to +2.
5.
Press the SETTING button to exit the setting
screen.
To adjust the half pedal trigger position
zH a l f P e d a l P o s .
GP300-ES-1A.indd 14 2015/04/24 13:38:06

Playing with Different Tones
EN-13
English
The tones of your Digital Piano have built-in elements that give them the characteristic reverberation of an acoustic
piano. Each of these elements can be individually adjusted as described below.
Adjusting Acoustic Piano Sound Characteristics
Display Name Description Setting Range
Hammer Response Hammer Response. The size of the hammers that strike the strings in an acoustic
piano changes according to the key range, so the timing of note sounding also
changes with the range. This settings lets you select timing of note sounding.
• Default: Optimum setting for currently selected tone.
Off: Fastest response across entire keyboard, regardless of range.
1 to 10: A greater value produces slower timing.
D (Default),
Off (Disabled),
1 to 10
Lid Simulator Lid Simulator. Timbre changes depending on how much the lid of an acoustic piano
is open. You can select one of the lid opening settings described below.
• Default: Optimum setting for currently selected tone.
Closed: Lid closed.
Semi (Semi-open): Lid partially open.
Full (Full-open): Lid fully open.
Removed: Lid removed.
D (Default),
Closed,
Semi,
Full,
Removed
Damper Resonance Damper Resonance. Pressing the damper pedal on an acoustic piano opens all 88 of
the strings, causing all of the strings that are harmonics of the strings that are played
to resonate. You can select one of the resonance settings described below.
• Default: Optimum setting for currently selected tone.
• Off (Disabled), 1 to 10: A larger value increases the effect level.
D (Default),
Off (Disabled),
1 to 10
Damper Noise Damper Noise. Damper noise is a slight metallic ringing sound that is generated as
the damper of an acoustic piano separates from the wires pedal when the damper
pedal is pressed. You can use the settings below to adjust the volume level of
damper noise.
• Default: Optimum setting for currently selected tone.
• Off (Disabled), 1 to 10: A larger value increases the noise level.
D (Default),
Off (Disabled),
1 to 10
String Resonance String Resonance. Playing on an acoustic piano causes the strings that are harmonics
of the played strings to resonate. You can select one of the resonance settings
described below.
• Default: Optimum setting for currently selected tone.
• Off (Disabled), 1 to 10: A larger value increases the resonance level.
D (Default),
Off (Disabled),
1 to 10
GP300-ES-1A.indd 15 2015/04/24 13:38:06

EN-14
Playing with Different Tones
1.
Press the SETTING button to display the
setting screen.
2.
Use the qand warrow buttons to select
“Acoustic Simulator” and then press the
ENTER button.
3.
Use the qand warrow buttons to select
the item you want to adjust.
4.
Use the u(–) and i(+) arrow buttons to
change the setting.
5.
Press the SETTING button to exit the setting
screen.
Hall Simulator
Simulates the rich clarity, unconstrained brilliance, and
other acoustic distinctive characteristics of world-
famous concert halls.
•Timbre and reverberation change depending on the
position in the concert hall where the listener is
located. Hall Simulator can simulate listening at any
position within the currently selected hall.
•Disabling Hall Simulator also disables the Hall
effect.
•Producing sound with the Digital Piano’s sound
source (keyboard play, MIDI Recorder*, Music
Library*) while “Player” is selected for the listening
position produces a four-channel (up, down, left,
right) three-dimensional sound. The “Listener”
position and/or playback using the Audio
Recorder*, Concert Play*, produces the same left/
right-channel acoustics of a standard stereo device.
*For details, see the pages referenced below.
–MIDI Recorder and Audio Recorder (page
EN-32)
–Concert Play and Music Library (page EN-25)
Chorus
Adds more breadth to your notes.
Brilliance
Effect for adjusting the brilliance of the tone.
1.
Press the SETTING button to display the
setting screen.
2.
Use the qand warrow buttons to select
“Effect” and then press the ENTER button.
3.
Use the qand warrow buttons to select
“Hall Simulator”.
zA c o u s t i c S i m u l a t o r > E n t
Using Effects
To apply a hall simulator
zE f f e c t > E n t
GP300-ES-1A.indd 16 2015/04/24 13:38:06

Playing with Different Tones
EN-15
English
4.
Use the uand iarrow buttons to select a
Hall Simulator name.
5.
Use the qand warrow buttons to select
“Position”.
6.
Use the uand iarrow buttons to select a
position.
•Player: Position of the performer seated in front of
the piano on the stage of the hall
Listener 1: Position of audience seated at the front of
the hall
Listener 2: Position of audience seated further back
than Listener 1
Listener 3: Position of audience seated further back
than Listener 2
7.
Press the SETTING button to exit the setting
screen.
1.
Press the SETTING button to display the
setting screen.
2.
Use the qand warrow buttons to select
“Effect” and then press the ENTER button.
3.
Use the qand warrow buttons to select
“Chorus”.
4.
Use the uand iarrow buttons to select a
chorus name.
5.
Press the SETTING button to exit the setting
screen.
Number
Hall simulator
Name Description
OFF Off
1 ROOM Room
2 SALON Salon
3 N.Y. CLUB Manhattan music club
4 SCORING
STAGE
Los Angeles movie scoring stage
(movie music recording studio)
5 DUTCH
CHURCH
Amsterdam church with
acoustics that are suitable for
music
6 STANDARD
HALL
Standard concert hall
7 OPERA HALL Uniquely shaped Sydney Concert
Hall
8 VIENNESE
HALL
Viennese classic concert hall,
which was built approximately
100 years ago
9 L.A. HALL Large modern Los Angeles
concert hall
10 BERLIN HALL Berlin arena type classic concert
hall
11 FRENCH
CATHEDRAL
Large gothic cathedral in Paris
12 BRITISH
STADIUM
Large outdoor stadium in the
London suburbs
zP o s i t i o n
To apply chorus to a tone
Display Setting
Off
Light Chorus
Chorus
Deep Chorus
Flanger
Off (OFF)
Light Chorus
Medium Chorus
Deep Chorus
Flanger (whooshing effect)
zC h o r u s
GP300-ES-1A.indd 17 2015/04/24 13:38:06

EN-16
Playing with Different Tones
1.
Press the SETTING button to display the
setting screen.
2.
Use the qand warrow buttons to select
“Effect” and then press the ENTER button.
3.
Use the qand warrow buttons to select
“Brilliance”.
4.
Use the u(–) and i(+) arrow buttons to
change the setting.
•+1 or higher: Makes the tone brighter.
–1 or lower: Makes the tone darker.
•The setting range is –3 to +3.
5.
Press the SETTING button to exit the setting
screen.
DSP makes it possible to digitally produce complex
acoustic effects. The DSP is assigned to each tone
whenever you turn on Digital Piano power.
You can split the keyboard in the center for duet play
so the left and right sides have the same ranges.
The left pedal operates as the left side damper pedal,
while the right pedal is the right side damper pedal.
The Duet Mode is the perfect way to conduct lessons,
with the teacher playing on the left side as the student
playing the same song on the right side.
•Only the damper pedal for the right side keyboard
supports half-pedal operations.
1.
Specify the number of the tone you want to
use.
•See “Selecting and Playing a Tone” on page EN-10 for
information about how to select a tone.
2.
Press the SETTING button to display the
setting screen.
3.
Use the qand warrow buttons to select
“Duet” and then press the ENTER button.
4.
Use the qand warrow buttons to select
“Duet Mode”.
To adjust brilliance
About DSP
zB r i l l i a n c e
Splitting the Keyboard for
Duet Play
C3 C4 C5 C6 C3 C4 C5 C6
Keyboard
Split point
Left keyboard Right keyboard
(middle C)(middle C)
Pedals
Left side damper pedal
Left and right side damper pedal
Right side damper pedal
zD u e t > E n t
GP300-ES-1A.indd 18 2015/04/24 13:38:06

Playing with Different Tones
EN-17
English
5.
Use the uand iarrow buttons to enter or
exit the Duet Mode.
•Off: Disabled
On: Enabled (Both left and right keyboard sounds
are input from the left and right speakers.)
Pan: Enabled (Left side keyboard play is output from
the left speaker and right side play is output
from the right speaker. The Duet Pan Mode
effect is applied only while a grand piano tone is
selected.)
•Turning on layer (page EN-18) automatically exits the
Duet Mode.
6.
Press the SETTING button to exit the setting
screen.
•After you are finished using the Duet Mode, repeat
the above procedure from step 2 and select “Off” in
step 5. The Duet Mode is also exited by any one of the
operations below.
–Turning on layer (page EN-18)
•Note that Layer (page EN-18), Transpose (page
EN-22), and normal Octave Shift (page EN-24) cannot
be selected while duet is enabled. You can use the
procedure under “To change the octaves of the duet
keyboards” below to change the octaves of the duet
keyboards.
•The effects below are not applied while the DUET
PAN lamp is lit.
–Acoustic Simulator (except for Hammer Response
and Lid Simulator) (page EN-13)
–Hall Simulator (page EN-14)
–Chorus (page EN-15)
You can change the ranges of the left and right
keyboards in octave units from their initial default
settings.
1.
Press the SETTING button to display the
setting screen.
2.
Use the qand warrow buttons to select
“Duet” and then press the ENTER button.
3.
Use the qand warrow buttons to select a
keyboard range.
•Upper Octave: Right-side keyboard
Lower Octave: Left-side keyboard
4.
Use the u(–) and i(+) arrow buttons to
change the octave.
•+1 or higher: Raises the octave by the specified value.
–1 or lower: Lowers the octave by the specified value.
0: Returns the octave to its original setting.
•The setting range is –2 to +2.
•Example: To select “Lower Octave” in step 3 and set
“+1” in step 4
5.
Press the SETTING button to exit the setting
screen.
To change the octaves of the duet
keyboards
zL o w e r O c t a v e
C4 C5 C6 C7 C3 C4 C5 C
6
Left keyboard Right keyboard
1 octave higher than initial
setting Unchanged
GP300-ES-1A.indd 19 2015/04/24 13:38:06

EN-18
Playing with Different Tones
Use the following procedure to layer two tones, so they
sound at the same time.
1.
Press the LAYER button.
2.
Use the uand iarrow buttons to display
“LAYER”.
3.
Select the main tone.
•Use the qand warrow buttons to select “U1”
(Upper 1) and then press the ENTER button.
4.
Select a tone and then press the ENTER
button.
•See “Selecting and Playing a Tone” on page EN-10 for
information about how to select a tone.
5.
Select the layered tone.
•Use the qand warrow buttons to select “U2”
(Upper 2) and then press the ENTER button.
6.
Select a tone and then press the ENTER
button.
7.
Press a keyboard key.
•Both tones sound at the same time.
8.
To cancel layering and switch to a single tone
(Upper 1), press the LAYER button or EXIT
button.
•Each press of the LAYER button toggles between
unlayered (one tone) and layered (two tones).
•Entering the Duet Mode (page EN-16) or Duet Pan
Mode will disable layering.
•Configuring of layering settings is not supported by
MIDI Recorder Track 2 recording.
1.
Hold down the LAYER button until the screen
shown below appears.
2.
Use the qand warrow buttons to select
“Layer Balance”.
3.
Use the u(–) and i(+) arrow buttons to
adjust the layer volume balance.
•–1 or lower: Increases the Upper 1 tone volume.
+1 or higher: Increases the Upper 2 tone volume.
0: Upper 1 and Upper 2 volume the same.
•The setting range is –24 to +24.
4.
To return to the screen you were at prior to
step 1 of this procedure, press EXIT button.
Layering Two Tones
X
U 1
X
U 2
To adjust the volume balance between
two layered tones
zL a y e r B a l a n c e
GP300-ES-1A.indd 20 2015/04/24 13:38:07

Playing with Different Tones
EN-19
English
You can use the procedure below to change the octave
of each layer.
1.
Hold down the LAYER button until the screen
shown below appears.
2.
Use the qand warrow buttons to select
the layer whose octave you want to change.
•Upper 1: Select “Upper1 Octave”
Upper 2: Select “Upper2 Octave”.
3.
Use the u(–) and i(+) arrow buttons to
change the octave.
•+1 or higher: Raises the octave by the specified value.
–1 or lower: Lowers the octave by the specified value.
0: Returns the octave to its original setting.
•The setting range is –2 to +2.
4.
To return to the screen you were at prior to
step 1 of this procedure, press EXIT button.
You can use the procedure below to assign different
tones to the right range and left range of the keyboard,
so it sounds like you are playing an ensemble between
two instruments.
•If you turn on both layer and split, layering will be
applied to the right side range of the keyboard only.
•Use of the Duet Mode (page EN-16) is recommended
to divide the keyboard in the center between a left
keyboard and right keyboard of identical ranges.
1.
Press the LAYER button.
2.
Use the uand ibuttons to display
“SPLIT”.
•To use both keyboard split and keyboard layering,
display “LAYER&SPLIT”.
3.
Select a tone for the left keyboard.
•Use the qand warrow buttons to select “L”
(Lower) and then press the ENTER button.
4.
Select a tone and then press the ENTER
button.
•See “Selecting and Playing a Tone” on page EN-10 for
information about how to select a tone.
To change the octave of each layer Splitting the Keyboard
between Two Different Tones
F#3
Acoustic Bass BERLIN GRAND
Split point
X
L
GP300-ES-1A.indd 21 2015/04/24 13:38:07
This manual suits for next models
1
Table of contents
Other Casio Musical Instrument manuals

Casio
Casio MT-640 User manual

Casio
Casio PRIVIA PX-735 User manual

Casio
Casio TONEBANK MT-750 User manual

Casio
Casio Privia PX-350M User manual

Casio
Casio CTK-710 User manual

Casio
Casio CT-S500 User manual

Casio
Casio RAP-1 User manual

Casio
Casio PX-S5000 User manual

Casio
Casio Celviano AP-22S User manual

Casio
Casio Privia PX-770 User manual

Casio
Casio CTK-3400SK User manual

Casio
Casio Privia PX-700 User manual

Casio
Casio CTK6000 User manual

Casio
Casio AP-750 User manual

Casio
Casio CELVIANO GP-310 User manual

Casio
Casio Privia PX-A800 User manual

Casio
Casio WK-1300 User manual

Casio
Casio AP-20 User manual

Casio
Casio CDP-100 User manual

Casio
Casio CTK-520L User manual