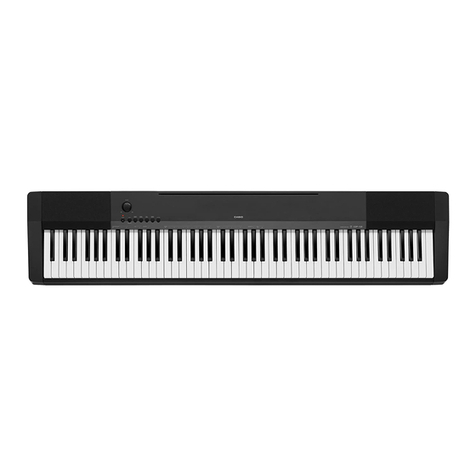
Casio Piano Sound CPS-60 User manual

Casto
Bano
Sound
CPS-60
Digital
Piano
Piano
Digital
CASIO.
CASIO
COMPUTER
CO.,
LTD.
6-1,
Nishi-Shinjuku
2-chome
Shinjuku-ku,
Tokyo
163,
Japan
MO04034201A
&@)
Printed
in
Japan
CASI
©.

Casio
Piano
Sound
CPS-60
Digital
Piano
Thank
you
and
congratulations
on
your
purchase
of
the
CASIO
CPS-60.
In
order
to
enjoy
the
features
and
functions
of
the
CPS-60
to
their
fullest,
be
sure
to
carefully
read
this
manual
and
follow
the
instructions
contained
herein.
Features
30
Preset
Tones
—
The
CPS-60
lets
you
choose
from
30
different
built-in
tones
provided
by
an
advanced
PCM
sound
source.
76-Key
Keyboard
with
Touch
Response
—
From
the
lightest
pianissimo
to
the
most
thunderous
fortissimo,
the
CPS-60’s
“Touch
Response”
keyboard
responds
to
even
the
most
subtle
changes
in
keyboard
dynamics.
And
a
full
76-key
keyboard
gives
you
expanded
freedom
of
musical
expression.
Reverb
Effect
—
The
CPS-60
is
provided
with
reverb
effect
to
add
wide
ranging
ambiance
to
tones.
64
Rhythms
—
All
the
rhythms
you
could
ever
need,
from
pops
and
rock
to
classic.
Auto-Accompaniment
(Multi-Accompaniment
System)
—
Provide
a
harmonic
pattern
with
an
auto-rhythm
that
you
select.
Memory
Function
—
The
memory
function
lets
you
“record”
notes
as
you
play
them
on
the
keyboard.
MIDI
Compatibility
—
The
CPS-60
features
MIDI
—
the
Musical
Instrument
Digital
Interface.
This
industry-standard
interface
lets
you
connect
your
keyboard
with
other
MIDI
instruments,
sound
sources
and
devices
for
synchronized
perfor-
mance.
NOTICE
This
equipment
has
been
tested
and
found
to
comply
with
the
limits
for
a
Class
B
digital
device,
pursuant
to
Part
15
of
the
FCC
Rules.
These
limits
are
designed
to
provide
reasonable
protection
against
harmful
interference
in
a
residential
installation.
This
equipment
generates,
uses
and
can
radiate
radio
frequency
energy
and,
if
not
installed
and
used
in
accordance
with
the
instructions,
may
cause
harmful
interference
to
radio
communications.
However,
there
is
no
guarantee
that
interference
will
not
occur
in
a
particular
installation.
If
this
equipment
does
cause
harmful
interference
to
radio
or
television
reception,
which
can
be
determined
by
turning
the
equipment
off
and
on,
the
user
is
encouraged
to
try
to
correct
the
interference
by
one
or
more
of
the
following
measures:
¢
Reonent
or
relocate
the
receiving
antenna.
*
increase
the
separation
between
the
equipment
and
receiver.
*
Connect
the
equipment
into
an
outlet
on
a
circuit
different
from
that
to
which
the
receiver
is
connected.
¢
Consult
the
dealer
or
an
experienced
radio/TV
technician
for
help.
FCC
WARNING
Changes
or
modifications
not
expressly
approved
by
the
party
responsible
for
compliance
could
void
the
user's
authority
to
operate
the
equipment.
10
11
12
15
General
Guide
Terminals
Assembly
Instructions
Power
Supply
Installing
batteries
Using
AC
power
Auto
power
off
function
General
Operations
Getting
started
VOLUME
sliders
Reverb
effect
Tuning
control
Demonstration
Tunes
To
playback
all
of
the
tunes
To
playback
a
specific
tune
Tones
Selecting
a
tone
To
change
the
display
Keyboard
split
tones
Key
transpose
Auto-Rhythms
Selecting
an
auto-rhythm
Playing
an
auto-rhythm
Contents
17
23
25
27
28
29
29
61
Auto-Accompaniment
Accompaniment
keyboard
Playing
an
accompaniment
using
CASIO
CHORD
Playing
an
accompaniment
using
standard
fingering
Using
the
MUSICAL
CON-
TROLLER
buttons
Using
the
ORCHESTRATION
buttons
Using
the
AUTO
HARMONIZE
button
Performance
Memory
Function
Recording
Playing
back
memory
contents
Memory
backup
battery
MIDI
MIDI
terminal
functions
Communicable
functions
Setting
the
MIDI
channel
External
Connections
Troubleshooting
Care
of
Your
Piano
Specifications
List
of
fingered
chord

General
Guide
H
!
i
!
'
<Rear
panel>
smn
h
i
i
(A:
16)
POWER
switch
Switches
the
unit
ON
and
OFF.
Indicator
above
this
switch
lights
when
power
is
ON.
This
indicator
will
lose
its
brightness
when
battery
power
weakens.
VOLUME
sliders
(—
page
10)
Control]
main
volume,
accompaniment
vol-
ume
and
rhythm
volume
separately.
3.
REVERB
controller
(—
page
10)
Controls
strength
of
the
reverb
effect.
TRANSPOSE
control
(+
page
14)
Slide
left
or
right
to
transpose
key
of
per-
formance
(raises/towers
overall
tuning).
This
control
makes
it
easy
to
tune
to
instru-
ments
tuned
to
different
keys
when
playing
in
ensemble,
and
is
convenient
for
adjust-
ing
key
to
match
the
range
of
vocalists.
Key
can
be
raised
or
lowered
one
full
oc-
tave,
in
half-step
increments.
CHORD
selector
(—
page
17)
Used
to
select
the
auto-accompaniment
function.
(J)
)
Musical
Controller
buttons
(—*
page
21)
Used
to
control
the
accompaniment
patterns
in
various
ways.
ORCHESTRATION
buttons
(>
page
22)
AUTO
HARMONIZE
button
(—+
page
22)
‘9
3-digit
display
Displays
operational
settings
and
levels.
10
DISPLAY
SELECT
button
(—
page
13)
RHYTHM
selectors
(—
page
15)
Used
to
select
one
of
the
auto-rhythms.
Score
stand
holes
(—
page
7)
For
inserting
the
score
stand
which
comes
with
this
piano.
13)
TONE
selectors
(—
page
12)
Used
to
select
one
of
the
preset
tones.
eee
MEMORY
buttons
(-*
page
23)
Used
to
“record”
your
keyboard
perfor-
mance.
DEMO
button
(—
page
11)
Used
to
start
and
stop
built-in
demonstra-
tion
tunes,
Headphone
jack
For
connection
of
optional
headphones.
Output
from
the
speaker
is
automatically
cut
when
headphones
are
connected.
Battery
compartment
(-*
page
8)
Tuning
control
Adjusts
the
pitch
of
the
entire
keyboard
within
+30
cents,
for
tuning
to
other
instru-
ments.
Standard
pitch
is
As
=
442Hz.
Terminals
(9)
MIDI
terminals
(IN/OUT/THRU)
(—>
page
25)
Used
to
connect
to
other
MIDI
instruments
and
devices.
DAMPER
PEDAL
jack
(~*
page
7)
For
connection
of
sustain
pedal
(SP-2)
which
comes
with
this
piano.
LINE
IN
terminals
(1./R)
For
connection
of
other
instruments,
audio
equipment,
etc.
Note
that
the
input
sound
cannot
be
controlled
by
the
VOLUME
slid-
ers
of
this
piano.
LINE
OUT
terminals
(L/R)
For
connection
to
keyboard
amplifiers,
ex-
ternal
speakers,
audio
equipments,
etc.
DC
12V
input
jack
(—
page
9)
For
connection
of
an
AC
adaptor
(CASIO’s
AD-12).

Assembly
Instructions
1
Assemble
the
CS-25P
stand.
*
In
addition
to
the
parts
that
come
with
this
unit,
you
will
also
need
a
large
Phillips
head
(+)
screwdriver.
*
Assemble
the
stand
in
an
area
where
the
floor
is
level.
@ertcoeseonsseva
Check
to
make
sure
that
you
have
al!
the
parts
before
you
start.
If
anything
is
missing,
contact
your
dealer.
Peeeeooneseusas
oer
eeenaneanene
Make
sure
the
3
holes
in
the
()
/.
nuts
are
aligned
with
the
holes
in
part
©).
¢
Insert
the
four
()
nuts
into
part
©),
making
sure
the
holes
are
aligned
correctly.
*
Put
the
four
©
washers
on
the
four
(D)
bolts,
and
use
the
(D)
bolts
to
secure
parts
(A)
and
to
part
‘C).
Align
these
holes.
IMPORTANT
Take
sufficient
care
when
screwing
the
(D)
bolts
into
the
(F)
nuts
to
make
sure
both
parts
are
properly
aligned.
Forcing
the
parts
together
can
Strip
the
bolt
and
make
proper
installation
impossible.
6
eee
mere
ee
ee
Eten
nen
tanen
ed
Install
the
piano
onto
the
stand.
Be
careful
to
avoid
pinching
your
hands
between
the
keyboard
and
stand.
¢
Be
sure
to
use
the
G)
butterfly
bolts
to
securely
anchor
the
piano
to
protect
against
it
falling
off
the
stand.
Connecting
the
pedal
Connect
the
accessory
sustain
pedal
(SP-2)
to
the
DAMPER
PEDAL
jack
as
illus-
trated
below.
DAMPER
PEDAL
jack
<Rear
Panel>
ae
|
Sustain
Pedal
SP-2
4
Install
the
music
stand.
Insert
the
two
ends
of
the
music
stand
into
the
holes
of
the
keyboard
as
illustrated
below.
IMPORTANT
*
Do
not
place
the
keyboard/stand
on
a
surface
that
is
unstable
or
not
level.
*
Do
not
place
heavy
objects
such
as
audio
equipment
on
top
of
the
keyboard.
Never
allow
small
children
to
climb
on
the
keyboard.
7
-
ne
ee
A
EE
=
a
a
ee
re
ee
ns
rr

Power
Supply
You
can
power
your
keyboard
with
6
D
batteries
or
standard
AC
power.
Installing
the
batteries
This
keyboard
can
be
powered
by
6
D
size
(SUM-1I/R20P)
manganese
dry
cell
batteries.
Make
sure
that
the
POWER
switch
is
set
to
the
OFF
position
when
installing
batteries.
}.
Open
the
battery
compartment
cover
on
the
back
of
the
unit.
2.
Load
new
batteries
taking
care
that
the
plus
(+)
and
minus
(—)
poles
are
facing
in
the
correct
directions.
Standard
battery
life
is
approximately
4
hours.
Notes
*
Weakened
batteries
will
result
in
lower
volume
or
poor
tonal
quality.
The
power
indicator
lamp
will
gradually
lose
its
brightness
when
battery
power
weakens.
At
this
time,
change
batteries
or
shift
to
the
alternate
power
source.
*
If
battery
power
drops
below
a
certain
level,
the
quality
of
the
tone
produced
deteriorates,
a
totally
different
tone
may
sound,
or
the
demo
tune
or
auto
rhythm
may
become
abnormal.
Should
any
of
these
symptoms
occur,
replace
batteries
as
soon
as
possible.
PRECAUTIONS
Incorrectly
using
batteries
can
cause
them
to
leak
or
burst,
and
may
damage
your
unit.
Note
the
following
precautions:
°
Be
sure
that
the
plus
(+)
and
minus
(—)
poles
are
facing
in
the
correct
directions.
°
Do
not
mix
battery
types.
*
Do
not
mix
new
batteries
with
old
ones.
*
Never
leave
dead
batteries
in
the
battery
compartment.
*
Kemove
batteries
when
not
using
the
unit
for
extended
periods.
©
Never
try
to
recharge
the
batteries
that
are
specified
for
the
power
supply
of
this
Mant.
*
Do
not
expose
batteries
to
direct
heat,
let
them
become
shorted
or
try
to
take
them
apart.
.
(If
a
battery
leaks,
clean
out
the
battery
compartment
of
the
unit
immediately,
taking
care
to
avoid
letting
the
battery
fluid
come
into
direct
contact
with
your
skin.)
eee
Using
AC
power
An
AC
adaptor
(AD-12)
is
required
when
using
household
current.
Use
only
a
genuine
CASIO
adaptor
with
the
same
voltage
rating
(100,
120,
220
or
240V)
as
the
power
supply
tn
your
area
to
prevent
damage
to
internal
components.
Be
sure
to
turn
the
power
of
the
unit
off
before
you
connect
the
adaptor
to
the
unit.
Plug
the
AC
adaptor
into
the
AC
outlet
and
the
cord
into
the
unit.
This
will
automatically
cut
off
the
battery
power
supply.
DC
12V
input
jack
AC
adaptor
AD-12
UNE
UNE
Out
oO
tev
L
iG
AC
outlet
©
IMPORTANT
| |
¢
The
adaptor
may
become
warm
when
it
is
being
used.
This
is
norma!
and
does
not
indicate
any
problem.
*
Be
sure
to
unplug
the
adaptor
from
the
power
source
when
you
are
not
using
the
unit.
)
;
*
Whenever
connecting
or
disconnecting
the
adaptor,
be
sure
that
the
power
of
the
unit
is
switched
off.
|
*.
Never
use
a
power
supply
that
does
not
match
that
specified
for
the
unit.
Doing
so
can
damage
the
adaptor
or
your
unit.
Auto
power
off
function
Power
Is
automatically
cut
off
approximately
6
minutes
after
the
last
operation
of
the
unit.
Power
supply
can
be
restored
by
switching
power
OFF
and
then
ON
again.
The
Auto
power
off
function
is
inoperative
when
playing
back
the
demonstration
tunes
(power
Is
not
turned
OFF,
even
though
you
don’t
touch
the
keyboard).
To
cancel
the
Auto
power
off
function
To
cancel
the
Auto
Power
Off
function,
turn
the
power
switch
ON
while
holding
down
the
PIANO
3
tone
selector.
The
unit
will
remain
ON
until
you
turn
OFF
manually.

General
Operations
REVERB
controller
VOLUME
sliders
(MAIN/ACCOMP/RHYTHM
)
POWER
switch
Getting
started
Set
the
POWER
switch
to
ON.
Adjust
the
volume
level
using
the
MAIN
VOLUME
slider.
Select
one
of
the
64
preset
tones
(see
“Tones”,
page
12).
Now,
start
playing.
da
yt
ty
—
Volume
sliders
MAIN
VOLUME
slider
—
Adjusts
the
overall
volume
of
the
unit.
ACCOMP
VOLUME
slider
—
Adjusts
the
volume
of
the
accompaniment
pattern.
RHYTHM
VOLUME
slider
—
Adjusts
the
volume
of
the
auto-rhythm.
Reverb
effect
Reverb
effect
makes
tones
longer
after
they
are
played,
which
gives
the
feeling
they
are
being
played
in
a
large
hall.
This
piano
has
REVERB
controller,
which
you
can
adjust
the
strength
of
the
reverb
effect.
*
If
you
want
to
play
without
reverb,
slide
the
REVERB
controller
to
MIN
position.
Tuning
control
You
can
adjust
the
pitch
of
the
entire
keyboard
within
+30
cents
using
the
tuning
control
on
the
rear
panel.
This
allows
€asy
tuning
with
other
instruments.
IQ
Demonstration
Tunes
This
unit
features
4
preset
demonstration
tune
which
have been
carefully
pro-
grammed
to
showcase
all
the
features
and
benefits
of
this
piano.
You
can
specify
individual
tunes
for
playback,
or
you
can
play
back
all
4
tunes
straight
through.
ere
re
ger
rr
=
>
eS
maa
kchenieoranttated
arenas
oo
ed
eee
‘ase
=
a
=
oo:
ee
——_
mm
At
eH.
6688
(SS
2B
ic
Hehe
|
To
playback
all
of
the
tunes
1.
Set
the
POWER
switch
to
ON.
2.
Press
the
DEMO
button.
*
Playback
starts
from
the
first
demonstration
tune,
and
continues
with
the
other
tunes
In
sequence.
After
the
4th
tune
ends,
playback
starts
again
from
the
first
tune.
3.
To
stop
playback,
press
the
DEMO
button
again.
To
playback
a
specific
tune
1.
Set
the
POWER
switch
to
ON.
2.
Hold
down
one
of
the
tone
selectors
illustrated
below.
1
2 3
4
HARPSI-
PIANO
1
PIANO
3
E.PIANO
1
CHOAD
PIANO
2
HONKY-TONK
E.PIANO
2
E
CLAVIER
O
3.
While
holding
down
the
tone
selector,
press
the
DEMO
button.
¢
Playback
starts
from
the
beginning
of
the
tune
you
select.
When
the
end
of
the
tune
is
reached,
playback
starts
again
from
the
beginning
of
the
selected
tune.
4.
To
stop
playback,
press
the
DEMO
button
again.
a
{1

Notes
*
You
can
play
along
with
the
playback
of
the
demonstration
tunes
with
PIANO
|
tone.
Note
that
you
cannot
change
the
preset
tone
while
playing
back
the
demonstration
tune.
*
Key
transpose
setting
(page
14)
does
not
affect
the
playback
of
demonstration
tunes.
*
All
the
sliders
except
MAIN
VOLUME,
DEMO
button
and
START/STOP
button
are
inoperable
while
playing
back
the
demonstration
tunes.
Selecting
a
tone
You
can
choose
from
30
different
tones.
To
select
a
tone,
follow
the
Steps
below.
oe
as
PANG
3
£
Pian
t
GUITAR
OOS
2228222
|
E
PANG
2
E
Cua
VERE
MARIMBA
Peapet
pert
TONE
selectors
SELECT
button
|.
Set
the
POWER
switch
to
ON.
PIANO
|
tone
is
automatically
selected
when
you
turn
on
this
piano.
2.
Specify
either
the
upper
or
lower
row
of
preset
tones
by
pressing
the
SELECT
button.
The
upper
or
lower
indicator
lights
to
show
the
active
row.
3.
Press
one
of
the
TONE
selectors
to
choose
a
preset
tone,
Note
|
When
you
select
a
preset
tone,
ule
display
snows
the
number
iRé
selected
tone.
Note
the
ie
rollowing,
|
|
Selected
tone
:
Oo
Display
|
Selected
tone
Display
PIANO
|
|
I.
PIANO
2
16.
PIANO
3
2;
HONKY-TONK
17.
E.PIANO
|
(Electric
Piano)
3
E.PIANO
2
(Electric
Piano
2)
~~
‘18.
HARPSICHORD
4
E.CLAVIER
(Electric
Clavier)
19.
VIBRAPHONE
ae
MARIMBA
20.
PIPE
ORGAN
? .
6.
~
ROCK
ORGAN
21:
JAZZ
ORGAN.
|
fi
ACOUS.GUITAR
(Acoustic
Guitar)
22.
GUT
GUITAR
|
8.
~~
E.GUITAR
(Electric
Guitar)
23.
STRINGS
PIANO
|
9.
TRUMPET
-
24.
VIOLIN
7
:
10.
‘CELLO
2.
SAXOPHONE
11.
CLARINET
26.
FLUTE
©
12.
OBOE
iad
W.BASS/PIANO
(Wood
bass/Piano)
13.
E.BASS/E.PIANO
STRINGS»
14.
(Electric
Bass/Electric
Piano)
28.
BRASS
°
15:
SYNTH-ENS
|
(Synthesizer
Ensemble)
29,
PERCUSSION
30).
To
change
the
display
The
3-digit
display
on
the
front
panel
of
this
piano
actually
displays
3
different
values:
TONE
number,
RHYTHM
number
and
TEMPO
value.
You
can
change
the
display
by
pressing
the
DISPLAY
SELECT
button
located
to
the
right
of
the
3-digit
display.
When
the
DISPLAY
SELECT
button
is
pressed,
display
changes
as
shown
below.
Keyboard
split
tones
Some
of
the
preset
tones
split
the
keyboard
and
assign
two
or
more
sounds.
With
such
a
preset
tone,
the
sound
produced
depends
on
what
Poon
of
the
keyboard
you
play.
For
example,
W.BASS/PIANO
puts
WOOD
BASS
on
the
left
and
PIANO
on
the
right
of
the
keyboard.
13

W.BASS/PIANO
WOOD
BASS
—
3g
—______
PIANO
>
PERCUSSION
|
@
dh
1
2
3496
D
80/2
@
@®
@®@ (6)
L
Bass
drum
©
Crash
cymbal
d)
|
Floor
tom
2:
Snare
drum
@
Ride
cymbal
(2)
Cow
bell
3.
Rim
shot
®
Hitom
13)
Timbales
4
Closed
hi-hat
@)
Midtom
(4)
Maracas
5.
Open
hi-hat
(0
=
Low
tom
15)
Claves
(6)
Clap
hands
Key
transpose
The
key
of
the
entire
keyboard
can
be
transposed
in
half-tone
steps
between
F*
and
F
by
simply
sliding
the
TRANSPOSE
contro!
right
and
left.
The
central
position
sets
the
keyboard
to
the
key
of
C.
TRANSPOSE
FGwWapepcc'o
BPE
F
i#ispttasbtpayee
Note
When
you
choose
a
keyboard
split
tone
(page
13),
the
keyboard
split
point(s)
of
the
sounds
moves
according
to
the
key
transpose
setting.
lI
Auto-rhythms
|
Selecting
an
auto-rhythm
This
piano
features
64
auto-rhythms
to
choose
from.
Each
rhythm
has
a
2-digit
number.
To
select
an
auto-rhythm,
find
its
rhythm
number
in
the
64
RHYTHM
list
printed
on
the
score
stand,
and
enter
the
number
using
the
RHYTHM
selectors.
¢
“POPS
1”
rhythm
(No.1.1)
is
selected
automatically
whenever
you
switch
the
power
of
the
piano
ON.
RHY
FHM
POWER
OFFI
ION
AHYTHM
TONE
TEMPO
Enter
the
rhythm
’s
two-digit
number
by
press-
ing
the
RHYTHM
selectors.
For
example,
to
select
16
BEAT
(No.4.5),
press
[4]
[5].
®
®
°
RHYTHM
TONE
TEMPO
.
Yo
change
the
rhythm,
repeat
Step
2
above.
Note
You
can
also
change
the
selected
rhythm
by
pressing
only
one
RHYTHM
selector.
Note
the
following:
Selected
rhythm
=
Press
—+
Newly
selected
rhythm
No.5.
1
I
No.1.1
No.
1.1
2
No.
1.2
No.1.2
5
No.2.5

Playing
an
auto-rhythm
a
Cin
RHYTHM
VOLUME
MIN!
1
bo
ot
MAX
;
|.
After
selecting
an
auto-rhythm,
press
the
START/
|
STOP
button
to
start
the
rhythm.
Oo
|
C_)
C=)
SYNCHRO
.
START/STOP
Adjust
the
tempo
using
the
TEMPO
control
but-
tons.
Each
press
of
&
speeds
up
the
tempo,
while
pressing
W
slows
it
down.
The
3-digit
display
shows
the
tempo
of
the
rhythm.
*
The
tempo
of
the
auto-rhythm
can
be
adjusted
between
40
and
256
beats
per
minute.
COC)
Y
TEMPO
aA
You
can
adjust
the
volume
of
the
rhythm
by
using
the
RHYTHM VOLUME
slider.
*
Note
that
the
auto-rhythm
does
not
sound
when
RHYTHM VOLUME
slider
is
set
to
MIN.
RHYTHM
VOLUME
MIN!
£—
@
oF
ot
max
Press
the
START/STOP
button
again
to
stop
auto-
rhythm
play.
SYNCHRO
START/STOP
*
You
can
use
the
MUSICAL
CONTROLLER
buttons
to
start
an
auto-rhythm
with
intro
pattern,
inserting
fill-ins
to
the
rhythm,
etc.
Please
refer
to
page
21!
“Using
MUSICAL
CONTROLLER
buttons”
for
details.
i
16
Hit
Auto-accompaniment
I
This
unit
features
64
accompaniment
patterns
that
let
you
add
full
accompaniments
to
your
performances
automatically.
You
can
select
from
two
types
of
auto-accompaniment
—
simplified
fingering
chord
play
(|
CASIO
CHORD
ON
})
or
standard
fingering
(FINGERED).
Accompaniment
keyboard
When
you
set
the
CHORD
selector
to
FINGERED
or
CASIO
CHORD
ON,
the
keys
of
the
lower
2
octave
of
the
keyboard
are
the
accompaniment
keys
and
the
rest
of
the
keyboard
is
the
melody
section.
AMAA
Accompaniment
Melody
keyboard
keyboard
Playing
an
accompaniment
using
CASIO
CHORD
The
CASIO
CHORD
system
lets
you
easily
play
the
four
main
types
of
chords.
Playing
of
the
chords
is
simplified
as
shown
in
the
chart
below.
C
(C
Major
Chord)
LLL
t
Pressing
one
accompaniment
key
Mayor
chord
Pressing
two
accompaniment
keys
Cm
(C
Minor
Chord)
C7
(C
Seventh
Chord)
Minor
chord
Pressing
three
accompaniment
Seventh
chord
neve
ttt
B\/ciol/e€frigjaj/sale|orese)
ssing
Cm7
2
Pressing
four
Minor
seventh
;
accompaniment
(C
Minor
Seventh
keys
nen
Chord)
y
ttt
17

Note
The
bottom
note
that
you
play
determines
the
name
of
the
chord.
For
example,
if
the
bottom
note
is
C,
the
keyboard
plays
a
C
chord.
Follow
these
steps
to
play
the
CASIO
CHORD
auto-accompaniment.
1.
Set
the
CHORD
selector
to
the
ON
position.
CHORD
=
[Casio
FINGERED
t
som
ON
OFF
RHYTHM
2.
Select
one
of
the
auto-rhythms.
(refer
to
“Auto-
rhythms”
on
page
15)
ame
Ese
SYNCHRO
START/STOP
Start
the
auto-rhythm
by
pressing
the
START/
STOP
button.
Press
one
to
four
accompaniment
keys.
The
ac-
companiment
automatically
plays.
Adjust
TEMPO
A
/
¥,
MAIN
VOLUME
slider,
RHYTHM
VOLUME
slider
and
ACCOMP
VOLUME
slider.
RHYTHM
VOLUME
CC.)
MN
ad
|
oT
ot
oF
max
MAIN
VOLUME
ACCOMP
VOLUME
mvdo
-odvot
ot
tt
wax
min?
§
oT
ot
oT
sax
Press
the
START/STOP
button
to
stop
the
auto-
acCOMpaniment.
O
aS
eae
SYNCHRO
START/STOP
Note
You
can
also
use
introductions,
fill-ins
and
ending
patterns
in
your
accompaniment
performance.
See
“Using
the
MUSICAL
CONTROLLER
buttons”
on
page
21.
eee
18
Playing
an
accompaniment
using
standard
fingering
The
standard
fingering
(FINGERED)
mode
lets
you
play
a
wider
variety
of
chords.
You
can
start
an
accompaniment
pattern
by
pressing
down
either
three
or
four
of
the
proper
accompaniment
keys.
This
unit
ts
capable
of
recognizing
15
different
chords.
The
following
shows
the
fingerings
of
the
recognized
chords
with
a
root
of
C.
Note
that
you
can
omit
the
fifth
note
(which
are
within
parentheses
in
the
illustrations
below)
to
produce
“7”,
“m7”,
“may7”,
“mM7”,
“add9”
and
“m
add9”
chords.
C
Cm
Cdim
Caug
Csus4
C7
Cm7
Cmaj7
Cm7>
C7°
Lilia
basta
C7sus4
Caddg
Cm
add9
CmM7
Cdim7
Oe
A
Le
ee
Each
of
the
above
examples
shows
only
one
of
the
possible
fingerings
for
each
chord.
Note
that
you
can
play
a
chord
by
pressing
its
notes
in
any
combination.
For
examle,
each
of
the
following
fingerings
produces
the
same
C
chord.
WON
*
See
the
“List
of
fingered
chord”
on
pages
61
and
62
for
infomation
on
the
fingering
of
chords
with
all
the
roots.
19

Follow
these
steps
to
play
the
standard
fingering
auto-accompaniment.
|
I}.
Set the
CHORD
selector
to
the
FINGERED
posi-
thon.
CHORD
CASIO
FINGERED
CHORD
OFF
—\
|
7
ON
RHYTHM
2.
Select
one
of
the
auto-rhythms.
(refer
to
“Auto-
rhythms”
on
page
15)
bag
Start
the
auto-rhythm
by
pressing
the
START/
STOP
button.
O
COC)
SYNCHRO
=|
START/STOP
Press
the
accompaniment
keys
for
the
desired
chord.
Adjust
TEMPO
&
/'¥,
MAIN
VOLUME
slider.
RHYTHM
VOLUME
slider
and
ACCOMP
VOLUME
slider.
RHYTHM
VOLUME
CDC)
win
ET
8
ob
od
oD
Max
MAIN
VOLUME
ACCOMP
VOLUME
mvd
to
tot
@
&
¢
pax
mint
&€
& @
4
Max
6.
Press
the
START/STOP
button
to
stop
the
auto-
accompaniment.
-_
Note
You
can
also
use
introductions,
fill-ins
and
ending
patterns
in
your
accompaniment
performance.
See
“Using
the
MUSICAL
CONTROLLER
buttons”
on
page
21.
soc
SYNCHRO
START/STOP
Using
the
MUSICAL
CONTROLLER
buttons
The
ten
MUSICAL
CONTROLLER
buttons
give
you
control
over
the
accompani-
ment
patterns.
When
the
CHORD
selector
is
in
the
FINGERED
or
ON
position,
you
can
control
all
of
the
accompaniment
patterns.
When
it
is
in
the
OFF
position,
you
can
control
the
rhythm
pattern
only.
AUTO
HARMONIZE
|
button
BREAK
button
ORCHESTRATION
ENDING
button
buttons
INTRO
button
A
an
Roe
Gyomeege
Ss
“
.on
Cw
aS
HEE
mi
in
=.
im
|
AUTO
HARMONIZE
INTHG
BHEARK
ENDING
CHOHD
1
CHORD
2
BASS
t——_—_—.
0ACHESTHATION
——
Gb:
Ge
|
Ge
aniaa
CO
CO)
iN
THO(LONG)
FALL
IN
COPA
SYNCHRO
STAAT/STOP
¥
TEMPO
a
INTRO
(LONG)
pos
SYNCHRO
START/
TEMPO
button
FILL-IN
button
STOP
button
control
button
buttons
¢
INTRO
button
This
button
inserts
a
light
l-measure
introduction
before
starting
the
normal
accompaniment
pattern.
¢
INTRO
(LONG)
button
This
button
inserts
a
4-
to
5-measure
introduction
before
starting
the
normal
accompaniment
pattern.
The
chord
progression
used
in
the
intro
leads
into
the
progression
used
for
the
accompaniment.
Even
if
you
do
not
specify
an
accompa-
niment
keyboard
chord
when
you
press
this
button
for
an
intro,
the
unit
automati-
cally
bases
the
intro
on
the
last
chord
you
played
(or
on
Cmaj
if
you
have
switched
the
unit
ON
and
have
not
yet
played
a
chord).
¢
FILL-IN
button
When
you
press
this
button
during
play
of
an
accompaniment,
a
|-
to
2-measure
fill-in
pattern
is
inserted.
*
BREAK
button
When
you
press
this
button
during
play
of
an
accompaniment,
a
I-
to
2-measure
patten
is
inserted,
which
stops
at
the
beginning
of
a
subsequent
pattern.
Ne
ey
21

©
ENDING
button
When
you
press
this
button
in
place
of
the
START/STOP
button
to
end
the
accompaniment
play,
a
1-
to
3-measure
ending
pattern
is
inserted
before
accom-
paniment
play
is
stopped.
¢
CODA
button
When
you
press
this
button
in
place
of
the
START/STOP
button
to
end
the
accompaniment
play,
a
4-
to
5-measure
long
ending
pattern
is
inserted
before
accompaniment
play
is
stopped.
The
progression
of
chords
used
in
the
ending
pattern
are
based
on
the
chord
that
is
being
played
when
you
press
this
button.
*
SYNCHRO
button
Press
this
button,
and
the
unit
stands
by
waiting
for
you
to
play
a
note
on
the
accompaniment
keyboard.
The
selected
rhythm
pattern
begins
as
soon
as
you
press
a
key
(or
more
than
three
correct
keys
in
case
you
selected
FINGERED
mode)
on
the
accompaniment
keyboard.
Using
the
ORCHESTRATION
buttons
The
auto-accompaniment
patterns
produced
by
this
unit
consist
of
4
different
ele-
ments;
rhythm
track,
bass
line,
chord
|
pattern
and
chord
2
pattern.
The
ORCHES-
TRATION
buttons
switch
the
sound
of
these
elements
(except
the
rhythm
track)
ON
and
OFF.
For
example,
if
you
want
only
a
rhythm
track
and
bass
line
for
your
accompaniment,
you
can
turn
off
the
CHORD
|
and
CHORD
2
elements.
ORCHESTRATION
buttons:
CHORD
1
button
switches
chord
|
sound
on
and
off.
CHORD
2
button
switches
chord
2
sound
on
and
off.
BASS
button
switches
bass
sound
on
and
off.
Using
the
AUTO
HARMONIZE
button
If
this
button
is
depressed
during
play
of
an
accompaniment
pattern,
the
chord
selected
on
the
accompaniment
keyboard
is
automatically
harmonized
with
notes
played
on
the
melody
keyboard.
The
melody
keyboard
becomes
4-note
polyphonic
when
you
activate
the
AUTO
HARMONIZE.
MW
Performance
Memory
Function
;
The
performance
memory
function
lets
you
“record”
notes
as
you
play
them
on
the
keyboard.
Up
to
2,400
notes
can
be
stored
in
memory
for
playback.
MEMORY
O
peers
Me
Ee
gm
SS
ee
Me
ata
a
&
se
a:
Weta:
Ty
ee
Sh0ee
re
he
Fn
TT
RECORD
button
ia
RECORD
__
Recording
START/STOP
button
Co
START/STOP
MEMORY
buttons
Recording
|.
Start
an
auto-rhythm
and
adjust
the
tempo
of
the
recording.
|
2.
Press
the
RECORD
button
to
enter
the
recording
standby
mode.
The
light
above
the
RECORD
button
flashes.
3.
Set
the
CHORD
selector
to
FINGERED
or
ON
if
you
want
to
use
auto-accompa-
niment
in
your
recording.
If
not,
set
this
switch
to
OFF.
4.
Select
the
auto-rhythm
you
like.
|
|
e
If
you
don’t
want
an
auto-rhythm
in
your
recording
(or
if
you
want
to
start
an
auto-rhythm
during
recording),
press
the
Musical
Controller
START/STOP
but-
ton
here.
¢If
you
want
to
start
an
auto-rhythm
with
intro
pattern,
press
the
INTRO
(or
INTRO
LONG)
button
here.
¢
If
you
want
to
start
an
auto-rhythm
using
synchro
start,
press
the
SYNCHRO
button
here.
|
|
5.
Press
the
recording
START/STOP
button
to
start
recording.
Recording
starts
after
one
measure
of
beat
count.
6.
Play
the
keyboard
as
you
like.
| |
7.
Press
the
recording
START/STOP
button
again
to
stop
recording.
Notes
on
recording
¢
You
can
record
changes
in
the
following
operations
as
well
as
keyboard
play
during
recording.
Changing
preset
tones
Changing
auto-rhythms.
Starting
or
stopping
a
rhythm
track.
Starting
a
rhythm
track
using
an
INTRO
(or
INTRO
LONG)
pattern.
23

Inserting
the
FILL-IN
(or
BREAK)
patterns
of
the
rhythms.
Ending
the
rhythm
track
with
an
ENDING
(or
CODA)
pattern.
ORCHESTRATION
buttons
setting
(ON
or
OFF)
AUTO
HARMONIZE
button
setting
(ON
or
OFF)
*
Memory
capacity
is
approximately
2,400
notes.
Operations
such
as
changes
in
rhythms
and
tones
are
counted
as
a
half-note.
Recording
automatically
ends
when
you
exceed
the
memory
capacity.
Playing
back
memory
contents
I.
Press
the
recording
START/STOP
button
to
play
back
your
performance.
The
light
above
the
RECORD
button
lights
and
playback
starts,
-.
Press
the
recording
START/STOP
button
again
to
stop
playback.
*
You
can
adjust
the
tempo
of
playback
using
TEMPO
control
buttons.
Memory
Backup
Battery
This
piano
comes
with
a
lithium
battery
that
supplies
the
power
required
to
retain
performance
memory
data
when
power
is
turned
off.
The
life
of
this
battery
is
about
5
years,
and
so
it
must
be
replaced
periodically.
Note
that
performance
memory
data
will
be
lost
whenever
you
switch
power
off
while
the
battery
is
dead.
IMPORTANT
The
backup
battery
must
be
replaced
by
an
authorized
CASIO
service
representa-
tive.
Contact
your
local
CASIO
Service
Center
once
every
5
years
to
arrange
to
have
the
battery
replaced.
WARNING
*
The
lithium
battery
used
for
memory
backup
presents
fire,
explosion,
and
severe
burn
hazard.
Be
sure
to
contact
an
authorized
CASIO
Service
Center
to
have
the
battery
replaced.
*
CASIO
Computer
Co.,
Ltd.
assumes
no
responsibility
for
any
damage
or
loss
caused
by
deletion
of
performance
memory
data
as
a
result
of
malfunction,
repairs,
or
battery
replacement.
MIDI
:
3
7
“MIDI”
stands
for
“Musical
Instrument
Digital
Interface”.
Practically
speaking,
it
lets
you
connect
this
keyboard
to
other
MIDI-equipped
musical
instruments
and
devices,
such
as
synthesizers,
drum
machines,
sequencers,
and
even
personal
com-
puters.
MIDI
terminal
functions
MIDIIN
—
Receives
external
MIDI
messages.
MIDI
OUT
—
Sends
MIDI
messages
to
external
devices.
MIDI
THRU
—
Receives
external
MIDI
messages
through
MIDI
IN
and
outputs
them
without
modification.
—————_
MID|
———--—
THRU
OUT
IN
Communicable
functions
The
following
functions
can
be
sent
and
received
through
the
CPS-60’s
MIDI
terminals.
For
details
on
the
MIDI
functions,
see
the
“MIDI
Implementation
Chart”
inside
the
back
cover
of
this
manual.
Note
Number,
Velocity
—__
Keyboard
pitch
ON/OFF,
Touch
Response
data.
*
Note
number
messages
are
sent/received
regardless
of
the
position
of
the
CHORD
selector.
However,
it
is
recommendable
to
set
this
selector
to
OFF
position
when
you
use
the
MIDI
function
of
this
piano.
Program
Change
|
Each
preset
tone
corresponds
to
the
program
change
number
0~29
as
listed
below.
PIANO
|
PIANO
3.
E.PIANO
|
HARPSICHORD
VIBRAPHONE
PIPE
ORGAN
JAZZ
ORGAN
GUT
GUITAR
STRINGS
PIANO
VIOLIN
SAXOPHONE
ROCK
ORGAN
PLUTE
ACOUS.GUITAR
W.BASS/PIANO
E.GUITAR
STRINGS
TRUMPET
BRASS
CELLO
PIANO
2
:
CLARINET
HONK
Y-TONK
OBOE
E.PIANO
2
[E.BASS/E.PIANO
E.CLAVIER
SYNTH-ENS
MARIMBA
PERCUSSION
0)
|
2
3
4
5
6
7
8
9

Sustain
pedal
ON/OFF
ae
Ca
“8
wee
7
ae
ea
ee
de
Sustain
pedal
ON/OFF
data
can
be
sent
when
you
connect
a
sustain
pedal
to
the
DAMPER
PEDAL
jack
of
the
CPS-60.
Notes
¢
Soft
pedal
ON/OFF
message
can
also
be
received,
though
it
cannot
be
sent
from
the
CPS-60.
<<Connection
example>>
By
connecting
MIDI
OUT
terminal
of
the
CPS-60
to
MIDI
IN
terminal
of
another
MIDI
keyboard,
the
MID]
keyboard
plays
the
same
note
as
you
play
on
the
CPS-60.
The
result
is,
the
sounds
of
both
keyboards
can
be
played
in
ensemble
to
make
a
“thick”
voice
or
totally
new
sound.
MIDI
keyboard
Setting
the
MID!
channel
In
order
to
communicate
with
other
MIDI
devices,
the
MIDI
channe]
numbers
of
both
units
must
match.
The
MIDI
channel
can
be
set
between
channel
|
and
channel
16.
Follow
the
steps
below
to
set
the
MID]
channel
of
the
CPS-60.
Switch
the
CPS-60
power
OFF.
Hold
down
the
PIANO
1
tone
selector
and
turn
the
power
back
ON:
While
still
holding
down
the
PIANO
]
tone
selector,
press
TEMPO
control
buttons
A
or
W
to
set
the
MIDI
channel.
The
display
will
show
the
MIDI
channel.
4.
Release
the
tone
selector
to
exit
MIDI
channel
setting.
‘eo
to
~_
Notes
¢
The
MIDI
channel
is
automatically
set
to
“1”
when
the
power
is
turned
ON.
*
To
cancel
the
Auto
Power
OFF
function
in
the
MIDI
mode,
use
the
PIANO
3
tone
selector
instead
of
the
PIANO
1
tone
selector
in
procedure
2.
*
The
same
MIDI
channel
is
applied
to
both
transmission
and
reception
of
MIDI
data.
26
«i
aa
inlRnetlinn
ns
Acree
abel
External
Connections
.
IMPORTANT
‘
Before
you
connect
the
CPS-60
to
any
other
device,
be
sure
to
first
switch
off
the
power
of
the
CPS-60
and
the
other
device.
|
| |
¢
When
turning
the
CPS-60’s
power
ON
or
OFF
after
having
made
connections,
please
set
the
volume
controllers
on
both
the
CPS-60
and
the
other
device
to
“minimum”.
Also
please
be
sure
to
read
the
owner’s
manuals
of
the
equipment
to
be
connected.
|
LINE
OUT
(output)
terminals
(Left,
Right)
:
|
=
Used
to
connect
to
audio
equipment
or
keyboard
amplifiers,
allowing
you
to
enjoy
playing
at
more
impressive
volumes.
Note
that
the
connecting
cord
you
use
depends
on
the
type
of
jack
you
are
connecting
to.
Amplifier’s
input
Jacks
(usually
labeled
“AUX
IN”)
AUX
IN
—
i
Left
<<Connection
example>>
CPS-60
(Rear
panel)
LINE
OU
AR
1.
©
©—
cca
1/4-inch
(6.3
mm)
plug
Pin
plug
LINE
IN
(input)
terminals
(Left,
Right)
|
Used
to
connect
to
other
electronic
musical
instruments,
tape
recorders,
etc.
Allows
output
of
signals
from
other
instruments
and
devices
through
the
CPS-60’s
built-in
speakers.
Note
that
volume
levels
cannot
be
altered
with
the
CPS-60’s
volume
control.
| |
of
Tape
recorder’s
>
é
<<Connection
example>
output
jacks
CPS-60
(Rear
panel)
LINE
OUT
LINE
IN
an
1/4-inch
(6.3
mm)
plug
Pin
plug
27

'
Troubleshooting’
-
No
sound
when
key-
Change
volume
control
board
keys
are
pressed.
Volume
control
set
to
|
setting.
MIN.
Headphones
connected
to
keyboard.
Disconnect
headphones.
Transpose
setting
is
not
ic
Read
Keyboard
out
of
tune.
Set
transpose
to
cc?
(page
14).
Tuning
control
is
off.
Adjust
the
tuning
control
(page
10).
No
rhythm.
Main
and
rhythm
volume
turned
down.
Turn
up
main
and
—
rhythm
volume.
Turn
up
main
and
accompaniment
volume.
No
accompaniment.
Main
and
accompaniment
volume
turned
down.
Volume
control
set
to
MIN.
Cannot
play
back
demonstration
tunes.
Change
volume
control
setting.
Headphones
connected
to
|
Disconnect
headphones.
keyboard.
Occasional
interference.
Use
a
power
outlet
as
far
away
as
possible
from
appliance
thought
to
be
Causing
interference.
Wall
outlet
used
to
power
keyboard
is
located
too
close
to
outlet
being
used
for
a
refrigerator,
wash-
ing
machine,
or
other
electrical
appliance.
28
Care
of
Your
Piano
Avoid
heat,
humidity
or
‘direct
sunlight.
(o
eg
:
Do
not
overexpose
ffi
‘ial
to
direet
sunlight,
or
place
near
an
air
conditioner,
or
in
any
extremely
hot
place...)
..
a
4
ene
Take
care
>
not
to
drop
the
unit
and
avoid
strong
impact.
gg
SS
ge
gt
Oe
te
tok:
Sagi
Strong
impact
may
cause
malfunctions.
When
carrying
or
transporting
the
unit,
protect
the
keyboard
and
switches
with
soft
cloth
or
other
material.
Keep
the
unit
free
of
liquids,
dust,
etc.
Do
not
allow
foreign
matter
to
get
between
the
keys,
especially
metallic
objects
such
as
hairpins,
sewing
needles
or
coins.
Also,
do
not
let
the
unit
get
wet.
Never
attempt
to
modify
any
parts
of
the
unit.
a
The
unit
is
a
precision
instrument,
made
of
electronic
parts.
Any
modification
of,
or
tampering
with
inner
parts
may
cause
malfunction.
Do
not
use
lacquer,
thinner
or
similar
chemicals
for
cleaning.
Clean
the
keyboard
with
a
soft
cloth
dampened
in
a
weak
solution
of
water.
and
a
neutral
detergent.
(Soak
the
cloth
in
the
solution
and
squeeze
until
it
is
almost
dry.)
Specifications
Model:
CPS-60
Keyboard:
76
keys,
with
initial
touch
Polyphonic:
max.
12
notes
Tones:
30
Auto-rhythms:
64
29

Auto-accompaniment:
Casio
Chord
ON/FINGERED
Musical
Controller
Effects
Memory:
Built-in
tunes:
Terminals:
Control:
Speakers:
Power
supply:
Power
consumption:
Dimensions:
INTRO,
INTRO(LONG),
FILL-IN,
BREAK,
ENDING,
CODA
ORCHESTRATION
(CHORD
I,
CHORD
2,
BASS),
AUTO
HARMONIZE
real-time
memory
(memory
capacity:
approx.
2,400
notes)
4
tunes
LINE
OUT
terminals
(L/R):
Output
impedance;
2.2kQ,
Output
voltage;
1.5V
(RMS)
MAX
LINE
IN
terminals
(L/R):
Input
impedance;
47kQ,
Sensitivity;
200mV
DAMPER
PEDAL
jack
Headphone
jack
MIDI
IN/OUT/THRU
terminals
DC
12V
jack
Transpose
(F*~C~F:
half-note
increments)
Tuning
control
(As
=
442Hz
+30
cents)
Volume
contro!
(Main/Accompaniment/Rhythm)
*
Reverb
control
14cm
x
2
(output:
SW
+
5W)
2-way
AC/DC
power
source:
¢
AC:
100,
120,
220
or
240V
(+t
10V),
50/60
Hz,
with
optional
AC
adaptor
AD-12
*
DC:
6
D
size
manganese
dry
batteries.
Battery
life:
approx.
4
hours
IS
W
1224(W)
x
409(D)
x
95(H)
mm
48
¥/i6"(W)
x
16
!/s"(D)
x
3
3/4"(H)
Dimensions
with
stand:
Weight:
Accessories:
1224(W)
x
500(D)
x
767(H)
mm
48
ie"(W)
x
19
!/16"(D)
x
30
4/16"(H)
12.4kg
(27.3lbs)
[18.9kg
(41.7lbs)
with
stand]
Stand
(CS-25P),
Sustain
pedal
(SP-2),
Dust
cover,
Score
stand
*
Designs
and
specifications
are
subject
to
change
without
notice.
a
30
Table of contents
Other Casio Musical Instrument manuals
Casio
Casio WK-1300 User manual
Casio
Casio PX-S1100RD User manual

Casio
Casio CDP-235R User manual

Casio
Casio CTK6000 User manual

Casio
Casio CDP-200R User manual

Casio
Casio Casiotone MT-520 User manual
Casio
Casio TONE BANK CT-395 User manual

Casio
Casio LK-120 User manual

Casio
Casio Celviano AP-38 User manual

Casio
Casio Celviano AP-25 User manual

Casio
Casio Privia PX-5S User manual

Casio
Casio AP-20 User manual

Casio
Casio PX-350M User manual
Casio
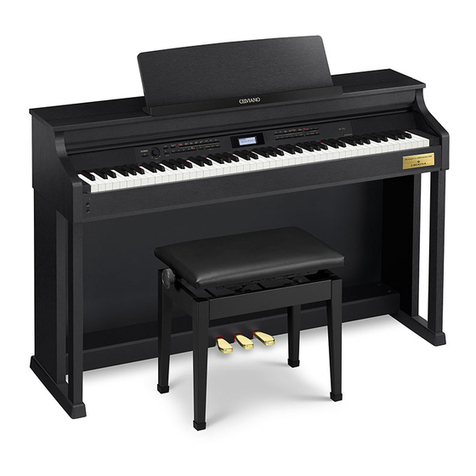
Casio DG-10 Operator's manual

Casio
Casio TONEBANK MT-750 User manual

Casio
Casio Casiotone CT-370 User manual
Casio
Casio CTK-6250 User manual

Casio
Casio CDP-S350 User manual

Casio
Casio Privia PX-100 Installation instructions

Casio
Casio DH-800 Operator's manual