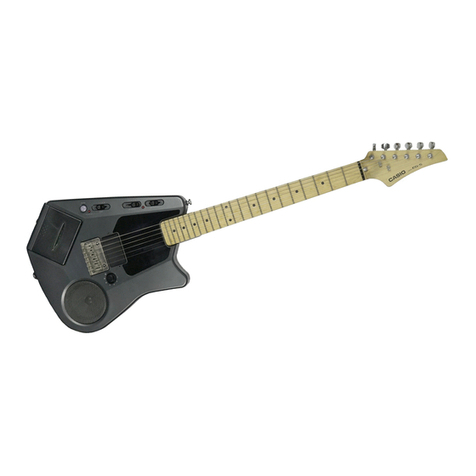
Casio DG-1 Operator's manual

CASIO
DIGITAL
GUI
TAR
|
rGel
|
Player's
/
Manual—1
/
Manual
del
|
Guitarrista-11;
i
dr
fi?
}
Wily
"
/
Sa
reLET
a
ie
i}
CASIO.

nner
_
a
Brees
=
d
=
a
Thank
You
And
congratulations
on
your
choice
of
the
CASIO
DG-]
Digital
Guitar.
Your
digital
guitar
is
an
entirely
new
type
of
digital
musical
instrument.
which
features
the
latest
in
state-of-the-art
digital
technology.
Read
the
To
obtain
optimum
performance
and
assure
long-term
reliability,
be
sure
Manual
to
read
this
manual
carefully
before
playing
vour
new
DG-]
guitar.
#
Contents
of
this
manual
are
subject
to
change
without
notice.
®
CASIO
has
done
its
best
to
include
all
pertunent
information
on
the
DG-1
in
this
manual.
If
vou
should
find
any
errors
or
have
questions
on
the
contents,
please
contact
vour
distributor.
#
CASIO
reserves
exclusive
rights
to
the
contents
of
this
manual.
®
CASIO
does
not
claim
responsibility
for
damages
or
claims
incurred
as
a
result
of
the
use
of
the
DG-]
or
this
manual.
Important
"=
Please
be
careful
of
extreme
temperatures,
=
moisture
and
direct
sunlight.
Precautions
Please
avoid
using
or
storing
your
DG-1
in
places
subject
to
direct
sunlight,
excessively
damp
places
or
near
air
conditioning
and
heating
appliances
where
temperatures
and
moisture
tend
to
be
extreme.
Also,
de
not
leave
this
unit
in
an
automobile
with
the
windows
closed
during
hot
summer
months.
=
Please
do
not
drop
this
instrument
or
subject
it
to
strong
shocks.
Subjecting
this
precision
instrument
to
Strong
shocks
may
cause
malfunctions
or
damage
the
neck.
so
please
use
extreme
care
ip
handling.
®
Make
sure
no
foreign
matter
gets
inside
of
this
unit.
Please
take
care
that
no
foreign
objects,
especially
metal
objects
such
as
hair
pins,
sewing
needles
or
coins
get
into
the
unit.
Any
meta!
objects
or
hquids
entering
the
unit
mav
cause
malfunctioning
as
well
as
ar
electric
shock
hazard.
="
Customizing
may
cause
malfunction
and
accidents.
The
DG-1
uses
many
high-precision
electronic
components.
Converting
it
In
any
manner
or
needlessly
touching
interna!
parts
may
cause
ma!tunction
and
accidents
and
shouid
thereiore
be
avoided
under
all
circumstances.
™
Do
not
use
thinner
or
Similar
chemicals
when
cleaning
this
unit.
To
clean
the
DG-1.
wipe
the
exterior
suriace
with
@
soft
cloth
Campened
with
a
neutral
detergent
solution
which
has
been
Wrung
out
completely.
Never
use
paint
thinner,
benzene
or
other
solvents.

i
adda
f
Aig
cera
feat
ede
eG
pissda
trees
gs
Ceo
sce
eULE
woe
bak
—
—
—
Contents
Features
and
Functions
Power
Supply
Changing
Strings
Specifications
OOD
IN
Im
law
Troubleshooting
Guide

Overall
View
a
ce
‘Power
Switch
Used
to
tum
power
ON
and
OFF.
2\Main
Volume
Control
(t)
(cy)
{~J)
Used
to
control
volume
of
guitar
sounds.
“Rhythm
Volume
Control
Used
to
contro!
valume
of
rhythm
sounds.
‘Speaker
High
pevtorman-r
10m
(4
inch)
built-in,
Speaser.
Mute
Key
Used
to
mute
sound
during
neriormancey.
Start/Stop
Key
Used
te
start
anc
stop
selected
aulo-Tnyinm.
Synchro/Fill-in
Key
Used
tc
select
Senchro
start
or
insev.
Shins
in
autc-rhvtnm
periore.
ence.
(en
pressed.
Tempo
indicator
(154)
flashes
selectez
ema.
Wher.
2
string
1S
Se
the
eutcerpvtam
be-
gins
auijmaticety.
in
synchro-
nizatlor.
(ror.
ist
Deal.
When
nressec
CUTINE
Eute-Thyt
perlormence,
27.
ae
ili
is
insertez
in
the
rhythm
pattert..
@
Pres:
the
Sencnra
ihe
ONO
WETS
HOLE
LE:
lie
anni
SIQIT
Wold
6:
Start/stop
Key
/7
Synehro/Fill-in
|
Key
Sensor
Cover
ye
Mute
Key
Main
Volume
Coniro!
Rhythm
Volume
Control
i
bili)
fee
AY
HH
Ijin
nt
IH,
fy
ui.
4
Power
Switch
4
Speaker

2S
A
th
CN
san,
.
--
wegen.
oy
ee
ee
a
eae
Sn
en
Panel
Control
Section
(8)
Tone
Selectors,
(‘Select
Key,
©
Galea
Select
Indicator
The
tone
selectors
are
used
to
specify
desirec
cuitar
tones.
Use
the
tone
selectors
to
choose
a
tone.
Each
selector
1s
marked
with
nwo
names,
one
above
the
selector
and
one
below.
When
the
select
mdicator
1s
OFF,
tone
marked
above
the
selector
is
selected.
When
the
selec:
indicator
1s
ON,
tone
marsxe¢
below
the
selector
1S
selected,
Rhythm
Selectors,
>
Select
Key,
Select
Indicator
The
rhvthm
ss:ectors
are
used
to
specify
desired
rhythms.
Lse
the
rhvtnm
se
lectors
tO
choose
2
rhvin..
Each
selec-
1025
mar
kee
one
above
the
sciector
and
one
below.
Wren
the
select
iIncicator
is
OFF.
thyvtnm
marked
above
in
selector
is
Sarae
ec.
Wi
nes
ne
SEjECT
ING
COIN
TWO
names.
(8)
Tone
12
(9
Select
TONE
GUITAR
1
@
GUITAR
2
E
GUITAR
BFUNKY
GLOCKEN
@
HARP
SHAMISEN
|
|
Selectors
ORGAN
1
@
ORGAN
2
TRUMPET
@
CHORUS
|
io’
Select
——-————_-©)
Indicator
w
SELECT
Key
:
Fempo
Control
Keys
Used
to
adjust
rhythm
tempo.
Press
the
<
A
>
kev
to
speed
up
rhythm,
or
the
<
W
>
kev
tu
slow
rhythm
down.
Hold
the
kev
down
to
make
major
changes
in
tempo.
©
Press
noth
Revs
simuliancousiv
to
minalize
tempo
(reset
at
factory
setting
|
=
220)
M16
BEAT
@
REGGAE
MENKA
@
MANDOLIN
RHYTHM
ROCK
POPS
ae
ee
ee
COUNTRY
a?
Rhythm
wee
ee
ee
ee
SWING
oe
Selectors
BBLUES
BOSSA
NOVA
MSLOW
ROCK
|
WALTZ
:
@
TANGO
|
6
So
Select
|
m
SELECT
Indicator.
|
J?
Select
i
Key
Us!
Tempo
Indicator
-
Tempo
Control
Keys
|
‘15
Tempo
Indicator
Indicates
the
tempo
of
auto-
rhvthm.
Lights
to
indicate
the
Tirst
beat
of
each
measure.
Also
lights
when
in
stand-by
Status
in
Synchro
start
mode.

eS
7
*
+
8A
eee
ete
a
pees
errant
ew
mp
Connections
(2,
Output
Jack
=
()
AC
Adaptor
Jack
Input
corc
-rom
AC
adaptor
(AD-5)
wher
using
home
cur-
rent
or
car
adaptor
(CA-5).
(2)\Output
Jack
Connect
hez¢ohones
for
pri-
vate
lister:ns
(useful
at
night).
Or
connec:
7¢
audio
or
musi-
ca]
instrument
amplifiers.
3)Tuning
Control
Used
to
control
tuning,
raising
or
jowerns
zzning
within
2
+30
cents
range.
Useful
in
matching
tring
with
other
instrumen::.
!
Vibration
(Sound)
|
Sensor
}-—
'
i
3
String;
|
|
Finger-
board
i
ON/OFF
O1
$$
|
a
AC
Adaptor
Jack
Making
Music
On
the
DG-1
1].
When
a
string
is
plaved.
the
String
s
vibration
1s
sensed
by
a
built-in
sensor
and
the
selected
tone
1s
output
through
the
built-in
speaker.
°.
The
digital
guitar
leatures
switches
which
are
actualiv
built-
in
to
the
fingerboard
behind
each
iret.
It
vour
finger(s)
is
not
properly
centered
over
the
strings
vou
depress.
neighboring
strings
may
sound
(even
though
vou
haven
t
depressed
neighbor-
Ing
strings),
as
the
switches
mav
be
activated.
@
\6
sound
is
output
i
scrings
are
plaved
100
sozily.
;
|
Sensor
|_|
Switch
|
(Pitch)
!
LS|
=
aa
Circuitry
[|
tr
dina
Tk,
a,
Slt
aw’.
a
4
Mag
Bese
-.
2
-
OE
SS
ERE
(3.
Tuning
Control
Note:
There
are
two
different
basic
tvpes
of
preset
sounds
built-in
to
the
DG-1—
sounds
which
decay,
such
as
the
guitar
tone,
and
sounds
which
are
sustained,
such
as
the
organ
tone.
Sustained
sounds
may
be
cut
off
by
using
the
mute
key.
or
by
releasing
the
fretboard
(which
turns
OFF
the
built-in
sensor
switch).
Speaker
—
Output

Household
AC
Current
Connection
Panel
Use
Six
AA-size
(SUM-3)
Batteries
Back
side
Panel
AC
Outlet
|
AC
Adaptor
AD-5
Connecting
AC
Adaptor
Connection
of
an
AC
adaptor
(AD-5,
optional)
allows
the
unit
to
be
powered
bv
standard
house-
hold
current.
Use
onlv
an
adaptor
with
the
same
voltage
rating
as
your
local
power
supply.
inserting
and
Replacing
Batteries
compartment
cover
and
insert
batteries.
taking
care
When
replacing
batteries,
be
sure
to
replace
all
six
Remove
the
battery
that
polarity
1S
COTTeCT.
to
ensure
longer
Datterv
ie.
@
Turn
power
OFF
ocrore
replacing
batieries.
@
Battery
lite
o:
nign-periormance
R6P
(
i3
hours.
Weakenec
es
will
result
in
lower
volume.
pvor
tonal
quality
anc
eventuelly
misoperation
of
junctions.
It
such
symptoms
occur.
replace
ali
six
batteries
with
new
ones
as
soon
as
possible.
PRECAUTIONS
Incorrecily
using
batteries
can
cause
leakage
or
bursts.
and
mav
damage
vour
product.
Note
the
following
precautions:
1.
Be
sure
that
+/—
polarity
is
correct.
2.
DONO.
Mix
Satiery
IV
pe.
S.
Do
not
mix
new
baetierles
with
old
one
4,
Never
ieave
fea
Datteries
in
batterv
Sanaa
as
they
may
Cause
malfunctions.
5.
Remove
batteries
when
not
using
the
product
for
extended
perloc.
6.
The
supphec
battenes
are
not
rechargeable.
i.
Do
not
expose
the
battery
to
direct
heat.
Jet
1:
become
SHOnieC
Or
16
cee
it
apa
(li
a
battery
iczks.
ciegan
out
the
batterv
compartment
o7
the
produc:
imme<iatelv
taking
care
to
avoid
jetting
the
battery
fluid
come
inte
rect
contact
with
vour
Skin.)
SUM-3)
drv
cells
is
approximately
Lighter
Car
Battery
Adaptor
CA-5
Cigarette
Lighter
Connecting
Car
Adaptor
Connection
of
a
car
adaptor
(CA-3,
optional)
allows
the
unit
to
be
powered
through
4
vehicle's
cigarette
lighter
socket.
m™
Always
ensure
that
the
power
of
the
unit
is
OFF
when
connect-
Ing
or
disconnecting
adaptors.
@
Only
use
specifieé
CASIO
AC
or
Car
adaptors
to
prevent
damage
to
the
unit.
®
Adaptors
normaliv
become
warm
when
connected
to
the
power
source.
This
is
not
cause
jor
worrv.
but
adaptors
should
be
disconnected
whenever
the
unit
1s
NOt
usec
tor
extended
peniods.
Auto
Power
Off
Function
An
automatic
power
cut-off
Tunction
activates
adoroximately
C
minutes
after
thé
last
operatior
o:
the
unit.
Power
supply
can
be
restorec
bY
switching
the
power
y:
the
unit
OFF
anc
tnen
ON
again.

Changing
Strings
When
changing
strings,
use
the
2
accessory
hex
wrenches
(large
and
small)
supplied
with
this
unit,
according
to
the
following
procedures.
These
procedures
should
be
repeated
for
each
individual
string.
Hex
Wrench
(Small)
|
Peg
Ty
Hex
Wrench
£2.
|
Pa
te
ra
{
Larae)
].
Use
the
smal:
hex
wrench
to
rum
the
head
peg.
iaosening
the
string
to
be
replaces.
2.
Remove
the
sensor
cover
by
loosening
the
7wo
screws
holding
It
in
place,
using
the
large
hex
wrench.
.
Free
the
strimz
tc
be
replacec
pv
pressing
the
sing
stopper
holaing
I
lo
one
side
one
pull
the
loose
end
ot
the
sting
through
the
sen-
sor
section
anc
iinally
remove
it
trom
the
string
stopper
eo
|
String
Stoppe:
C=
Ss
Zoe
String
:
4.
li
2
smali
en7:
at
one
end
o:
the
new
st
a
en7
7eec
©
through
tne
siving
sitrver
as
iliustratec.
de
~!
5.
Pass
tne
new
string
through
the
sensor
section,
then
loop
it
under
‘the
hook
as
illustrated
and
pull
it
uuchi
te
mx
the
string
stopper
in
place.
a
Ory
~~
Move
toward
SEL
guitar
body
by
oa
&
v
Hex
Wrench
(Large)
woe
|
i
i?
Tighten
Hold
taught
while
tuantening
peg
=
Le
Hex
Wrench!
te
eae
(Large)
meal
:
|
|
|
|
|
|
i
1
i
|
|
6.
Insert
tne
large
hex
wrench
at
the
enc
of
the
heac
anc
turn
it
counterclockwise
IG
move
the
corresponding
peg
in
the
alrec-
tom
Of
the
guitar
DOGY.
7.
Pass
tne
loose
end
of
the
string
thrauch
the
hole
in
:ne
cor-
resai
onding
peg.
Wile
noicing
the
String
taught
with
one
hand.
tighten
the
peg
with
the
small
hex
wrench.
§.
Replace
the
sensor
cover.
4
Insert
the
large
hex
wrench
at
the
end
of
the
head
and
turn
x
clockwise
to
move
the
peg
towards
the
head
end,
applying
tension
on
the
string.
Never
ust
pliers
or
other
touls
to
apply
abnorma!
string
tension.
af
doing
so
mav
Warp
or
Gamage
tne
neck.
Alsc.
aVOIG
USINE
EXCESSIVE
1OTCe
OF
ine
NECK.
Note:
*
Use
commercially.
available
“gut”
invion)
gular
—
as
replacement
strings
(gauge:
(1.76
—
0.86
mmi.
Never
use
Slee:
SITINGS
OF
Strings
with
other
gauges.
*
Tf
vou
misplace
elther
of
tne
accessory
hex
wrenches,
vou
can
but
repiace-
ment
wrenches
at
vour
Casic
dealer.
or
at
vour
local
hardware
outiet.
The
large
wrench
is
¢
mm.
while
the
smal
wrench
1s
2.5
mm.
Be
sure
to
jooser.
string
tensicr.
petore
storing
vour
guitar
for
long
periods.

Specifications
36S
Specifications
Model:
Polyphonic:
Preset
Tones:
Auto-rhythms:
Rhythm
Controls:
Tuning
Control:
Other
Control:
Speaker:
Terminals:
Power
Source:
Auto
Power
OFF:
Power
Consumption:
Dimensions:
Weight:
Standard
Accessories:
Optional
Accessories:
Casio
Digital
Guitar
DG-1
6-note
polyphonic
—
12
Tones:
guitar
1
and
2,
electric
guntar,
funky,
glocken,
harp.
shamisen,
mandolin,
organ
]
and
2,
trumpet,
chorus
12
Rhythms
(PCM
source);
rock,
16
beat.
pops.
reggae,
countrv.
enka,
swing,
blues.
bossa
nova,
slow
rock,
waltz,
tango
start/stop
kevs,
synchro/fill-in
key,
tempo
control
keys,
tempo
indicator,
rhythm
volume
control
A4=442
H2+50
cents
(+
1/4
tone)
mute
kev
10cm
(4-inch)
dia
x
J]
(2.0
W)
output
jack
(output
impedance
=
10kQ,
output
voltage=(.5
V
(RMS)
MAX),
AC
adaptor
jack
(DC
9
V)
3-way
AC/DC
power
source;
DC:
6
AA-size
(SUM-3/R6P)
drv
cell
batteries
(Battery
life
approx.
3
hours)
AC:
AC
adaptor
(AD-5,
optional)
Car
Batterv:
car
adaptor
(CA-3
optional)
Power
turns
OFF
automatically
approximately
6
minutes
afier
last
operation.
4
W
882
(L)
x
255
(W)
x
77
(AH)
mm
(34
3/4”
(L)
x
10”
(W)
x
3
'/ie”
(H))
2.8
Kg
(6.2
Ibs)
including
battenes
6
AA-size
drv
cell
batteries.
2
hex
wrenches
AC
adaptor
(AD-5),
Car
adaptor
(CA-5).
Custom
soft
case
(SC-60G).
Headphones
(CP-2)
*
Design
ane
speeviccuons
arc
subrect
to
change
withoui
notice.

Ka.
a
2
a
Troubleshooting
Guide
Symptom
No
sound
!s
output,
even
when
strings
are
plaved.
|
Rhythm
does
not
sound.
@
\lain
volume
control
is
at
its
Possible
Cause
minimum.
m
Headphones
connected.
!
®
Auto
power
OFF
function
)
has
turned
power
OFF.
|
|
!
!
®
Rhythm
volume
control
is
at
|
Its
munimum.
|
Remedy
@
Adjust
main
volume
to
desired
level.
|
#
Disconnect
headphones.
=
Turn
power
back
ON
(sec
page
6)
m
Adjust
rhythm
volume
to
desired
level.
,
\
!
y
'
'
=
}
:
:
\
}
:
:
:
:
"
i
Sound
is
occasionally
distarted.
@
Interference
caused
by
electrical
appliances.
m@
Use
a
power
outlet
away
from
appliances.
Occasiona!
reception
of
television
o7
radio
waves.
=
High-output
broadcasting
Station
in
neighborhood.
=
Try
changing
position
of
|
instrument.
|
|
(Ex)
If
vou're
plaving
near
a
window,
trv
moving
away
from
window.
For
surther
suggestions,
contact
vour
service
center.
m@
Raise
main
volume
level,
No
sound
o2tput
when
unit
is
connected
i¢
external
amp.
|
{
|
|
\
|
w
\fain
volume
control
is
at
its
minimum.
@
Short
in
connection
cord.
®
Replace
connection
cord.
a
al
oe
=
wes
ed
og
Pe
ORR
Nr
adel
SE
oie

Guidelines
Laid
Down
by
FCC
Rules
for
Use
of
the
Unit
in
the
U.S.A.
Not
Applicable
to
Other
Areas.
This
equipment
generates
and
uses
radio
frequency
energy
and
if
not
installed
and
used
properly,
that
is,
in
strict
accordance
with
the
manufacturer's
instructions,
may
cause
interference
to
radio
and
television
reception.
It
has
been
type
tested
and
found
to
comply
with
the
limits
for
a
Class
B
computing
device
in
accord-
ance
with
the
specifications
in
Subpart
]
of
Part
15
of
FCC
Rules.
which
are
designed
to
provide
reasonable
protection
against
such
interference
in
a
residential
installation.
However,
there
is
no
guarantee
that
interference
will
not
occur
in
a
particular
installation.
If
this
equipment
does
cause
interference
to
radio
or
television
reception.
which
can
be
determined
bv
turning
the
equipment
off
and
on.
the
user
is
encouraged
to
trv
to
correct
the
interference
by
one
or
more
of
the
tollowing
measures:
@
reorient
the
receiving
antenna
w
relocate
the
computer
with
respect
to
the
receiver
™
move
the
computer
away
from
the
receiver
™
plug
the
computer
into
a
different
outlet
so
that
computer
and
receiver
are
on
different
branch
circuits.
If
necessary,
the
user
should
consult
the
dealer
or
an
experienced
radio‘television
technician
lor
additional
suggestions.
The
user
may
find
the
following
booklet
prepared
by
the
Federal
Communications
Commission
helpful:
“How
to
Identify
and
Resolve
Radio-TV
Interterence
Problems”.
This
booklet
1s
available
from
the
US
Government
Printing
Office.
Washington,
D.C.,
20402.
Stock
No.
(104-000-00345-S.
10
Table of contents
Other Casio Musical Instrument manuals
Casio
Casio MA-170 User manual

Casio
Casio CDP-S105 User manual

Casio
Casio AP-710 User manual
Casio
Casio MZ-X300 User manual

Casio
Casio Privia PX-870 User manual

Casio
Casio VA-10 User manual

Casio
Casio Privia PX-765 User manual

Casio
Casio LD-80 User manual

Casio
Casio Aculaser M2 User manual

Casio
Casio Celviano AP-25 User manual

Casio
Casio Celviano AP-25 User manual

Casio
Casio PX-780M User manual

Casio
Casio CTK-1300ES User manual

Casio
Casio CPS-7 User manual

Casio
Casio Privia PX-350M User manual

Casio
Casio CTK-3500 User manual

Casio
Casio AP-260 User manual

Casio
Casio Celviano GP-300BK User manual

Casio
Casio CTK-100 User manual

Casio
Casio Celviano AP-28 User manual