Operation Guide 5381
E-29
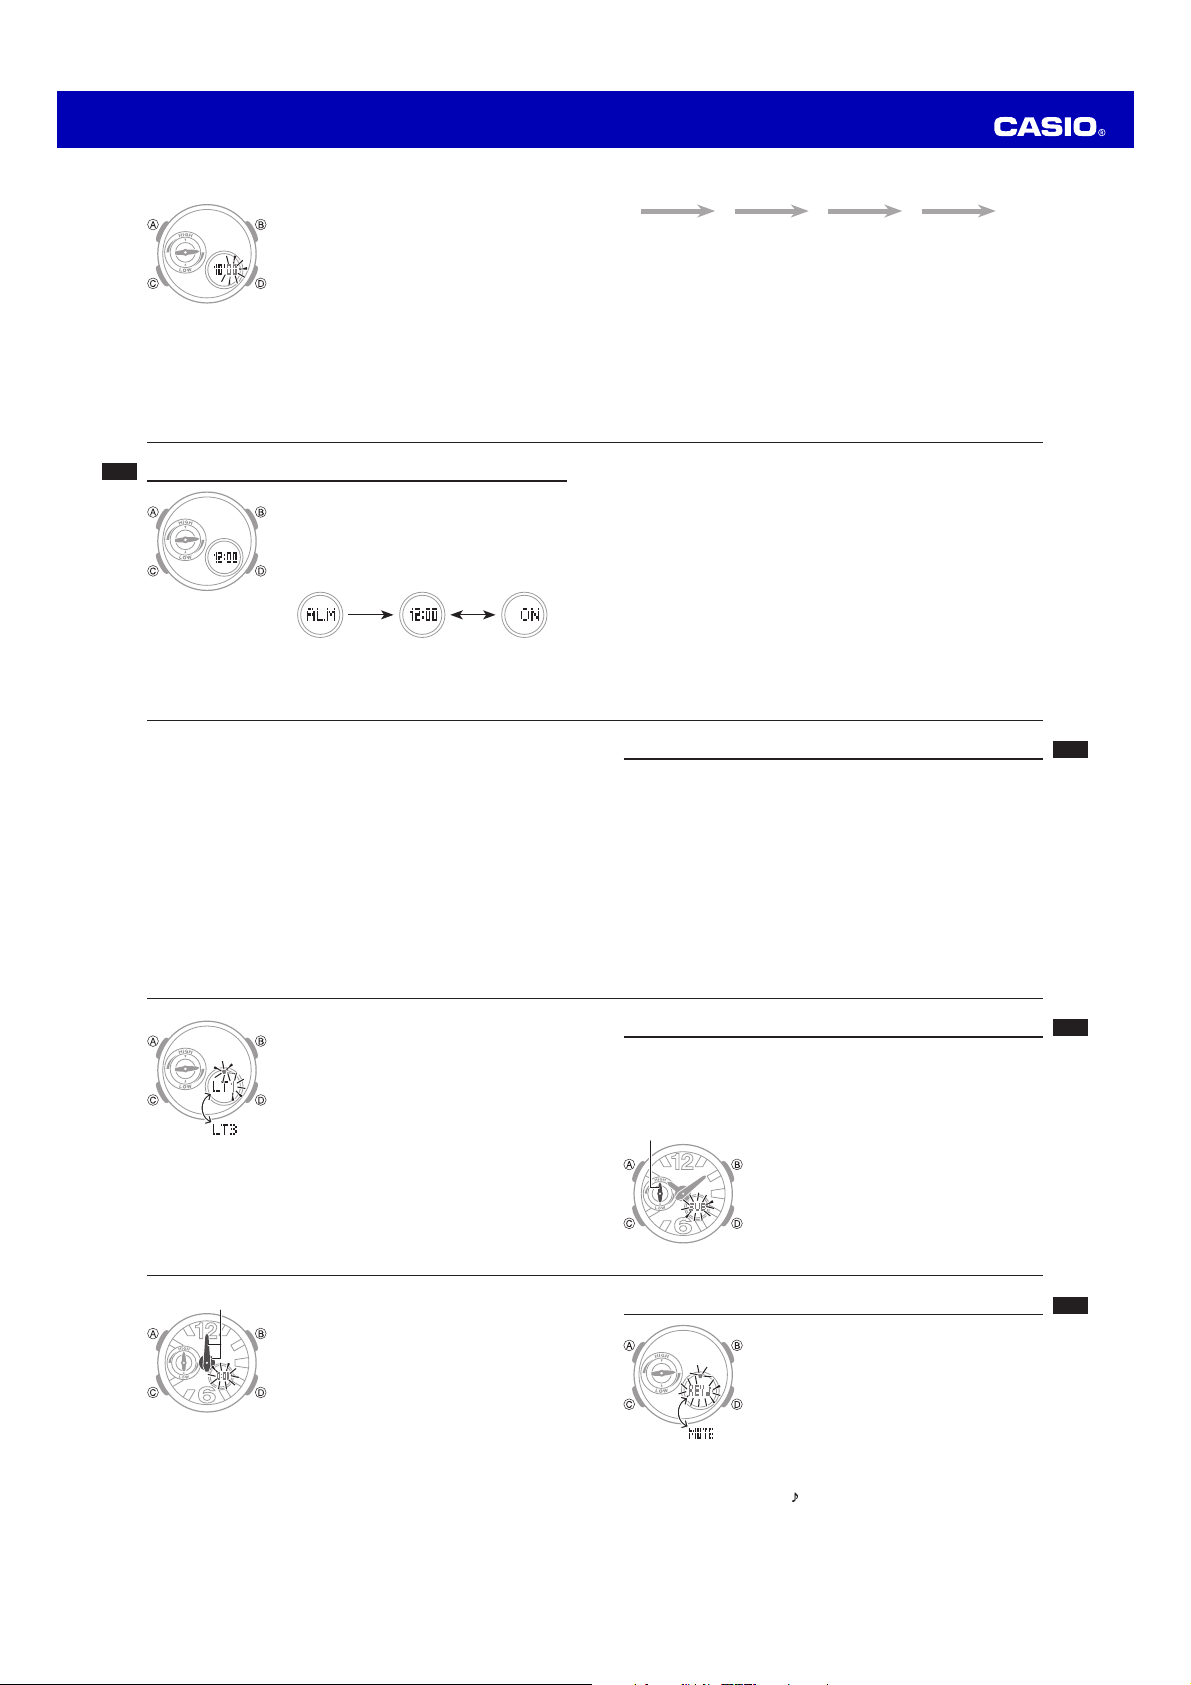
1. Enter the Thermometer Mode (page E-12).
2. Hold down Afor at least two seconds until the temperature
value disappears from the display.
•When you release Athe temperature value will start to flash.
•The hour and minute hands automatically move out of the way at
this time (page E-15).
3. Use D(+) and B(–) to calibrate the temperature value.
Calibration unit: 0.1°C (or 0.2°F)
Calibration range: –10.0 to 60.0°C (or 14.0 to 140.0°F)
Important!
•To cancel a temperature reading correction setting, hold down Dand Bat the
same time. The watch will beep.
4. Press Ato return to the Thermometer Mode.
E-28
Correcting the Temperature Reading
The temperature sensor of this watch is adjusted at the factory and so further
adjustment is not required by you. However, if you notice that the readings
produced by the watch are different from readings produced by another instrument,
you can use the procedure in this section to make corrections. You also can use
this procedure to clear a correction.
Important!
•The watch will not be able to produce correct temperature readings if you make a
mistake during the correction procedure. Check to make sure that the value you
use for correction produces correct temperature readings.
•Before performing the following procedure, remove the watch from your wrist and
leave it for about 20 or 30 minutes to allow the case temperature to become the
same as the air temperature.
E-27
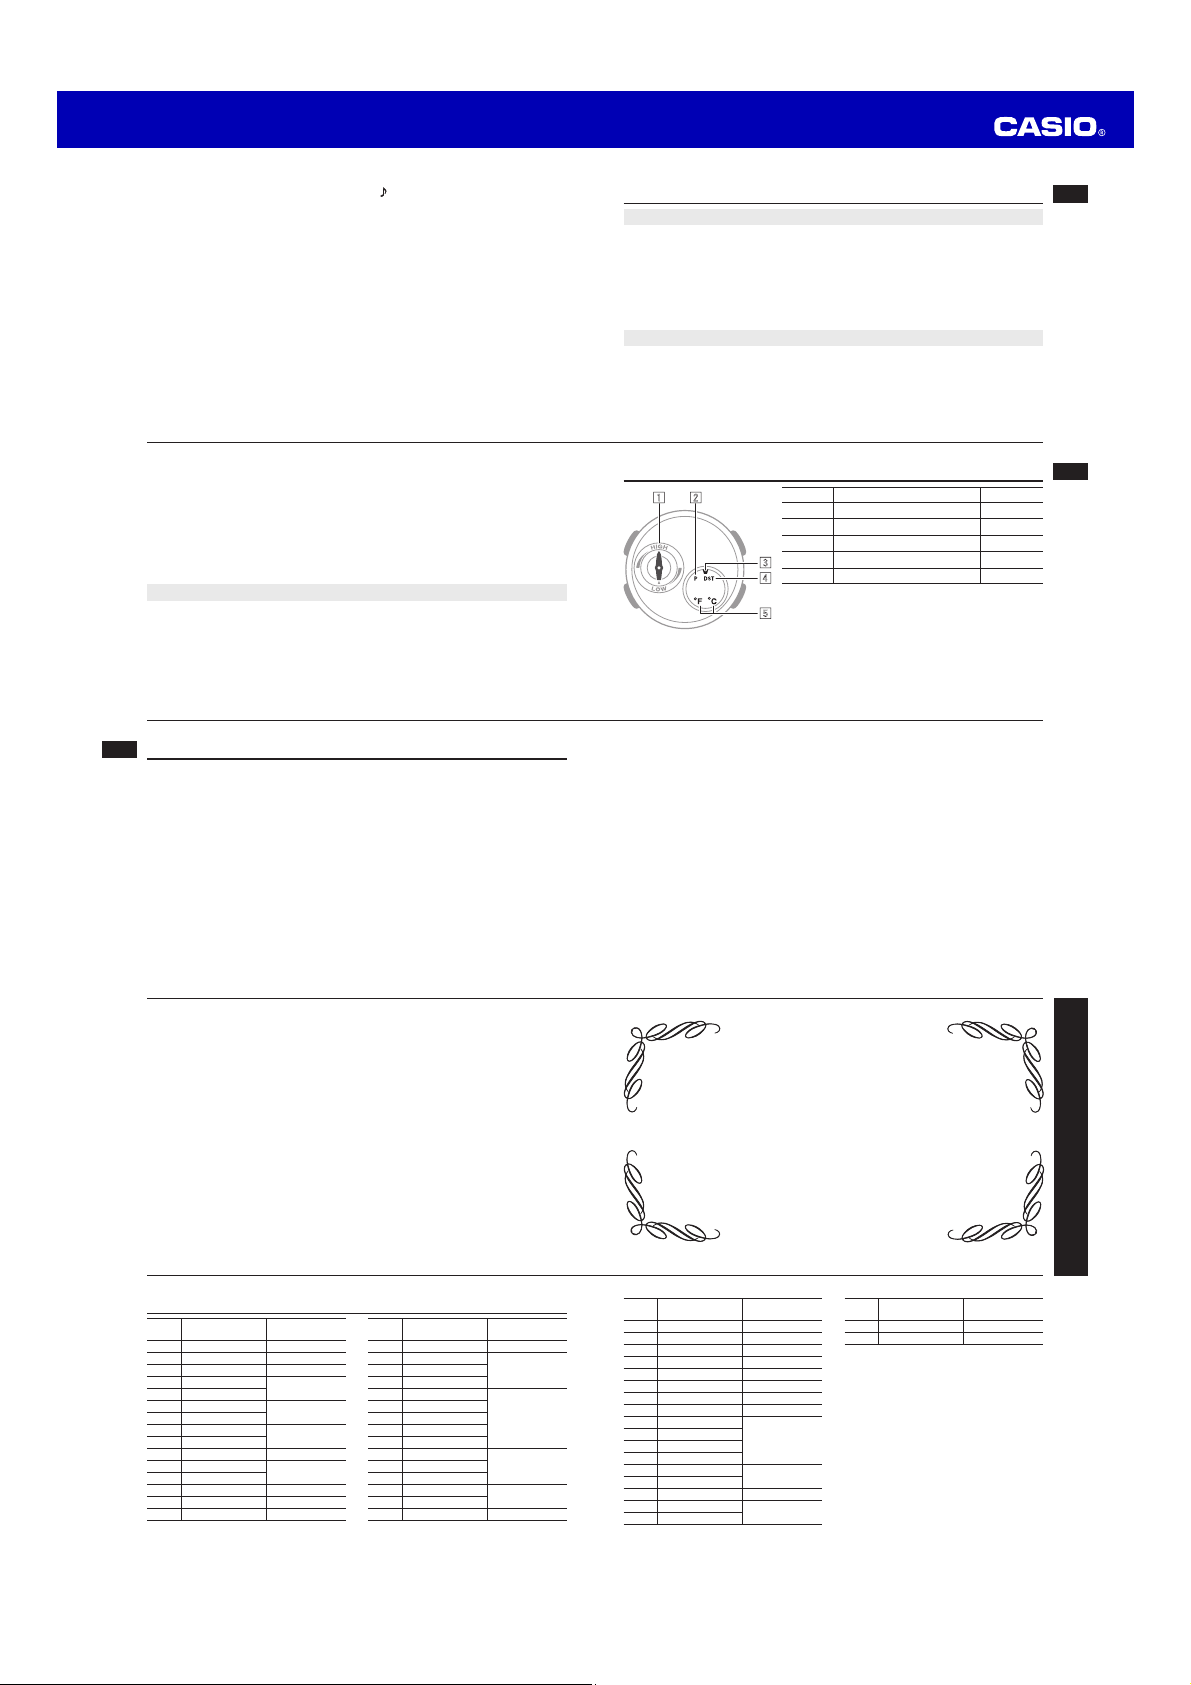
3. Press C.
•This will cause the current measurement
unit to flash.
4. Use Dto select the measurement unit you
want.
5. Press Ato return to the Thermometer Mode.
Important!
•When TYO (TOKYO) is selected as the Home City, the temperature unit is set
automatically to Celsius (°C). These settings cannot be changed.
D
E-26
Measurement unit: 0.1°C (or 0.2°F)
Measurement range*: –10.0 to 60.0°C (or 14.0 to 140.0°F)
* --.- is displayed in place of the temperature when reading is outside the allowable
range.
2. Press Cto return to the Timekeeping Mode.
To switch a temperature reading unit between Celsius (°C) and Fahrenheit (°F)
1. Enter the Thermometer Mode (page E-12).
2. Hold down Afor at least two seconds until the temperature value disappears
from the display.
•When you release Athe temperature value will start to flash.
•The hour and minute hands automatically move out of the way at this time (page
E-15).
E-25
Thermometer
This watch uses a temperature sensor to take temperature readings.
•You can select either Celsius (°C) or Fahrenheit (°F) as the temperature
measurement unit (page E-26).
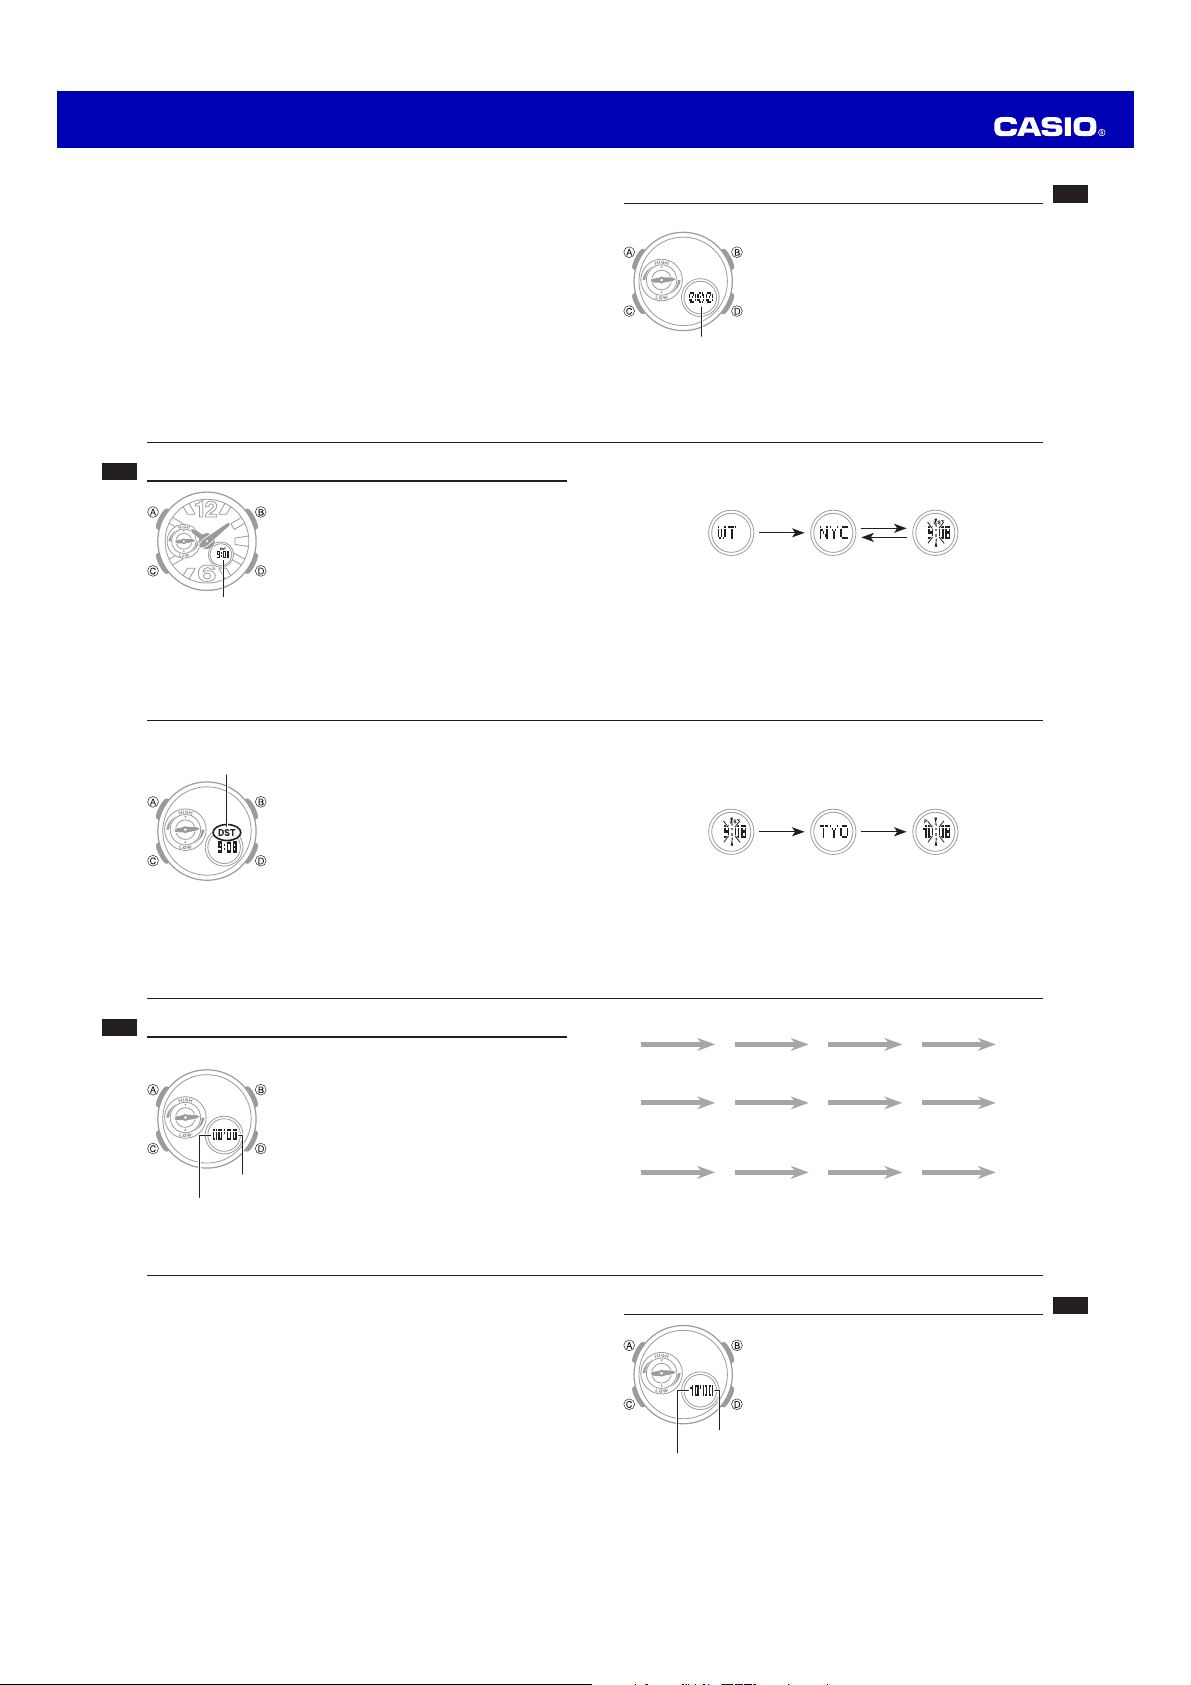
To take a temperature reading
1. In the Timekeeping Mode, press D. This will enter the
Thermometer Mode, which is indicated by TEMP on
the display.
•If TEMP does not appear when you press D, press
it again (page E-12).
•The temperature reading will appear about one
second after TEMP.
•The reading is updated at five-second intervals for two
to three minutes. After that, the watch automatically
returns to the Timekeeping Mode.
Temperature
E-24
Note
•Resetting the seconds to 00 while the current count is in the range of 30 to 59
causes the minutes to be increased by 1.
•The watch’s built-in full automatic calendar makes allowances for different month
lengths and leap years. Once you set the date, there should be no reason to
change it except after you have the watch’s battery replaced.
•The day of the week changes automatically when the date changes.
E-23
3. When the timekeeping setting you want to change is flashing, use Dand/or B
to change it as described below.
Screen To do this: Do this:
Toggle between 12-hour (12H) and 24-hour
(24H) timekeeping Press D.
Reset the seconds to 00 Press D.
Change the hour or minute Use D(+) and B(–).
Change the year Use D(+) and B(–).
Change the month or day Use D(+) and B(–).
4. Press Ato exit the setting mode.
E-22
2. Press Cto move the flashing in the sequence shown below to select the other
settings.
City Code
(page E-18)
CDST
(page E-20)
C
12/24-Hour Format
C
Seconds
C
CHour
C
Illumination Duration
(page E-55) Minutes
CC
Button Operation Tone On/Off
(page E-59) C
Day
C
Month
C
Year
E-21
Adjusting the Digital Time and Date Settings
Use the procedure below to adjust the digital time and date settings.
To configure the digital time and date settings
1. In the Timekeeping Mode, hold down Auntil ADJ
appears.
•This indicates the city code setting mode.
•The hour and minute hands automatically move out of
the way at this time (page E-15).
E-20
To change the Daylight Saving Time (summer time) setting
1. In the Timekeeping Mode, hold down Auntil ADJ
appears.
•This indicates the city code setting mode.
•The hour and minute hands automatically move out of
the way at this time (page E-15).
2. Press Cto display the DST setting mode.
3. Press Dto toggle between Daylight Saving Time (ON)
and Standard Time (OFF).
•Note that you cannot switch between daylight saving
time and standard time while UTC is selected as your
Home City.
4. After the setting is the way you want, press Ato
return to the Timekeeping Mode.
•The DST indicator appears to indicate that Daylight
Saving Time is turned on.
DST indicator