Castlewood 1394/FireWire ORB 2.2 GB User manual

1394/FIREWIRE ORB 2.2 GB
Installation Guide
Users Guide
Trou leshooting
How to Get Help
Warranty
Registration
Owners Manual

1
SECTION 1 INSTALLATION GUIDE
Things to Consider . . . . . . . . . . . . . . . . . . . . . . . . . . . . . . . . . . . . . . . . 2
1.1 Introduction . . . . . . . . . . . . . . . . . . . . . . . . . . . . . . . . . . . . . . . . . . 3
1.2 System equirements . . . . . . . . . . . . . . . . . . . . . . . . . . . . . . . . . . 3
1.3 Hardware/Tools for Installation . . . . . . . . . . . . . . . . . . . . . . . . . . .3
1.4 Package Contents . . . . . . . . . . . . . . . . . . . . . . . . . . . . . . . . . . . . . 3
1.5 Installation Precautions . . . . . . . . . . . . . . . . . . . . . . . . . . . . . . . . . 4
1.6 Hardware Setup . . . . . . . . . . . . . . . . . . . . . . . . . . . . . . . . . . . . . . . 5
1.7 Software Setup . . . . . . . . . . . . . . . . . . . . . . . . . . . . . . . . . . . . . . . . 7
SECTION 2 USE S GUIDE
2.1 Operating your O B Drive . . . . . . . . . . . . . . . . . . . . . . . . . . . . . . 8
2.2 Using O B Disks . . . . . . . . . . . . . . . . . . . . . . . . . . . . . . . . . . . . . 9
2.3 Accessing Your O B Drive . . . . . . . . . . . . . . . . . . . . . . . . . . . . . 11
2.4 eassigning Drive Letters . . . . . . . . . . . . . . . . . . . . . . . . . . . . . . 11
2.5 Large Drive Support . . . . . . . . . . . . . . . . . . . . . . . . . . . . . . . . . . 12
2.6 Partitioning a Disk . . . . . . . . . . . . . . . . . . . . . . . . . . . . . . . . . . . . 12
SECTION 3 T OUBLESHOOTING . . . . . . . . . . . . . . . . . . 14
SECTION 4 SPECIFICATIONS . . . . . . . . . . . . . . . . . . . . . . 16
SECTION 5 CUSTOME SUPPO T . . . . . . . . . . . . . . . . 18
SECTION 6 WA ANTY . . . . . . . . . . . . . . . . . . . . . . . . . . . . 19
SECTION 7 SOFTWA E LICENSE AG EEMENT . . . 21
SECTION 8 STANDA DS AND EGULATIONS . . . . 25
TABLE OF CONTENTS

Look through this Installation Guide. If you feel in any way
unsure of performing this installation, then, we strongly
recommend contacting a qualified computer technician to install
or assist in the installation.
2
THINGS TO CONSIDE :

WELCOME TO O B!
The ORB drive offers you everything that you want in a porta le, remova le
disk drive high capacity and fast throughput speed at an afforda le price
that can e easily connected to your system using a 1394/FireWire port.
1.1 INT ODUCTION
This installation guide provides detailed instructions and illustrations, as
well as, safety precautions that will help you to install your ORB disk drive.
It is recommended that you use this guide along with your computer manual
for you will need to refer to the manual during the installation process.
1.2 SYSTEM EQUI EMENTS
Hardware:
PC Pentium class systems with 1394 Port
Mac Power Mac with FireWire Port, G3 and G4
Operating Systems:
PC Win 98SE, Win 2000, Win ME, Win XP
Mac Mac OS 9.0.4 - 9.2.x, OS X.1.x
1.3 HA DWA E/TOOLS FO INSTALLATION
You may require tools if you need to install an add-on 1394/FireWire adapter
card. In this case, follow the instructions provided y the vendor of the add-
on card to perform this installation.
1.4 PACKAGE CONTENTS
The ORB 1394/FireWire drive consists of:
3
SECTION 1 INSTALLATION GUIDE
O B 2.2GB drive, Power supply, 6-pin 1394/FireWire cable,
1394/FireWire Converter, Quick Installation Guide and the O B
Installation Suite CD.
Figure 1
QUICK
INSTALLATION
GUIDE
The simple, easy, short-cut
to get you up and running
with your new ORB drive.
1394/F
IRE
W
IRE
E
XTERNAL
INSTALLATION GUIDE

1.5 INSTALLATION P ECAUTIONS
Be sure to read the following Installation Safety Instructions efore proceeding
on to the actual installation steps. Damage could occur to your drive and
disk if these precautions are not followed. If for any reason you do not
understand these instructions, please contact a qualified computer technician
to install or assist in the installation.
Temperature Stabilization - Before removing the drive from its protective
plastic ag, ensure the drive has reached room temperature. This is
accomplished y allowing the drive to sit in its protective plastic ag in
the room environment for at least one hour.
Shock - Dropping, jarring, or moving the drive while the disk is spinning
can cause catastrophic damage. The drive should e placed on a flat,
horizontal surface whenever an ORB disk is installed. The ORB disk
should always e removed from the drive efore the ORB drive is
moved.
4
INSTALLATION GUIDE

1. Connect the 1394/FireWire converter to the O B drive
as shown in Figure 6.
Ensure that the ORB drive is powered off.
2. Connect the O B drive power supply.
First, attach the round power connector from the power
supply to the ORB drive (center, rear of the drive).
Then, plug the power supply into an AC outlet.
P OBLEM! If the Power/Status LED is not
glowing green or does not light up, refer to
Section 3, Troubleshooting.
CAUTION! The drive should be powered off before
connecting or disconnecting the 1394/FireWire
converter.
5
Become familiar with your ORB 2.2GB drive and 1394/FireWire converter
Figure 2
Drive front view
Emergency eject hole
Disk insert/eject utton
Power/Status LED
Figure 3
Drive rear view
SCSI IN
Power supply connector
SCSI OUT
6-pin FireWire
(IEEE1394) port Detach clip
Figure 4
Converter front view
Figure 5
Converter rear view
High density 50-pin
SCSI connector
Power LED (Green)
1.6 HA DWA E SETUP
In this section you will e physically connecting your ORB 2.2GB drive
through a 1394/FireWire converter to your computer system.
Figure 6
Figure 7
INSTALLATION GUIDE

3. Insert an O B disk into the drive.
Press the Insert/Eject utton on the front of the drive. The drive door will
open for approximately 5 seconds.
CAUTION! Do not label the disk with a lead pencil.
Please use an indelible ink pen.
To insert the ORB disk, slide the disk all the way into your ORB drive. Push
in and then firmly press down on the disk until it snaps into place. You can
refer to Section 2.2, Using ORB Disks, for further information on disk insertion.
Within a few seconds, the door should close and the Power/Status LED
should egin flashing am er.
Within approximately 15 seconds, the Power/Status LED should stop linking
and will glow green. This indicates that the disk is mounted and your drive
is ready.
P OBLEM! The disk ejects (does not mount). efer
to the Section 3, Troubleshooting.
4. Connect the O B drive to the computer.
Connect the 1394/FireWire ca le to an availa le 1394/FireWire port of your
computer system.
6
Figure 8
INSTALLATION GUIDE

1.7 SOFTWA E SETUP
1.7.1 WINDOWS OS
1. You will see a new drive icon in My Computer as shown elow.
2. You do not need to install any driver/software from Castlewoods Installation
CD in order to use your 1394/FireWire ORB drive. Win 2000 / Win ME /
Win XP contain the necessary software support. If you are using Win
98SE, you may need to download and install software update from
Microsoft. See Microsoft support article Q242975 for more information.
P OBLEM! If you do not see a new drive icon in My
Computer, please refer to Help Files located on the
Support Center at www.castlewood.com or on the
Installation CD.
3. To disconnect the drive, you need to click on the Unplug or Eject Hardware
icon on the Task ar as shown elow. Then, select stop ORB Drive (X:).
You will see the message ox you can safely remove the device. Click
OK and you can now disconnect the drive.
1.7.2 Mac OS
1. Check your FireWire version first.
You need to download FireWire 2.5 or a ove from Apple we site and install
it if your FireWire version is older than 2.5. You can check your FireWire
version with the Devices and Volumes in the Apple System Profiler.
2. The device/volume will mount on the desktop. You have successfully
installed the drive.
P OBLEM! If you do not see a drive/volume icon
on the desktop, please refer to Help Files
located
on the Support Center at www.castlewood.com
or on
the Installation CD.
7
INSTALLATION GUIDE

SECTION 2 USE S GUIDE
2.1 OPE ATING YOU O B D IVE
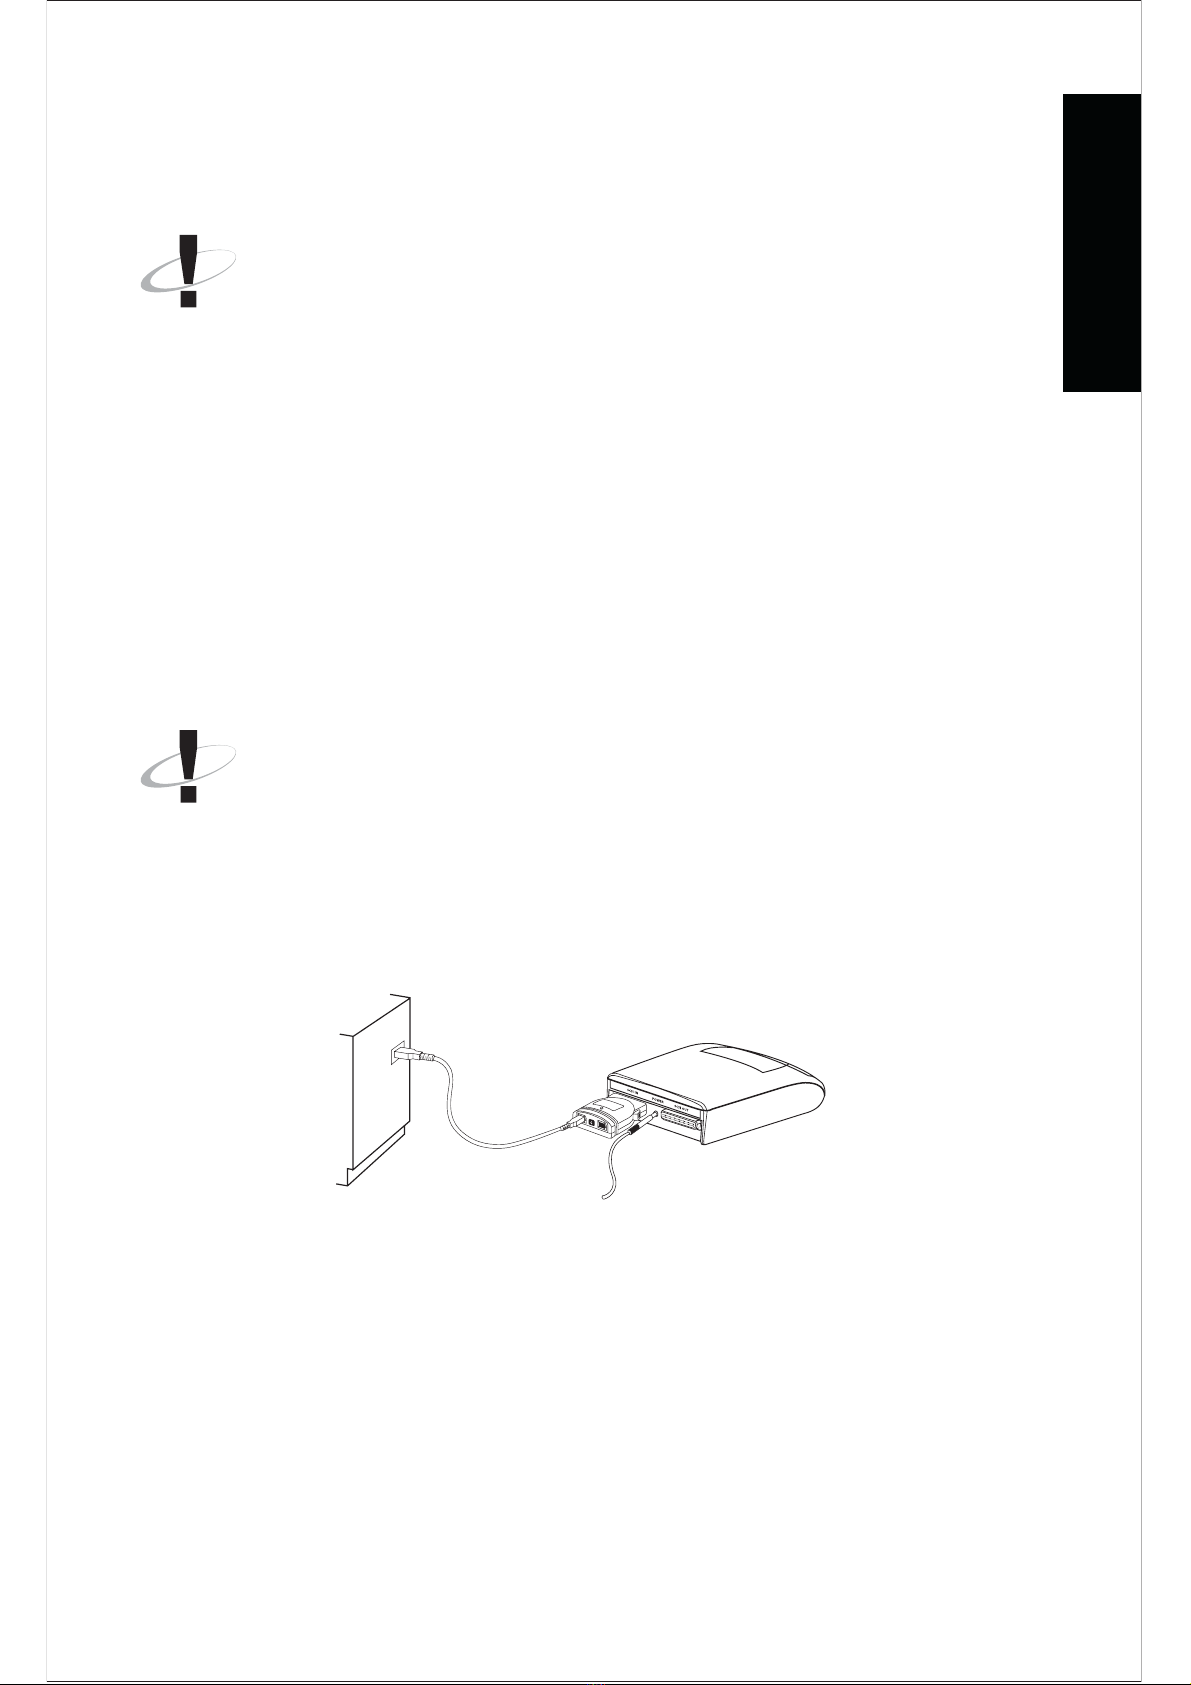
Now that you have successfully installed your ORB drive, you will soon e
a le to make use of the wide range of features and applications that it offers:
Important ecord Storage If you need a place to keep
special files (confidential information or any other valua le items like
product plans and designs, personnel files, udgets, company directories,
computerized check ooks and tax records), the ORB disk is a perfect
solution.
Portable Information With your new ORB drive, you have the
a ility to store vast amounts of information on a disk slightly larger than
a 3 1/2-inch floppy. This means you can put an ORB disk in its case
and then in your pocket to take it wherever you go.
Multimedia The ORBs fast speed and high capacity make it the
ideal storage device for CD-ROM, video, and digital images. You can
record an entire movie onto ORB disks and play it ack at your leisure.
Audio/Video Mastering & Playback The ORB drive
software includes mode-setting controls that allow professional A/V
specialists direct control of the drives read/write characteristics. Use of
A/V modes will optimize the ORB drive for the unique requirements of
Audio and Video specialists.
Instant Hard Disk Upgrade The ORB drive offers an easy
way to add an extra 2.2 giga ytes of storage space to your system.
Organization If you have files from many different types of sources
and you want to organize them, the ORB disks allows you to group
these files y storing different types of files on different disks.
Hard Drive Back Up The ORB drive presents a simple way to
ack up your hard drive. Just copy important files to the ORB disk and
you can access those files at any time.
8
USE S GUIDE

2.2 USING O B DISKS
Disk Insertion Instructions
Push the ORB disk straight into the ORB
drive with your finger, all the way in,
until it stops, and then press down
to ensure that the disk is seated.
Disk Ejection Instructions
Make sure that you eject the disk efore powering off your computer
system.
CAUTION: Do not try to remove disk by lifting up on the front
edge of the disk while it is in the drive.
CAUTION: Do not move or transport the drive with the disk
installed. This can damage the heads and media. A disk must
not be in the drive when the drive is moved or shipped.
From Windows Desktop
1. Close all open applications and files on the ORB disk efore ejecting
the disk otherwise data could e corrupted.
2. From the Desktop, dou le click on My Computer.
3. Right click on ORB drive icon.
4. Select Eject.
5. Green LED will flash am er (Disk spin down and air purge cycle).
6. ORB drive door will automatically open.
7. Disk will e ejected.
8. Remove ORB disk.
9. Door will automatically close.
10.Place ORB disk in protective ORB disk case.
From Mac Desktop
1. Close all open applications and files on the ORB disk efore ejecting
the disk otherwise data could possi ly e corrupted.
2. From the Desktop, highlight the ORB drive icon and hold the mouse.
3. Drag the icon and drop it in the Trash Can icon or utilize the eject
command support y pressing the command key (Apple) and E or
pressing the command key (Apple) and Y.
9
Figure 9
Disk insertion
USE S GUIDE

4. Green LED will flash am er (Disk spin down).
5. ORB drive door will automatically open.
6. Disk will e ejected.
7. ORB drive icon should disappear from Desktop.
8. Remove ORB disk.
9. Door will automatically close.
10.Place ORB disk in protective ORB disk case.
From Drive
It is recommended to eject from Windows or Mac desktop as descri ed
a ove during routine operation. The following is not applica le on Macintosh.
1. Close all open applications and files on the ORB disk efore ejecting
the disk otherwise data could e corrupted.
2. Press the Insert / Eject utton on the front of the drive.
3. Green LED will flash am er (Disk spin down).
4. ORB drive door will automatically open.
5. Disk will e ejected.
6. Remove ORB disk.
7. Door will close.
8. Place ORB disk in protective ORB disk case.
CAUTION: To provide maximum protection, do not leave an
O B disk in the ejected position with the drive door open. In
addition, store your O B disk in the protective disk case when
it is not in immediate use.
Using the O B Disk Case
Your ORB disk comes in a protective disk case. This case is provided
to ensure that your ORB disk has the maximum protection from am ient
conditions and normal physical use. Place the ORB disk into the ORB
disk case when it is not in immediate use. This will maximize your disk
life and minimize your risk of loss or damage.
Figure 10
O B disk and
protective disk case
Warning about foreign media damage
Do not attempt to insert any media other than ORB disks into the ORB
drive. It is not compati le with any media other than an ORB disk.
Inserting any media other than ORB disks will result in damage to your
drive and will void any warranty for the product.
10
USE S GUIDE

Figure 11
Emergency eject
Emergency Ejection Method
1. Disconnect the drive from your computer.
2. Remove power from your ORB drive y either unplugging the
power supply or removing the power connector from the drive.
3. Wait 30 seconds.
4. Insert a paper clip into emergency eject hole.
CAUTION: Do not insert a paper clip into the
emergency eject hole while there is power to your
PC and drive. This may result in damage to your
drive and disk, and may void your warranty.
2.3 ACCESSING YOU O B D IVE
My Computer: Win 98SE / Win 2000 / Win ME / Win XP
1. From the Desktop place the cursor over My Computer and dou le click.
2. Identify the ORB Remova le Drive and dou le click.
Explorer: Win 98SE / Win 2000 / Win ME / Win XP
1. From the Desktop click on the Start Button.
2. Select Programs.
3. Select Explorer.
4. Select My Computer.
5. Select the ORB icon from the drive hierarchy and dou le click.
Mac OS 9.0.4 - 9.2.x, Mac OS X.1.x
Identify the ORB drive/volume icon on Desktop and dou le click.
2.4 EASSIGNING D IVE LETTE S
Under Windows you may e a le to change the drive letter
assigned to your ORB drive.
11
USE S GUIDE

You may want to change the drive letter for convenience, or ecause there
was a change to existing drive letters when you installed your ORB drive.
Changes to existing drive letters may cause pro lems with applications
installed on the drives with changed letters.
Installation Help Note for 1394/FireWire drive covers in detail how drive
letters are assigned and the ways availa le to reassign drive letters. Help
notes are availa le on our we site at www.castlewood.com as well as on
the ORB Installation Suite CD.
2.5 LA GE D IVE SUPPO T
Windows Environment
Win 98/98SE / Win 2000 (SP2+) / Win ME / Win XP support the use of
partitions greater than 2GB (giga ytes) in capacity with FAT32. The maximum
supported partition size is 2TB (tera ytes). Large drive partition support can
help you dramatically reduce the amount of wasted space on your computers
hard disk.
One should e aware that this FAT32 configured partition can only e
recognized and accessed y Win 95 OSR2 / Win 98/98SE / Win 2000 / Win
ME / Win XP. DOS, original Win 95, Windows NT 4.0 (SP4+) or earlier
cannot access a FAT32 partition.
Mac Environment
Mac OS 9.0.4 and later supports Mac OS Extended File Format (HFS+).
This large drive partition support can help you dramatically reduce the
amount of wasted space on your ORB disk.
2.6 PA TITIONING A DISK
The ORB disk is a high quality and high capacity hard disk. The ORB disk
is preformatted with one 2.16GB extended FAT16 partition. The format can
e set to your preference. The ORB drive and disk partition ehave like any
Hard Disk Drive that you have on your system. The following ta le shows
the format options that exist to you ased on your operating system.
12
USE S GUIDE

Partition Options
Note: 1 GB = 1 illion ytes = 1,000,000,000 ytes
Value = Maximum Partition Size
NVO = Not Valid Option
e-Partitioning the O B disk:
Win 98SE / Win ME
Right click on the drive icon, select format to reformat a disk.
Win 2000 / Win XP
Right click on My Computer icon, select Manage/Disk Management to
partition and format.
Mac OS 9.0.4 - 9.2.x
Use Mac operating systems Erase Disk feature to reformat.
Mac OS X
Use the Disk Utility/Drive setup to reformat any ORB disk.
Table 1
Operating FAT16 FAT32 NTFS HFS (Mac OS HFS+ (Mac OS
System Standard) Extended)
Win 98SE 2.16GB 2.2GB NVO NVO NVO
Win 2000 2.16GB 2.2GB 2.2GB NVO NVO
Mac OS 9.0.4+ 1.9GB 2.2GB NVO 2.1GB 2.1GB
13
Win ME 2.16GB 2.2GB NVO NVO NVO
Win XP 2.16GB 2.2GB 2.2GB NVO NVO
USE S GUIDE

SECTION 3 T OUBLESHOOTING
If you encounter a pro lem while installing or using your ORB drive, check
this section for help.
If the information presented in this document does not help you resolve the
pro lem, visit the Support Center on our we site: www.castlewood.com.
CAUTION! The drive should be powered off before
connecting or disconnecting the 1394/FireWire
converter.
Power/Status LED Indicator Definitions
Green: Power is present and drive has passed self-test.
Amber: Data is eing written or read on the ORB disk.
ed: Error has occurred while checking the drive.
Upon Power On:
1. Steady Green Drive ready to accept disk.
2. Flashing Amber and then steady Green Disk is in and drive ready for
use.
3. Flashing Amber, motor spins up and then spins down, disk ejects
and LED turns steady Green Disk failed to spin up.
4. Flashing ed Drive Failure:
One flash - ROM failure
Two flashes - RAM failure
Three flashes - DRAM failure
Four flashes - Internal Bus failure
Five flashes - Interface failure
14
During Operation:
1. Steady Green Drive ready to accept an ORB disk
ORB disk is loaded.
2. Flashing Amber Disk loading or unloading.
Disk in use.
3. Flashing ed Possi le disk error detected during spin up.
Your disk will either e write-protected or ejected to safeguard the data.
One flash to four flashes Note the num er of red flashes and contact technical
support
Five flashes Bad power on detected. Cycle the power to your ORB drive.
T OUBLESHOOTING

Make sure the power supply is
plugged in
Make sure power connector to
drive is securely inserted in
drive.
Drive is defective - return to
place of purchase.
A) Make sure the power cable
connection to the O B drive is
secure.
B) Make sure the disk is
inserted and seated properly.
Make sure that you are properly
inserting the disk. efer to
section 2.2, Using O B Disks.
Try inserting a different disk. If
it mounts properly, there may
be a problem with the original
disk.
This could be caused by several
possible problems related to an
installation problem. The
following entry will help you
isolate the device that causes the
problem.
Make sure that the cables are
properly connected and both
ends of the cable connectors
are seated all the way and are
straight to the connector.
efer to the Support Center
on our web site at
www.castlewood.com.
15
Green light (LED) does not
illuminate or light.
ed light (LED) remains in the
on state.
The O B drive does not come
ready. (Green light (LED) on
the O B drive does not come
ready when disk is inserted.)
An O B disk will not stay
inserted.
After the O B drive is
installed, the computer hangs
during startup or the O B drive
does not appear on the
Desktop
For the latest help information:
T OUBLESHOOTING

SECTION 4 SPECIFICATIONS
Performance
Average Seek Time 11 ms read, 12 ms write
Data Transfer Rate 8.0 MB/s (interface)
12.2 MB/s (drive)
Burst Transfer Rate 20 MB/sec maximum
Rotation Speed 5400 rpm
Head MR (Magneto-Resistive)
CPU 25 MIPS DSP
Start/Stop Times 20 sec spin-up, 10 sec stop
Long Format Time 9 Minutes
Short Format Time Less than one second
eliability and Warranty
Relia ility: La yrinth sealed door with auto
closure and patented enclosure
environmental controls
MTBF 300,000 hours
Service Life 5 Years
Bit Error Rate 1 in 1012
Disk (estimated shelf life) 20 Years
Drive Warranty 1 Year Limited
General Information
Interface IEEE 1394/FireWire
Disk Storage Capacity 2.2 GB
Operating Systems Compati ility
Win 98SE, Win 2000, Win ME, Win XP
Mac OS 9.04 - 9.2.x, OS X.1.x
Hardware Compati ility PC: Pentium class systems with
1394 Port
Mac: Power Mac with FireWire Port,
G3 and G4
Power 5V (±5%), 1.5 amp (peak) start-up
0.75 amp continuous read/write
0.75 amp max seek, 0.2 amp stand y
mode
16
SPECIFICATIONS

17
Power Management Via software
Dimensions 6.5 x 1.5 x 5.25
Weight 1.19 l / 538.7 gm
Acoustical Noise Less than 36 dB
Operating Conditions
Temperature
Operating 10°C to 46°C
Storage -40°C to +60°C
Shipping -40°C to +60°C
elative Humidity (non-condensing)
Operating 10% to 80%
Non-Operating 10% to 90%
Vibration
Operational
0.03 inches p-p @ 5-10Hz, 0.5g p-p @
10-300Hz, 0.2g p-p @ 300-500Hz
Non-Operational 0.04 inches p-p @ 5-10Hz, 4g p-p @
10-500Hz
Shock @ 11ms duration 1/2 Sine wave
Operational 8g
Non-Operational 80g
Altitude
Operating 10,000 ft
All specifications are su ject to change. Actual performance is dependent on your system configuration.
SPECIFICATIONS

SECTION 5 CUSTOME SUPPO T
Additional O B Help Sources & Contact
USA & CANADA:
1-866-874-7878
For Europe, Middle East and Africa:
+49 (0) 7000 ORB INFO, (+49 (0) 7000 672 4636)
Countries outside North America and Europe:
See we site
Castlewood Systems Corporate
1-408-956-2500
Email:
Web Site:
www.castlewood.com
CUSTOME SUPPO T
18

SECTION 6 WA ANTY
Warranty. Castlewood Systems, Inc. (Castlewood) warrants the ORB drives
(the Drives) solely to the purchaser (Purchaser) against defects in workmanship
and materials for a period of one (1) year from the date of purchase. Castlewood
warrants the ORB disks (the Disks) solely to the Purchaser against defects
in workmanship and materials for a period of one (1) year from the date of
purchase (each a Warranty Period). The Drives and the Disks shall e
collectively and individually referred to as Product. All warranty claims must
e requested of Castlewood prior to the expiration of the applica le Warranty
Period. Purchaser may not transfer this warranty. Purchasers sole remedy, and
Castlewoods sole lia ility for a covered warranty defect shall e for Castlewood,
at its sole discretion, to either repair or replace the defective Product at no
charge. These warranties are void if the applica le Product has een altered
in, or damaged y accident, misuse, or a use, including, ut not limited to, the
use of unauthorized third party software or repairs, power surges, excessive
heat or humidity. Castlewood warranty o ligations shall not e enlarged or
diminished y Castlewoods provision of technical advice to Purchaser.
Exclusions. THE PRECEDING WARRANTY DOES NOT APPLY TO (I) ANY
SOFTWARE COMPONENTS OF THE PRODUCT; (II) ANY THIRD PARTY
SOFTWARE DISTRIBUTED ON OR WITH THE PRODUCT; (III) ANY
EXPENDABLE COMPONENTS INCLUDING, BUT NOT LIMITED TO, FUSES,
BULBS, AND CLEANING ACCESSORIES; AND (IV) ANY PRODUCTS NOT
MANUFACTURED BY OR FOR CASTLEWOOD (THE EXCLUDED ITEMS).
THE EXCLUDED ITEMS ARE LICENSED TO PURCHASER ON AN AS IS
BASIS.
Disclaimer of Warranties. EXCEPT FOR THE EXPRESS WARRANTIES
CONTAINED HEREIN, CASTLEWOOD DISCLAIMS ALL OTHER WARRANTIES,
WHETHER EXPRESS, IMPLIED OR STATUTORY, INCLUDING WITHOUT
LIMITATION, THE IMPLIED WARRANTIES OF MERCHANTABILITY, FITNESS
FOR A PARTICULAR PURPOSE, NON-INFRINGEMENT OR THEIR
EQUIVALENTS UNDER THE LAWS OF ANY JURISDICTION. THE REMEDIES
SET FORTH HEREIN SHALL BE THE SOLE AND EXCLUSIVE REMEDIES
OF PURCHASER WITH RESPECT TO ANY DEFECTIVE PRODUCT. SOME
JURISDICTIONS DO NOT PERMIT THE PRECEDING EXCLUSION OF
IMPLIED WARRANTIES FOR CERTAIN CONSUMERS SO SOME OF THE
ABOVE EXCLUSIONS OR LIMITATIONS MAY NOT APPLY TO PURCHASER.
19
WA ANTY
Table of contents
Other Castlewood Storage manuals
Popular Storage manuals by other brands

LaCie
LaCie Hard Drive Quick install guide

Brocade Communications Systems
Brocade Communications Systems 1606 manual

Overland Storage
Overland Storage NEO 8000 Remove & Replace Instructions

Verbatim
Verbatim HARD DRIVE user manual

Maxtor
Maxtor OneTouch II E01V200 Specifications

Cisco
Cisco NSS 324 Administration guide

Western Digital
Western Digital My Book World Edition Quick install guide

Kanguru
Kanguru BioSTOR user guide

asecos
asecos FX Series user manual

Dolby Laboratories
Dolby Laboratories Program Optimizer DP600 Replacement guide

Cavalry
Cavalry CADA002SA8 install guide

HP
HP Surestore 40fx - Optical Jukebox manual