1.6 HARDWARE SETUP
In this section you will be physically connecting your ORB SCSI Drive through a
USB to SCSI cable to your computer system.
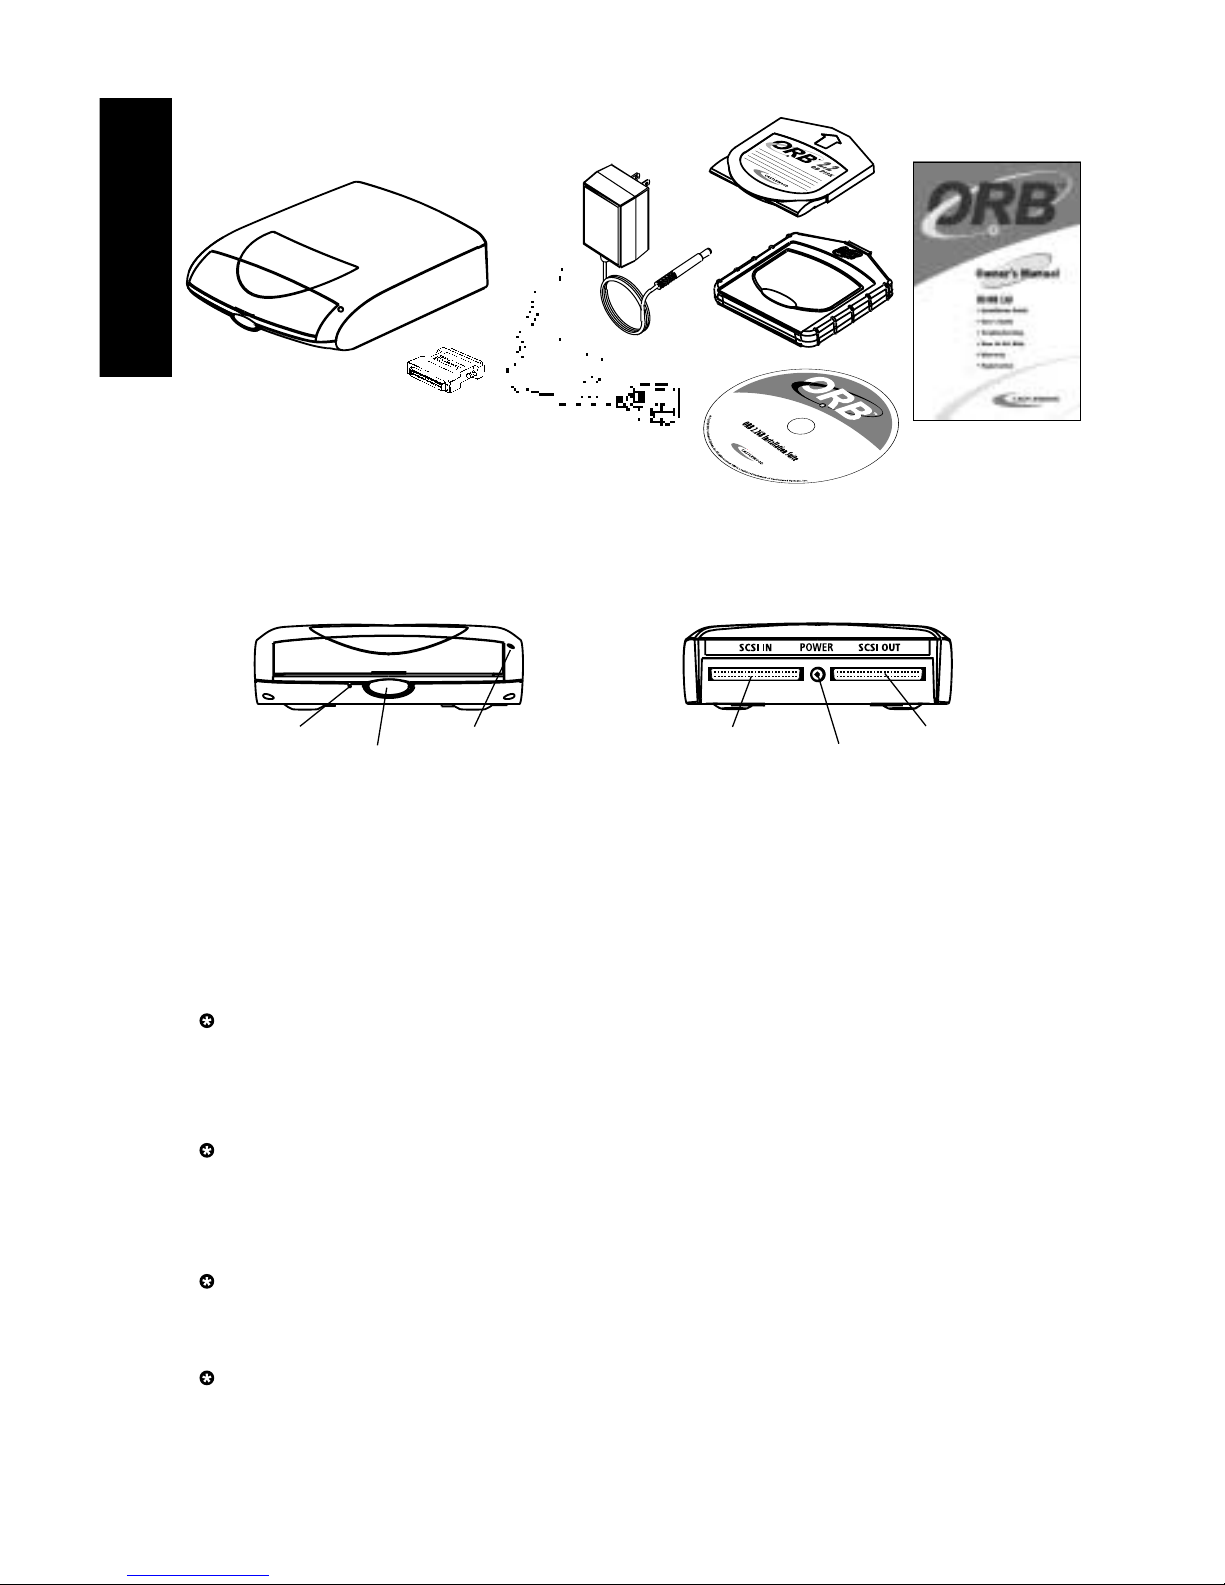
1. Unpack your ORB Drive and accessories.
You should have: An ORB 2.2GB SCSI Disk Drive, Power Supply, DB25 to HD50
cable adapter, USB to SCSI cable, ORB Disk with Disk Case, ORB Installation Suite
CD, and this Owner’s Manual. (see Section 1.4 Package Contents – Figure 1 –
page 3)
2. Connecting to an existing SCSI chain.
ORB USB Drive is an ORB SCSI Drive that connects to a USB port on your comput-
er system through a USB to SCSI cable. If you want to daisy-chain ORB SCSI Drives
to a PC, refer to Section 1.9, Connecting ORB Drive to an ORB SCSI chain, before
proceeding further. Otherwise, go to the next step.
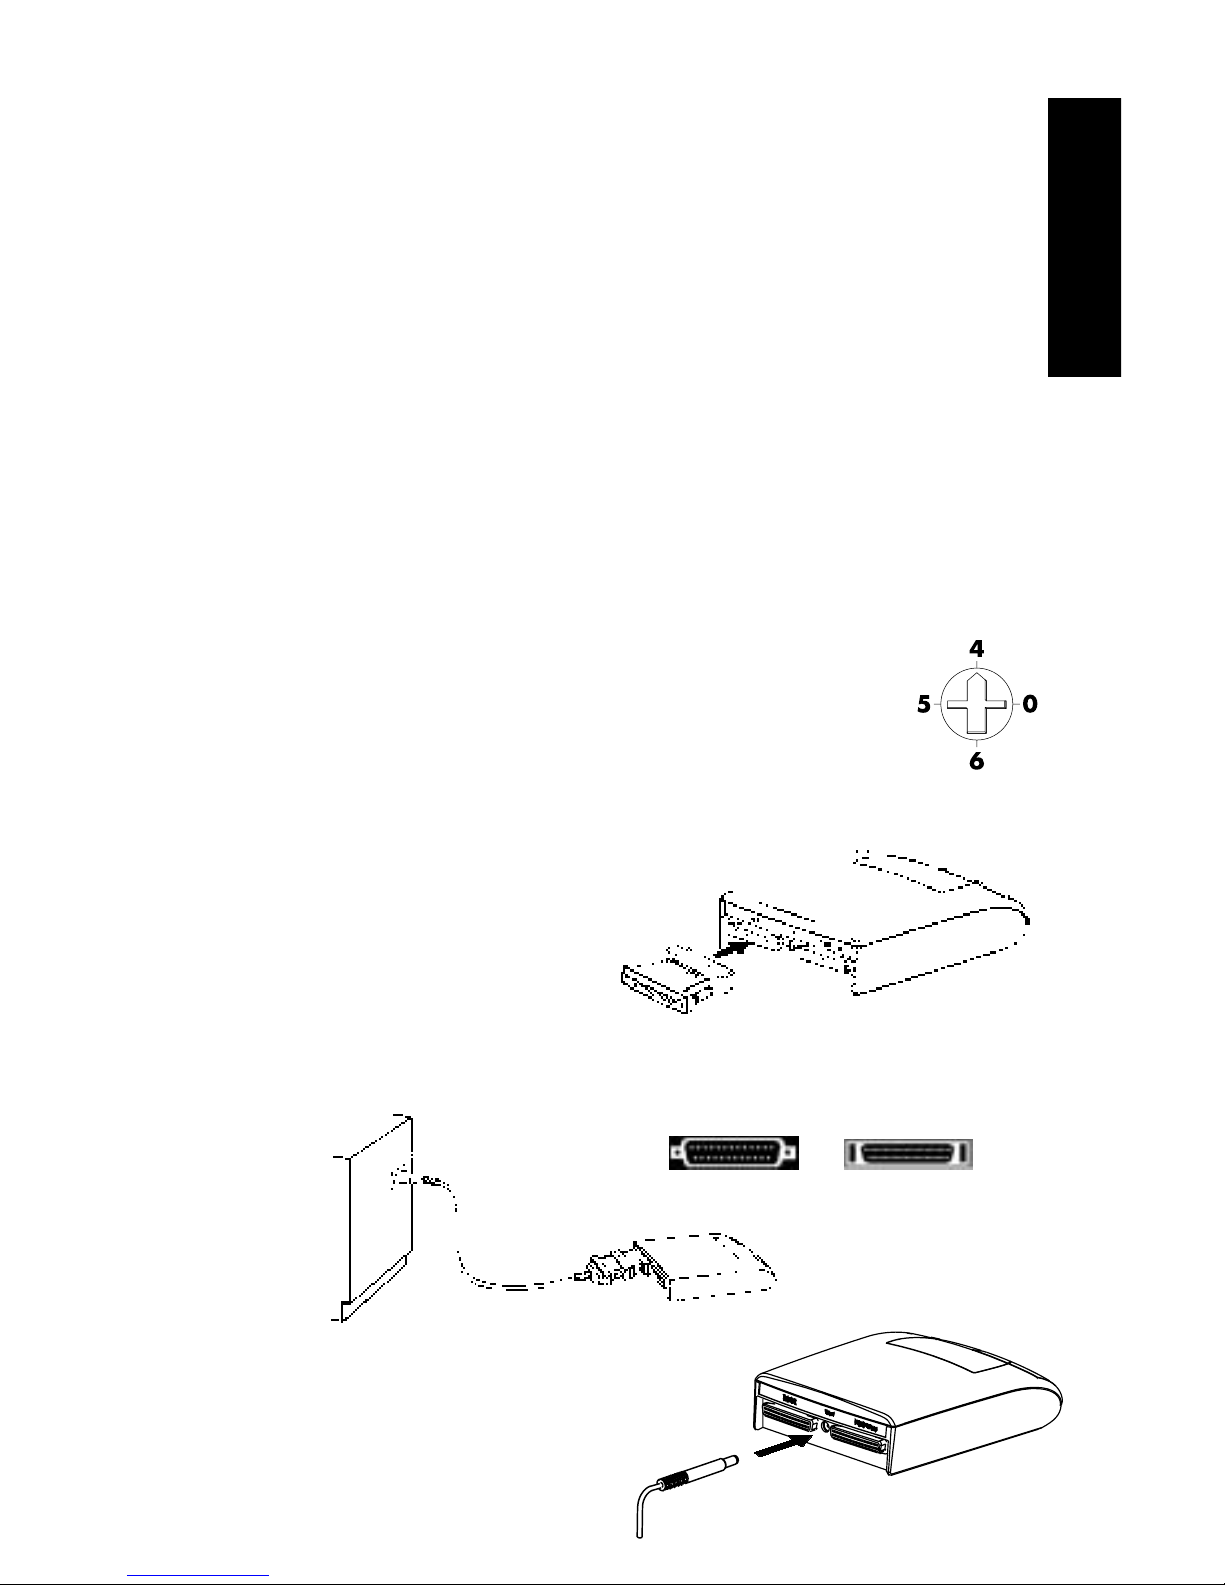
3. Assign a SCSI ID to your ORB Drive.
A SCSI ID is an integer, ranging from 0 to 7, each identifies a SCSI device on the
same SCSI chain. ID 7 is used by the USB to SCSI cable.
You can find ORB Drive’s ID switch on the bottom of the drive as shown
in Figure 4. The available IDs for the ORB Drive are ID 0, 4, 5 and 6.
The switch shown in Figure 4 is set to ID 4. If you are connecting this
drive to a Mac, the drive has to be set to ID 0 only.
You will need a #0 Philips screw driver to change the ID setting. Figure 4
If the ORB SCSI Drive is the only SCSI device connected to the USB to SCSI cable,
you can set the ID to any value. Otherwise, refer to section 1.9, Connecting ORB
Drive to an ORB SCSI Chain, before proceeding futher.
4. Connect the HD50 end of the SCSI cable
adapter to the ORB Drive’s SCSI IN
connector (left connector when
facing the rear of the drive). Figure 5
5. Connect the DB25 (male) end of the SCSI cable adapter to the
DB25 (female) end of the USB to SCSI cable.
Figure 6
6. Connect the ORB Drive power supply.
First, attach the round power connector from
the power supply to the ORB Drive (center,
rear of the drive). Then plug the power
supply into an AC outlet. Figure 7
5
INSTALLATION GUIDE
DB25 HD50