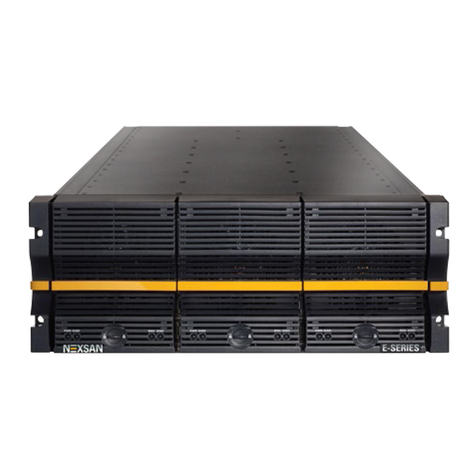
6 — Nexsan E-Series E48/E60/E48X/E60X Quick Start Guide
When applying power to the system, use ONLY the originally supplied IEC power cords. Do NOT
use other power cords, even if they appear identical to the supplied cords.
Nexsan E-Series storage systems do not have power switches. Do NOT attach the power cords
until the enclosure is fully installed, with all disk drives in place.
Powering up the storage expansion first (if applicable)
1
Using the two power cords supplied, connect each PSU on the storage expansion to mains power.
2
Wait about 10 seconds, then power up the main storage system to which the expansion is attached.
Powering up the main storage system
3
Using the two power cords supplied, connect each PSU to mains power.
NOTE:
You may need to use the SW0 switch to initiate the power up sequence. Press and hold the SW0
switch until you hear the systems cooling fans start up and then release. Do not hold the SW0 switch in
for longer than that as that may cause the product's controllers to start in Emergency Mode.
NOTE:
If the audible alarm sounds when the storage system is first powered on, the controller batteries
may be discharged. Press either SW0 switch on the rear of the enclosure to silence the alarm.
E60/E48/V/VT SW0 Switch (circled)
Check the connection to the storage expansion (if there is one)
4
When the main storage system is fully powered up (this may take up to 5 minutes), check the EXP IN L0
and L1 LEDs next to the expansion ports on the Expansion Modules. Both LEDs should be green.
If either of the EXP IN LEDs are flashing amber:
Power down both the main storage system and the storage expansion, correct the cabling (see
Attaching cables to the storage expansion (if applicable)), and then repeat steps 1 through 4.
The Nexsan Product ID is located on a label on the bottom left of the
rear panel (see example to the right - Model number highlighted).
Go to http://register.nexsan.com to register your product.
When the system has finished booting up, follow the instructions in
Chapter 1 “Basic Setup” of the Nexsan High Density Storage User
Guide (go to
https://helper.nexsansupport.com/
esr_downloads.html
) to get the system up and running.
NOTE: The default IP addresses for the RAID Controllers in a dual-
Controller system are 10.11.12.13 and 10.11.12.14. In a single-Controller system, the default IP address is
10.11.12.13. It is very important, however, that you change these IP addresses by following the
instructions under “Initial Network Address Setup,” in Chapter 1 of the Nexsan High-Density Storage User
Guide.
Part num er: P0450053 Rev: Q Release Date:
May 2021
Technical Support
Related Documentation:
Nexsan E-Series Installation and FRU Removal
By Email:
s pport@nexsan.com
and Replacement Guides, Nexsan High Density Storage User Manual
By We :
http://helper.nexsans pport.com
Copyright © 2010-2018 Nexsan Technologies, Inc. All Rights Reserved. Nexsan®, E-Centre™, Unity™, E18™, E48™, E60™, FASTier™, and the Nexsan
logo are trademarks or registered trademarks of Nexsan. All other trademarks and registered trademarks are the property of their respective
owners.
Nexsan 1289 Anvilwood Ave., S nnyvale, CA 94089 USA | www.nexsan.com
Powering on
CAUTION:
Registering and configuring E-Series systems


