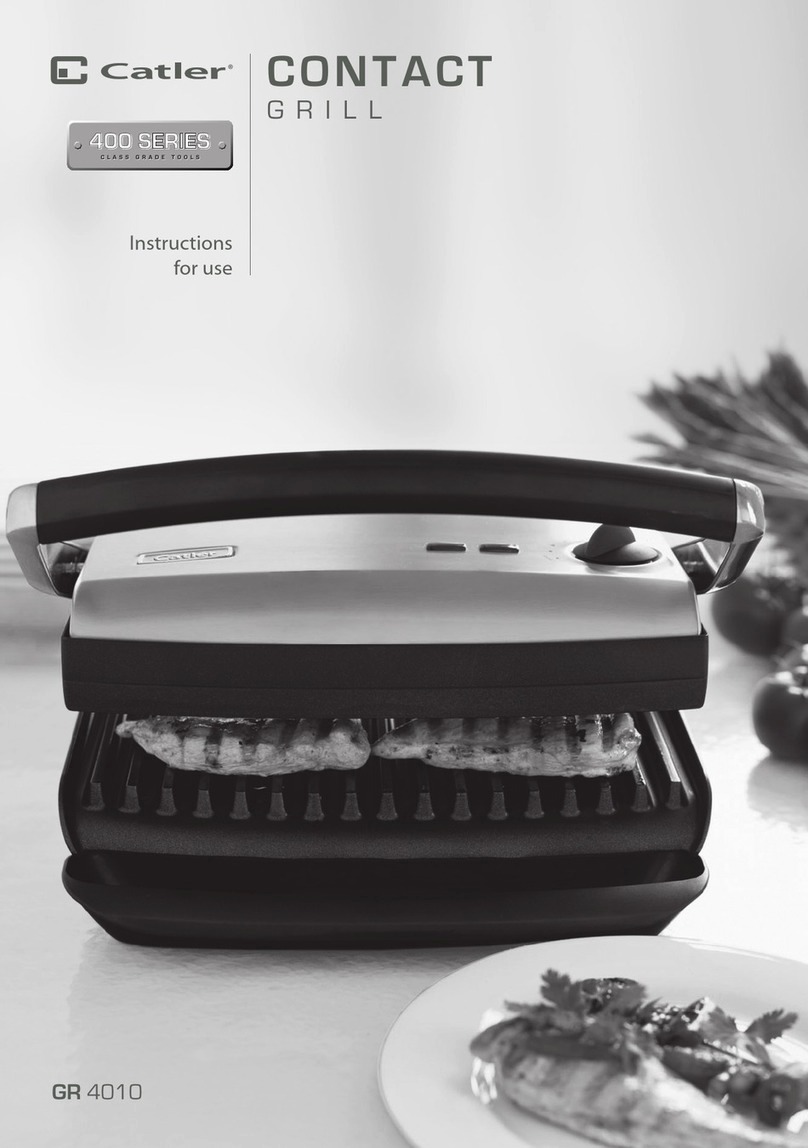
Catler GR 8012 User manual

CONTACT
GRILL
Instructions
for use
GR 8012

CONTACT
GRILL

1
CONTENTS
2 Congratulations
3 About your Contact Grill GR 8012
4 Catler recommendssafety rst
5 Know your Contact Grill GR 8012
7 Operating your Contact Grill GR 8012
7 Touse asanopen grill
8 Touse asaclosed grill
9 Touse asasandwich press
10 Adjustablegrilling heightcontrol
11 VariableTemperature Control
13 Grilling guide
15 Care and cleaning
R1 Recipes
CONTENTS

Congratulations
on thepurchase of your new Contact Grill GR 8012
2CONGRATULATIONS

3
CONGRATULATIONS
Inspired by thebelief thathealthy, low-fatmealscantaste great, your Catler
Contact Grill GR 8012 is designed with innovativefeatures and heavy-duty
components; ensuring powerful performance and healthy, tasty mealsand
snacks.
In developing this booklet our goal wasto provideyou with
theessential point from which you canstart exploring the
practical and everyday waysto makethebest use of your
Contact Grill GR 8012. Contact Grill GR 8012 represents easy
cooking of nutritious meals.
Wewould just liketo say thank you, and…
enjoy.

4CATLER RECOMMENDS SAFETY FIRST
CATLER RECOMMENDS SAFETY FIRST
WeatCatler are very safety conscious. Wedesignand manufacture consumer products with thesafety of you, our valued customer, foremost in mind.
In addition, weask thatyou exercise adegree of care when using any electrical appliance and adhere to thefollowing precaution:
IMPORTANT SAFEGUARDS FOR YOUR CONTACT GRILL GR 8012
WARNING!
AFTER PUTTING INTO OPERATION, THE
TOP PLATE GETS VERY HOT. DO NOT
TOUCH THE HOT SURFACE. TO LIFT UP
THE TOP PLATE, USE ONLY THE LEVELLING
HANDLE! WHEN TURNED OFF THE
DEVICE, THE TOP PLATE WILL STAY WARM
FOR SOME TIME. BEFORE ANY FUTHER
OPERATION, LET THE DEVICE COOL DOWN.
IF YOUR SKIN GETS IN TOUCH WITH
AHOT SURFACE, YOU RISK ABURN!
• Carefully read all instructions before
operating and savefor future reference.
• Removeany promotional stickers or labels
before using theContact Grill for therst time.
• Donot place theContact Grill neartheedgeof
abench or tableduring operation. Ensure the
surface is level, cleanand free of water, etc.
• Donot place theContact Grill on or near
ahot gasor electric burner, or where it could
touch aheated oven. Use theContact Grill
well away from walls.
• Provideadequate space aboveand on all
sides for air circulation around theContact
Grill.
• Donot place theContact Grill on any surface
thatmay beaected by heat. Theuse of
aheatresistant matis recommended on
these surfaces.
• Alwaysensure theContact Grill is properly
assembled before use.
• Donot touch hot surfaces. Use thehandleto
lift and open thetop plate. Takecare when
using theAdjustableGrilling HeightControl.
• Donot leavetheContact Grill unattended
when in use.
• Donot place anything on top of theContact
Grill when thelid is closed, when in use and
when stored.
• Alwaysswitch theContact Grill o, then
switch oatthepower outlet, then unplug
and allow to cool, if appliance is not in use,
before cleaning, before attempting to move
theappliance, disassembling, assembling
and when storing theappliance.
• Keep theexterior housing and thenon-stick
cooking plates clean. Follow thecleaning
instructions provided in this book.
IMPORTANT SAFEGUARDS FOR ALL
ELECTRICAL APPLIANCES.
• Fully unwind thecord before use.
• Toprotect against electric shock, donot
immerse cord, plug or appliance in water
orany other liquid.
• Donot let thecord hang over theedge
ofatableor counter, touch hot surfaces,
orbecomeknotted.
• It is recommended to inspect theappliance
regularly. Donot use theappliance if power
supply cord, plug or appliance becomes
damaged in any way. Return theentire
appliance to thenearest authorised Breville
service centre for examination and/or repair.
• Any maintenance other thancleaning
should beperformed atanauthorised
service centre.
• This appliance is for household use only.
Donot use this appliance for anything other
thanits intended use. Donot use in moving
vehicles or boats. Donot use outdoors.
• Theinstallation of aresidual current
device (safety switch) is recommended to
provideadditional safety protection when
using electrical appliances. It is advisable
thatasafety switch with arated residual
operating current not exceeding 30mA be
installed in theelectrical circuit supplying
theappliance. See your electricianfor
professional advice.
CAUTION: FULLY UNWIND THE CORD FROM THE CORD STORAGE FACILITY BEFORE USE

5
CATLER RECOMMENDS SAFETY FIRST
CAUTION: Hot Surface
The temperature of accessible surfaces may be high when the
appliance is operating.
• This appliance is not intended for use by young children or inrm
persons without supervision.
• Young children should besupervised to ensure thatthey donot play
with theappliance.
• This appliance canbeused by children aged from 8 years and above
and persons with reduced physical, sensory or mental capabilities
or lack of experience and knowledgeif they havebeen given
supervision orinstruction concerning use of theappliance in asafe
way and understand thehazardsinvolved.
• Children shall not play with theappliance.
• Cleaning and user maintenance shall not bemadeby children unless
they are older than8 and supervised.
• Keep theappliance and its cord out of reach of children less than8 years.

6KNOW YOUR CONTACT GRILL GR 8012
KNOW YOUR CONTACT GRILL GR 8012
ON/OFF switch
ON I, OFF 0
Quantanium non-stick scratch
resistant surface
Grill Lock dial
Stylish stainless
steel design
Non-stick ribbed
top plate
Non-stick atbottom
cooking plate
Removabledrip tray
2400 watts of power
Cord storage
Unique oating hinged
top plate
Patented adjustable
Grilling Height
Control feature
Levelling
handle
Variable
temperature
control dial
15 minute timer dial
Base plate tiltdial
Red heating light

7
Operating

8OPERATING YOUR CONTACT GRILL GR 8012
OPERATING YOUR CONTACT GRILL GR 8012
Removeany promotional materialsand
packaging materialsbefore use. Check that
thecooking plates are cleanand free of dust. If
necessary, wipeover with adamp cloth.
When using theContact Grill for therst time
you may notice ane smokehaze. This is caused
by therst heating of someof thecomponents.
There is no need for concern.
TO USE AS AN OPEN GRILL
1. Insert theplug into a230/240 Vpower
outlet and switch thepower ON. Switch the
on/obutton to ‘I’. T h ered heating lightwill
illuminate.
2. Ensure theRemovableDrip Tray is correctly
inserted and positioned back into the
appliance (see Fig 1).
3. Ensure thetop plate is in theclosed position
for more ecient preheating.
4. Turn theBase Plate TiltDial to theFlat
position.
5. Turn theVariableTemperature Control Dial
to ‘Sear’ for fast preheating.
6. Allow theContact Grill to preheatuntil the
red heating lightgoes out.
7. TheGrill must beclosed to release thelock.
Turn theGrill Lock Dial on thesideof the
grill to horizontal position (see Fig 2) and
use thehandleto pull thetop plate into the
open position (see Fig 3).
NOTE:
It is important thatthebase plate is in
theatposition when using asanopen
grill.
12 3

9
OPERATING YOUR CONTACT GRILL GR 8012
NOTE:
Grill Lock will automatically reset when
returned to the‘closed’ position.
8. Place meator foodsto becooked on either
or both of thecooking plates. Refer to
Grilling recipes or guidefor cooking times.
9. When thefood is cooked, removeusing
aplastic spatula.
NOTE:
Use the15 minute Timer Dial to select
apre-heating or cooking timebetween
1 – 15 minutes. TheDial will need to be
rotated clockwise completely before
selecting thedesired time.
When theselected timehaselapsed,
abell will ring once.
Thegrill will not turn o, it will remain
heating.
TO USE AS ACLOSED GRILL
1. Insert theplug into a230/240 Vpower
outlet and switch thepower ON. Switch the
ON/OFF button to ‘I’. T h ered heating
lightwill illuminate.
2. Ensure theRemovableDrip Tray is correctly
inserted and positioned back into the
appliance (see Fig 1).
3. Ensure thetop plate is in theclosed position
for more ecient preheating.
4. Turn theBase Plate TiltDial to theAngleor
Flatposition.
5. Turn theVariableTemperature Control dial
to ‘Sear’ for fast preheating.
6. Allow theContact Grill to preheatuntil the
red heating lightgoes out.
7. Use thehandleto pull thetop plate into the
90˚ position
8. Place meator foodsto becooked on the
base cooking plate. Refer to Grilling recipes
or guidefor cooking times.
NOTE:
TheContact Grill canbeused to cook
foodsin theopen or closed position.
9. Use thehandleto close thetop plate. The
top plate hasaoating hingesystem thatis
designed to press downevenly on thefood.
TheGrilling HeightControl on theright
hand sideof thetop plate is used to adjust
for thethickness of thefood. Thelevelling
handleon therighthand sideof thetop of
thegrill may beused to even out thetop
plate (see Fig 4). Thetop plate must befully
lowered to achievegrill marksonto thefood.
1

10 OPERATING YOUR CONTACT GRILL GR 8012
10. When thefood is cooked, use thehandleto
open thetop plate. Removethefood using
aplastic spatula.
NOTE:
Thered heating lightwill cycleon
and oduring thecooking process
indicating thatthecorrect temperature
is being maintained.
TO USE AS ASANDWICH PRESS
1. Insert theplug into a230/240 Vpower
outlet and switch thepower on. Switch the
ON/OFF button to ‘I’. T h ered heating light
will illuminate.
2. Ensure theRemovableDrip Tray is correctly
inserted and positioned back into the
appliance.
3. Ensure thetop plate is in theclosed position
for more ecient preheating.
4. Turn theBase Plate TiltDial to theFlat
position.
5. Turn theVariableTemperature Dial to the
‘Sandwich’ position.
6. Allow theContact Grill to preheatuntil the
red heating lightgoes out.
7. During this time, prepare thesandwich and
place it onto thebase plate. Alwaysplace
sandwiches towardstherearof thebase
plate.
8. Use thehandleto close thetop plate. The
top plate hasaoating hingesystem that
is designed to press downevenly on the
sandwich. TheGrilling HeightControl on the
righthand sideof thetop plate is used to
adjust for thethickness of thesandwich. The
levelling handleon therighthand sideof
thetop of thegrill may beused to even out
thetop plate.
NOTE:
Alwaysallow theContact Grill to
preheatuntil thered heating lightgoes
out.
9. Toasting should takeapproximately
5-8minutes. Exact toasting timewill be
amatter of preference. It will also depend on
thetypeof bread and lling used.
10. When thesandwich is cooked, use the
handleto open thetop plate. Removethe
sandwich using aplastic spatula. Never use
metal tongsor aknife asthese cancause
damageto thenon-stick coating of the
cooking plates.
NOTE:
Thered heating lightwill cycleon
and oduring thetoasting process
indicating thatthecorrect temperature
is being maintained.
CAUTION: FULLY UNWIND THE CORD FROM THE CORD STORAGE FACILITY BEFORE USE
4

11
OPERATING YOUR CONTACT GRILL GR 8012
USING THE ADJUSTABLE GRILLING HEIGHT
CONTROL FEATURE.
Your Contact Grill features anAdjustableGrilling
HeightControl feature which allowsyou to x
thetop plate to arangeof positions abovethe
base plate.
This allowsyour Contact Grill to beused asan
open toaster, ideal for toasting open sandwich
style‘melts’. It canalso beused to grill delicate
ingredients such assh and hamburger buns
without squashing.
1. Allow theContact Grill to preheatuntil the
red heating lightgoes out.
2. Place thefood to begrilled on thebase
plate.
3. MovetheAdjustableGrill Control clip on the
righthand sideof theContact Grill to the
desired height(see Fig 5).
4. Slowly lower thetop plate, using the
levelling handleon thetop right-hand side
of theplate, until it rests in theappropriate
position abovethefood (see Fig 6).
5. Thetop plate will radiate thedesired heat
to meltingredients such ascheese or lightly
grill foods.
NOTE:
TheAdjustableGrill HeightControl can
bemoved to accommodate thick or thin
foodsby sliding theclip forwardsor
backwardsalong thearm.
BASE PLATE TILT DIAL
1. Toplace thebase plate into thesloped
position, simply turn theBase Plate TiltDial
anti-clockwise until thedial reaches the
‘angle’ position. This position is suitablefor
achieving themaximum fatdrainagewhen
using theContact Grill asaclosed grill.
2. Toplace thebase plate into theatposition,
turn theBase Plate TiltDial clockwise until
thedial reaches the‘at’ position. This
position is ideal for cooking sausages,
pancakes, eggs, etc when aatplate is
required so thatthefoodsdonot run or
slideothegrill. It is important to use the
atposition when using theContact Grill as
anopen grill.
56

12 OPERATING YOUR CONTACT GRILL GR 8012
VARIABLE TEMPERATURE CONTROL DIAL
TheContact Grill GR 8012 features aVariable
Temperature Control dial which allowsavariety
of foodsto becooked. Just select atemperature
suited to thefoodswhich are being cooked.
With thedial set on Searthetemperature is
correctly suited to grill meats or other foods.
With thedial set on Sandwich thetemperature is
correctly suited to toasting sandwiches.
15 MINUTE TIMER DIAL
TheContact Grill GR 8012 features a15minute
timer which allowsyou to monitor thetime
elapsed during preheating or cooking. Toset the
timer, simply turn thedial clockwise completely
to the‘15’ position and then anticlockwise to
select thedesired minutes. Thetimer will ring
once when thedesired timehaselapsed. The
grill will not turn o, it will remain heating.
7

13
OPERATING YOUR CONTACT GRILL GR 8012
HINTS FOR BEST GRILLING RESULTS
MEAT
For best grilling results use meatcuts which are
thick enough to touch thetop and base plate
when theContact Grill is closed.
RECOMMENDED CUTS
Beef Sirloin (New York), Rump, Rib Eye
(Scotch Fillet), Fillet.
Lamb Trim Lamb Leg Steaks, Fillet, Eyeof Loin,
Cutlets and Diced Lamb.
Pork Buttery Loin Steaks, Spare Ribs, Leg
Steaks, Fillets, Diced Pork.
Tougher cuts such asbeef blade, topsidesteak,
lamb forequarter or neck chopscanbeused. To
tenderise these cuts marinate them for afew
hours or overnightin amarinadewith wine
or vinegarto help break downtheconnective
tissue.
It is not recommended to cook itemswith thick
bones such asT-bone steaks.
Donot saltmeatbefore cooking. Saltwill draw
out thejuices toughening themeat.
If using amarinaderecipeor pre-marinated
meats from your meatretailer, drain excess
marinadeoand dab with kitchen paper before
placing on theContact Grill. Somemarinades
contain high sugarlevelswhich canscorch on
thegrill plate when cooked.
Donot over cook meat, somemeats are better
served pink and juicy.
Donot pierce meatwith afork or cut meatwhile
cooking. This will let thejuices escape, resulting
in atougher, dry steak. Use tongsinstead.
When removing sh pieces, use aatheat
resistant plastic spatula to support thefood.
Parboiling sausages canalleviate theneed to
pierce sausages before cooking.

14 OPERATING YOUR CONTACT GRILL GR 8012
GRILLING GUIDE
Contact Grilling is ahealthy and ecient way to cook. Thecooking times
are approximate due to variances in ingredient thickness.NOTE:
These times relate to when thegrill is in theclosed and on the
contact position.
INGREDIENT AND TYPE COOKING TIME
Beef
• sirloin steak
• minute steak
• hamburger patties
3 minutes for medium rare
5-6 minutes for well done
1-2 minutes
4-6 minutes
Pork
• llet
• loin steaks
4-6 minutes
Lamb
• loin
• cutlets
• leg steaks
3 minutes
4 minutes
4 minutes
Chicken
• breast llet
• thigh llet
6 minutes or until cooked through
4-5 minutes or until cooked through
Sausages
• thin
• thick
3-4 minutes
6-7 minutes
Sandwich or Foccacia 3-5 minutes or until golden brown
Vegetables sliced 1/2“; 1.25 cm thick
• eggplant
• zucchini
• sweet potato
3-5 minutes
Seafood
• sh llet
• sh cutlets
• octopus (cleaned)
• shrimp
• scallops
2-4 minutes
3-5 minutes
3 minutes
2 minutes
1 minute

15
Cleaning

16 CARE AND CLEANING
CARE AND CLEANING
Before cleaning, switch thegrill oatthe
ON/OFF button, switch oatthepower outlet
and unplug. Allow your Contact Grill to cool
before cleaning. Theappliance is easier to clean
when slightly warm.
Alwayscleanyour Contact Grill after each use to
prevent abuild up of baked-on foods.
Wipecooking plates with asoft cloth to remove
food residue. For baked on food residue squeeze
somewarm water mixed with detergent over
thefood residue then cleanwith anon abrasive
plastic scouring pad.
NOTE:
Thecooking plates are coated with
anon-stick surface, donot use abrasives.
Donot use spray-on non-stick coatings
asthis will aect theperformance of the
non-stick surface on thecooking plates.
CLEANING THE DRIP TRAY
Removeand empty theDrip Tray after each use
and wash thetray in warm, soapy water. Avoid
theuse of scouring padsor harsh detergents as
they may damagethesurface.
Rinse and dry thoroughly with aclean, soft cloth
and replace.
QUANTANIUM SCRATCH RESISTANT COATING
Your Contact Grill features aspecial scratch
resistant non-stick coating thatmakes it safe to
use metal utensilswhen cooking.
Regardless of this fact, Catler recommends
thatcare is taken with thenon-stick coating
particularly when using metal utensils.
Donot use sharp objects or cut food insidethe
Contact Grill. Catler will not beliablefor damage
to thenon-stick coating where metal utensils
havebeen misused.
Cooking on anon-stick surface minimises the
need for oil, food does not stick and cleaning is
easier.
Any discolouration thatmay occur will only
detract from theappearance of Contact Grill and
will not aect thecooking performance.
When cleaning thenon-stick coating, donot
use metal (or other abrasive) scourers. Wash in
hot soapy water. Removestubborn residue with
anon abrasiveplastic scouring pad or nylon
washing brush.
WARNING: DO NOT IMMERSE ANY PART OF THE CONTACT GRILL GR 8012 IN WATER OR ANY OTHER
LIQUID

17
CARE AND CLEANING
STORAGE
Tostore your Contact Grill:
1. Switch otheappliance attheon/obutton, switch oatthepower
outlet and unplug.
2. Allow theContact Grill to fully cool.
3. Slidethestorageclip towardsthefront handleto theLOCK position
so thatthetop and bottom cooking plates are locked together.
4. Slidetheremovabledrip tray into place.
5. Wrap thecord in thecord storagearea below theappliance.
6. Store on aat, dry, level surface.
NOTE:
For added convenience theContact Grill may bestored standing
up in avertical position.

18
INSTRUCTIONS AND INFORMATION REGARDING THE DISPOSAL OF USED PACKAGING MATERIALS
Dispose of packaging material at a public waste disposal site.
DISPOSAL OF USED ELECTRICAL AND ELECTRONIC APPLIANCES
The meaning of the symbol on the product, its accessory or packaging indicates that this
product shall not be treated as household waste. Please, dispose of this product at your applicable collection point for the recycling
of electrical & electronic equipment waste. Alternatively in some states of the European Union or other European states you may
return your products to your local retailer when buying an equivalent new product. The correct disposal of this product will help save
valuable natural resources and help in preventing the potential negative impact on the environment and human health, which could be
caused as a result of improper liquidation of waste. Please ask your local authorities or the nearest waste collection centre for further
details. The improper disposal of this type of waste may fall subject to national regulations for fines.
For business entities in the European Union
If you wish to dispose of an electrical or electronic device, request the necessary information from your seller or supplier.
Disposal in other countries outside the European Union
If you wish to dispose of this product, request the necessary information about the correct disposal method from local government
departments or from your seller.
This product meets all the basic EU regulation requirements that relate to it.
Changes to the text, design and technical specifications may occur without prior notice and we reserve the right to make these changes.
Table of contents
Other Catler Grill manuals
Popular Grill manuals by other brands

Elegant Union Group
Elegant Union Group G-600 owner's manual

Proluxe
Proluxe SL1577 Operation manual

Klarstein
Klarstein Bambus manual

Blue Sky Outdoor Living
Blue Sky Outdoor Living HDPKG-2318 owner's manual

KitchenAid
KitchenAid 860-0003C Installation Instructions and Use & Care Guide

Somogyi
Somogyi home HG GR 02 instruction manual