manuals.online logo
Brands
  1. Home
  2. •
  3. Brands
  4. •
  5. Cedam
  6. •
  7. Indoor Furnishing
  8. •
  9. Cedam Oakwood Drawer User manual

Cedam Oakwood Drawer User manual

Notice de pose / Installation instructions / Verlegeanleitung
OAKWOOD
C
B
A
60
900 conseillé/ recommended / empf.
Prévoir hauteur des pieds si pieds utilisés/
Provide the heigt if cabinet legs used/
Überprüfen Sie die Höhe mit Möbelbeine
35
60
A x 2
Fixation murale appropriée non fournie /
Suitable attachment fittings not provided /
Beigefügte Befestigungsmaterial ist nicht vorgesehen
NOT.OAW.P46.DS.AD.01
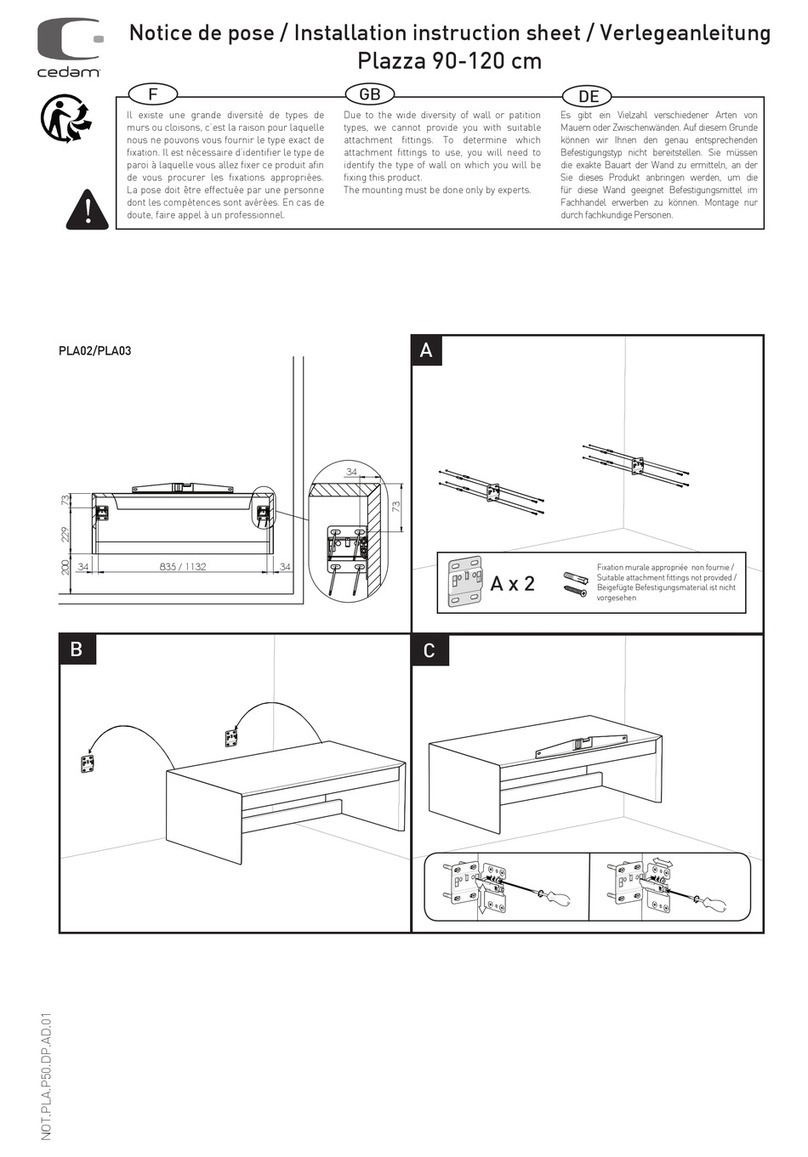
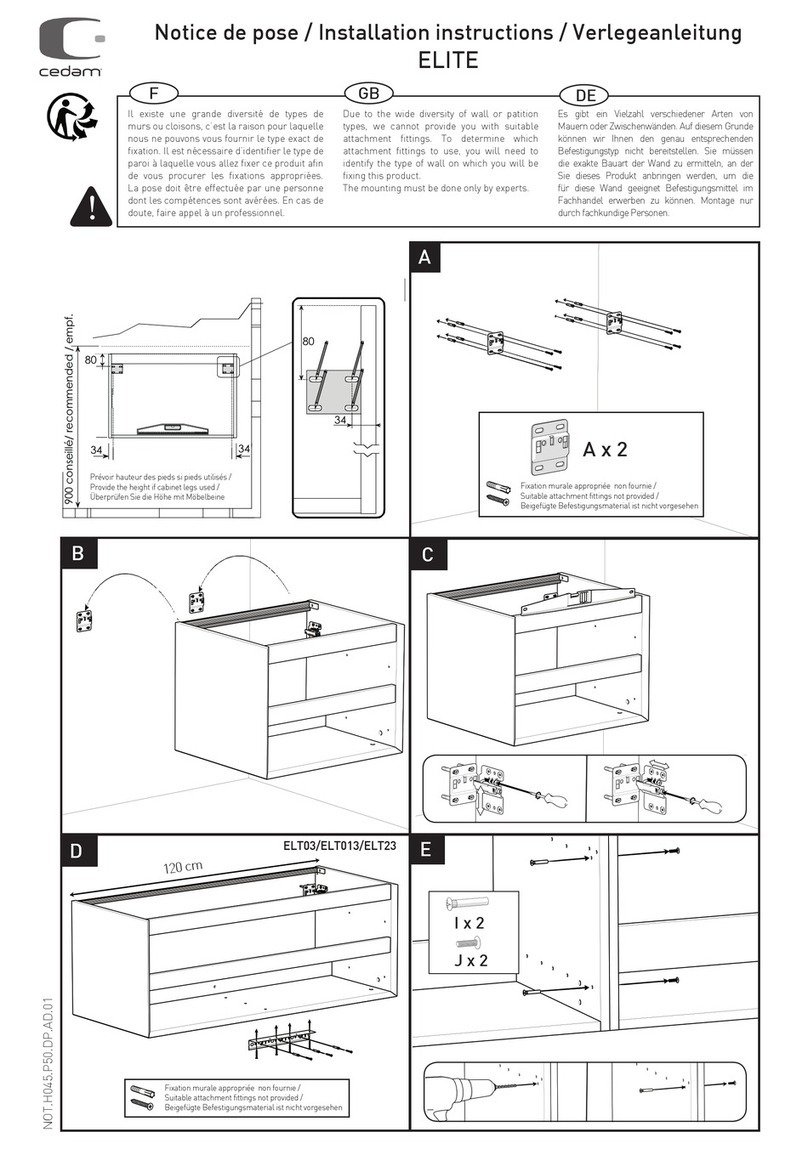
Il existe une grande diversité de types de
murs ou cloisons, c’est la raison pour laquelle
nous ne pouvons vous fournir le type exact de
fixation. Il est nécessaire d’identifier le type de
paroi à laquelle vous allez fixer ce produit afin
de vous procurer les fixations appropriées.
La pose doit être effectuée par une personne
dont les compétences sont avérées. En cas de
doute, faire appel à un professionnel.
Due to the wide diversity of wall or patition
types, we cannot provide you with suitable
attachment fittings. To determine which
attachment fittings to use, you will need to
identify the type of wall on which you will be
fixing this product.
The mounting must be done only by experts.
Es gibt ein Vielzahl verschiedener Arten von
Mauern oder Zwischenwänden. Auf diesem Grunde
können wir Ihnen den genau entsprechenden
Befestigungstyp nicht bereitstellen. Sie müssen
die exakte Bauart der Wand zu ermitteln, an der
Sie dieses Produkt anbringen werden, um die
für diese Wand geeignet Befestigungsmittel im
Fachhandel erwerben zu können. Montage nur
durch fachkundige Personen.
F GB DE
!
Notice de pose / Installation instructions / Verlegeanleitung
Tiroir / Drawer / Schubkasten
A B
A
1
2
3
B
Réglage en hauteur / Height adjustments /
Höhenverstellung
desserer légèrement la vis 1 et positionner en hauteur
la façade à l’aide de la vis excentrique 2. Plage de
réglage ± 2mm. Resserer la vis 1.
Lightly loosen screw 1 and adjust the height of the
front to the desired position using excenter screw 2.
Adjustment range is ± 2 mm. Tighten screw 1.
Schraube 1leichtlösenundFrontüberExzenterschraube
2 in die gewünschte Höhenposition bringen. Verstellweg
± 2 mm. Schraube 1 festziehen.
Réglage latéral / Side adjustment /
Seitenverstellung
pousser légèrement le levier de serrage 3 vers l’arrière,
soulever légèrement la façade, puis la déplacer sur les
cannelures, plage de réglage +/- 1,5 mm. Relâcher le
levier de serrage.
Press the clamping lever 3 lightly to the back and
move over the ribbing. Adjustment range is ± 1,5 mm.
Release the clamping lever.
Klemmhebel 3 leicht nach hinten drücken, Front leicht
anheben und über Riffelung verschieben (Verstellweg
±1,5 mm). Klemmhebel loslassen.
Réglage de l’inclinaison / Tilt angle
adjustment / Neigungsverstellung
Uniquement possible sur certains modèles. Plage de
réglage ± 4 mm.
Only possible for a selection of models. Adjustment
range is ± 4 mm.
Nur bei einigen Modellen vorhanden. Verstellweg ± 4 mm.
Tirer la coulisse
Pull out the drawer slide completely and lift
Lade komplett herausziehen und anheben
Mettre le tiroir sur la coulisse en l’inclinant vers l’avant
Set drawer on cabinet by slightly tilting it forward.
Lade leicht schräg auf die Korpusschiene aufsetzen.
Pousser le tiroir sur la coulisse horizontalement à fond
Push in until drawer locks in place
und einschieben bis die Lade einrastet
Réglages de la façade / Drawer front adjustments / Frontblendeverstellung
Montage de tiroir / Drawer mouting / Schubkasten-Montage
Démontage de tiroir / Drawer dismouting / Schubkasten-Demontage
Tirer le tiroir et le lever vers le haut
Pull out the drawer completely and lift it up
Lade komplett herausziehen und anheben
CBA
C
CLIC
Notice de pose / Installation instructions / Verlegeanleitung
Armoire / cabinet / Mittelschrank
OAKWOOD / EXTENSO LAQUE /LACQUER/LACK
B
A
24831 31
66
66
40 31
A x 2
Fixation murale
appropriée non fournie /
Suitable attachment
fittings not provided /
Beigefügte
Befestigungsmaterial
ist nicht vorgesehen
NOT.MC.TT.E19.01
Il existe une grande diversité de types de
murs ou cloisons, c’est la raison pour laquelle
nous ne pouvons vous fournir le type exact de
fixation. Il est nécessaire d’identifier le type de
paroi à laquelle vous allez fixer ce produit afin
de vous procurer les fixations appropriées.
La pose doit être effectuée par une personne
dont les compétences sont avérées. En cas de
doute, faire appel à un professionnel.
Due to the wide diversity of wall or patition
types, we cannot provide you with suitable
attachment fittings. To determine which
attachment fixtures to use, you will need to
identify the type of wall on which you will be
fixing this product.
The mounting must be done only by experts.
Es gibt ein Vielzahl verschiedener Arten von
Mauern oder Zwischenwänden. Auf diesem Grunde
können wir Ihnen den genau entsprechenden
Befestigungstyp nicht bereitstellen. Sie müssen
die exakte Bauart der Wand zu ermitteln, an der
Sie dieses Produkt anbringen werden, um die
für diese Wand geeignet Befestigungsmittel im
Fachhandel erwerben zu können. Montage nur
durch fachkundige Personen.
F GB DE
!
C
Tournez la tige du
poussoir afin de régler
sa sortie
Rotate the push button
to adjust the opening
Um Ausgang
einzustellen der
Stößelstange drehen
B
Notice de pose / Installation instructions / Verlegeanleitung
Porte / Door / Tür
A
DF
E
B
C
CLIC
Niveau faible / low level / geringe Stufe
Le levier de réglage est dirigé vers la paroi du caisson.
Convient aux petites portes légères.
Adjust lever points towards cabinet wall. Suitable for
small, light-weight doors.
Verstellhebel gegen Front vom Kasten richten.
Geeignet für kleine, leichte Türen.
Niveau moyen réglage usine / Medium level
(factory setting) / mittlere Stufe Werkseinstellung
Le levier de réglage est dirigé vers le bas (montage à gauche) ou
vers le haut (montage à droite). Convient aux portes standard.
Adjust lever points downwards when fitted on the left and
upwards when fitted on the right. Suitable for standard doors.
Verstellhebel zeigt nach unten bei Links annschlag oder nach
oben bei Rechtsanschlag. Geeignet für standard Türen.
Niveau fort / high level / starke Stufe
Le levier de réglage est dirigé vers l’intérieur du
caisson. Convient aux grandes portes lourdes
Adjust lever points into the cabinet. Suitable for
large, heavy doors.
Verstellhebel zeigt in den Korpus.
Geeignet für grosse, schwere Türen.
Réglages sans outil de l’amortisseur / Adjustment of damper / Dämpfer Verstellung
AC

This manual suits for next models

2

Other Cedam Indoor Furnishing manuals

Cedam ELITE User manual

Cedam

Cedam ELITE User manual

Cedam Plazza PLA02 User manual

Cedam

Cedam Plazza PLA02 User manual

Popular Indoor Furnishing manuals by other brands

Southern Enterprises CK556000TX Assembly instructions

Southern Enterprises

Southern Enterprises CK556000TX Assembly instructions

OAKWORKS PX Series user manual

OAKWORKS

OAKWORKS PX Series user manual

Steelcase Universal Storage manual

Steelcase

Steelcase Universal Storage manual

Exim International Island series Assembly instructions

Exim International

Exim International Island series Assembly instructions

modway Transmit EEI-2528 manual

modway

modway Transmit EEI-2528 manual

Home Decorators Collection BRADSTONE S-3426-A Use and care guide

Home Decorators Collection

Home Decorators Collection BRADSTONE S-3426-A Use and care guide

PAIDI DIEGO 146 8434 manual

PAIDI

PAIDI DIEGO 146 8434 manual

Fif Möbel Toro-4 Assembly instruction

Fif Möbel

Fif Möbel Toro-4 Assembly instruction

IMS FORINVEST SAINT GERMAIN Assembly instruction

IMS FORINVEST

IMS FORINVEST SAINT GERMAIN Assembly instruction

Relita LUKA Assembly instructions

Relita

Relita LUKA Assembly instructions

Glacier bay PPMELCHT18 Use and care guide

Glacier bay

Glacier bay PPMELCHT18 Use and care guide

Cantoni FUTURA Checklist

Cantoni

Cantoni FUTURA Checklist

CONFORAMA HUGO TI-144 Assembling instructions

CONFORAMA

CONFORAMA HUGO TI-144 Assembling instructions

Teknion hiSpace operation instruction

Teknion

Teknion hiSpace operation instruction

Enitial Lab Furniture of America YNJ-1466 Assembly instructions

Enitial Lab

Enitial Lab Furniture of America YNJ-1466 Assembly instructions

Allen + Roth EFC11-PZ1 Assembly manual

Allen + Roth

Allen + Roth EFC11-PZ1 Assembly manual

Desalto SKIN ALLUNGABILE Assembly instruction

Desalto

Desalto SKIN ALLUNGABILE Assembly instruction

AFi HB-MDN Assembly instructions

AFi

AFi HB-MDN Assembly instructions

manuals.online logo
manuals.online logoBrands
  • About & Mission
  • Contact us
  • Privacy Policy
  • Terms and Conditions

Copyright 2025 Manuals.Online. All Rights Reserved.