6
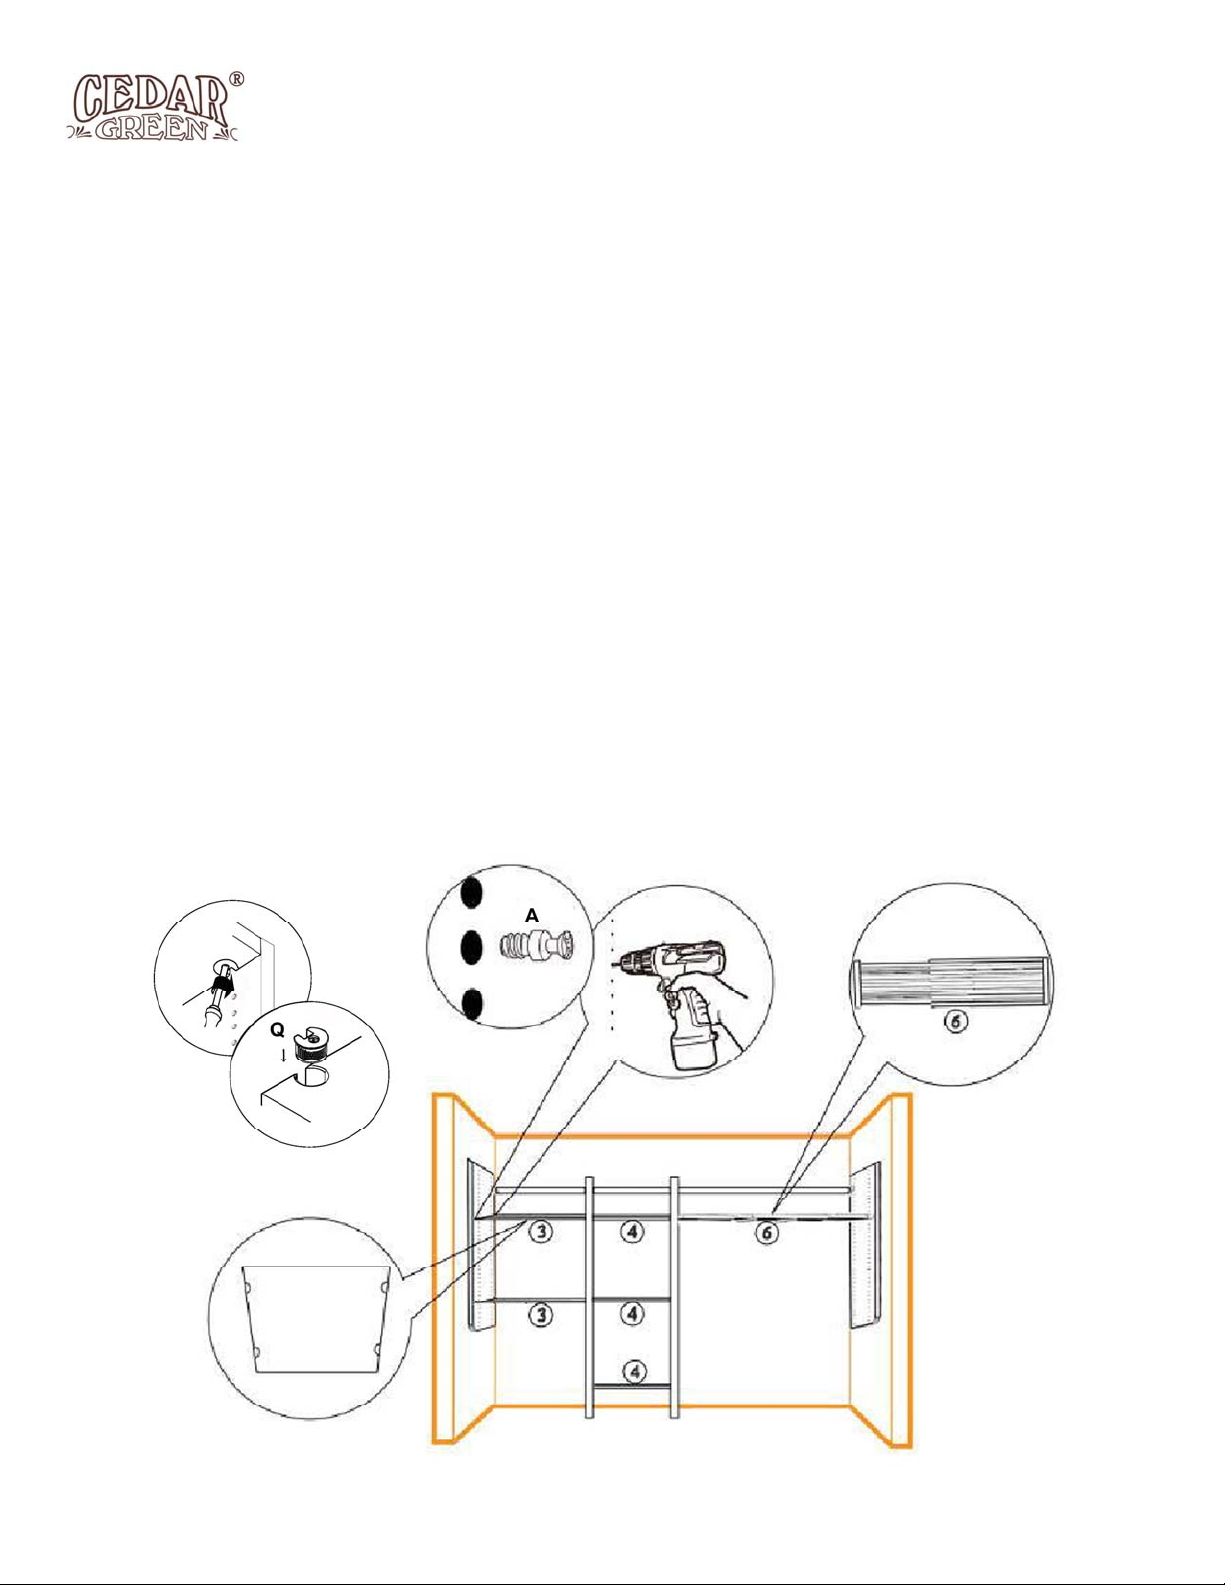
Insert Rafix Connector (Q) into shelf holes with the openings facing outward.
Mount Rafix Connector Bolt (A) 9 holes down from top on left Wall Panel (1) and
Tower Panel (2). Set 24” Shelf (3) on to Rafix Connector Bolts (A).
Set 18” Shelf (4) on to Rafix Connector Bolts (A) in tower.
Set Adjustable Shelf (6) on to right Wall Panel (1), pull or push to adjust shelf
width to desired length.
Tighten all Rafix Connectors by positioning screwdriver at 25° and turn clockwise.
Mount Rafix Connector Bolt (A) 4 holes up from bottom on left Wall Panel (1)
and Tower Panel (2). Mount Rafix Connector Bolt (A) in the middle of Tower
Panel (2).
Repeat steps to mount 2nd 24” Shelf (3) and two other 18” Shelf with Rafix (4).
Level tower and wall panels using vertical and depth adjustment screws.
Note:
Rafix Connector Bolt (A) can be mounted in different holes depending on customer’s
desired shelf location (e.g. can be mounted on top holes for flat top shelving)