manuals.online logo
Brands
  1. Home
  2. •
  3. Brands
  4. •
  5. Celestron
  6. •
  7. Accessories
  8. •
  9. Celestron StarSense 94008 User manual

Celestron StarSense 94008 User manual

1 | ENGLISH
You can control your StarSense Autoguider (SSAG) via your
smartphone using the Celestron SkyPortal Powered by SkySafari™
mobile app.
What you’ll need:
• A smartphone running the most recent version of the SkyPortal mobile
app, available free in the Apple App Store or Google Play
• Either a WiFi-enabled Celestron telescope, e.g., NexStar Evolution,
OR a Celestron computerized mount plus the SkyPortal WiFi Module
accessory (sold separately)
• StarSense Autoguider, installed and connected to your telescope
mount (for help, refer to the SSAG manual)
To use SSAG with the SkyPortal app:
1. Ensure SSAG is connected to one of the telescope mount’s AUX
ports.
2. Power on the mount.
3. Connect to the telescope’s WiFi network with your smartphone.
-Under available WiFi networks, the telescope will display as
“Celestron-###” with ### being digits and letters.
4. Open the SkyPortal app.
5. Select the telescope icon in the bottom right of the screen.
6. Select “Connect and Align.” The app will now initiate alignment.
Position your telescope for alignment using one of the following
methods:
a. For EQ mounts with home position switches (e.g., CGX), press
“OK,” and the mount will now move to the home position.
b. For EQ mounts without home position switches (e.g., Advanced
VX), the app will prompt you to move the telescope to the home
position index marks. You can manually move the telescope or use
the on-screen telescope controls.
c. For AZ mounts, point your telescope at the northern horizon using
the on-screen telescope controls. The telescope tube should be
roughly level to the ground and pointing North.
d. For AZ mounts on an EQ wedge, enable the wedge option on
the Scope Setup screen. Navigate to the Scope Setup screen by
selecting Settings > Setup and Control. Then select “StarSense
INSTRUCTION MANUAL
Model # 94008
Wedge Align Enabled.” Next, go back to the main planetarium
screen, cancel the current alignment, and press “Connect and
Align” again. Follow the on-screen prompts. You’ll also need to set
the telescope to the initial position. For the Northern Hemisphere,
the forks should be pointing North with the optical tube at 90°
pointing South.
NOTE: You can access to the Scope Setup screen directly by pressing
the Celestron Settings icon near the bottom of the screen.
ENGLISH
Using StarSense Autoguider
with the SkyPortal App
2 | ENGLISH
Polar Alignment
Polar alignment assistance with SSAG is currently unavailable through
the SkyPortal app. However, SkyPortal supports the All-Star Polar
Alignment (ASPA) procedure for accurate polar alignment of your mount.
Remember, you must perform a sky alignment again after performing
ASPA, as you will be moving the entire mount. SkyPortal will prompt you
to realign after completing ASPA.
Other Alignment Methods
On the Scope Setup screen (Settings Menu > Setup and Control, or
just press the Celestron Settings icon), you can select a couple of other
alignment options.
StarSense Manual Align
StarSense Manual Align lets you manually slew the telescope to
alignment points you choose instead of automatic preset points. If your
observing site has many obstructions or clouds passing through, you
may find StarSense Manual faster and more convenient than StarSense
Auto. To use StarSense Manual, select “Align Using StarSense Manual”
from the Scope Setup screen. Now, the next time you choose “Connect
and Align,” the app will prompt you to perform a StarSense Manual Align.
Follow the on-screen instructions. You can slew the telescope to any
position in the sky that is free of obstructions. Keep alignment points at
least 30° away from each other in both axes.
StarSense Single-Point Align
StarSense Single-Point Align allows you to align by manually slewing
to only one area of the sky. It is the fastest way to align but provides
the least accurate pointing model for the mount. But remember, SSAG
will still use its Precise GoTo functionality to center objects accurately,
so this fast procedure may be all you need for casual observing. You
can also add additional alignment points later to improve your mount’s
accuracy using the Align>Align command (see below). To use StarSense
Single-Point, select “Align Using StarSense Single-Point” from the
Scope Setup screen. The next time you “Connect and Align,” you will
be prompted to perform a StarSense Single-Point Align. Follow the on-
screen instructions.
7. The automatic alignment will now begin. EQ mounts will slew to two
points in the western sky and then two points in the eastern sky to
obtain alignment references. AZ mounts will slew to three points
around the sky. If you previously performed a Center Calibration, you
can now use SSAG to locate objects. If you have not completed a
Center Calibration, SkyPortal will prompt you to do so. Proceed to
step 8.
8. Center Calibration aligns SSAG’s field of view with the telescope’s
field of view. This step generally only needs to be done once because
SSAG saves Center Calibration data in its internal memory. The next
time you connect to SSAG with the app, you will not need to center
calibrate again unless you have moved the SSAG onto a different
telescope optical tube.
a. To Center Calibrate, choose a star from the planetarium interface,
then press “GoTo.” The telescope will slew close to the star, but the
star may not be in the telescope’s field of view.
b. Use the on-screen direction buttons to precisely center the star in
the telescope’s field of view. When you are finished, press “Align” at
the bottom of the screen. Then press “Calibrate.”
c. The app will complete the Center Calibration process.
You are now ready to use SSAG to find objects in the night sky. Simply
select an object in the app and tap “GoTo.” Precise GoTo functionality
is on by default, so stars should appear well-centered within the
telescope’s field of view. When SSAG is performing Precise GoTo, the
app will display “Star Sensing.”
Guiding
Initiating autoguiding with SSAG through the SkyPortal app is easy.
Press the “play” (forward-facing triangle) button in the Guiding Bar
shown near the top of the planetarium interface.
SSAG will automatically calibrate itself for guiding and then begin
guiding. After guiding begins, the play button will change to a stop
(square) button.
The Guiding Bar displays data about guiding performance—RA and Dec
RMS tracking errors and the “S” and “Q” numbers. The “S” number is the
number of stars SSAG is using for guiding. The “Q” number represents
the quality of the guiding, essentially a measurement of current seeing
conditions—zero is poor, while 100 is ideal.
Press the “stop” button in the Guiding Bar to stop guiding.
You must reinitiate guiding by pressing the play button after you slew to
a new object. Doing so allows SSAG to recalibrate itself for guiding on a
different point in the sky.

3 | ENGLISH
NEED ASSISTANCE? Contact Celestron Technical Support
celestron.com/pages/technical-support
Product design and specifications are subject to change without prior notification.
This product is designed and intended for use by those 14 years of age and older
©2023 Celestron. Celestron and Symbol are trademarks of Celestron, LLC. All rights reserved.
Celestron.com • 2835 Columbia Street, Torrance, CA 90503 USA
06-23
Adding Additional Alignment Points with
the Align>Align Command
SSAG’s built-in Precise GoTo functionality allows it to center objects in
the field of view regardless of how accurate the mount’s pointing model
is. Nevertheless, if desired, you can continually improve your mount’s
pointing accuracy by adding additional alignment points to its pointing
model.
To add alignment points, slew the telescope to any area of clear sky.
Select “Align” from the options at the bottom of the screen, then select
“Align” again. You can add up to a total of 10 alignment points.

Other manuals for StarSense 94008

2

Other Celestron Accessories manuals

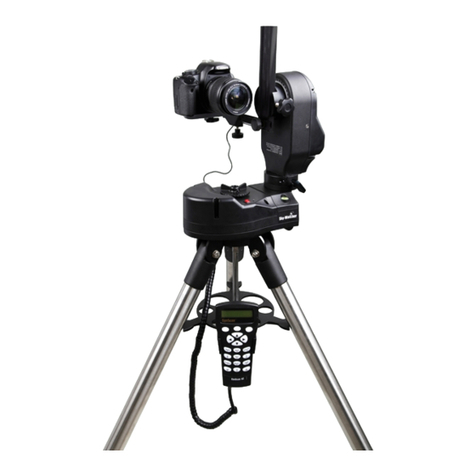
Celestron AllView Mount User manual

Celestron

Celestron AllView Mount User manual

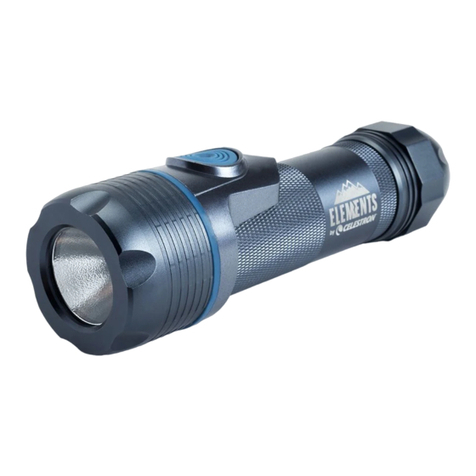
Celestron ELEMENTS THERMOTORCH 5 User manual

Celestron

Celestron ELEMENTS THERMOTORCH 5 User manual

Celestron CGE1100 Manual

Celestron

Celestron CGE1100 Manual

Celestron FireCel Plus User manual

Celestron

Celestron FireCel Plus User manual

Celestron EDGEHD User manual

Celestron

Celestron EDGEHD User manual

Celestron 94306 User manual

Celestron

Celestron 94306 User manual

Celestron Mossy Oak Gamekeeper FireCel+ 93549 User manual

Celestron

Celestron Mossy Oak Gamekeeper FireCel+ 93549 User manual

Celestron FOCUS 94155-A User manual

Celestron

Celestron FOCUS 94155-A User manual

Celestron STARPOINTER PRO User manual

Celestron

Celestron STARPOINTER PRO User manual

Celestron 94155 User manual

Celestron

Celestron 94155 User manual

Celestron StarSense AutoAlign User manual

Celestron

Celestron StarSense AutoAlign User manual

Celestron EclipSmart User manual

Celestron

Celestron EclipSmart User manual

Celestron StarPointer User manual

Celestron

Celestron StarPointer User manual

Celestron Popular Science ThermoCharge 3 User manual

Celestron

Celestron Popular Science ThermoCharge 3 User manual

Celestron POWER CONTROLLER 4X User manual

Celestron

Celestron POWER CONTROLLER 4X User manual

Celestron NexImage User manual

Celestron

Celestron NexImage User manual

Celestron 94020 User manual

Celestron

Celestron 94020 User manual

Celestron 93571 User manual

Celestron

Celestron 93571 User manual

Celestron NexStar+ Hand Control User manual

Celestron

Celestron NexStar+ Hand Control User manual

Celestron FireCel Plus User manual

Celestron

Celestron FireCel Plus User manual

Celestron 94175 User manual

Celestron

Celestron 94175 User manual

Celestron 94306 User manual

Celestron

Celestron 94306 User manual

Celestron ECLIPSMART 94248 User manual

Celestron

Celestron ECLIPSMART 94248 User manual

Celestron CrossAim User manual

Celestron

Celestron CrossAim User manual

Popular Accessories manuals by other brands

Salus SS912ZB Installation & quick start guide

Salus

Salus SS912ZB Installation & quick start guide

Datalogic S45-T53 Series operating instructions

Datalogic

Datalogic S45-T53 Series operating instructions

Z-Wave HSD-200Z user manual

Z-Wave

Z-Wave HSD-200Z user manual

DigiDesign 888/24 I/O installation guide

DigiDesign

DigiDesign 888/24 I/O installation guide

berlinger Fridge-tag 2 L user manual

berlinger

berlinger Fridge-tag 2 L user manual

Vega vegaplus sr 68 operating instructions

Vega

Vega vegaplus sr 68 operating instructions

IKEA TRADFRI E1702 manual

IKEA

IKEA TRADFRI E1702 manual

Osmio Sanser user manual

Osmio

Osmio Sanser user manual

Aspilos AT 600 quick start guide

Aspilos

Aspilos AT 600 quick start guide

Beurer IL 35 Instructions for use

Beurer

Beurer IL 35 Instructions for use

Hytronik HC419VRC/R instruction manual

Hytronik

Hytronik HC419VRC/R instruction manual

SOMFY animeo IB + installation guide

SOMFY

SOMFY animeo IB + installation guide

Edu-Logger 900-209 Guide

Edu-Logger

Edu-Logger 900-209 Guide

Venture Measurement Genuine Bindicator VRF-2000 Series quick start guide

Venture Measurement

Venture Measurement Genuine Bindicator VRF-2000 Series quick start guide

Centralite 3-Series Product data sheet

Centralite

Centralite 3-Series Product data sheet

ATEN VS92A quick start guide

ATEN

ATEN VS92A quick start guide

Knick SE 554X AMSN Series manual

Knick

Knick SE 554X AMSN Series manual

ROSE DISPLAYS BUTTERFLY CLIPS WITH RING AND HOOK instruction sheet

ROSE DISPLAYS

ROSE DISPLAYS BUTTERFLY CLIPS WITH RING AND HOOK instruction sheet

manuals.online logo
manuals.online logoBrands
  • About & Mission
  • Contact us
  • Privacy Policy
  • Terms and Conditions

Copyright 2025 Manuals.Online. All Rights Reserved.