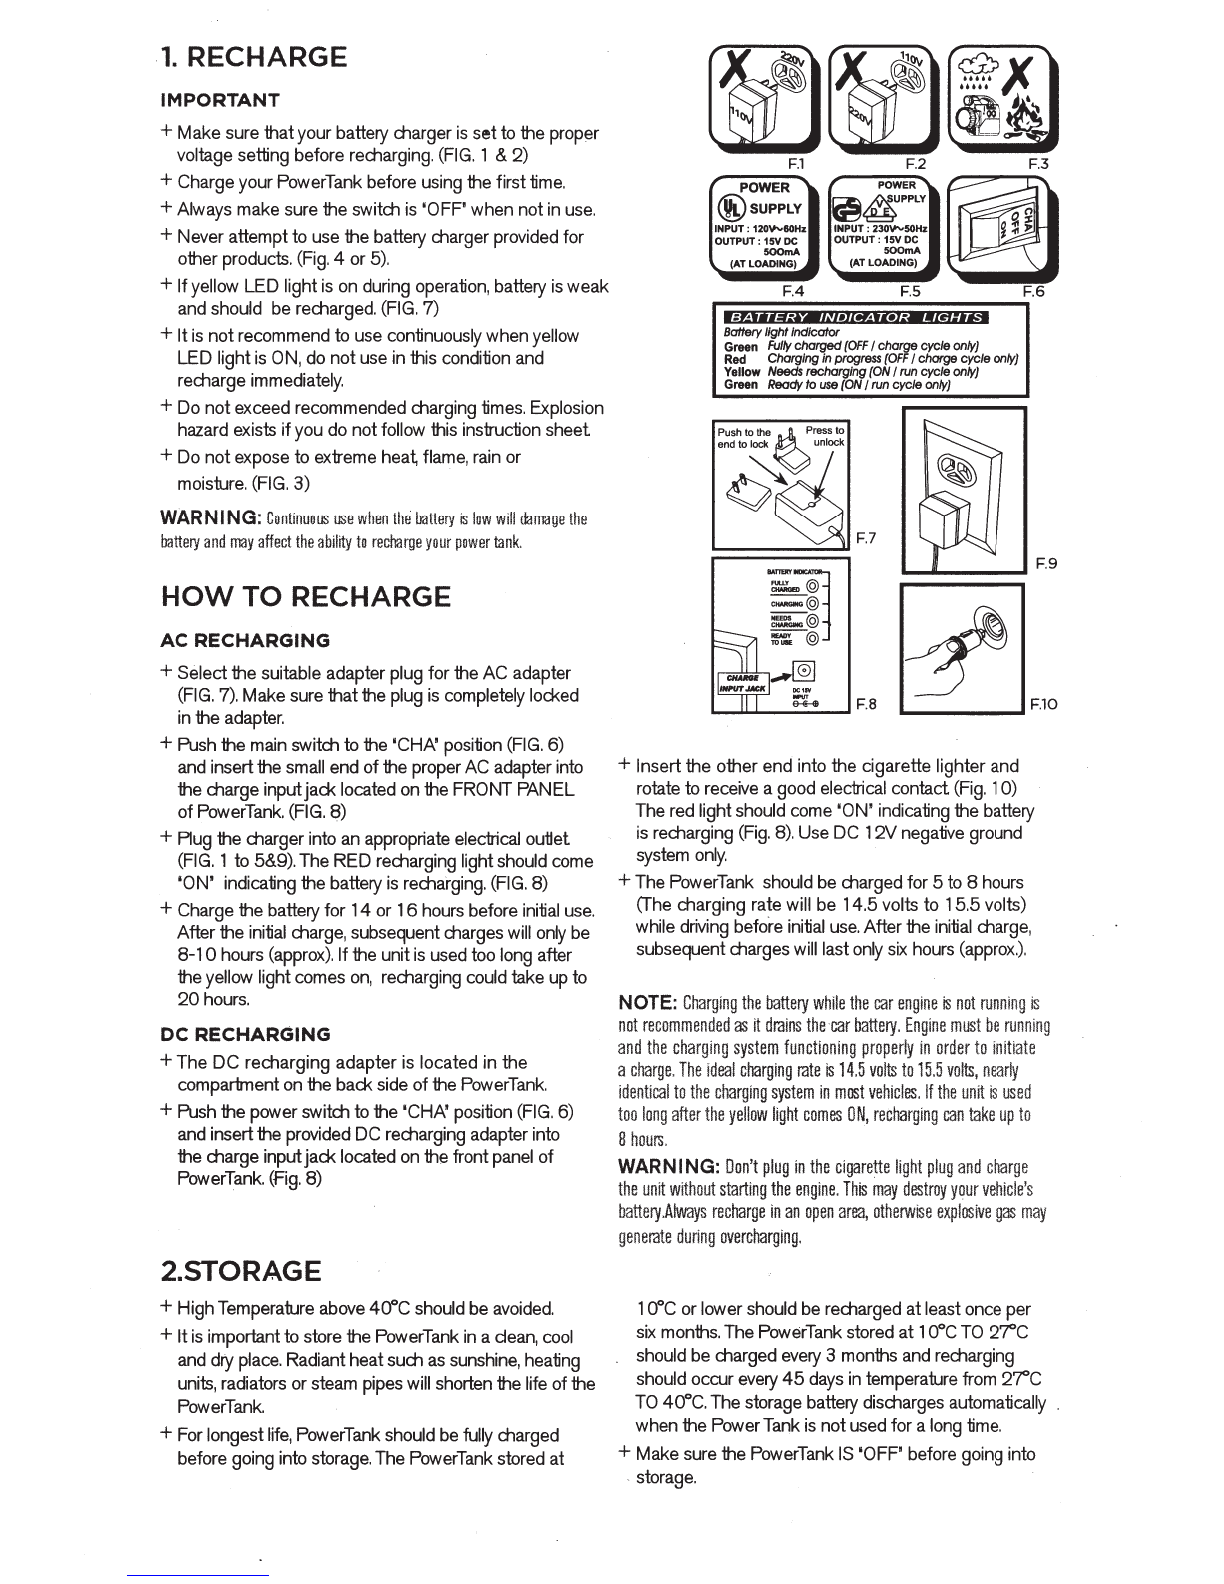
3.0PERATION
POWER
SUPPLY
+Make
sure your devices match ihe PowerTank's
rating-
DC 1
2V
I 1
OA.
(Fig. 12)
+ Uses ihe
DC
cord wiih car plug to connectyour device
to DC
12V
output receptacle.
+Switch
"ON"
ihe
PowerTank before turning ON your
device. (Fig.11)
WARNING:
12V
cigarette
lighter
socket
current
output
must
not
exceed
10
AMP.
FLASHLIGHT
+Switch
"ON" ihe PowerTank. (FIG.11)
+ Press Flashlight "ON/OFF" button ONCE to turn
"ON"
F.12
F.14
ihe
light (Fig. 14)
CIRCUIT
BREAKER
+Press
"ON/OFF" button TWICE to turn on "FLASHING"
+Your
power tank built-in drcuitbreaker ensures a safe
function. operation. IfDC 1
2V
outputover 10 AMP, ihe drcuit
+Press
button again to turn "OFF"
ihe
flashlight breaker will cut
off
ihe power.
+ Light diffuser enclosed for emergency purposes
..
POWERFUL
SPOTLIGHT
+ Adjust
ihe
spotiight head to desired direction. (FIG.13)
+Switch
ON
ihe
PowerTank. (FIG.11)
+Switch
ON
ihe
spotiight (FIG.14)
WARNING:
Do
not
use
to
jumpstart
a
vehicle.
This
will
result
in
short
circuit
or
sircuit
breaker
cut
off.
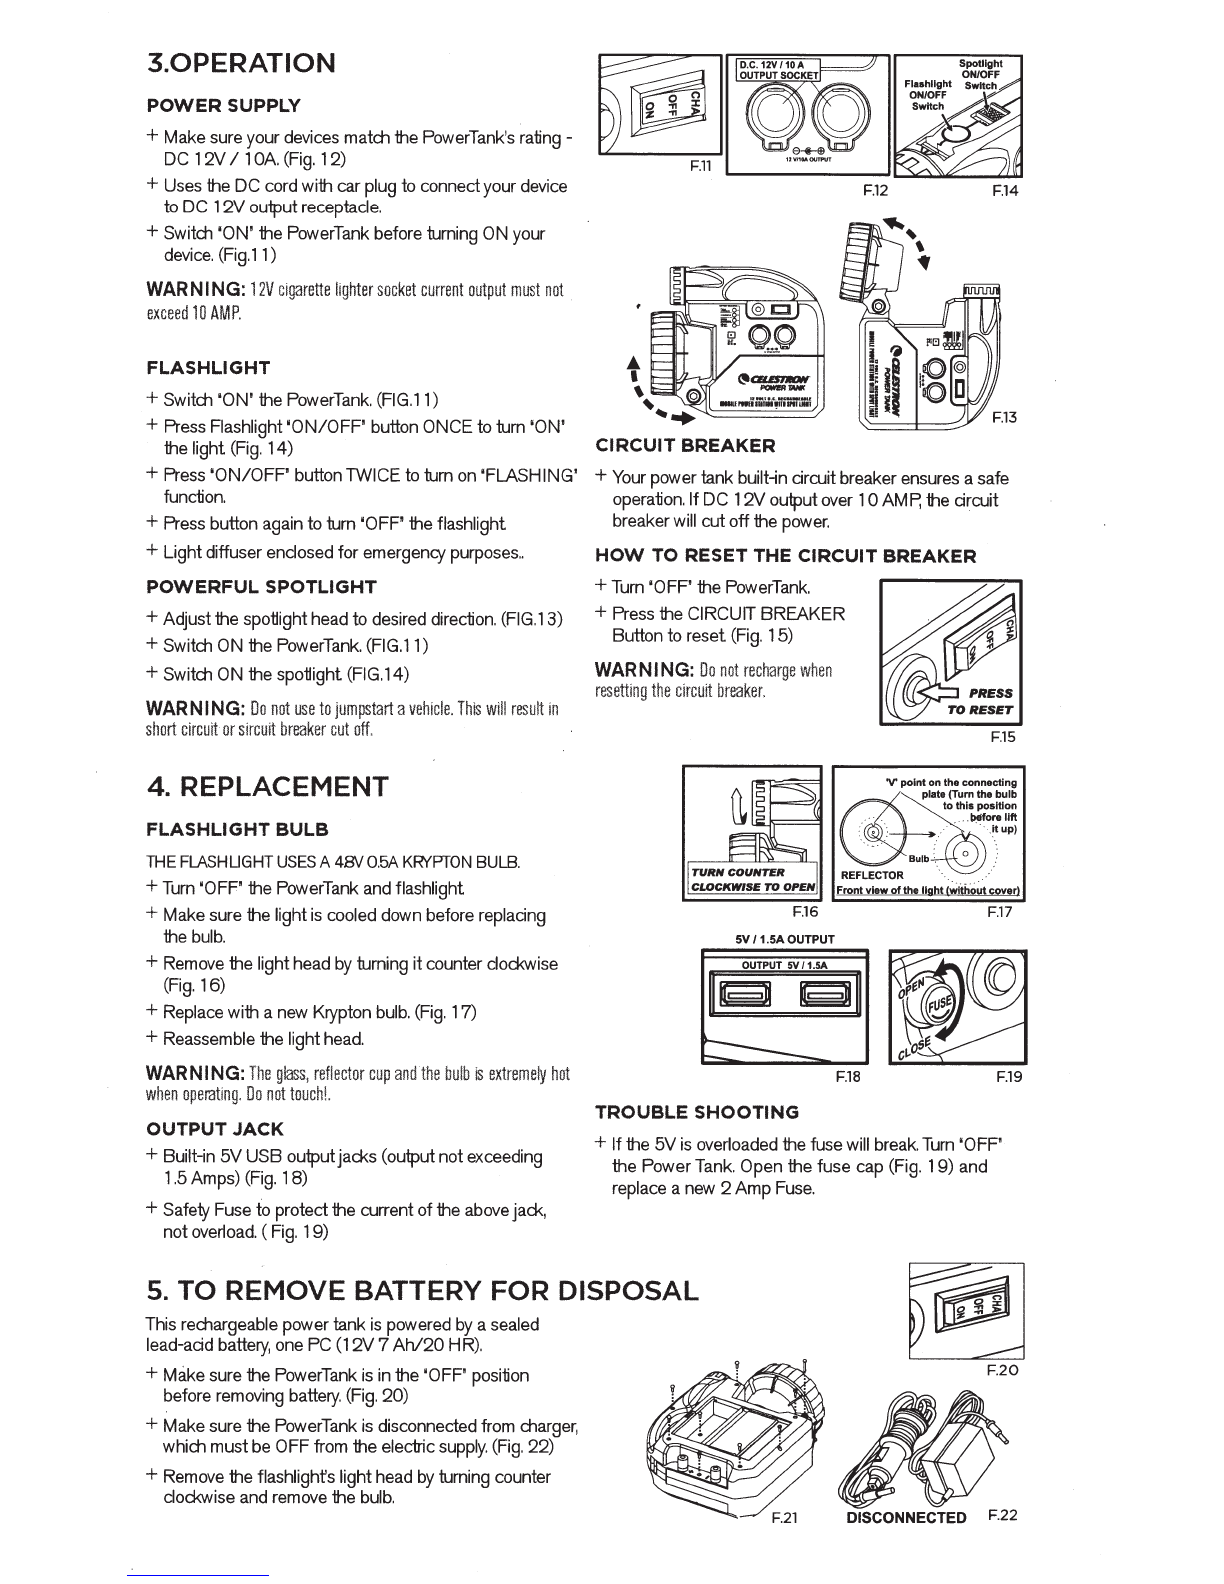
4. REPLACEMENT
FLASHLIGHT
BULB
THE
FLASHUGHT
USES
A 48V
0.5A
KRYPTON
BULB.
+Turn
"OFF"
ihe
PowerTank and flashlight
+ Make sure
ihe
light
is
cooled down before repladng
ihe bulb.
+ Remove
ihe
light head by turning
it
counter clockwise
(Fig.
16)
+ Replace wiih a new Krypton bulb.
(Fig.
17)
+ Reassemble
ihe
light head.
WARNING:
The
glass,
reflector
cup
and
the
bulb
is
extremely
hot
when
operating.
Do
not
touch!.
OUTPUT
JACK
+ Built-in
5V
USB
outputjacks (output not exceeding
1
.5
Amps) (Fig. 18)
+ Safety Fuse to protect
ihe
current
of
ihe abovejack,
not
overload. ( Fig. 19)
HOW
TO RESET THE
CIRCUIT
BREAKER
+ Turn
"0
FF"
ihe
PowerT
ank.
+ Press ihe CIRCUIT
BREAKER
Button to reset (Fig. 15)
WARNING:
Do
not
recharge
when
resetting
the
circuit
breaker.
F.15
'V'
point
on the connecting
REFLECTOR
late {Turn the bulb
to
this position
' .
'-IM!f~~:
~~
' '
.
. 0
,:
Front view
of
the
light
l~ittlout
cover!
F.16
F.17
5V
/1.5A
OUTPUT
F.18
F.19
TROUBLE
SHOOTING
+If
ihe
5V
is
overloaded ihe fuse will break.
Turn
"OFF"
the PowerTank. Open
ihe
fuse cap (Fig.
19)
and
replace a new 2 Amp Fuse.
5.
TO REMOVE BATTERY FOR DISPOSAL
This rechargeable power tank
is
powered
by
a sealed
lead-add battery, one PC
(12V
7
Ah/20
HR).
+ Make sure
ihe
PowerTank
is
in
ihe
"OFF" position
before removing battery. (Fig.
20)
+Make
sure
ihe
PowerTank
is
disconnected from charger,
which mustbe OFF from
ihe
electric
supply.
(Fig.
22)
+ Remove
ihe
flashlight's lighthead by turning counter
clockwise and remove
ihe
bulb.
F.20
DISCONNECTED F.22