CEMB TR-NC/8 User guide

Vibration equipment division
www.cemb.com
CEMB S.p.A.
Via Risorgimento, 9
23826 MANDELLO del LARIO (Lc) Italy
TR-NC/8
No-CoNTaCT TRaNsmiTTeR
Use aNd maiNTeNaNCe iNsTRUCTioN maNUal
*Translation of the original instructions


Vibration equipment division
TR-NC/8 - Rev.02/2013
General Index
1. General descrIptIon 3
1.1 SyStem compoSition 3
2.
operatInG prIncIple and typIcal applIcatIons 4
3. specIfIcatIons 5
4.
rules for proper InstallatIon 7
4.1
Wiring and poWer Supply 7
4.2
maximum loop load in relation to the poWer Supply voltage 7
4.3
connection diagram 7
4.4
material of the area the SenSor faceS 8
4.5 SenSor poSitioning 8
4.6 Quality of the Surface the SenSor faceS 9
4.7 runout 9
4.8 deviceS for SenSor inStallation 10
5. I
nstallatIon 11
5.1 F
inal poSitioning 13
5.2
general ruleS for proper electrical inStallation 13
5.2.1 ElEctrical cabinEt 13
5.2.2 Wiring 14
5.2.3
cablE shiElding 15
5.2.4 Earthing 15
5.2.5 T
roublEshooting 15

TR-NC/8 - Rev.02/2013

Vibration equipment division
3
TR-NC/8 - Rev.02/2013
1. General descrIptIon
Monitoring vibrations of machinery in operating conditions allows examining the trend of the vibrations over time, predicting
which part will start to deteriorate rst and planning maintenance so as prevent production stops because of serious faults
and the consequent economic losses.
Rarely does a vibratory phenomenon develop over time according to linear or known laws; sometimes it increases gradually,
as in the case of wear, other times rapidly, as in the case of faulty lubrication, or it occurs suddenly and severely, as in the
case of breakage of turbine blades.
You can act timely to prevent major damage caused by high vibrations only by continuous monitoring using instruments
equipped with alarm and locking devices that are activated when vibration exceeds preset safety limit values.
Vibration is monitored by means of a sensor facing the rotor in correspondence to the measuring point and a cable connect-
ed to a signal power and processing board.
Initially designed and developed for monitoring steam turbines of large thermoelectric power stations (where they are of vital
importance), continuous monitoring instruments (whose cost has come down considerably) have proved to have manifold
application possibilities and usefulness in the most varied industrial plants, wherever there are high-end machines that need
to be highly accurate and maintained such over time, or auxiliary machines (fans, pumps) whose failure would cause pro-
duction stops with the resulting economic losses.
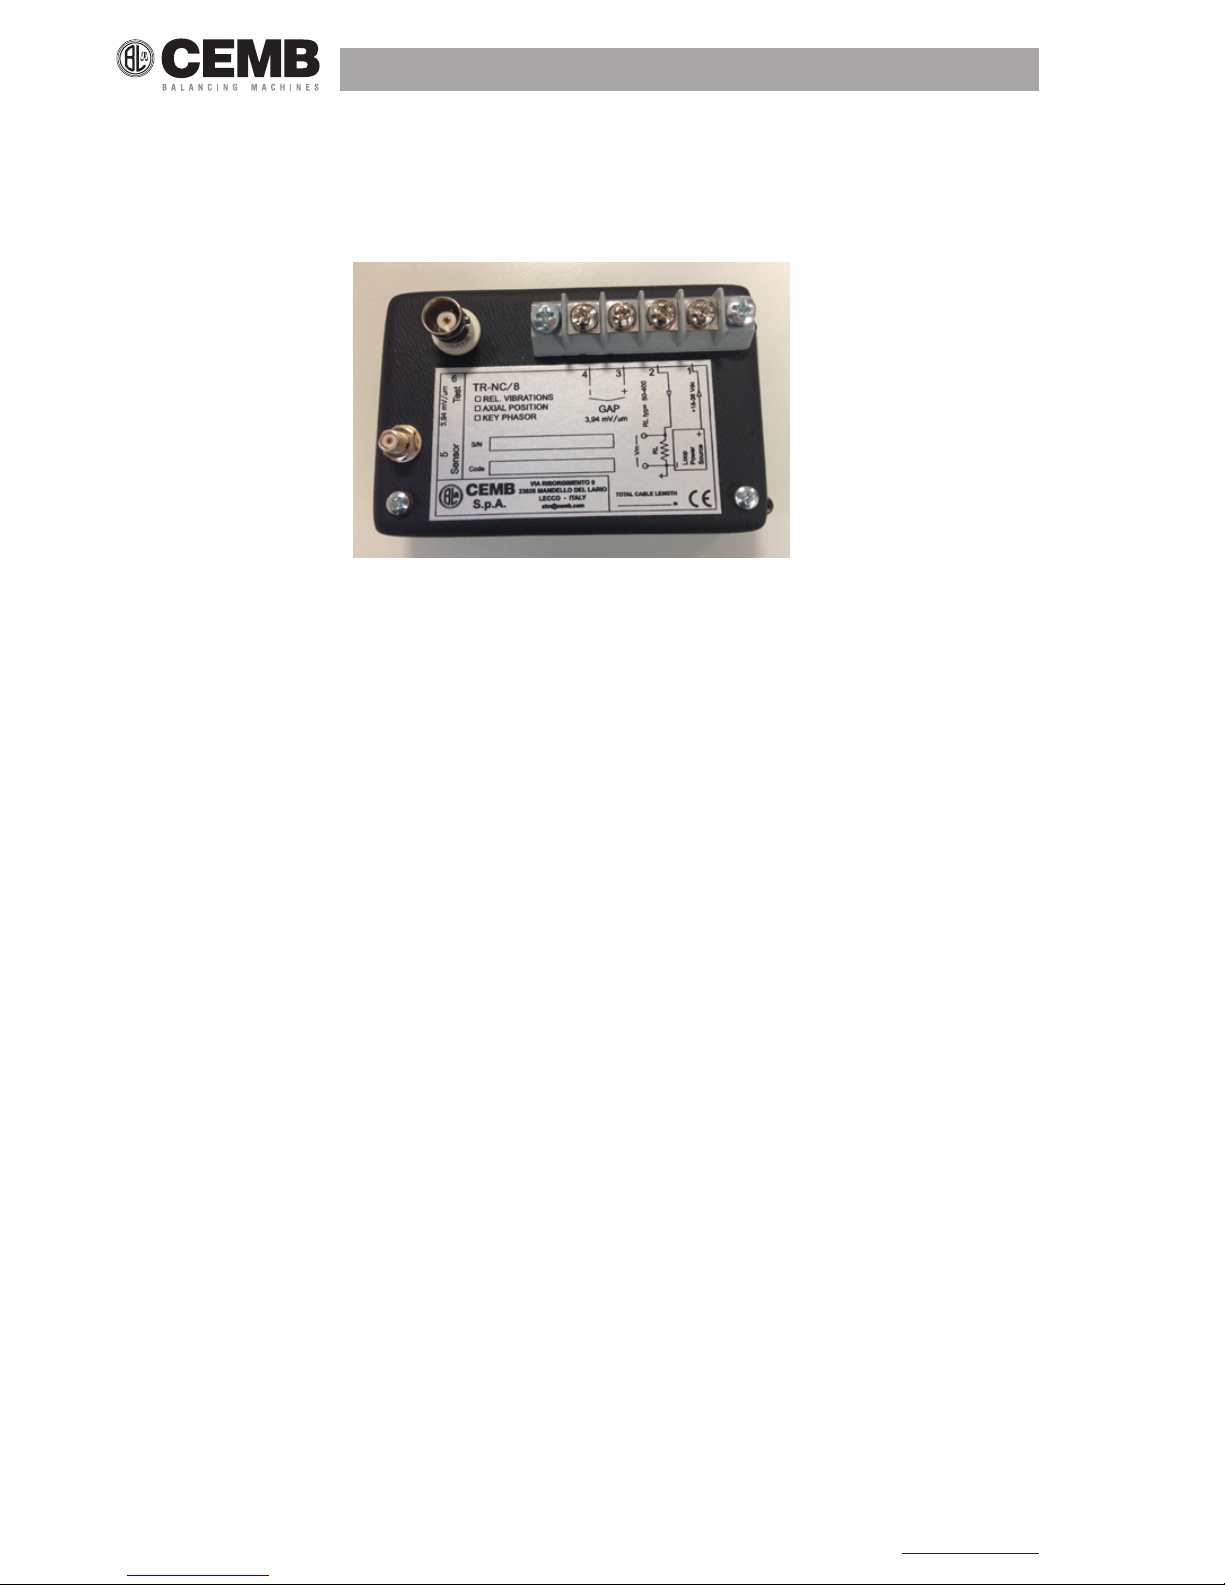
The transmitter operates with a current loop of 4-20 mA and, depending on the model, has a current output proportional to
the distance between the sensor and the target (displacement measurement), the target vibration (vibration measurement)
or the gearwheel rotation speed (speed measurement).
1.1 system composItIon
The TR-NC8 measuring system is made up of three parts:
• T-NC8/API series no-contact sensor
• T-NC/API series extension cable
• TR-NC8 transmitter
No-contact sensor Extension cable

4
TR-NC/8 - Rev.02/2013
The total length of the cable between the sensor and the transmitter represents an “electrical length“, which means that
each system is calibrated in the CEMB laboratory for a specic total cable length, consequently, any change in length on a
pre-calibrated system will give rise to measurement errors.
The total length of the sensor-transmitter connection must therefore be dened in advance based on the installation require-
ments.
Transmitter
The transmitter provides the measuring signal on a current loop of 4-20mA as well as a voltage signal proportional to the gap
for evaluation of correct sensor positioning.
The electronics is contained in a casing and encapsulated in a special resin.
2.
operatInG prIncIple and typIcal applIcatIons
The inductive eddy current type sensors operate by generating a high-frequency electromagnetic eld, which in its turn
generates induced eddy currents in the target. The induced eddy currents generate an impedance variation in the sensor,
which, measured and linearised by dedicated electronics, is converted into a signal proportional to the distance from the
target. The target must necessarily be made of a conductive material and variations in material would produce measurement
differences, which is why the transmitter is calibrated for a specic material.
Typically the sensor faces a piece of ferrous material; anisotropy of the rotor material, chrome-plating, surface roughness,
etc. may cause signicant errors.
The typical applications of the device are:
• Measurement of relative vibrations between the shaft and the bearing in systems where continuous monitoring is re-
quired, also in the most severe operating conditions.
• Monitoring of displacement of a metal surface, also moving (e.g. axial or differential displacement measurements).
• Speed measurement on a gearwheel
The transmitter provides an output on a current loop of 4-20mA proportional to the parameter measured and can be connect-
ed to dedicated PLC or DCS acquisition boards.

Vibration equipment division
5
TR-NC/8 - Rev.02/2013
3. specIfIcatIons
Basic composition sensor, extension, transmitter
Type of measurement differential
Measurement range ± 1 mm (0,5÷2,5 mm)
Dynamic range
frequency 0÷500 Hz (displacements)
frequency 1.5÷10.000 Hz (vibra-
tions)
Output signal 4-20mA loop + analogue gap
Linearity over the entire measurement range and
within the operating temperature limits indicated ± 1%
4-20mA output scale factor according to order code
GAP + BNC scale output factor 100 mV/mil (3.94 mV/µm)
GAP + BNC centre scale output 5.00VDC
GAP + BNC scale start output 1.07VDC
GAP + BNC scale end output 8.94VDC
Sensitivity to temperature according to ANSI/API 670-93
Power supply 24VDC nominal
Operating range
temperature (sensor)
temperature (transmitter)
humidity (sensor)
humidity (transmitter)
= - 35 to + 175° C
= - 20 to + 70° C
= max 100%
= max 95% (non condensing)
Sensor connection miniature coaxial connector
(sensor / transmitter)
Output connections
4-way screw terminal board
(transmitter / instrument)
BNC for analyser connection
Transmitter weight ~ 1 Kg
Sensor weight ~ 0,1 Kg
Maintenance none
Special versions
ATEX certied version
for applications in classied areas
II 1 G Ex ia IIC T5 Ga
II 1 G Ex ia IIC T6 Ga

6
TR-NC/8 - Rev.02/2013
3,000
4,000
5,000
6,000
7,000
8,000
9,000
10,000
0,00
4,00
8,00
12,00
16,00
20,00
24,00
0,00 0,20 0,40 0,60 0,80 1,00 1,20 1,40 1,60 1,80 2,00
Sensibilità [mA/mm]
Corrente [mA]
Distanza [mm]
TR-NC/8 -LOOP
Corrente [mA]
Sensibilità [mA/mm]
8.00mA/mm ±5%
3,000
3,200
3,400
3,600
3,800
4,000
4,200
4,400
4,600
4,800
5,000
0,00
1,00
2,00
3,00
4,00
5,00
6,00
7,00
8,00
9,00
10,00
0,00 0,20 0,40 0,60 0,80 1,00 1,20 1,40 1,60 1,80 2,00
Sensibilità [V/mm]
Tensione [V]
Distanza [mm]
TR-NC/8 -GAP
Tensione [V]
Sensibilità [V/mm]
3.94V/mm ±5%
3.1 T
ypIcal characterIstIc curves

Vibration equipment division
7
TR-NC/8 - Rev.02/2013
0
100
200
300
400
500
600
700
16 18 20 22 24 26 28 30 32 34
Max load [Ohm]
Power supply [V]
LOOP
SUPPLY
AND
MEASURE
(PLC or DCS)
MEASURE
LOAD
CABLE
LOAD
RESISTANCE
+24Vdc
4.
rules for proper InstallatIon
Measurements made using no-contact sensors that exploit the eddy current principle may be compromised or falsied by a
series of phenomena or parameters which should be taken into consideration when designing the monitoring system.
4.1
WIrInG and poWer supply
The monitoring instruments require an external power supply which should as directly as possible branch off from a reliably
efcient source also in cases of emergency of the main electric systems.
Power supply from a low-voltage network used for other instruments should be avoided, as their failure might place the aux-
iliary supply network out of service and hence also the monitoring instruments.
If the power supply is necessarily centralized for various instruments, suitable devices should be installed so that failure of a
single instrument or amplier or transmitter cannot affect the power supply to the other instruments.
Use a bipolar shielded cable; the cross-section of the conductors is related to the distance between the transmitter and the
acquisition system. If the distances are considerable, take into account the sum of the voltage drops on the load and on the
cable, which must ensure proper power supply to the transmitter. The nominal supply voltage is 24 VDC. The transmitter
can also measure correctly with a voltage between 24 and 35 VDC, guaranteeing a maximum loop load value (sum of the
measurement resistance plus the cable resistance) as shown in the graph below.
4.2
maxImum loop load In relatIon to the poWer supply voltaGe
4.3
connectIon dIaGram

8
TR-NC/8 - Rev.02/2013
4.4
materIal of the area the sensor faces
Although the sensor can face any ferromagnetic material, it should however be considered that the sensitivity and linearity
of the measurement range very much depend on the chemical properties of the material.
Unless otherwise requested, the measuring system is calibrated in the CEMB laboratories using AISI 4140 stainless steel
(42CrMo4) as reference material, which is normally used in the construction of machine shafts.
4.5 sensor posItIonInG
The magnetic eld generated by the sensor is propagated in all directions, therefore, if there are other electrically conductive
materials in this eld (known as sensor reference cone), the measurement result will be affected.
For this reason, when installing the sensor in the machine, the following conditions need to be observed:
► Free space around the sensor
► Minimum shaft diameter
► Distance from the shaft shoulders
► Distance between sensors

Vibration equipment division
9
TR-NC/8 - Rev.02/2013
4.6 QualIty of the surface the sensor faces
The roughness of the surface the sensor faces affects the measurement sensitivity.
• For this reason, roughness values between 0.4 and 0.8 μm RMS (API directives) are required.
• Surfaces should not be faced with galvanic coatings.
4.7 runout
RUNOUT means the summation of the errors relating to the area of the shaft the sensors are facing, which falsify the measure-
ment result.
• Mechanical RUNOUT:
Caused by deviation of the shaft area the sensor is facing from the ideal circular shape and by elliptic rotors.
This runout can be measured using mechanical devices, such as dial gauges or a no-contact transmitter.
The measurement is to be made with a number of revolutions between 1 and 100 where vibration phenomena do not
occur.
• Electrical RUNOUT:
Caused by the effect the structure of the shaft material has on the signal measured by the demodulator.
A variation in the measured value is caused by the following phenomena:
>Non-uniform shaft density.
>Inhomogeneous conductivity caused by alloy material distribution.
>Residual magnetism.
The RUNOUT is constant in phase and amplitude as the number of revolutions vary and might be added to or subtracted
from the actual vibration, falsifying the measurement made.
Measured
vibration
Actual
vibration
RUNOUT
RUNOUT in phase with vibration Actual
vibration
Measured
vibration
RUNOUT
RUNOUT and vibration shifted 180° out of

10
TR-NC/8 - Rev.02/2013
4.8 devIces for sensor InstallatIon
The no-contact sensors can be installed in tapped holes in the machine structure or in the bearing support. In some cases,
machines already have the necessary holes so that the transducers can simply be tted and then adjusted to obtain the
exact air gap.
Otherwise the sensors can be installed on brackets or rigid supports.
In the latter case, be particularly careful to fasten the sensors as rigidly as possible in order to minimise vibrations due to
installation.
Example of fastening devices

Vibration equipment division
11
TR-NC/8 - Rev.02/2013
5. I
nstallation
• Prepare the machine to t the fastening devices (holes, brackets, supports, etc.) of each sensor, then install the sensor
separating it from the relative transmitter.
• Prepare the cable protection devices (sheaths, ducts) on the machine.
• Position the junction boxes housing the transducers at a distance from the machine that takes into account the total
length of the sensor+extension cable connection.
RemembeR that the length of the connection between the sensoR and the tRansmitteR should not be changed, as
this would Result in changes in instRument lineaRity and calibRation.
With the machine stationary, make a rst adjustment of the mechanical gap to approximately 1.5 mm.
• For sensors installed outside the bearing, this adjustment can be made using a thickness gauge
• For sensors installed inside the bearing support, it is advisable to measure the total depth of the hole using a gauge and
screw in the sensor so that the mechanical gap is approximately 1.5 mm
• Recommended probe case torque 10 N x m. For the rst 10 threads, maximum torque 3 N x m.

12
TR-NC/8 - Rev.02/2013

Vibration equipment division
13
TR-NC/8 - Rev.02/2013
5.1 F
Inal posItIonInG
The TR-NC8 transmitter is supplied already calibrated and complete with sensor and extension cable. Should the sensor be
replaced with one of the same type, the transmitter does not need to be recalibrated.
After positioning the sensor with the nominal air gap indicated (1.50 mm) and connecting it to the transmitter, the sensor and
the transmitter need to be ne-calibrated as follows:
• connect the transmitter power supply to the terminals indicated
• connect a voltmeter to the GAP+ and GAP- terminals
• move the sensor a bit at a time until reading 5VDC on the voltmeter and lock the sensor in this position.
5.2
General rules for proper electrIcal InstallatIon
The monitoring system, consisting of the sensor installed on-board the machine, the transmitter and the analogue signal acquisition
system, has a low-voltage circuit which, coexisting with the power and drive circuits, may be affected by electromagnetic
phenomena.
For this reason, the following installation rules need to be observed in order to prevent interference with the monitoring
system.
5.2.1 ElEctrical cabinEt
A system should have a dedicated cabinet for the power devices and one for the control devices.
If sharing the same cabinet, it is recommended to use a shielding wall connected to earth.

14
TR-NC/8 - Rev.02/2013
If an inverter is present, it is advisable to use lters to eliminate the disturbances emitted or a separate circuit to supply the
control devices. In fact, when a “sensitive” instrument is supplied by an electrical power source common to several devices,
the disturbances generated by the power devices are transmitted to the control devices via the common power supply lines.
An unpainted reference earth plate should be installed at the bottom of the electric cabinet.
The metal sheet or grille used should be connected at various points to the frame of the metal cabinet.
All the components should be directly bolted onto this earth plate.
Take particular care in choosing the cable clamps as they must ensure a secure shield connection.
5.2.2 Wiring
The sensor connection cables should not be laid parallel to or together with inductive load power conductors or motor power
cables. The cables must be laid in separate cable ducts at least 15 cm apart.
Should the power and control cables need to run through common points, they must be perpendicular to each other at the
point where they cross.
All the connections must be as short as possible, as the oating lines function as active and passive antennas.
Keep a distance of > 100mm from the conductors, which are a source of disturbance.
If using a cable with a larger number of conductors than necessary, all the unused conductors must be connected to earth
together with the shield.

Vibration equipment division
15
TR-NC/8 - Rev.02/2013
5.2.3
cablE shiElding
Always use shielded cables and connect the shield only on one side of the wiring.
It is recommended to use the device side in order to guarantee equipotentiality between the cable shielding and the earth
reference.The shield must cover the cable up to the device input, possibly avoiding braid interruptions, which reduce the
leakage capacity..
5.2.4 Earthing
A system should have dedicated earth cables for the power and the control and they should come together only upstream
of the earth stake. Otherwise, slight leakage to earth of a power device might shift the zero reference of the control device.
The earth cable must have an as large as possible cross-section (minimum 4 mm²) in order to ensure low impedance.
All the device earth references (boards, acquisition system, cable shields) must refer to a single earth point.
5.2.5 T
roublEshooting
The persons that work with the TR-NC8 monitoring system must have adequate technical training and qualications.
Recommended operations to check for system faults:
TYPE OF FAULT 4-20mA LOOP READING
Demodulator not connected or damaged 0mA
Sensor not connected or damaged about 2mA

16
TR-NC/8 - Rev.02/2013
Table of contents
Popular Transmitter manuals by other brands

Blu Stream
Blu Stream HEX31WPB-TX user manual

DGFLOW
DGFLOW TEEVALVE 10 1 1/2 Operator and maintenance manual

IMG STAGE LINE
IMG STAGE LINE TXS-707HSE instruction manual

FOS Technologies
FOS Technologies AirLink manual

Skytech
Skytech Smart Stat-IV Installation and operation instructions

Cine Gears
Cine Gears Ghost Eye 150M Manual book