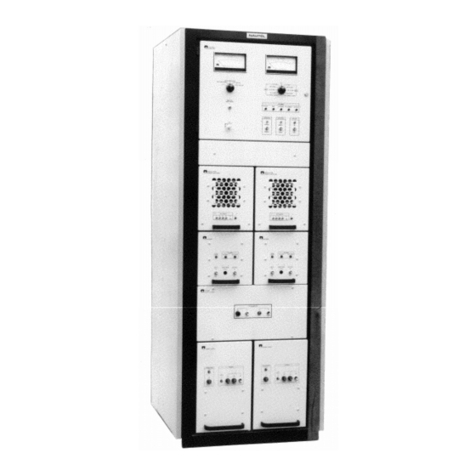
Nautel GV40 User manual

2: INSTALLATION MANUAL
GV40/GV30
TRANSMITTER
Document ID: NHB-GV30-GV40-INS
Version: 5.0
Issue Date: 2021-03-01
Status: Standard
Making Digital Radio Work


VERSION 5.0 2021-03-01 PAGE III
GV40/GV30 INSTALLATION MANUAL
Contact Information
Nautel Limited
10089 Peggy’s Cove Road
Hackett’s Cove, NS Canada B3Z 3J4
Toll Free: +1.877.6NAUTEL (662.8835)
(Canada & USA only) or
Phone: +1.902.823.3900 or
Fax: +1.902.823.3183
Nautel Inc.
201 Target Industrial Circle
Bangor, Maine USA 04401
Phone: +1.207.947.8200
Fax: +1.207.947.3693
Customer Service (24-hour support)
+1.877.628.8353 (Canada & USA only)
+1.902.823.5100 (International)
Email: [email protected]
Web: www.nautel.com
The comparisons and other information provided in this document have
been prepared in good faith based on publicly available information.
For verification of materials, the reader is encouraged to consult the
respective manufacturer's most recent publication on the official
website or through contact with Customer Service.
© Copyright 2021 NAUTEL. All rights reserved.


GV40/GV30 INSTALLATION MANUAL TABLE OF CONTENTS
VERSION 5.0 2021-03-01 PAGE 2.V
CONTENTS
Contact Information 2.iii
RELEASE CONTROL RECORD 2.vii
Preparing for installation 2.1.1
Unpacking and Positioning 2.2.1
Installing Options 2.3.1
Upgrading to Dual Exciter 2.3.2
Redundant LVPS Upgrade 2.3.3
Installing the UPS Interface 2.3.4
Installing the Orban Inside Card 2.3.5
Connecting to Station Reference Ground 2.4.1
Connecting Ac Power 2.5.1
Installing the RF Feed Cable 2.6.1
Installing Program Inputs 2.7.1
Planning Complete? 2.7.1
Routing Cables 2.7.1
Installing Control/Monitor Wiring 2.8.1
Planning Complete? 2.8.1
Routing Cables 2.8.1

GV40/GV30 INSTALLATION MANUAL TABLE OF CONTENTS
PAGE 2.VI VERSION 5.0 2021-03-01
Commissioning 2.9.1
Pre-Commissioning Tasks 2.9.2
Commissioning 2.9.3
Going On-Air 2.9.4
Network Setup 2.9.5
Configuring an External UPS 2.9.7
Parts and Tools 2.10.1
Contacting Nautel 2.10.1
Parts Supplied by Nautel 2.10.2
Parts Not Supplied by Nautel 2.10.2
Parts Ordering 2.10.2
Module Exchange Program 2.10.3
Tools for Installation 2.10.3
Pre-Installation / Installation Assistance 2.11.1
Pre-Installation Consulting 2.11.1
Installation and Commissioning Service 2.11.1
Online Documentation 2.11.2
On-Site Support 2.11.3
Training 2.11.3
Standard Warranty 2.11.4
Extended Warranties 2.11.7
List of terms 2.12.1

GV40/GV30 INSTALLATION MANUAL
VERSION 5.0 2021-03-01 PAGE 2.VII
RELEASE CONTROL RECORD
ISSUE DATE REASON
5.0 2021-03-01 Release 5 of GV40/GV30 (NARF75D/02). Supports software
version GV SW 4.4.1 and later.

GV40/GV30 INSTALLATION MANUAL
PAGE 2.VIII VERSION 5.0 2021-03-01

GV40/GV30 INSTALLATION MANUAL PREPARING FOR INSTALLATION
VERSION 5.0 2021-03-01 PAGE 2.1.1
SECTION 2.1: PREPARING FOR INSTALLATION
Before installing your GV40/GV30 transmitter, perform the following steps:
1. Ensure that you have performed the pre-installation tasks described in the
GV40/GV30 Pre-installation Manual.
2. Make sure that you received all the components. Check your packing list.
3. Inspect all crates and packages for damage. Monitor the tip and drop indicators attached to the
crates to determine if a crate has been tipped over or has been subjected to excessive shock (see
Figure 2.1.1).
Figure 2.1.1: Tip and drop indicators
4. Report any damage immediately to your Nautel sales representative and the carrier.
5. Move the crates as close as possible to the transmitter’s planned location.
6. Unpack the crates in accordance with the instructions provided on the outside of the crates.
For each crate, remove the panel labelled open this side. The panel is attached using Phillips
head screws.
Remove any visible packing material, including braces, from the crate's interior.
Remove the lag bolts on the bottom edge of the remaining three sides, leaving only the
transmitter and its support pallet.

GV40/GV30 INSTALLATION MANUAL PREPARING FOR INSTALLATION
PAGE 2.1.2 VERSION 5.0 2021-03-01
7. Review any assembly notes or instructions contained inside the transmitter crates. (For sites
requiring custom configurations, the instructions provided with the transmitter replace the
instructions provided here.)
8. Assemble your parts and tools. For a list of required tools, see “Parts and Tools” on page 2.10.1.
9. When you are ready to install the GV40/GV30 transmitter, follow the steps shown in Figure 2.1.2.
Figure 2.1.2: Flowchart - Installing the transmitter
TIP When you have completed a task or step, put a check mark beside the step number.
CAUTION! FAILURE TO COMPLY WITH RECOMMENDATIONS MAY VOID YOUR
MANUFACTURER’S WARRANTY. FOR MORE INFORMATION, REVIEW YOUR
WARRANTY DOCUMENT.
Connecting to Station Reference Ground - see page 2.4.1
Connecting Ac Power - see page 2.5.1
Installing the RF Feed Cable - see page 2.6.1
Unpacking and Positioning - see page 2.2.1
Installing Options - see page 2.3.1
Installing Program Inputs - see page 2.7.1
Installing Control/Monitor Wiring - see page 2.8.1
Commissioning - see page 2.9.1

GV40/GV30 INSTALLATION MANUAL UNPACKING AND POSITIONING
VERSION 5.0 2021-03-01 PAGE 2.2.1
SECTION 2.2: UNPACKING AND POSITIONING
To install an GV40/GV30 transmitter, perform the following tasks:
1. Lift and slide each of the transmitter cabinets off the base of its crates. Crated and uncrated
cabinet weights are shown in Table 2.2.1.
Table 2.2.1:
GV40/GV30 Cabinet Weights
2. Using necessary mechanical assistance (forklift, etc.), position both cabinets in their final location.
If the transmitter needs to pass through a doorway that is less than 32.9 in. (83.6 cm) wide, you
must remove the transmitter’s rear filter panel (secured with 1/4 turn fasteners) to reduce the
transmitter depth to 31.7 in. (80.5 cm). You can also remove the front door to reduce the
transmitter depth to 30 in. (76.2 cm).
3. Obtain the operating system (OS) password document which is located in the back of the front,
left-hand side door. Store in a safe place for future reference.
NOTE: This password is needed in the event access is required to the transmitter’s operating system. It
is a unique password to your transmitter, however if there is a need to change this password, see
“Changing the OS Password” on page 3.4.5 in the Operations and Maintenance Manual.
4. Remove the transmitter’s rear panels to allow access to customer input wiring. This may have
already been done in Step 2. See Figure 2.2.1 on page 2.2.3 to see access panels.
5. Using a 5-mm hex key (located in the ancillary kit), level the transmitter by adjusting the levelers in
the transmitter’s bottom corners (see Figure 2.2.2 on page 2.2.4).
6. If you are anchoring your transmitter against seismic activity, obtain four 2-1/4 inch square
washers (Nautel Part # HPS30) from the ancillary kit. Position the transmitter over four pre-drilled
WARNING! DO NOT MOVE THE TRANSMITTER UNLESS SUFFICIENT MANPOWER
OR MECHANICAL ASSISTANCE IS AVAILABLE TO MOVE IT INTO POSITION
WITHOUT DAMAGING THE CABINET OR CAUSING INJURY TO PERSONNEL.
CABINET CRATED WEIGHT UNCRATED WEIGHT
Transmitter Cabinet 844 kg (1860lbs) 744 kg (1640 lbs)

GV40/GV30 INSTALLATION MANUAL UNPACKING AND POSITIONING
PAGE 2.2.2 VERSION 5.0 2021-03-01
mounting holes and install four anchoring bolts (user-provided), with square washers, in the holes
provided in the bottom of the transmitter cabinet (see Figure 2.2.3 on page 2.2.5). It is possible to
drill through the hole plugs in the bottom of the transmitter, without removing them.
7. If desired, remove the M8 shipping screws in the back of each RF power module (see Figure 2.2.4
on page 2.2.6). Nautel recommends you remove these screws, unless your site experiences seismic
activity.
8. Install the RF Output Connector, which was partially dissembled for shipment, as follows (see
Figure 2.2.5 on page 2.2.7 and Figure 2.2.6 on page 2.2.8):
NOTE: The RF output connector was factory configured prior to shipping.
Remove the output cover packing plates from the RF output connector on top of the
transmitter. The packing plate - along with three spacer plates - are secured using four M6
screws. Remove only the packing plate, leave the spacer plates in place and retain the screws.
Obtain the Output Stud Plate, which was packaged with the ancillaries. If unable to locate the
output stud plate in the ancillaries, it may have been tyrapped to the rear of the transmitter
due to space restrictions. Using the M6 screws retained above, install the output stud plate on
top of the spacer plates. Firmly tighten M6 hardware. Note that the output stud plate’s studs
contain the necessary securing hardware (nuts, flat washers and split washers) to connect the
RF output to a dummy load or the antenna system in Section 2.9, “Commissioning”.
9. Verify that the RF feed cable/hardline reaches the RF output (antenna) connector on the top of the
cabinet. The RF feed cable/hardline will be connected in Section 2.6, “Installing the RF Feed Cable”.
10. Obtain the two ac entry boxes (Nautel Part # 219-8277) and their securing hardware (four M4
screws for each ac entry box), which are bagged and packed with the ancillaries. Install the ac
entry boxes, noting proper orientation, on top of the transmitter as shown in Figure 2.2.7 on page
2.2.9.
11. Proceed to Section 2.3, “Installing Options” to configure your transmitter for any options that were
purchased.
12. Do not re-install the rear panels at this time.

GV40/GV30 INSTALLATION MANUAL UNPACKING AND POSITIONING
VERSION 5.0 2021-03-01 PAGE 2.2.3
Figure 2.2.1: Rear Access Panels
1/4-TURN LATCHES
16 in each rear panel
LOWER, REAR PANELS
11 M5 screws each
LOCK OUT AC POWER
BEFORE REMOVING!
REAR

GV40/GV30 INSTALLATION MANUAL UNPACKING AND POSITIONING
PAGE 2.2.4 VERSION 5.0 2021-03-01
Figure 2.2.2: Cabinet Leveler Detail
CABINET LEVELER
(located in each corner
of transmitter)

GV40/GV30 INSTALLATION MANUAL UNPACKING AND POSITIONING
VERSION 5.0 2021-03-01 PAGE 2.2.5
Figure 2.2.3: Seismic Anchoring Hole Locations
SEISMIC ANCHORING
HOLES
4 places (3/4 in holes)
FLOOR VIEW OF CABINET FROM ABOVE
FRONT
*
* Contact Nautel to discuss
bottom ac entry requirements.

GV40/GV30 INSTALLATION MANUAL UNPACKING AND POSITIONING
PAGE 2.2.6 VERSION 5.0 2021-03-01
Figure 2.2.4: RF Power Module Shipping Bolts
M8
SHIPPING
BOLTS
(1 per
module)
PARTIAL
REAR VIEW
(FILTER
PANELS
REMOVED)

GV40/GV30 INSTALLATION MANUAL UNPACKING AND POSITIONING
VERSION 5.0 2021-03-01 PAGE 2.2.7
Figure 2.2.5: RF Output Connector Assembly Detail - 3-1/8 inch EIA (Standard)
TORQUE OUTPUT CONNECTION TO 292 IN-LBS OR 25 FT-LBS
OUTPUT
CONNECTOR
CUP
OUTPUT PLATE
SPACER PLATES
-01

GV40/GV30 INSTALLATION MANUAL UNPACKING AND POSITIONING
PAGE 2.2.8 VERSION 5.0 2021-03-01
Figure 2.2.6: RF Output Connector Assembly Detail - 4-1/16 inch EIA (Optional)
TORQUE OUTPUT CONNECTION TO 292 IN-LBS OR 25 FT-LBS
OUTPUT
CONNECTOR
CUP
OUTPUT PLATE
SPACER PLATES

GV40/GV30 INSTALLATION MANUAL UNPACKING AND POSITIONING
VERSION 5.0 2021-03-01 PAGE 2.2.9
Figure 2.2.7: Ac Entry Box Installation
Figure 2.2.8:
AC ENTRY BOX
219-8277
(obtain from Packing
Supplies and secure
using four M4 screws)
FRONT
REAR UPS WIRING ENTRY
pilot hole (punch to desired size)

GV40/GV30 INSTALLATION MANUAL UNPACKING AND POSITIONING
PAGE 2.2.10 VERSION 5.0 2021-03-01
Other manuals for GV40
1
This manual suits for next models
1
Table of contents
Other Nautel Transmitter manuals

Nautel
Nautel NX5 User manual

Nautel
Nautel XR12 User manual

Nautel
Nautel NX10 User manual

Nautel
Nautel NX50 User manual

Nautel
Nautel FM10011 User manual

Nautel
Nautel NV7.5 User manual

Nautel
Nautel VS2.5 User manual

Nautel
Nautel NX15 User manual

Nautel
Nautel NX Series Installation guide

Nautel
Nautel NV5LT Programming manual

Nautel
Nautel GV60 Programming manual

Nautel
Nautel GV10 User manual
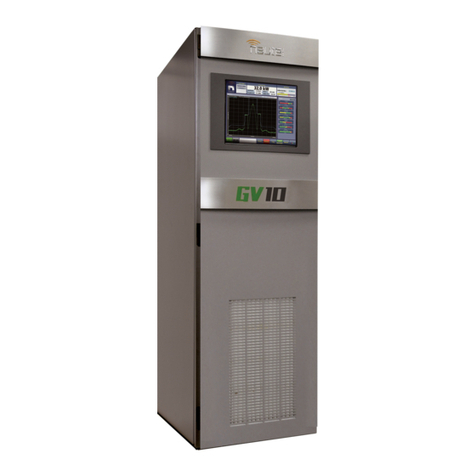
Nautel
Nautel GV20 User manual

Nautel
Nautel VS300 Programming manual

Nautel
Nautel NX100 User manual

Nautel
Nautel VS300 User manual

Nautel
Nautel NV20LT User manual

Nautel
Nautel VX150 User manual

Nautel
Nautel NX50 Programming manual

Nautel
Nautel ND500II User manual