3
CONTENT
INTRODUCTION
TechnicalSpecications
KeyFeatures
INSTALLATION
MountingtheSA1DKController
WiringDiagrams
FEATURES AND CONCEPTS
Normal,Secure&MasterUsers
ModesofOperation
ChangingtheModelofOperation
RequestToExit(REX)Button
CaseandBackTamper
BL-D40ExternalSounder
PROGRAMMING THE SA1DK
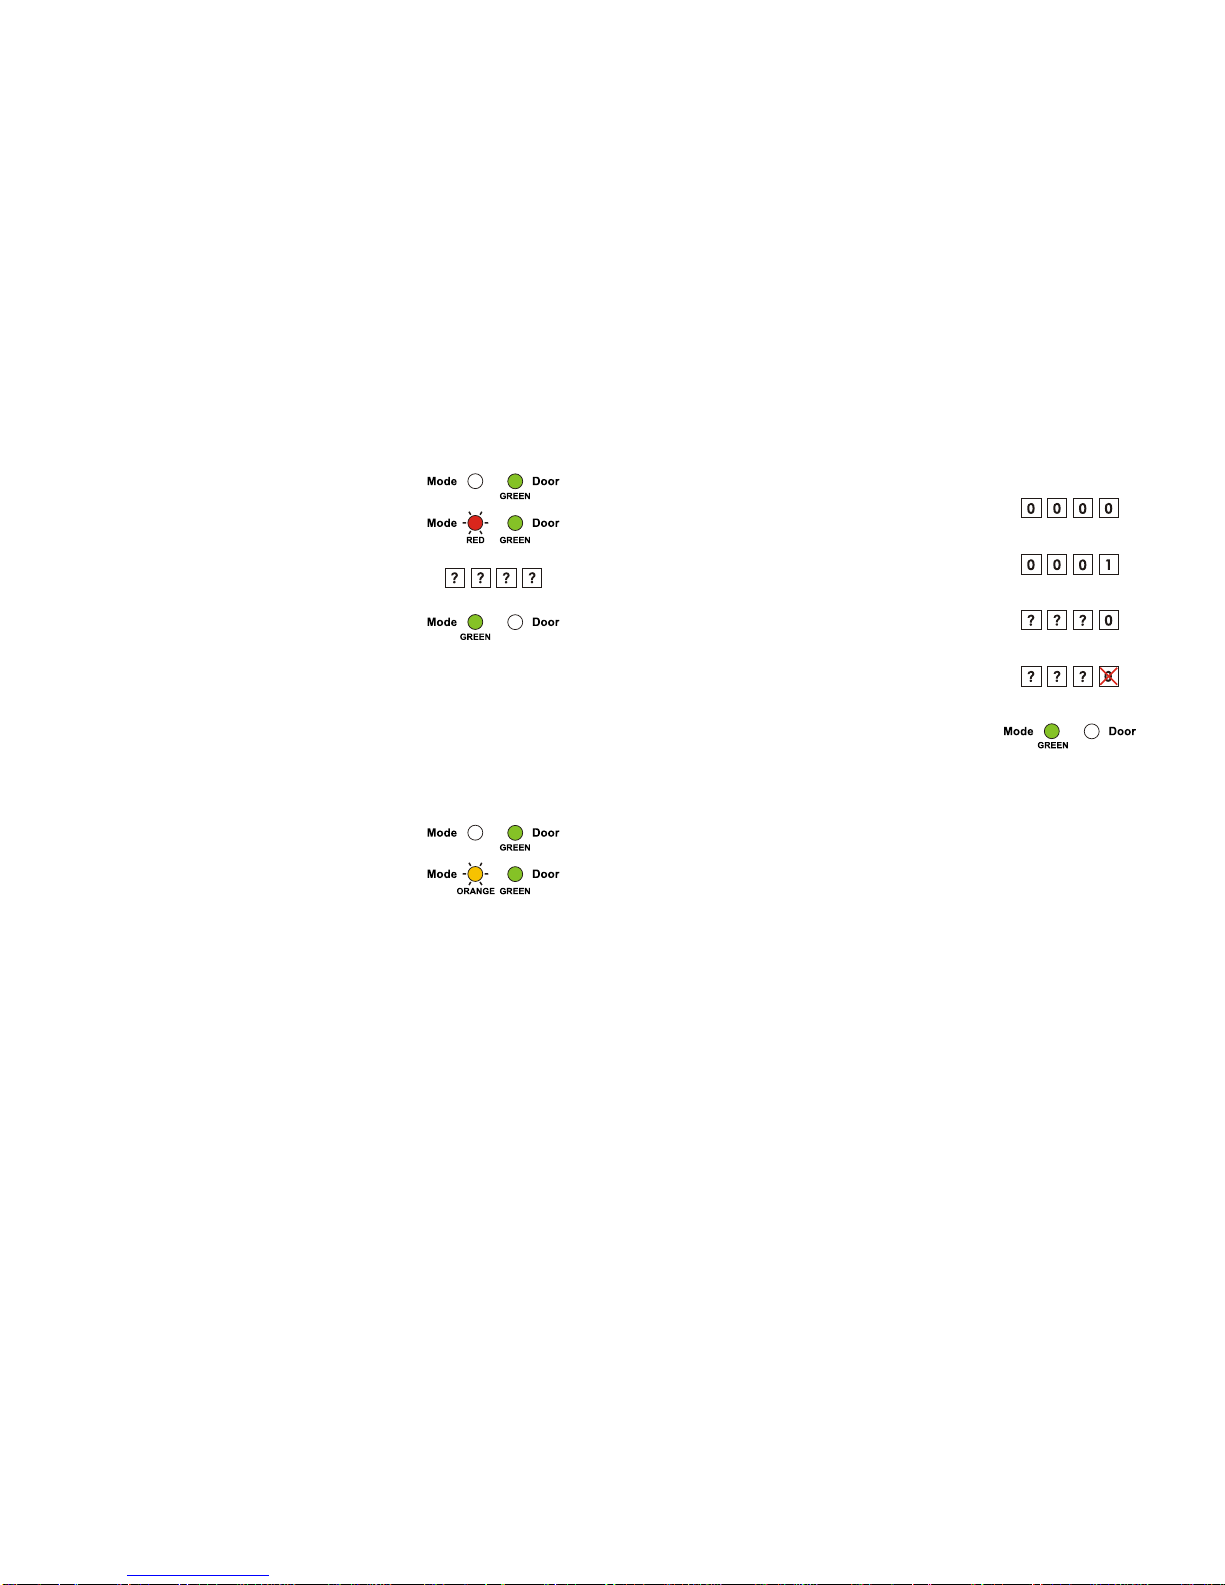
EnteringProgrammingMode
ExitingProgrammingMode
1 ChangingtheOpenCode1
2 ChangingtheOpenCode2
3 ChangingtheProgrammingCode
4 ChangingtheNormal/SecureCode
5 ChangingtheNormal/BypassCode
DoorChimeSettings
6 SettingFailSafe/SecureOperation
SettingTamperSirenTime
7 EnrollingPrimaryandSecondaryCodes
8 DeletingPrimaryandSecondaryCodes
0 ReturntoFactoryDefaultSettings
ReplacingalostProgrammingCode
ReplacingalostNormal/SecureCode
APPENDIX
Glossary
...........................................................................................................................3
....................................................................................................4
.....................................................................................................................5
.............................................................................................................................6
........................................................................................6
...............................................................................................................8
...................................................................................................9
.......................................................................................9
........................................................................................................10
...................................................................................11
........................................................................................12
..................................................................................................12
..............................................................................................13
................................................................................................14
..........................................................................................15
.............................................................................................15
.............................................................................................16
............................................................................................16
..................................................................................17
.............................................................................18
.............................................................................18
..............................................................................20
.......................................................................21
.........................................................................24
..................................................................................26
..............................................................................................26
..........................................................................................27
...................................................................................................................................28
................................................................................................................................28
TheSA1DKisakeypadaccesscontrolunit.
Theunitacceptsupto500usersandprovidesentryviatheuseofPINcodes.
Equipmentprovided
ThefollowingisprovidedaspartofeverySA1DKpackage:
-SA1DKAccessControlUnit
-InstallationKit
-InstallationandOperatingInstructions
Additional Equipment Required
1) Electric Lock Strike Required
FailSafe(PowertoLock)orFailSecure(PowertoOpen)
2) Power Supply with Backup Battery
12to16VDC(FromaRegulatedPowerSupply)
3) Request To Exit (REX) Button
NormallyOpenType-Switchisclosedwhenpressed
4) BL-D40 External Sounder (Optional)
ProvidesSiren,Bell,andChimefunctionstoSA1DK
Introduction