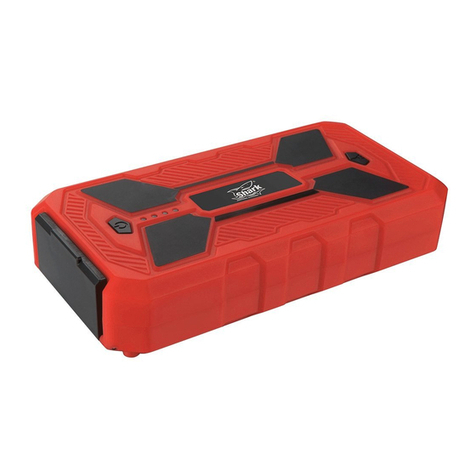
Certa CTJMPST13WA User manual

13000MAH WATER RESISTANT
PORTABLE JUMP STARTER
WITH WIRELESS CHARGER
CTJMPST13WA


•Use only the included battery clamp to start the car.
•Do not use this unit if any part of the cable, clamp or cord is damaged.
•Never connect both clamps together when the product is turned ON.
•Do not connect both cable clamps to the same piece of metal. Otherwise, the
jump starter will be damaged.
SAFETY & WARNINGS

1 On/Off button
(multifunctional)
Press the button to charge your devices.
Press the button to see the remaining capacity.
Long press the button to turn the flashlight on or off.
2 LED display screen
Displays:
oRemaining power percentage.
oCharge and discharge status.
oWireless charging status.
oSOS status.
3
Wireless charging
pad
Only functions with devices equipped with the wireless
charging feature.
4
USB-C input port
Charge the product (via USB-A to USB-C cable).
5
USB output port
(QC 3.0)
Charge external devices. QC 3.0 compatibility will be
enabled for devices that support this function.
6
Jump-starting port
Insert the plug into the jump-starting port.
7
LED flashlight
Flashlight modes: Solid, SOS, Alert and Off
8 Black clamp
Connect the black clamp to the negative terminal of the car
battery.
9 Red clamp
Connect the red clamp to the positive terminal of the car
battery.
10
Plug
To be inserted into the jump-starting port for use (6)
11
Battery clamp
indicator lights
Shows the status of the smart battery clamp.
12
Force start button
For instances where the car battery voltage is too low.
OVERVIEW

Charging the jump starter
1. Connect the product to a suitable wall adapter via the USB-C cable.
2. Short press the On/Off button to turn on the product. While charging the jump
starter, the LED display screen will show the current battery power percentage.
Once it is fully charged, the LED display screen will show 100%.
3. Unplug the cable when no charge is required.
Charging USB devices
1. Connect the product and the device to be charged via USB cable.
2. Press the On/Off button to turn on the product.
3. Unplug the cable when no charge is required.
OPERATION
Note:
•When using it for the first time, make sure that the jump starter is fully
charged.
•Please use the provided USB-C cable to charge the product.
•A USB wall adapter is not included with the product.

Wirelessly charging devices
1. Press the power button once to enable the wireless charging function.
2. Place the device on top of the wireless charging icon to start.
3. You may need to adjust the orientation of the device on the wireless charging pad
for optimal results.
LED flashlight
Long press the On/Off button for 3 seconds to turn on the light. Short press the On/Off
button to switch the light modes between Solid, SOS, Alert and Off.
Note:
The wireless charging feature only works on devices that allow Qi (inductive) wireless
charging. Only use the wireless charging pad with Qi-certified devices.

Jump start your car
Step 1: Insert the plug of the smart battery clamp completely into the jump starter. If the
green and red indicators on the battery clamp are flashing alternately, you are safe to move
on to the next step.
Note:
This product is for 12V cars only (up to 7.0L petrol or 5.0L diesel engine). Always ensure
that the battery level is above 50% before you use it to jump start your car.

Step 2: Connect the red clamp to the positive terminal (+) of the car battery and connect the
black clamp to the negative terminal (-) of the car battery. If the green and red indicators on
the battery clamp are flashing alternately, you are safe to move on to the next step.
However, if the red indicator light is on:
•The battery clamp may be connected in reverse. If so, you need to disconnect
the battery clamp from the vehicle and the jump starter.
•Adjust the clamps for maximum contact with battery terminals.
Step 3a: Start the car as normal.
•If the car fails to start, disconnect the battery clamp from the vehicle and the jump
starter. Wait for at least 30 seconds before trying again.
•If the car still fails to start after 3 attempts, use the force start function as per step
3b.
START

Step 3b (optional): Force start function.
•Make sure that the clamps are connected to the correct polarity battery terminal.
•Hold the force start button for 3 seconds to enable the force start function.
•When the indicator light of the smart clamp is solid green, the vehicle will need to
be started within 30s.
Step 4: Once your car is started, remove the battery clamp from the car battery and the
jump starter within 30 seconds.
LED Indicator
Situation
Flashing between red/green
Ready to work/operational status
Solid red
1. Battery clamp is connected in reverse:
oCheck the orientation of the clamps on the
battery terminals
2. The clamp is short-circuited:
oCheck whether the clamps are contacting one
another or are connected to the same piece of
metal.
3. Reverse charging protection; the voltage of the car
battery is higher than 12.6V:
oNo jump starting is needed to start the car.
Rapidly flashing red The temperature of the clamp exceeds 65 (+/-5) degrees.
Remove the clamp until the lights flash red and green.
Slowly flashing green The voltage of the jump starter is too low. Charge the
jump starter
Force start button

•Never use the product to start a bulging or damaged car battery.
•Store the product in a shaded, well-ventilated area.
•Handle the product with care. Avoid dropping or striking the product heavily and
repeatedly.
•Do not attempt to disassemble or modify the product.
•Do not use detergents to clean the product.
•Do not place or use the product in a high-temperature environment for an
extended period. The operating temperature of this product is -20-60° C. The
storage temperature of the product should not exceed 50°C.
•Check the battery level of the product at least once every three months and charge
the product in time.
•Keep the product away from children and pets.
Capacity
13000mAh
Type C input
5V/2A
USB output
5V/3A, 9V/2A, 12V/1.5A
Wireless charging
5V/2A, 10W max
Jump-start current
500A (last for 1s)
Peak jump-start current
1000A (last for 0.2s)
Over-discharge protection
≦13v±0.3v
Overheating protection
> 65℃±5℃
Reverse charging protection
≧(2.6v±0.3v)
Dimensions (L x W x H)
180 x 92 x 36mm
CARE & MAINTENANCE
SPECIFICATIONS

How is the product turned off?
This product will power off automatically when no load is detected or when charging is
complete.
How long does it take to fully charge the jump starter?
Approximately 7 hours through the Micro USB or Type C input ports.
How many times can this product start the vehicle with full capacity?
Approximately 15 times.
How many times can this product fully charge my mobile phone?
This will depend largely on the battery capacity of the mobile phone being used. For
example, an iPhone 8 can be fully charged ~3-4 times.
•1 x 13000mAh Jump Starter
•1 x Smart Battery Clamp
•1 x USB Type C cable
•1 x Quick Start Guide
•1 x Carry Pouch
FAQ
IN THE BOX

Need more information?
We hope that this user guide has given you
the assistance needed for a simple set-up.
For the most up-to-date guide for your product,
as well as any additional assistance you may require,
head online to help.kogan.com
Table of contents
Other Certa Remote Starter manuals
