Chandler Systems D15 User manual

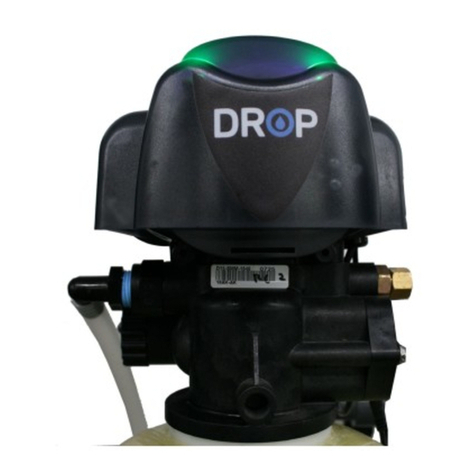
15 - Control Valve

A
2
2
Chandler Systems
2

TABLE OF CONTENTS
Table of Contents................................................................................................................ 3
Valves Specications.......................................................................................................... 4
Legacy View Control Start Up Procedure.......................................................................... 5
Advance Settings.................................................................................................... 6
Status History ......................................................................................................... 9
Salt Monitoring Update......................................................................................... 10
Main Menu.......................................................................................................................... 15
Normal Operation................................................................................................................ 17
Master Programming Mode.............................................................................................. 19
Filter Master Programming................................................................................................ 21
Aeration Master Programming......................................................................................... 24
Cabinet Softener Breakdown............................................................................................. 27
Filter Breakdown................................................................................................................. 31
Aeration Breakdown............................................................................................................ 33
Side Valve Breakdown........................................................................................................ 36
Bypass Assembly............................................................................................................... 40
Service Instructions........................................................................................................... 41
Error Codes......................................................................................................................... 42
Troubleshooting................................................................................................................. 43
Valve Dimensions............................................................................................................... 44
Warranty............................................................................................................................. 46
One or more features of this product are covered by U.S. patents, visit http://csih2o.com/patents.php for more
information.
FCC Compliance Statement:
http://www.chandlersystemsinc.com/les/FCC_Compliance_Statement.pdf
Industry Canada Compliance Statement:
http://www.chandlersystemsinc.com/les/Industry_Canada_Compliance_Statement.pdf
WARNING:
Lubricants
Do NOT use Vaseline, oils, hydrocarbon lubricants or spray silicone anywhere! Petroleum base lubricants will
cause swelling of o-rings and seals. The use of other lubricants may attack plastic Noryl®. It is recommended
that Dow
Corning® silicone grease be used as a lubricant for all control valves. Dow Corning® 7 Release Compound is used
in the manufacture of Chandler Systems control valves. (Part # LT-150)
Sealants
Pipe dope and liquid thread sealers may contain a carrier that attacks some plastic materials. It is recommended
that only Teon® tape be used to seal plastic Noryl® threaded ttings.
3

A
4
Valve Control Board Connections
D15 Valve Specications
Valve Material Noryl®*
Inlet / Outlet 3/4” - 1”
Cycles 5
Flow Rates (50 psi inlet) - Valve Alone
Continuous (15 psi drop) 21 gpm
Peak (25 psi drop) 27 gpm
CV (flow at 1 psi drop) 5.4
Max. backwash (25 psi
drop)
17 GPM
Regeneration - Downow
Adjustable Cycles Yes
Time Available 99 minutes per cycle
Meter Information
Meter Accuracy Range .25 - 15 gpm +/- 5%
Meter Capacity Range (gal.) 1 - 9,999
Dimensions
Distributor Pilot 1.050” O.D.
Drain Line 1/2” NPT Q.C.
Brine Line 3/8”
Mounting Base 2-1/2” - 8 NPSM
Height From Top of Tank 7.7”
Typical Applications
Water Softener 6” - 16” Diameter up to 4
ft.3
Capacity
Iron Filter 6” - 16” Diameter
Sediment Filter 6” - 16” Diameter
Carbon Filter 6” - 16” Diameter
Neutralizing Filter 6” - 16” Diameter
Additional Information
Electrical Rating 12 VDC
Pressure Hydrostatic: 300 psi
Working: 20 - 125 psi
Temperature 34 ° - 110 ° F
*Noryl is a registered trademark of General Electric Company
Valve specications
Chandler Systems
4

Valve Control Board Connections
When you download the Legacy View app and
open it, you will see a screen similar to this one.
Any Legacy View bluetooth compatible device
will appear here as long as it is within range and
you have bluetooth enabled on your phone or tab-
let. Simply click on your device to get started.
After selecting your system,
you will be greeted with one
of the follow Dashboards
(depending on Softener
or Filter). To begin, adjust
the settings in ORANGE by
tapping on the box. The sys-
tems come preset here and
the default settings should
-
tions.
Legacy View Control Start Up
Legacy View Control
5

A
6
Softeners Filters
1
3
5
7
9
2
4
6
8
10
1
3
5
7
9
11
2
4
6
8
11
1. Current time on the system. Tap the box to set the time to that of the devices
2. Shows battery life of attached 9v backup battery
3. a. Softeners: Shows current water flow
b. Filters: Days until next regeneration
4. a. Softeners: Amount of soft water remaining
b. Filters: The time the system regenerates
5. Amount of water used that day
6. Highest GPM read that day
7. a. Softeners: Water hardness that can be adjusted by tapping on the box
b. Filters: Current GPM of water being used
8. a. Softeners: When the system regenerates
b. Filters: Amount of days between regenerations
9. a. Softeners: Allows the user to view a simulated version of their salt levels in order to
b. Filters: Amount of water used on average
10. Amount of water used on average
11. A graph of water usage for a whole month
Legacy View Control
Chandler Systems
6

Advanced Settings
The Advance Settings page is
where cycle times and certain
other settings can be adjust-
ed. To get there simply click
on the three lines in the top
left hand corner to bring up
the side menu and just tap on
the Advance Settings button.
Only change these settings if
instructed by Chandler
Systems or a Registered
Plumber.
7

A
8
Advanced Settings - Softener
1
3
5
7
9
2
4
6
8
10
Advanced Settings - Aeration Filter
1
3
4
6
8
2
5
7
1. Days left until next regeneration based on Regeneration Day Over-
ride
2. Amount of days between regeneration can set between 0-29. Set
ting at 0 turns this feature off
3. Percentage of soft water saved in case system runs out before next
regeneration time
4. Capacity of system based on size of tank. This is preset at factory
and should never need to be adjusted.
5. Turns the display off until a button is pressed
6. Turning this on adjust the cycles to have the forth regeneration step
tank dry until a regeneration is needed.
7. An upflow cycle to clean the media bed
8. Draws in salty water from the brine tank and rinses it over the media
bed to rejuvenate the resin
9. A downflow cycle to re-compact the media bed
10. Fills the brine tank with water for the next regeneration
1. How often the system adds air to the water
2. Turns the display off until a button is pressed
3. How much the system draws a chemical if the system is setup for
that feature.
4. Non-Adjustable step for purging air out of the system
5. An upflow cycle to clean the media bed
7. Draws air and/or chemical into the media bed to oxidize and remove
any contaminants
8. A downflow cycle to re-compact the media bed
NOTE:
Advance Settings Page
Chandler Systems
8

Status and History
The Status and History page under the side menu gives a more detailed account of how much water is actually
being used.
1
3
5
6
2
4
6
7
8
1. Amount of water flowing through system currently
2. Total gallons treated since system was installed
3. Amount of water that has gone through system since last regeneration
4. Total number of regenerations since system was installed
5. Number of regenerations since the system last lost power
6. Number of gallons used everyday
7. Total number of gallons used between each regeneration
8. Highest recorded gpm value per day
9

App Salt Monitoring Update
The recent release of Legacy View, version 3.1.18, adds Salt Monitoring to the existing generation of residential
and commercial metered softeners that are running the C4.22 rmware. Below is an overview of the new func-
tionality.
General Setup and Use
will see a new item on the dashboard called, “Brine
Tank Level” and it will display “Click to Setup” to indi-
Once you tap “Click to setup” or “Set”-
For residential metered softeners, this will default to a
inches.
For commercial metered softeners, this will default to a
inches. Note that the commercial brine tanks will also
include the 24 inch and 30 inch brine tank option.
enter the current salt level in the tank by either tapping
the brine tank or sliding up and down to the desired
position. This will need updated every time you add
salt to your brine tank. You can also adjust the initial
“Salt Monitoring” section).
A
10
Chandler Systems
10

When the salt level is set the brine tank level on the dash-
board will update to show a smaller representation of the
brine tank with the current salt level. When the softener
completes a regeneration the salt level will be updated
accordingly. Please note that the value may be lower than
what was shown when entering the salt level. This is ex-
pected behavior as it rounds down to the pounds of salt
remaining that can complete full regenerations to help
avoid hard water from breaking through.
When a valve reports it has low salt it can be seen on the
device list when you initially open the app. This happens
when the salt level in the brine tank is determined to be at
20% or less.
Salt Monitoring
For users that would like to see the overall salt level status, for one or more metered softeners, without having to
connect to each valve then we also oer that functionality as well. The setup and functionality work a little dierently
in Android and iOS so both methods will be shown to illustrate this. However, they will both do a quick scan every
30 minutes for nearby metered softeners. If a metered softener is found, then it will check to see if that softener was
included in the monitoring. If it was included, then the status is checked and reported.
You can enable the salt monitoring service by tapping the
magnifying glass icon from the brine tank settings dialog.
dialog. Tapping the button under the “Enable Monitoring”
option toggles the monitoring on or off. Once enabled, it
will be enabled for all valves. However, you must indicate
what valves you would like to monitor. Enabling the salt
monitoring will also automatically include the softener
you’re connected to. You can decide whether to include a
valve by toggling the option under “Include Softener”. This
must be done for each valve you want to monitor.
Android Salt Monitoring
11

-
-
cation is a service that runs in the background and will
trigger a Bluetooth scan every 30 minutes, as mentioned
salt levels, then it will display “Salt Level: OK”. If a soften-
er is reporting that it has low salt, then “Salt Level: Low”
will be display with a warning symbol. Once you add more
salt to your brine tank and adjust the level in the app it
-
Note:
If no softeners have been included, then “No Softeners Detected” will be displayed. This will also be displayed
during initial setup as Bluetooth devices do not advertise when you’re connected to them. However, once monitor-
loaded again and show correctly. Also, if the softener(s) being monitored is not in Bluetooth range during the last
No Softeners Detected”.
iOS Salt Monitoring
iOS uses a widget to monitor the salt level and can be used on any device running iOS 14 or later. The widget can
be setup using the following steps:
From the Home Screen, touch and hold a widget or an
empty area until the apps start to jiggle. Once the apps
are jiggling, press the gray + button in the upper left-
hand corner.
A
12
Chandler Systems
12

Scroll down until you see Legacy View and tap that to
select it.
From here, you can click and drag the widget to the
home screen or click the “Add Widget” button. This will
place it on the home screen, and it will initiate an initial
scan.
Once the widget is on the home screen, you can either
tap any empty space or tap the “Done” button.
13

monitoring within the app by tapping the magnifying glass
icon from the brine tank settings dialog. Tapping the icon
button under the “Enable Monitoring” will explain the steps
to setup the widget. You can decide whether to include a
valve by toggling the option under “Include Softener”. This
must be done for each valve you want to monitor.
Note:
If no softeners have been included, then “No Softeners Detected” will be displayed. However, once you have en-
abled monitoring and included the softener to be monitored, then it will update when the next scan occurs. Also,
if the softener being monitored is not in Bluetooth range during the last scheduled scan, the widget will say “No
Softeners Detected”.
Troubleshooting
If the salt level in the tank is not tracking with the salt level reported in the app, then there is most likely a problem
tank properly. This could be the screen under the injector cover is plugged or the brine line flow control is fouled.
It could also not be properly drawing the water out of the brine tank, but this would probably be indicated by an
unusually high-water level in the brine tank. The injector could also need cleaned. If there is less salt than expect-
damaged or missing.
Once setup, the widget will trigger a Bluetooth scan
every 30 minutes, as mentioned above. If all softeners
display “Salt Level OK”. If a softener is reporting that
it has low salt, then “Salt Level Low” will be displayed.
Once you add more salt to your brine tank and adjust
-
ping this widget will also open the app.
A
14
Chandler Systems
14

Main Menu / Button Control
1. To enter main menu press the Menu/Enter button
(Time of Day will Flash)
2. To set time of day press the Set/Change button
(First digit will begin to flash)
-To change digit value press the Set/Change button
multiple times and then press the Menu button to
adjust the next digit
- (Next digit will flash)
- (Once hours is accepted all digits will flash)
3. With all digits flashing press the Menu button to set A.M. or
P.M.
- To change digit value press the Set/Change Button
until it is correct
- To accept the digit press the Menu/Enter Button
- (Once A.M./P.M. is accepted the next Menu/Enter
item will flash)
4. (Metered Version) Setting The Hardness
- To change digit value press the Set/Change button
multiple times and then press the Menu button to
adjust the next digit
- Once the Last Digit is Accepted all Digits will Flash
Note: One cycle must be completed before new
setting will be accepted.
15

A
16
Main Menu
5. (Filter Version)
-To change digit value press the Set/Change button mult
iple times and then press the Menu Button to adjust the
next digit
-Once the last digit is accepted all digits will flash
Notes: -Maximum Value is 29
-If value is Set to 0, automatic regeneration will never
occur
-Note: One cycle must be completed before new set-
ting will be accepted.
6. (Aeration Version)
-To change digit value press the Set/Change button mul-
tiple times and then press the Menu button to adjust the
next digit
-Once the last digit is accepted all digits will flash
-If value is set to 0, automatic regeneration will only occur
with a regeneration
Note: One cycle must be completed before new set
ting will be accepted.
7. To Exit menu press the Menu/Enter Button
Note: If no buttons are pressed for 60 seconds or long-
er the menu will automatically be exited.
Chandler Systems
16

Normal Operation
-As Treated Water is Used the Gallons Remaining Display will Count Down from a Maximum Value to 0.
-Once the Count Reaches 0 a Regeneration Cycle will be Initiated at the Next Designated Regeneration Time.
1. (Metered Version)
-Normal Display Alternates Between Time of Day and Gallons of Treated Water Remaining.
-When the display is Showing Gallons Remaining and there is Water Flow the Upper Colon Lights will Flash.
17

A
18
2. (Filter/Aeration Version)
-Normal Display Alternates Between Time of Day and Days Until Regeneration.
-Days Remaining Until the Next Regeneration will Count Down from the Regeneration Day Override Value to 1
Day Remaining.
-Once the Count Reaches 1 a Regeneration is Initiated at the Next Designated Regeneration Time.
Chandler Systems
18

Normal Operation
1. Battery Back-Up (This unit uses a standard 9 volt alkaline battery)
-Installing the battery
-The control valves have a battery wire that hangs down
from the control board into the battery tray
-From there, let the battery just sit in the tray
-Features of battery back-up
-Maintains the time of day during power failures.
-The battery back-up continues to count down gallons re-
maining during power failure (Metered Version)
Note:
* Menus can not be accessed during power failure
* If a power failure occurs while the valve is in regeneration the valve will cycle to a bypass position and will re-
sume the regeneration when power is restored.
Starting Extra Regeneration Cycles
1. Starting Delayed Extra Cycle
-(Metered Version)
-If gallons remaining is not already at 0 Press and Hold the Set/Change Button
-After 3 seconds the gallons remaining display will read 0 Example [ 0000 ]
-Regeneration cycle will be initiated at the next designated regeneration time
-(Filter/Aeration Version)
-If days remaining is not already at 1 press and hold the Set/Change Button.
-After 3 seconds the days remaining display will read 1
-Regeneration cycle will be Initiated at the next designated regeneration time
2. Starting Immediate Extra Cycle - First, Complete Above Delayed Cycle Steps
-(Metered Version)
-With gallons remaining at 0, press and hold the Set/Change button
-After 3 seconds the regeneration cycle will begin
-(Filter Version)
-With days remaining at 1 press and hold the Set/Change button
-After 3 seconds the regeneration cycle will begin.
3. Fast Cycling Thru Regeneration
-First complete above immediate cycle steps
-Press and hold the Set/Change button
-After 3 seconds the valve will start to advance to the next step
19

A
20
Master Programming Mode
Entering Master Programming Mode
-To Enter Master Programming Mode Press and Hold both buttons for 5 seconds.
Note: All Master Programming functions have been preset at the factory. Unless a change is desired it is
NOT necessary to enter the Master Programming Mode.
THIS IS EASIER TO DO ON THE LEGACY VIEW APP
Regeneration Time (r)
After pressing the Menu/Enter and Set/Change Button, the display shows the option setting for Regeneration
-
time - [ r 2A ] (Factory Setting for Softeners)
To adjust this value press the Set/Change button.
To accept the digit value press the Menu/Enter button.
Regeneration Day Override
Press Menu/Enter Button. This display is used to set the maximum amount of time (in days) the unit can be in ser-
at the set Regeneration Time. A 0 setting will cancel this feature. The Max Value for this item is 29.
Example: Override every 7 days - [ A - 07 ] (Factory Setting)
Cancel setting - [ A - 00 ]
To adjust this value press the Set/Change button.
To accept the digit value press the Menu/Enter button.
Chandler Systems
20
Table of contents
Other Chandler Systems Control Unit manuals
Popular Control Unit manuals by other brands

Sony
Sony MB0402C2 user manual
Kohler
Kohler K-10668 Homeowner's guide

Pentair
Pentair SUDMO IntelliTop 2.0 operating instructions
Redi Controls
Redi Controls RuptureSeal RS-2 operation & maintenance
Powers
Powers IntelliStation Jr User guide and instruction manual
DH Instruments
DH Instruments PG7600 installation instructions
