Channel Safety Systems Rapidfire User manual

CHANNEL SAFETY SYSTEMS t: 0845 884 7000 | w: www.channelsafety.co.uk
INSTRUCTION MANUAL - Issue 1 - 02/2014 | 1
INSTRUCTION MANUAL
CHANNEL SAFETY SYSTEMS t: 0845 884 7000
Peterseld Business Park f: 0845 884 6000
Bedford Road
Peterseld
Hampshire e: sales@channelsafety.co.uk
GU32 3QA w: www.channelsafety.co.uk
Temporary wireless battery operated re system
from Channel Safety Systems

CHANNEL SAFETY SYSTEMS t: 0845 884 7000 | w: www.channelsafety.co.uk
INSTRUCTION MANUAL - Issue 1 - 02/2014 | 2
The Rapidre Temporary wireless battery operated re system can combine up to 10 units, consisting of 1 master unit and 9 other break glass or smoke detec-
tor units. The Rapidre system is powered by batteries and requires no mains voltage supply.
Battery life
According to the number of units linked to the master unit, the life of the batteries will be:-
INTERFACE PRESENTATION & FEATURES
Master unit
Manual call point mounted in a white ABS box with integral sounder.
Master unit power supply
• Radio module: 3Vcc lithium 1300mAh battery.
• Break glass and sounder: 6 LR 61 Alkaline 9 volts battery
• Dimensions: 242 mm(H) x 126 mm(W) x 75 mm(D)
• Weight: 0.8Kg
• Average power consumption in standby: 2μA
Sounder
• Loudspeaker: 90 decibels @ 2 meters
• Visual alarm: Operates in conjunction with the sounder) 0,6 Hertz (1 ash every 1.5 seconds)
Manual call point (MCP)
Manual call point power supply
• Radio module:3Vcc lithium 1300mAh battery
• Average power consumption in standby: 0.60μA
Maximum range between the MCP and the master unit is 100 meters in free air condition.
This distance will be reduced within buildings. It is essential that full testing is carried out.
NUMBER OF UNITS 123456789
EXPECTED BATTERY LIFE
(IN YEARS)
12109876655
Test and operation key
The key has three functions:
1. Testing
2. Resetting the MCP
3. Opening the master unit

CHANNEL SAFETY SYSTEMS t: 0845 884 7000 | w: www.channelsafety.co.uk
INSTRUCTION MANUAL - Issue 1 - 02/2014 | 3
Opening and closing master unit
1. To open the master unit Use the black key xed on the top of the box
2. Press the two slots on the underside the box with the two pins of the key
3. The front face can now be removed by hinging upwards
4. To close the box, engage the top front face in the slots on top of the box. Clip the lower part of the front face to the back box
Master Unit - Mounting
Fix the box at maximum 1.30 meters high using the integrated spirit level.
1. Open the front face of the box
2. Mark the location of the holes
3. Drill the holes in the wall
4. Place the base of the box on the wall (using the integrated spirit level)
5. Insert & tighten the four screws.
6. Replace the facia
INTERFACE PRESENTATION & FEATURES CONTINUED...
Fix the manual call point between 1.2 & 1.6m high. Follow the same procedure as the master unit mounting.

CHANNEL SAFETY SYSTEMS t: 0845 884 7000 | w: www.channelsafety.co.uk
INSTRUCTION MANUAL - Issue 1 - 02/2014 | 4
Batteries insertion
CAUTION: please ensure the batteries are correctly installed. Observe the correct battery polarity. The PCB may be damaged if this is not carried out.
Master unit - Connect the 9 volts 6 LR 61 Alcaline battery to the corresponding terminals in the box, to the right of the loudspeaker.
Insert the lithium 3Vcc battery in to the radio module behind the MCP (lowest part of the box).
MCP - Insert the lithium 3Vcc battery in the base of the box.
BATTERIES

CHANNEL SAFETY SYSTEMS t: 0845 884 7000 | w: www.channelsafety.co.uk
INSTRUCTION MANUAL - Issue 1 - 02/2014 | 5
CONNECTION
Link manual call points & slave MCP/Sounder units to the master unit
Each unit should be linked to the master unit one at a time.
1. To link the MCP to the master unit, open the MCP or slave MCP/Sounder unit. Open the Master unit
2. Place the unit you wish to link next to the master unit
3. Press the CONFIGURATION button in the MCP or slave unit for 5 seconds (the unit will bleep to indicate each second)
4. Once the unit sent the conguration signal the buzzer will pulse and the amber LED will illuminate
5. Release the CONFIGURATION button
6. Press the VALIDATION button in the master unit until you hear a long bleep
7. The MCP/Slave unit is now linked to the master unit and will now enter the‘Signal strength’mode
8. Take the MCP or slave unit to the required location and ensure the signal strength is adequate. The MCP/Slave unit will regularly bleep up to 5 times to
indicate signal strength
9. If the signal strength is adequate, install the unit. (or relocate & check signal strength)
10. Press the VALIDATION button in the MCP/Slave unit
The unit is now operational
To add another MCP or master unit (slave) to the existing group: repeat the steps 1 to 10.
Maximum number of MCP, smoke detectors or slave units is 9 per master unit.

CHANNEL SAFETY SYSTEMS t: 0845 884 7000 | w: www.channelsafety.co.uk
INSTRUCTION MANUAL - Issue 1 - 02/2014 | 6
CONNECTION CONTINUED...
Link Smoke Detector to the Master unit.
Each unit should be linked to the master unit one at a time.
1. To link the smoke detector to the master unit, open the Master unit
2. Place the unit you wish to link next to the master unit
3. Remove the battery isolation tag (unit bleeps rapidly)
4. Within 20 seconds press the clear button/indicator on the side of the detector. Unit bleeps. Release button. LED ashes blue
5. Press the VALIDATION button in the master unit until you hear a long bleep
6. The detector is now linked to the master unit and will now enter the ‘Signal strength’mode
7. Take the detector to the required location and ensure the signal strength is adequate. The detector unit will regularly bleep up to 5 times to indicate
signal strength (see page 5 for signal strength). If the signal strength is adequate press the clear button on the side of the detector. Detector will bleep.
8. If the signal strength is adequate, install the unit. (or relocate & check signal strength)
Checking radio signal strength
When the MCP, smoke detector or slave unit is in signal strength mode it bleeps from 1 to 5 times within ba few seconds. These bleeps indicate the quality of
the radio reception (from very poor to very good). Ensure the location for each device gives at least 3 bleeps. If it does not then another location should be
chosen If the radio reception is poor, ensure that there are no obstructions in the radio path.
NUMBER OF BLEEPS 1 2 3 4 5
SIGNAL STRENGTH
Very Poor
+
Poor
++
Medium
+++
Good
++++
Very Good
+++++
Signal Strength not adequate Adequate Signal Strength
Setting up of the MCP, detectors and slave units
Place the unit at the required location.
Place the unit more than one meter from:
• Electrical switchboard or cables.
• Any metal object,
• Radio disturbance sources.
Avoid placing the unit on/near metal objects, electrical equipment or cabling.

CHANNEL SAFETY SYSTEMS t: 0845 884 7000 | w: www.channelsafety.co.uk
INSTRUCTION MANUAL - Issue 1 - 02/2014 | 7
DIAGNOSTICS
Diagnostic mode
The diagnostic mode allow you to check the quality of the signal strength between the master unit (master) and the MCP and slave units.
To activate the diagnostic mode, press the transparent switch on the master unit for at least 5 seconds.
The diagnostic mode is activated when
• The green LED of the master unit blinks
• Every unit linked to the master unit emits a bleeping sequence which corresponds to the quality of the signal strength.
To exit the diagnostic mode, press the transparent switch on the master unit (automatic exit after 15 minutes).
Faults
FAULTY UNIT INDICATED BY... AND BY...
Master Unit
Slave Unit
MCP
Flashing orange LED on the master unit One or several bleeps (every 30 seconds)
depending on the fault.
NUMBER OF BLEEPS FAULTY UNIT FAULT
1 Master Unit Battery
2 MCP integrated in the master unit Battery
3 MCP or slave unit Battery
4 At least 1 MCP or slave unit Communication fault
Identify the fault
The master unit sounds 1 to 4 bleeps depending on the fault:
The MCP or slave unit which has a fault is indicated by:
1 bleep every 30 seconds: battery fault
2 bleeps every 30 seconds: communication fault (no signal received from the master unit master in 24 hours)
Repair the fault by replacing the battery
Replace the defective battery by:
• Lithium 3Vcc CR 17 345 battery for the MCP (including the one installed in the master unit.
• 9V 6 LR 61 battery for the master unit.

CHANNEL SAFETY SYSTEMS t: 0845 884 7000 | w: www.channelsafety.co.uk
INSTRUCTION MANUAL - Issue 1 - 02/2014 | 8
Communication
Go on to the diagnostic mode to check the quality of the signal strength. Relocate if required.
Clear conguration
Should you wish to clear the conguration data to allow the units to be reused or relocated:
Master unit, MCP or Slave unit
• Open the MCP/Slave unit
• Press & hold the CONFIG button, the unit will bleep. Press & hold the VALID button. The unit will give a series of long bleeps followed by a series of short
bleeps followed by one long bleep. The unit is now decommissioned.
Smoke Detector
• The smoke detectors do not need to be‘de programmed’, simply de powering them using the battery isolate tag and then logging them on to a new
system carries out this function.
Operation
Manual Alarm
The general alarm is activated when one of the MCP’s is activated.
Resetting
Insert the black key in the MCP and turn 1/4 counter-clockwise to restore the normal position.
Testing
• Insert the key in the hole on the front face of the MCP.
• The MCP activates the alarm mode.
• Reset the MCP by turning 1/4 counter-clockwise
• Do not turn the key more than 1/4. Remove the key by turning clockwise.
Manual call point
Resetting
Once one of the MCP has been activated, reset it with the black key, turn the key 1/4 clockwise (remove key by turning clockwise) The alarm will silence in
about 15 seconds.
Internal LEDs
Amber LED: sends the alarm signal to the combined master unit
Red LED: the alarm is accepted by the master unit
Maintenance
We advise you to keep the equipment clean and to ensure that the installation is in a dry and ventilated area.
9V 6 LR 61 battery test
The system will automatically test the batteries every 12 hours.
Manual test
• Press the transparent switch on the master unit
• The indicators illuminate and will indicate the battery voltage
• The master unit emits a‘beep’at the same time as the indicators turns on to check that the loudspeaker works
Indication
The colour mode indicates the battery voltage:
As a precautionary measure, change the battery when the indicator is red. Always replace the batteries with the same type as originally supplied.
CONNECTION CONTINUED...
COLOUR VOLTAGE
Green 9 - 8 V
Orange 8 - 7.5 V
Red 7.5 - 7 V

CHANNEL SAFETY SYSTEMS t: 0845 884 7000 | w: www.channelsafety.co.uk
INSTRUCTION MANUAL - Issue 1 - 02/2014 | 9

INSTRUCTION MANUAL
CHANNEL SAFETY SYSTEMS t: 0845 884 7000
Peterseld Business Park f: 0845 884 6000
Bedford Road
Peterseld
Hampshire e: sales@channelsafety.co.uk
GU32 3QA w: www.channelsafety.co.uk
Other manuals for Rapidfire
1
Table of contents
Popular Smoke Alarm manuals by other brands
Ei Electronics
Ei Electronics Ei 181 Ionisation product manual
Elkron
Elkron FL100 Installation and user manual

Bosch
Bosch FCS-320-TP Series Quick installation guide
Siemens
Siemens DOW1171 Installation
C-LOGIC
C-LOGIC 700-SD instruction manual
System Sensor
System Sensor 2312/24T Installation and maintenance instructions
Teletek electronics
Teletek electronics SensoMAG S30 Installation instruction
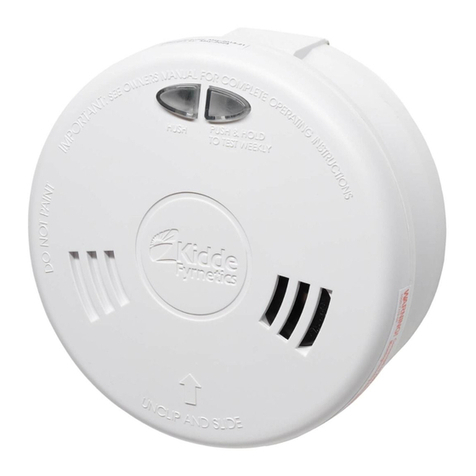
Kidde
Kidde Fyrnetics Slick 1SFW owner's manual

AirSense
AirSense Stratos Micra 10 Installer's handbook
System Sensor
System Sensor Innovair DH100ACDCLP Installation and maintenance instructions

Honeywell
Honeywell SiXSMOKE-CN Quick installation guide
Kidde
Kidde 0916E Brochure & specs
