Checkme O2 Max User manual
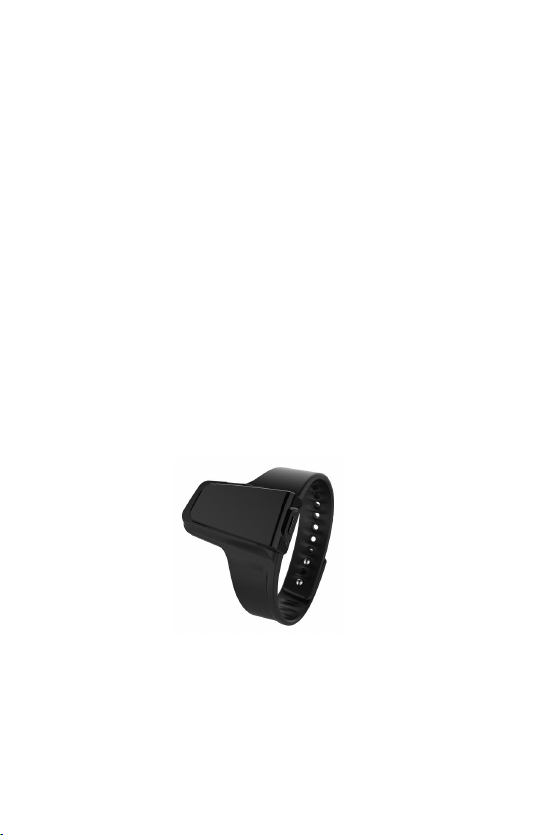
Checkme O2 Max
Smart Wrist Pulse Oximeter
User Manual

User’s Manual
Contents
1. Introduction............................................................................................ 1
2 Using the Monitor................................................................................... 4
3 PC software.............................................................................................8
4 Maintenance............................................................................................9
5 Troubleshooting......................................................................................9
6 Specifications........................................................................................10
7 Electromagnetic Compatibility............................................................11
1
1. Introduction
1.1 Intended Use
This product is intended to be used for measuring,
displaying and storing of pulse oxygen saturation
(SpO2),pulse rate and motion in home or healthcare
facilities environment. App can show real-time SpO2,
pulse rate; get record, display results and report.
Note:
The data and results provided by this device are for pre-check
screening purpose only and cannot be directly used for diagnostic
or treatment.
The data provided by the APP and PC software (optional) is not
intended for diagnosis or treatment purpose, always consult your
doctor for any health condition.
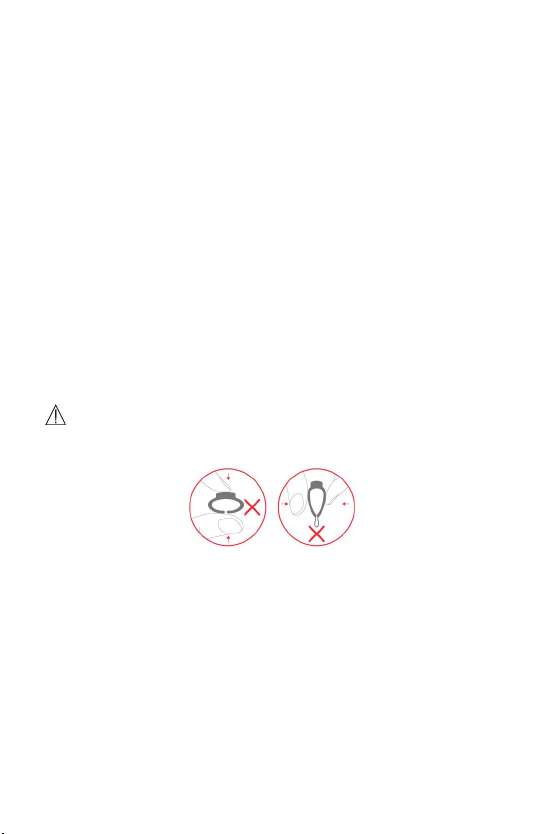
Warnings and Cautionary Advices
DO NOT squeeze the sensor or apply excessive force on
the sensor & cable.
Do not use this device during MRI examination.
Never submerge the device in water or other liquids. Do
not clean the device with acetone or other volatile solutions.
Do not place this device in pressure vessels or gas
sterilization device.
Consult your doctor immediately if you experience
symptoms that could indicate acute disease.
Do not self-diagnose or self-medicate on the basis of this
device without consulting your doctor. In particular, do not
start taking any new medication or change the type and/or
dosage of any existing medication without prior approval.
Use only cables, sensors and other accessories specified

2
in this manual.
Prolonged continuous SpO2monitoring may increase the
risk of undesirable changes in skin characteristics, such as
irritation, reddening, blistering or burns.
Check the SpO2sensor application site every 6-8 hours to
determine the positioning of the sensor and the circulation
and skin sensitivity of the patient. Patient sensitivity varies
depending on medical status or skin condition. For patients
with poor peripheral blood circulation or sensitive skin,
inspect the sensor site more frequently.
Functional tester cannot be used to assess the accuracy of
a SpO2sensor or a device.
This device is designed to determine the arterial oxygen
saturation percentage of functional hemoglobin. Factors
that may degrade pulse oximeter performance or affect the
accuracy of the measurement include the following:
- excess ambient light
- excessive motion
- electrosurgical interference
- blood flow restrictors
(arterial catheters, blood pressure cuffs, infusion lines,
etc.)
- moisture in the sensor
- improperly applied sensor
- incorrect sensor type
- poor pulse quality
- venous pulsations
- anemia or low hemoglobin -concentrations
- cardiogreen and other -intravascular dyes
- carboxyhemoglobin
- methemoglobin
- dysfunctional hemoglobin
3
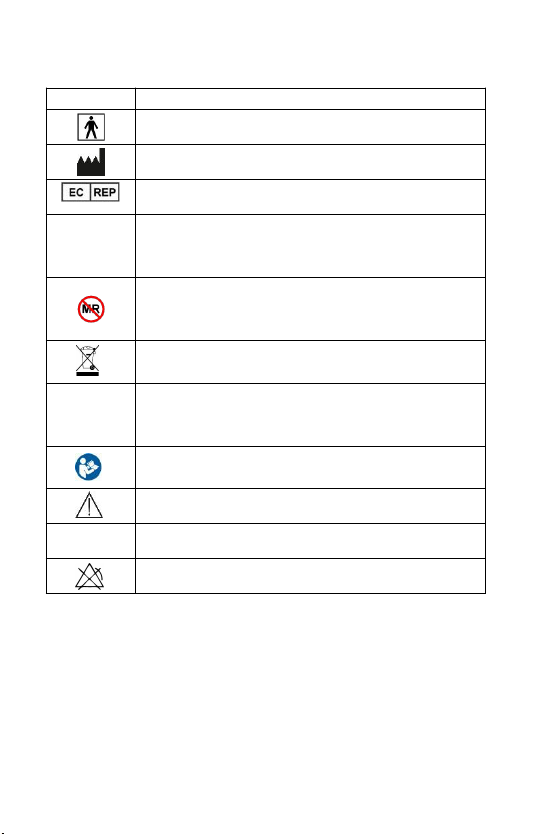
1.2 Guide to Symbols
1.3 Unpacking
Main Unit × 1
Ring Sensor × 1
Cable × 1
User Manual × 1
Symbol
Description
Type BF-Applied Part
Manufacturer
European authorized representative
CE0197
CE Marking indicating conformance to
EC directive No. 93/42/EEC concerning
medical devices.
MRI unsafe. Presents hazards in all MR
environments as device contains
strongly ferromagnetic materials.
Indicate separate collection for electrical
and electronic equipment (WEEE).
IP22
Protected against spraying water and
against access to hazardous parts with a
tool, per IEC 60529.
Follow Instructions for Use.
Warning and Caution!
SN
Serial number
No alarm system.

4
2 Using the Monitor
2.1 Overview
1. Pulse oximeter
2. Wristband
3. Sensor interface / charging interface
4. Power button
5. SpO2 sensor
Screen display item description:
SpO2
Pulse rate
Wear the sensor
Time
Remaining battery capacity
Alert is on
Alert is off
Bluetooth is connecting

5
2.2 Charging
Charge the battery before using.
Use the charge cable to charge the battery of device in
the USB Port of the computer or with USB charging
adapter.
After being fully charged, the device will power off
automatically.
2.3 POWER ON/OFF
POWER ON:
Press the button for 1 second to turn on the device.
POWER OFF:
Automatically power off: The device will turn off
automatically in 2 minutes if no measurement, no
operation or without App connection.
Manually power off: You can press the button for about
2 seconds to turn off.
2.4 TAKE THE FIRST RECORDING
START. Wear the device and the Ring Sensor, press
the button to power on. And keep yourself in the quiet
environment.
(For the sake of clarity, recommended the user wear the
monitor watch on their left wrist and put the ring sensor
on the thumb. If it is too tight, try another finger.
Avoid being loose.)

6
STOP. After the record, take off the Ring Sensor (and
the device), the recording will be
save after the countdown. (If the
working time is less than 1 minute,
the data will not be saved.)
Note:
Please avoid excessive motion for the sensed
finger during recording and avoid any strong
ambient light condition.
2.5 Stop monitoring & sync data
Take off the sensor, the countdown
will begin.
During the countdown, if you wear
the sensor again, the record will be
resumed.
After the countdown, the data will be ready for sync.
Note:
The duration of the recording is 1mins~10 hours. And
the device can collect and store maximum 4 recording,
when the 5th recording coming, the first recording will
be will covered.
Sync data to the ViHealth App
You can Sync the data to your app after
the countdown or next time after you
turn on the device.
Note: Refer the ViHealth app manual for more details.
2.5.1 How to find the Serial Number?
1)Detach the main unit from wristband.
2)Flip the main unit over, the series number is
printed on the label of product.

7
Note:
The serial number is on the back of the device.
2.6 How to synchronize the time of the device
The time of the monitor will be automatically
synchronized with the network time on your smart
device after connected with the app.
Note: Refer the ViHealth app manual for more details.
2.7 Alert
When the monitor detects low blood oxygen or
abnormal pulse rate, it supports triggering vibration
reminders or sound reminders.
You can customize the vibration reminder after the
monitor power on, or use the App to configure the
vibration intensity.
The sound reminder only can be configured on the App.
2.8 Download App
App name: ViHealth
iOS: App Store
Android: Google Play

8
Compatibility
The device is compatible with iOS versions 9.0+ and
Android versions 5.0+. Refer the ViHealth app manual
for more details.
2.9 Bluetooth Connection
The device Bluetooth will be enabled automatically
when the device is on.
Note: DO NOT PAIR in the settings of your smart
device.
3 PC software
3.1 Download the PC Software
PC Software: O2 Insight Pro
Download from: www.viatomtech.com/support
Install the software on Windows PC or Mac.
3.2 How to connect the monitor to PC
1. Turn on device, connect the device to PC USB
port with the supplied Cable of data.
2. Open the PC software, download data from the
device.
3. With the optional PC software,You can view and
print report, which can also be exported as PDF or
CSV files.
3.3 How to connect the monitor to Mac
1. Turn on device, and turn on the Bluetooth of the
Mac.

9
2. Open the “O2 Insight Pro” software and click the
“Connect” on the screen. Choose your device to
connect.
3. Then click the “download” on the screen. Then the
data will sync with your Mac.
4. You can view and print report, which can also be
exported as PDF or CSV files.
4 Maintenance
4.1 Cleaning
Use a soft cloth moistened with water or alcohol to
clean the device surface.
4.2 Battery
To keep the battery in good condition, charge the
battery every 6 months when the device is not in use.
5 Troubleshooting
Problem
Possible Cause
Possible Solution
Device does
not turn on or
no response.
Battery may be
low.
Charge battery and try
again.
Unexpected
software condition
Press the button for about
10 seconds to reset
Device might be
damaged.
Please contact your local
distributor.
The app
cannot find
the device.
The Bluetooth of
your phone is off.
Turn on the Bluetooth in
the phone.
10
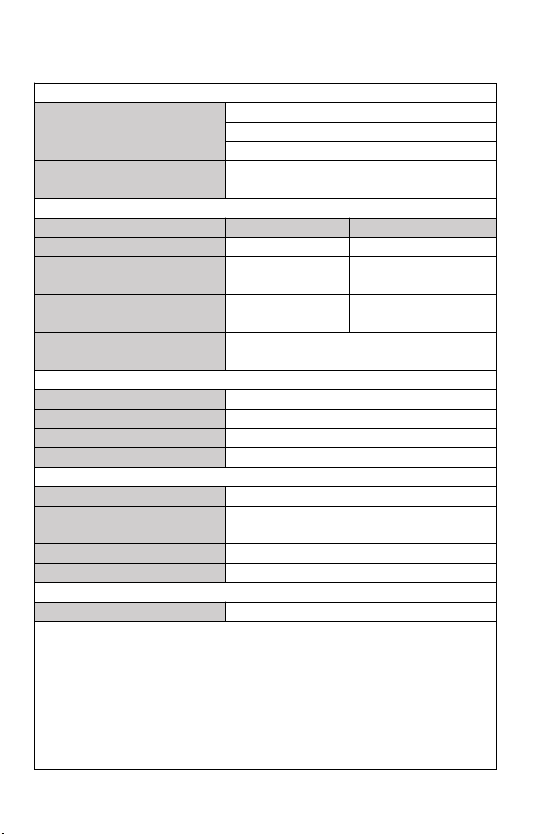
6 Specifications
Classifications
EC Directive
MDD, 93/42/EEC
R&TTE, 1999/5/EC
ROHS 2.0, 2011/65/EU
Degree protection
against electrical shock
Type BF
Environmental
Item
Operating
Storage
Temperature
5 to 40°C
-25 to 70°C
Relative humidity
(noncondensing)
10% to 95%
10% to 95%
Barometric
700 to 1060
hPa
700 to 1060 hPa
Degree of dust & water
resistance
IP22
Physical
Weight
18 g (main unit)
Display
OLED
Wireless
Bluetooth 4.0 BLE
Vibrator
Built in
Power Supply
Charge input:
DC 5V ±10%
Battery type
Rechargeable lithium-polymer
battery
Battery run time
72 hours
Charge time
2.5 hours
SpO2
Standards
Meet standards of ISO 80601-2-61
Measurement accuracy verification: The SpO2accuracy has
been verified in human experiments by comparing with arterial
blood sample reference measured with a CO-oximeter. The
pulse rate accuracy has been verified by Emulator. Pulse
oximeter measurement are statistically distributed and about
two-thirds of the measurements are expected to come within
the specified accuracy range compared to CO-oximeter
measurements.

11
SpO2range
70% to 100%
SpO2Accuracy (Arms)
80-100%:±2%, 70-79%:±3%
PR range
30 to 250 bpm
PR accuracy
±2 bpm or ±2%,whichever is
greater
Wave length
660-940nm
Output power
Red/Infrared: 3mW max. avg.
Storage
Capacity
4 records,10 hours for each
Mobile APP
iOS
iOS 9.0 or above, iPhone 4s/iPad
3 or above
Android
Android 5.0 or above, with
Bluetooth 4.0 BLE
7 Electromagnetic Compatibility
The device meets the requirements of EN 60601-1-2.
Warnings and Cautions
Using accessories other than those specified in this manual may
result in increased electromagnetic emission or decreased
electromagnetic immunity of the equipment.
The device or its components should not be used adjacent to or
stacked with other equipment.
The device needs special precautions regarding EMC and needs
to be installed and put into service according to the EMC
information provided below.
Other devices may interfere with this device even though they
meet the requirements of CISPR.
When the inputted signal is below the minimum amplitude
provided in technical specifications, erroneous measurements
could result.
Portable and mobile communication equipment may affect the
performance of this device.
Other devices that have RF transmitter or source may affect this
device (e.g. cell phones, PDAs, and PCs with wireless function).
EMC table information is listed on our website:


Shenzhen Viatom Technology Co., Ltd
4E,Building 3, Tingwei industrial Park,
Honglang North 2nd Road, Baoan, 518100
Shenzhen, P.R.China
www.viatomtech.com
MedNet GmbH
Borkstrasse 10, 48163 Muenster, Germany
Tel:+49 251 32266-0 Fax:+49 251 32266-22
2020.11 Version: A
Contents of this manual are subject to changes without prior
notice.
©Copyright 2020 Shenzhen Viatom Technology Co., Ltd. All
rights reserved.
Model: Oxiband
Table of contents
Popular Personal Care Product manuals by other brands


Sensio
Sensio SE30298P0 quick start guide

Easylife
Easylife EL1520 instruction manual

NARCI
NARCI NP-P100 user manual

Bodypoint
Bodypoint BB111 Installation and user instructions

Specialised Orthotic Services
Specialised Orthotic Services Custom Home Chair Moulded user manual

Tria
Tria Skin rejuvenating laser Getting started


