manuals.online logo
Brands
  1. Home
  2. •
  3. Brands
  4. •
  5. Chef's Choice
  6. •
  7. Accessories
  8. •
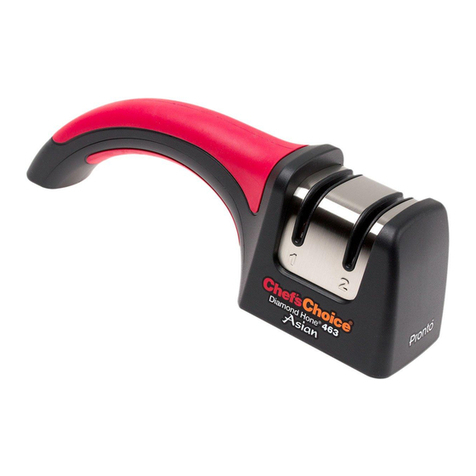
  9. Chef's Choice Pronto Diamond Hone 463 User manual

Chef's Choice Pronto Diamond Hone 463 User manual

Pronto™Diamond Hone®
Messerschleifger t für
asiatisches Messer
Modell 463
Wir gratulieren!!
Das Pronto™Model 463, konzipiert für die Schärfung von
asiatischen Messern, wird von Chef’sChoice®, dem
weltweit führenden Unternehmen auf dem Gebiet der
Schneidkantentechnologie, hergestellt. Es handelt sich
um ein überaus schnelles manuelles Messerschleifgerät
für eine beispiellos leistungsfähige Schneide bei Ihren
asiatischen Schneidwaren. Die Schneide ist auf
extreme Schärfe feingeschliffen, behält jedoch starke
mikroskopisch kleine Zähne bei, die sie bei allen
Anforderungen in der Speisenvorbereitung und
insbesondere bei Produkten mit Faserstruktur mühelos
durch das Material gleiten lassen. Die Schneide ist
überraschend haltbar, kann jedoch bei Bedarf schnell
nachgeschliffen werden.
Sie werden von der einfachen Handhabung des
Pronto™und der guten Leistung Ihrer asiatischen Messer
angenehm überrascht sein. Bitte lesen Sie die
Anweisungen sorgfältig durch, und befolgen Sie sie
USING PRONTO™
Note: Always clean your knife before sharpening in the
Pronto™!You will find that the Pronto™can create and
maintain an exceedingly sharp and effective edge on all
your conventional fine edge and serrated cutlery. The
primary edge facets are each formed in Stage 1 at a
nominal 15 degrees which results in a total primary edge
of 30 degrees (15° on each side). Stage 2 creates a
second bevel at a slightly larger angle leaving a strong
double beveled edge structure that will stay sharp longer.
Always use the sharpener with the stage numbers 1 and
2, facing you.
Safety: Keep your fingers clear of the blade edge at all
times. Hold the handle with your left hand making
certain that all your fingers and thumb remain safely
behind the partition wall where the handle attaches to the
sharpening stage.
FINE EDGE KNIVES STAGE 1
To sharpen, hold the sharpener on the table with your
left hand. Insert the knife blade into the slot of Stage 1.
Hold the blade level with the table, press down to bring
the knife edge into firm sustained contact with both of
the two internal diamond coated disks and slide the
blade back and forth in a sawing-like motion. For
optimum results center the blade left to right in the
slot and avoid rubbing against the walls of the slot.
Apply a downward force of about 4-5* pounds as you
move the blade. Listen carefully to the disks to insure
both disks are rotating when you move the blade.
Sharpening will not be as effective if you press too lightly
while sharpening.
If your knife, before sharpening, is not very dull you may
find that only about 10 or less back and forth stroke pairs
in Stage 1 (with recommended downward pressure) will
be sufficient to put a keen edge on the blade. However, if
the knife starts out very dull you may find that 20 or more
back and forth paired strokes will be needed the firsttime
as you reshape and sharpen the old edge. Before leaving
Stage 1 check the edge for sharpness by slicing a piece
Pronto™Diamond Hone®
Knife Sharpener for Asian
Knives Model 463
Congratulations!!
The Pronto™Model 463 designed to sharpen Asian style
blades is manufactured by Chef’sChoice®, the world’s
leader in cutting edge technology. It is an exceedingly fast
manual sharpener that will create an exceptionally
effective cutting edge on your Asian style cutlery. The
cutting edge is finely honed to extreme sharpness but
retains strong microscopic teeth that gives it a highly
effective bite for all your food prep needs and especially
for fibrous materials. The edge is surprisingly durable yet
can be resharpened quickly whenever necessary.
You will be pleased to see how easy the Pronto™is to
use and how well your Asian knives will perform. Read
and follow the instructions carefully.Keep the sharpener
close at hand so that you can enjoy the pleasure of sharp
knives every day.
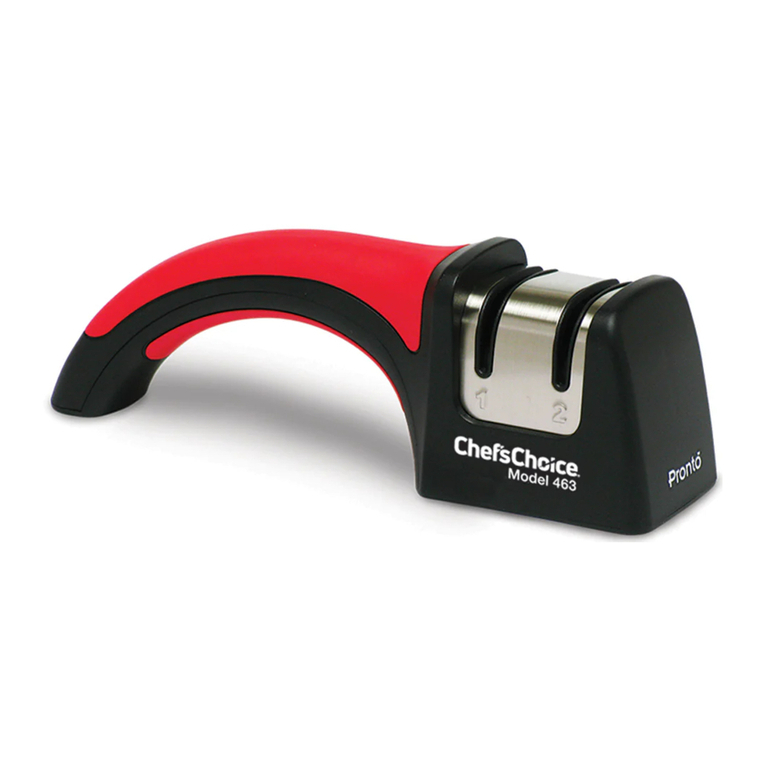
DESCRIPTION OF THE PRONTO™
You will appreciate that the soft touch ergonomical
handle of the Pronto™is extremely comfortable providing
a secure grip.There are two slots, the first (#1) uses fine
diamond abrasives to create and hone a sharp primary
edge and a second slot (#2) where that edge is ultrahoned
at a slightly larger angle with micron size diamonds to its
final sharpness.
In each, the first and second stage, both sides of the
edge are sharpened simultaneously by two precision
diamond coated conical honing disks. The orientation of
the disks is such that by sharpening in both stages the
entire length of the edge is sharpened.
Small rubber feet secure the Pronto™to any dry clean
surface. The soft touch handle further reduces the
opportunity for slippage while sharpening.
of paper. It should cut paper readily with only a slight
roughness to the cutting action.
* 4 to 5 pounds is about the weight of a 2 inch thick telephone book
STAGE 2
If the knife is correctly sharpened in Stage 1 only 2-5back
and forth stroke pairs in Stage 2 will complete the small
second bevel and the edge will be very sharp and
effective. It should cut paper smoothly allowing you to
make straight or curved cuts easily.
For optimum results center the blade (left and right)
within the slot and keep the length of the blade aligned
with the center line of the slot as you sharpen.Applyabout
3-4 pounds downward pressure on the blade in Stage 2.
Hold the blade level, make smooth consistent strokes
while maintaining recommended downward pressure
and make certain the disks are turning.
RESHARPENING THE KNIFE EDGE
Follow the procedure for Stage 2 described above for
“Using Pronto™”, making two to three (2-3) pairs of
strokes while maintaining recommended downward
pressure. Generally you should be able to resharpen
several times using only Stage 2. Listen to confirm the
sharpening disks are turning.Test edgefor sharpness and
if necessary make four (4) back and forth pairs of
repeated strokes in Stage 1 followed by two to three
(2-3) pairs in Stage 2.
SERRATED BLADES
Serrated blades can be sharpened in Stage 2. Center the
blade in the slot of Stage 2 and make five (5)
forward and back stroke pairs. Examine the edge and if
necessary make another 5 full strokes.Examine blade. If
the blade to be sharpened is very dull, first make two full
strokes (forward and back pairs) in Stage 1 and then
make five (5) paired strokes in Stage 2. Because of its
nature, a serrated knife will never appear as sharp or cut
as smoothly as a straight edged blade. Caution: Do not
make many strokes in Stage 1, which can quickly remove
metal from a serrated edge.
ASIAN BLADES
The Pronto™which sharpens at a primary angle of 15
degrees, can sharpen all double faceted Asian blades
such as the Santoku which is traditionally sharpened
at 15º.
Do not sharpen in the Pronto any single sided,
single facetedAsian Kataba knives, such as the traditional
sashimi styled blade that is commonly used to prepare
ultra thin sashimi.The Pronto™sharpens simultaneously
both sides of the cutting edge while the sashimi knives
are designed to be sharpened only on one side of the
blade. The versatile Chef’sChoice®Electric Model 15XV
and Model 1520 are designed to also sharpen all single
faceted Asian style knives.
CERAMIC KNIVES
The Pronto™is not recommended for ceramic knives.
SCISSORS
Do not attempt to use the Pronto™to sharpen scissors.
EdgeCraft does manufacture both electric and manual
scissor sharpeners.
BRANDS OF KNIVES
The Pronto™will put an excellent edge on all double bevel
15 degree Asian knives including Santoku style knives
regardless of brands, including Henckels, Wüsthof,
Sabatier, Lamson and Goodnow, Global, Forshner,
Russell Harrington, Forshner, Messermeisser, Mundial,
Cuisinart, Kitchen Aid, Shun and many, many more.
TEST FOR SHARPNESS
To test for sharpness and cutting ability of your knife,hold
a sheet of paper vertically by its upper edge and carefully
cut down through the sheet a small (but safe) distance
from your fingers.A sharp edge (on a straight edge blade)
will cut smoothly without tearing the paper.
Alternatively try cutting a tomato. The knife should
penetrate the skin of the tomato and cut through
it on the first pull without applying significant force to
the knife.
MAINTENANCE:
• The exterior can be cleaned with a damp
soft cloth
• Periodically shake out and dispose of the metal
sharpening dust by inverting the sharpener and
lightly tapping it onto a newspaper, paper towel,or
other paper sheet.
• No oils or other lubricating liquids are necessary
with this sharpener.
Limited Warranty: Used with normal care, this EdgeCraft product is
guaranteed against defective material and workmanship fora period of
one (1)year from dateof original purchase (“WarrantyPeriod”).We will
replace or repair, at our option,any product or part that is defective in
material or workmanshipwithout charge if the product is returned to us
postage paid with dated proof of purchase within the
Warranty Period.This warranty doesnot applyto commercial useor any
product abuse. ALL IMPLIED WARRANTIES, INCLUDING IMPLIED
WARRANTIES OFMERCHANTABILITYAND FITNESS FOR A PARTICULAR
PURPOSE, ARE LIMITED TO THE WARRANTY PERIOD. EDGECRAFT
CORPORATION SHALL NOT BE LIABLE FOR ANY INCIDENTAL OR
CONSEQUENTIAL DAMAGES. Some states do not allow limitations on
how long an implied warranty lasts and some states do not allow
exclusions orlimitationsof incidental or consequentialdamages,so the
above limitations or exclusions may not apply to you. This limited
warranty gives you specific legal rights, and you may also have other
rightswhich vary from state to state.
Figure 2. K ife i Stage 2.
Figure 1. K ife i Stage 1. Use back a d forth
sharpe i g strokes with modest dow ward pressure
(See text.) Figure 3. Serrated k ife i Stage 2.
GB
entsprechend. Bewahren Sie das Messerschleifgerät
immer griffbereit auf, damit Sie nie auf das Vergnügen
verzichten müssen, jeden Tag mit scharfen Messern
zu arbeiten.
BESCHREIBUNG DES PRONTO™
Der ergonomische Soft-Haltegriff des Pronto™ist äußerst
bequem und liegt sicher in der Hand. Das Gerät weist
zwei Schlitze auf: Im ersten (#1) werden feine
Diamantschleifmittel verwendet, um eine scharfe erste
Schneide zu erzeugenund abzuziehen. Im zweiten Schlitz
(#2) wird die Schneide mit mikroskopisch kleinen
Diamanten in einem etwas größeren Winkel zu ihrer
endgültigen Schärfe feingeschliffen.
In beiden Stufen werden beide Seiten der Schneide
gleichzeitig von zwei diamantbeschichteten konischen
Präzisionsschleifscheiben geschliffen. Die Scheiben
sind so ausgerichtet, dass in beiden Stufen die Schneide
über ihre gesamte Länge geschliffen wird.
Kleine Gummifüße bieten dem Pronto™sicheren Halt
auf jeder trockenen und sauberen Oberfläche. Der
Soft-Haltegriff verringert des Weiteren die Gefahr, beim
Schleifen abzurutschen.
GEBRAUCH DES PRONTO™
Hinweis: Reinigen Sie das Messer grundsätzlich vor dem
Schleifen mit dem Pronto™!Sie werden feststellen, dass
der Pronto™überaus scharfe, leistungsstarke und
haltbare Schneiden bei all Ihren üblichen Schneidwaren
mit Glatt- und Sägeschliff erzeugt. Die ersten Arbeitss-
chritte werden jeweils in Stufe 1 mit einem Nominal-
winkel von 15 Grad gebildet, wodurch eine erste
Schneide mit einem Gesamtwinkel von 30 Grad entsteht
(15° auf jeder Seite). Die 2. Stufe erzeugt eine zweite
Zuschärfung in einem etwas größerenWinkel und bildet
somit eine starke, beidseitig zugeschärfte Schneidstruk-
tur, deren Schärfe länger hält. Verwenden Sie das
Schleifgerät immer so, dass die Zahlen der Stufen 1 und
2 zu Ihnen hin zeigen.
Sicherheit: Halten Sie die Finger immer von der
Klinge fern.Halten Sie den Griff mit der linken Hand und
achten Sie darauf, dass sich alle Finger und der Daumen
D I
hinter der Schutzabtrennung befinden, die Griff und
Schleifstufe voneinander trennt.
MESSER MIT GLATTSCHLIFF PHASE 1
Zum Schleifen halten Sie das Schleifgerät mit der linken
Hand auf dem Tisch fest. Führen Sie die Klinge in den
Schlitz der ersten Stufe ein. Halten Sie das Messer
waagerecht zum Tisch, drücken Sie die Schneide nach
unten, bis sie die beiden internen diamantbeschichteten
Scheiben berührt, und bewegen Sie die Klinge in einer
sägeähnlichen Bewegung vor und zurück. Für ein
optimales Ergebnis zentrieren Sie die Klinge in der Mitte
des Schlitzes und vermeiden Sie ein Scheuern der Klinge
an den Seitenwände des Schlitzes. Drücken Sie die Klinge
mit der Kraft eines Gewichts von ca. 2 bis 2 1/2*
Kilogramm nach unten.Achten Sie sorgfältig darauf, dass
sich beide Scheiben beim Bewegen der Klinge drehen.
Der Schleifvorgang ist nur dann effektiv, wenn Sie beim
Schleifen ausreichenden Druck ausüben.
Wenn das Messer vor dem Schleifen nicht sehr
stumpf ist, genügen in Stufe 1 möglicherweise schon
10 oder weniger Vor- und Zurückbewegungen (mit dem
empfohlenen Druck nach unten), um für eine scharfe
Schneide der Klinge zu sorgen. Wenn die Klinge zu
Beginn jedoch sehr stumpf ist, müssen Sie sie
möglicherweise mehr als 20 Mal vor und zurück
bewegen, um die alte Schneide neu zu formen und zu
schleifen. Bevor Sie Stufe 1 abschließen, prüfen Sie die
Schärfe der Schneide, indem Sie ein Blatt Papier
durchschneiden. Die Schneide sollte das Papier
problemlos schneiden können und nur eine leicht raue
Schnittkante hinterlassen.
* 2 bis 2 1/2 Kilogramm entsprechen in etwas dem Gewicht eines
5 cm dicken Telefonbuchs.
STUFE 2
Wenn das Messer in Stufe 1 richtig geschliffen wurde,
sind in Stufe 2 nur 2-5 Vor- und Zurückbewegungen nötig,
um die kleine zweite Zuschärfung zu vervollständigen,
damit die Schneide äußerst scharf und leistungsfähig
ist.Es sollte Papier glatt durchschneiden und problemlos
gerade oder bogenförmige Schnitte ermöglichen.
Abbildu g 2. Messer i Stufe 2.
Abbildu g 1. Messer i Stufe 1. Zum Schleife mit
mäßigem Druck ach u te vor- u d zurückbewege
(siehe Text). Abbildu g 3. Messer mit Sägeschliff i Stufe 2.
D
Made in the USA
By the makers of the professional Chef’sChoice®
Diamond Hone®Knife Sharpeners, sold worldwide,
EdgeCraft Corporation
825 Southwood Road
Avondale, PA 19311, USA
(800)-342-3255; (610)-268-0500
Chef’sChoice®and EdgeCraft®are registered trademarks of the
EdgeCraft Corporation.
Patents pending.
© EdgeCraft Corporation 2010
M631950 G10
www.chefschoice.com
™
Affilatore Pronto™
Diamond Hone®per coltelli
asiatici modello 463
Congratulazioni!
Il modello 463 Pronto™, appositamente realizzato per
affilare lame asiatiche, è prodotto da Chef’sChoice®,
il leader a livello mondiale nella tecnologia dedicata ai fili
delle lame.Si tratta di un affilatore manuale sorprenden-
temente veloce e in grado di realizzare fili estremamente
taglienti,per coltelli asiatici affilati come rasoi.Il filo della
lama viene finemente levigato per ottenere la massima
affilatura. Tuttavia, conserva una seghettatura micro-
scopica estremamente efficace,così da garantire coltelli
straordinari per la preparazione di cibi, in particolare per
l'uso con sostanze fibrose.La lama presenta una durata
sorprendente e può essere riaffilata rapidamente in
qualsiasi momento si riveli necessario.
È fantastico scoprire la semplicità d’uso di Pronto™e la
straordinaria efficienza dimostrata nell’affilatura dei
coltelli asiatici.Leggere e seguire le istruzioni con atten-
zione. Tenere l’affilatore a portata di mano per godere
di tutti i vantaggi garantiti da coltelli sempre affilati.
DESCRIZIONE DI PRONTO™
L'impugnatura morbida ed ergonomica di Pronto™offre
una presa sicura ed estremamente confortevole. Sono
presenti due spazi, il primo (n. 1) utilizza abrasivi in
Modell 15XV und das Model 1520 dienen zum Schärfen
von jeglichen einschneidigen asiatischen Messern.
KERAMIKMESSER
Der Pronto™wird nicht für Keramikmesser empfohlen.
SCHEREN
Versuchen Sie nicht, den Pronto™zum Schleifen von
Scheren zu verwenden. EdgeCraft produziert sowohl
elektrische als auch manuelle Scherenschleifgeräte.
MESSERMARKEN
Mit dem Pronto™erzielen Sie bei allen beidseitig
zugeschärften asiatischen 15-Grad-Messern, wie z. B.
Santoku-Messern, eine ausgezeichnete Schneide,
ungeachtet der Marke, einschließlich Henckels, Wüsthof,
Sabatier, Lamson und Goodnow, Global, Forshner,
Russell Harrington, Messermeisser, Mundial, Cuisinart,
Kitchen Aid, Shun und viele viele mehr.
SCHÄRFETEST
Zum Prüfen der Schärfe und Schneidfähigkeit des
Messers halten Sie ein Blatt Papier vertikal am oberen
Rand fest und schneiden Sie das Blatt in geringer (aber
sicherer) Entfernung von den Fingern ein. Eine scharfe
Schneide (bei Klingen mit Glattschliff) schneidet sanft
durch das Papier ohne es einzureißen.
Alternativ können Sie auch versuchen, eine Tomate zu
schneiden. Das Messer sollte die Haut der Tomate durch-
dringen und sie auf Anhieb ohne großen Druckaufwand
durchschneiden.
PFLEGE:
• Die Außenseite kann mit einem feuchten,
weichen Tuch gereinigt werden.
• Entfernen Sie regelmäßig den beim Schleifen
entstehenden Metallstaub; drehen Sie das
Messerschleifgerät dazu um und klopfen es
leicht auf eine Zeitung, ein Papiertuch oder ein Blatt
Papier aus.
• Für dieses Messerschleifgerät sind weder Öle noch
andere Schmiermittel erforderlich.
Begrenzte Garantie:Bei normaler Benutzung diesesProdukts gewährt
EdgeCraft eine Garantie auf fehlerhaftes Material und Montagefehler
für einen Zeitraum von einem (1) ahr ab dem Kaufdatum
(„Garantiezeitraum“). Produkte bzw. Teile mit Material- oder Ferti-
gungsfehlern werden nach unserem Ermessen kostenlos ersetzt oder
repariert, wenn das Produkt mit datiertem Kaufnachweis innerhalb der
Garantiezeit mit bezahlten Portokosten an uns zurückgesandt wird.
Diese Garantie trifft nicht für gewerbliche Nutzung oder jederArt von
Missbrauch des Produktes zu. ALLE GARANTIELEISTUNGEN, EIN-
SCHLIESSLICH MARKTFÄHIGKEIT ODER EIGNUNG FÜR EINEN BES-
TIMMTEN ZWECK, SIND AUF DEN GEWÄHRLEISTUNGSZEITRAUM
BEGRENZT. DAS UNTERNEHMEN EDGECRAFT HAFTET NICHT FÜR
NEBEN-ODER FOLGESCHÄDEN.In einigenStaaten sindEinschränkun-
gen der gesetzlichen Garantiefrist und in anderen Ausschlüsse oder
Einschränkungen von beiläufig entstandenen oder Folgeschäden nicht
zulässig. Die oben angeführten Einschränkungen bzw. Ausschlüsse
gelten für Sie daher möglicherweise nicht. Diese Garantieerklärung
sichert Ihnen bestimmte Rechte zu, die durch weitere Rechte ergänzt
werdenkönnen, dievon Staat zu Staatunterschiedlich sind.
diamante fini per creare e levigare un filo primario
tagliente, mentre il secondo (n. 2) è destinato a una
levigatura extra, eseguita su un angolo lievemente
superiore con diamanti delle dimensioni di un micron, per
il conferimento del livello di affilatura finale.
Sia nella prima che nella seconda fase,entrambi i lati
del filo della lama vengono affilati simultaneamente
grazie all’uso di due dischi conici di levigatura di
precisione rivestiti in diamante.L’orientamento dei dischi
è tale da consentire l’affilatura in entrambe le fasi e per
tutta la lunghezza del filo della lama.
I piedini in gomma applicati consentono di fissare
Pronto™su qualsiasi superficie asciutta e pulita. Inoltre,
l'impugnatura morbida riduce ulteriormente l'eventualità
che il dispositivo scivoli nel corso dell’affilatura.
UTILIZZO DI PRONTO™
Nota: pulire sempre il coltello prima di affilarlo con
Pronto™!Pronto™può creare e mantenere fili straordi-
nariamente affilati ed efficienti per tutti i tradizionali coltelli
a lama fine e seghettata. Le facce del filo primario
vengono formate in fase 1, a 15 gradi nominali,al fine di
ottenere un filo della lama primario di 30 gradi totali (15°
su ciascun lato). In fase 2 si crea una seconda
smussatura, eseguita a un angolo lievemente superiore e
finalizzata a costituire un doppio filo smussato e, di
conseguenza, garantire una maggiore durata dell'affi-
latura. In fase 1 e 2, impiegare l’affilatore rivolgendo
sempre la parte anteriore verso l’utilizzatore.
Sicurezza: tenere sempre le dita lontano dall'estrem-
ità della lama. Tenere l’impugnatura con la mano sinistra
accertandosi che tutte le dita, pollice compreso, siano
posizionate correttamente dietro la parete divisoria, posta
tra impugnatura e area di affilatura.
COLTELLI A LAMA FINE - FASE 1
Per eseguire l'affilatura, tenere fermo sul tavolo
l'affilatore utilizzando la mano sinistra. Inserire la lama
del coltello nello spazio di fase 1. Allineare la lama al
tavolo, quindi premere verso il basso per portare il filo del
coltello a contatto fisso con ambo i dischi interni rivestiti
in diamante. Successivamente, far scorrere la lama in
avanti e indietro con un movimento simile a quello usato
per segare. Per garantire risultati ottimali, centrare la lama
nello spazio procedendo da sinistra a destra edevitando
sfregamenti contro le pareti dello spazio stesso. Durante
lo spostamento della lama, esercitare una pressione verso
il basso pari a circa 2* kg. Ascoltare con attenzione il
suono emesso dai dischi per assicurarsi che entrambi
ruotino al passaggio della lama. Una pressione troppo
lieve potrebbe pregiudicare l’efficacia dell’affilatura.
Se, prima dell’affilatura, il coltello non è eccessiva-
mente smussato, in fase 1 potrebbero essere sufficienti
10 passaggi avanti e indietro, o meno, per ottenere
un'affilatura adeguata (qualora sia applicata la pressione
verso il basso richiesta). Tuttavia, per coltelli molto
smussati potrebbero essere richiesti 20 o più passaggi
avanti e indietro quando si tenta per la prima volta di
ridare forma e di affilare un vecchio filo. Prima di passare
alla fase successiva, controllare l’affilatura della lama
provando a tagliare un pezzo di carta. La carta deve poter
essere tagliata rapidamente, con un’azione decisa.
* 2 kg equivale,all’incirca, al peso di una rubrica telefonica di 4 cm
di spessore
FASE 2
Se il coltello è affilato correttamente in fase 1, in fase 2
saranno necessari solo 2-5 passaggi avanti e indietro per
realizzare la seconda piccola smussatura e rendere la
lama eccezionalmente tagliente ed efficace. Le lame
sottoposte a questa procedura devono tagliare la carta
con estrema semplicità consentendo di effettuare tagli
dritti o curvi senza il minimo sforzo.
Per risultati ottimali, centrare la lama all’interno dello
spazio (procedendo da sinistra a destra) e allinearla nel
senso della lunghezza alla linea mediana dello spazio
stesso in fase di affilatura.In fase 2, applicare sulla lama
una pressione verso il basso di circa 1,5 kg. Tenere la
lama allineata, eseguire passaggi decisi e corretti
esercitando al contempo la pressione verso il basso
indicata e assicurarsi che i dischi stiano ruotando.
RIAFFILATURA DEL FILO DELLA LAMA
Seguire la procedura di fase 2 descritta sopra nella
sezione “Utilizzo di Pronto™”,effettuando due o tre (2-3)
passaggi avanti e indietro e continuando a esercitare la
pressione verso il basso consigliata. Di norma,un coltello
dovrebbe poter essere riaffilato più volte utilizzando
esclusivamente la procedura di fase 2. Ascoltare i suoni
emessi per verificare che i dischi stiano ruotando come
richiesto. Verificare l’affilatura del filo della lama e, se
necessario,eseguire quattro (4) passaggi avanti e indietro
ripetuti come da fase 1, seguiti da due o tre (2-3)
passaggi avanti e indietro come da fase 2.
LAME SEGHETTATE
Le lame seghettate possono essere affilate in fase 2.
Centrare la lama nello spazio di fase 2 ed effettuare
cinque (5) passaggi avanti e indietro. Esaminare il filo
della lama e, se necessario, procedere con altri 5
passaggi avanti e indietro.Esaminare la lama.Se la lama
da affilare è eccessivamente smussata, procedere
innanzitutto con due passaggi avanti e indietro di fase 1,
quindi aggiungere altri cinque (5) passaggi avanti e
indietro di fase 2. In virtù della sua natura, il coltello
seghettato non potrà mai risultare affilato o tagliente
come un coltello a lama piatta. Attenzione: evitare di
eseguire un numero eccessivo di passaggi avanti e
indietro in fase 1, per evitare la rimozione di metallo dalla
lama seghettata.
LAME ASIATICHE
L’affilatore Pronto™, utilizzato per affilare a un angolo
primario di 15 gradi, può affilare tutte le lame asiatiche
a doppia faccia, quali le lame Santoku, di norma affilate
a 15º.
Non utilizzare Pronto per affilare coltelli asiatici Kataba
a una faccia,quali le tradizionali lame stile sashimi usate
comunemente per preparare questo tipo di pietanza nel
caso in cui si desideri realizzarla con pesce tagliato molto
finemente. Pronto™affila simultaneamente entrambi i
lati del filo della lama, mentre i coltelli sashimi sono
progettati per essere affilati solo su un lato. I versatili
modelli elettrici Chef’sChoice®15XV e 1520 sono
progettati per affilare anche tutti i coltelli asiatici a una
sola faccia.
COLTELLI IN CERAMICA
Pronto™non è consigliato per i coltelli in ceramica.
FORBICI
Non tentare di usare Pronto™per affilare le forbici.
EdgeCraft produce affilatori per forbici sia elettrici
che manuali.
MARCHI DI COLTELLI
Pronto™garantisce uno straordinario filo della lama su
tutti i coltelli asiatici con doppio filo smussato da
15 gradi, compresi coltelli stile Santoku. Non si
prevedono distinzioni dovute ai vari tipi di marchi, quali
Für ein optimales Ergebnis richten Sie die Klinge (links
und rechts) mittig in dem Schlitz aus und achten Sie
darauf, dass die gesamte Länge der Klinge während des
Schleifens im Schlitz zentriert bleibt. Üben Sie in Stufe 2
ca. 1 1/2 bis 2 Kilogramm Druck nach unten auf
die Klinge aus. Halten Sie das Messer waagerecht, führen
Sie gleichmäßige Bewegungen mit dem empfohlenen
Druck aus und achten Sie darauf, dass die Scheiben
sich drehen.
NACHSCHLEIFEN DER MESSERSCHNEIDE
Gehen Sie gemäß dem Verfahren für Stufe 2,wie obenim
Abschnitt „Gebrauch des Pronto™” beschrieben, vor und
führen Sie zwei bis drei (2-3) Vor- und Zurückbewegun-
gen mit dem empfohlenen Druck nach unten aus. Im
Allgemeinen sollte ein mehrmaliges Nachschleifen nur
mit Stufe 2 möglich sein.Vergewissern Sie sich, dass sich
die Schleifscheiben drehen. Prüfen Sie die Schärfe der
Schneide und führen Sie nötigenfalls jeweils vier (4)
Vor- und Zurückbewegungen in Stufe 1 und anschließend
zwei bis drei (2-3) Vor- und Zurückbewegungen in
Stufe 2 aus.
KLINGEN MIT SÄGESCHLIFF
Klingen mit Sägeschliff können in Stufe 2 geschliffen
werden. Setzen Sie die Klinge mittig in den Schlitz der
Stufe 2 ein und führen Sie jeweils fünf (5) Vor- und
Zurückbewegungen aus. Prüfen Sie die Schneide und
führen Sie nötigenfalls 5 weitere Vor- und Zurückbewe-
gungen aus. Prüfen Sie die Klinge. Wenn die Klinge, die
geschliffen werden soll, sehr stumpf ist,führen Sie zuerst
2 volle Bewegungen (jeweils 2 Vor- und Zurückbewe-
gungen) in Stufe 1 aus und anschließend fünf (5) volle
Bewegungen in Stufe 2. Aufgrund ihrer Beschaffenheit
wirkt die Schneide eines Messers mit Sägeschliff nie so
scharf oder schneidet nie so sanft wie eine Klinge mit
Glattschliff. Vorsicht: Führen Sie in Stufe 1 nur wenige
Bewegungen aus,da sonst der Metallabrieb von Messern
mit Sägeschliff beschleunigt wird.
ASIATISCHE KLINGEN
Der Pronto™, der mit einem primären Winkel von 15 Grad
schärft, kann ebenfalls doppelschneidige asiatische
Klingen schleifen, wie beispielsweise Santoku-Messer,
die üblicherweise mit 15 Grad geschliffen werden.
Verwenden Sie den Pronto nicht zum Schleifen von
einseitigen, einschneidigen asiatischen Kataba-Messern,
wie z.B. dem traditionellen Sashimi-Messer, dass im
Allgemeinen zum Schneiden von ultradünnem Sashimi
verwendet wird. Der Pronto™schleift gleichzeitig beide
Seiten der Schneide; Sashimi-Messer sind jedoch so
konzipiert, dass nur eine Seite der Klinge geschliffen wird.
Das vielseitig einsetzbare elektrische Chef’sChoice®
Hergestellt in den USA
Von den Herstellern der professionellen, weltweit
im Handel erhältlichen Chef's Choice®Diamond Hone®
Messerschleifgeräte.
EdgeCraft Corporation
825 Southwood Road
Avondale, PA 19311, USA
(800)-342-3255; (610)-268-0500
Chef's Choice®und EdgeCraft®sind eingetragene Warenzeichen
der EdgeCraft Corporation.
Patente angemeldet.
© EdgeCraft Corporation 2010
M631950 G10
www.chefschoice.com
Fabbricato negli Stati Uniti
Dai produttori degli affilatori professionali Chef’sChoice®
Diamond Hone®,venduti in tutto il mondo,
EdgeCraft Corporation
825 Southwood Road
Avondale, PA 19311, Stati Uniti
(800)-342-3255; (610)-268-0500
Chef’sChoice®ed EdgeCraft®sono marchi registrati di EdgeCraft
Corporation.Brevetti in corso di registrazione.
© EdgeCraft Corporation 2010
M631950 www.chefschoice.com G10
I
Figura 2. Coltello i fase 2.
Figura 1. Coltello i fase 1. Effettuare passaggi di
affilatura ava ti e i dietro esercita do u a pressio e
moderata verso il basso (vedere il testo). Figure 3. Coltello seghettato i fase 2.
Henckels, Wüsthof, Sabatier, Lamson and Goodnow,
Global, Russell Harrington, Forshner, Messermeisser,
Mundial, Cuisinart, Kitchen Aid, Shun e molti altri.
TEST DI AFFILATURA
Per testare l’affilatura e la capacità di taglio del coltello,
tenere un foglio di carta verticalmente per il bordo
superiore e tagliare attentamente a una breve ma sicura
distanza dalle dita.Un filo della lama affilato (di una lama
piatta) esegue il taglio senza lacerare la carta.
In alternativa, tagliare un pomodoro. Il coltello deve
perforare la buccia del pomodoro e tagliarla alla prima
pressione senza che sia necessario applicare una
forza eccessiva.
MANUTENZIONE:
• Pulire l’esterno con un panno soffice e umido
• Periodicamente, scuotere l’affilatore posizionandolo
sottosopra su un foglio di carta di giornale, una
salvietta o un altro foglio di carta e
picchiettarlo per rimuovere la polvere metallica
accumulatasi all’interno.
• L’affilatore non richiede l’impiego di olio o altri
liquidi lubrificanti.
Garanzia limitata: Se usato inaccordoalle normali precauzioni, questo
prodotto EdgeCraft è garantito dadifetti dimaterialee fabbricazione per
un periodo pari a 1 (un) anno a decorrere dalladata d'acquisto originale
("Periododi garanzia"). Sarà sostituito o riparato,a discrezione della So-
cietà e senza costi aggiuntivi, qualsiasi prodotto o parte di esso che
risulti difettoso nelmaterialeo nella fabbricazione, qualora restituitocon
affrancatura prepagata entro la scadenza del periodo di garanzia e
corredato di provad'acquistoattestantela data. Questa garanzia non è
applicabileagli usi commerciali o in casodi usi non corretti delprodotto.
TUTTE LEGARANZIE IMPLICITE, INCLUSE QUELLE DI COMMERCIABIL-
ITÀ O DI IDONEITÀ A UNO SCOPO, SONO LIMITATE AL PERIODO DI
GARANZIA. EDGECRAFT CORPORATION DECLINA OGNI RESPONSABIL-
ITÀ RISULTANTE DA DANNI ACCIDENTALI O CONSEQUENZIALI. Alcuni
Paesinon ammettono limitazioni sulladurata di una garanzia implicita,
mentrealtri non consentono l'esclusione o la limitazione di danni acci-
dentali o consequenziali. Pertanto,le limitazioni o le esclusioni sopra in-
dicate potrebbero non essere applicabili per l'acquirente. La presente
garanzia limitata conferisce diritti legali specifici,oltre ad altri possibili
diritti che variano a secondadel Paese.
™
™

Other manuals for Pronto Diamond Hone 463

6

Other Chef's Choice Accessories manuals

Chef's Choice Chef's Choice AngleSelect DC 1520 User manual

Chef's Choice

Chef's Choice Chef's Choice AngleSelect DC 1520 User manual

Chef's Choice 442 User manual

Chef's Choice

Chef's Choice 442 User manual

Chef's Choice Diamond Hone 115 User manual

Chef's Choice

Chef's Choice Diamond Hone 115 User manual

Chef's Choice Pronto Diamond Hone 464 User manual

Chef's Choice

Chef's Choice Pronto Diamond Hone 464 User manual

Chef's Choice 250 User manual

Chef's Choice

Chef's Choice 250 User manual

Chef's Choice 476 User manual

Chef's Choice

Chef's Choice 476 User manual

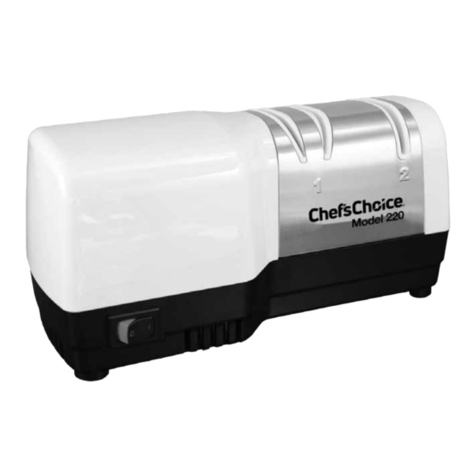
Chef's Choice Hybrid Diamond Hone 220 User manual

Chef's Choice

Chef's Choice Hybrid Diamond Hone 220 User manual

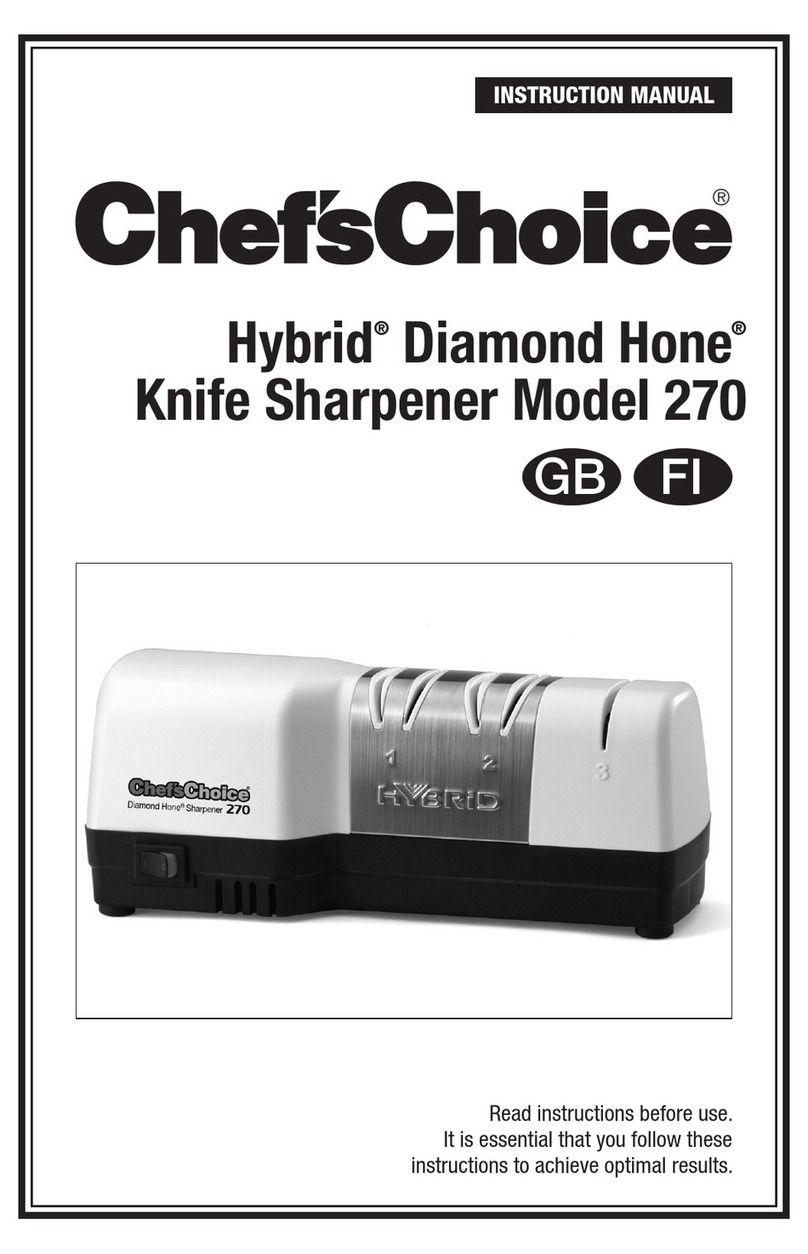
Chef's Choice Hybrid Diamond Hone 270 User manual

Chef's Choice

Chef's Choice Hybrid Diamond Hone 270 User manual

Chef's Choice EdgeCraft E1520 User manual

Chef's Choice

Chef's Choice EdgeCraft E1520 User manual

Chef's Choice Diamond Hone 478 User manual

Chef's Choice

Chef's Choice Diamond Hone 478 User manual

Chef's Choice Angle Select 1520 User manual

Chef's Choice

Chef's Choice Angle Select 1520 User manual

Chef's Choice Diamond Hone MultiEdge 460 User manual

Chef's Choice

Chef's Choice Diamond Hone MultiEdge 460 User manual

Chef's Choice 315S User manual

Chef's Choice

Chef's Choice 315S User manual

Chef's Choice Pronto Diamond Hone 463 User manual

Chef's Choice

Chef's Choice Pronto Diamond Hone 463 User manual

Chef's Choice SteelPro 475 Series User manual

Chef's Choice

Chef's Choice SteelPro 475 Series User manual

Chef's Choice Commercial Pronto Diamond Hone 465 User manual

Chef's Choice

Chef's Choice Commercial Pronto Diamond Hone 465 User manual

Chef's Choice 290 User manual

Chef's Choice

Chef's Choice 290 User manual

Chef's Choice D202 User manual

Chef's Choice

Chef's Choice D202 User manual

Chef's Choice EdgeSelect 120 User manual

Chef's Choice

Chef's Choice EdgeSelect 120 User manual

Chef's Choice 2 Stage 460 User manual

Chef's Choice

Chef's Choice 2 Stage 460 User manual

Chef's Choice EdgeSelect-Pro Diamond Hone 125 User manual

Chef's Choice

Chef's Choice EdgeSelect-Pro Diamond Hone 125 User manual

Chef's Choice Diamond Hone 440 User manual

Chef's Choice

Chef's Choice Diamond Hone 440 User manual

Chef's Choice Pronto Diamond Hone 464 User manual

Chef's Choice

Chef's Choice Pronto Diamond Hone 464 User manual

Chef's Choice 2100 User manual

Chef's Choice

Chef's Choice 2100 User manual

Popular Accessories manuals by other brands

Samsung SmartThings STS-PRS-250 quick start guide

Samsung

Samsung SmartThings STS-PRS-250 quick start guide

ASM posirot PRAS Series Installation and operation manual

ASM

ASM posirot PRAS Series Installation and operation manual

Mobicool MCF 40 operating manual

Mobicool

Mobicool MCF 40 operating manual

Apex Digital APXBASE installation guide

Apex Digital

Apex Digital APXBASE installation guide

Little Labs multi z pip rev.b Operator's manual

Little Labs

Little Labs multi z pip rev.b Operator's manual

elero Aquero manual

elero

elero Aquero manual

Hioki 9279 instruction manual

Hioki

Hioki 9279 instruction manual

Veris Industries AG01E installation guide

Veris Industries

Veris Industries AG01E installation guide

Clevertouch WL10A-G user manual

Clevertouch

Clevertouch WL10A-G user manual

motif CAD0001 user manual

motif

motif CAD0001 user manual

Goldair GFS SERIES operating instructions

Goldair

Goldair GFS SERIES operating instructions

Baumer OM70-11216510 manual

Baumer

Baumer OM70-11216510 manual

Tascam us-2x2 Reference manual

Tascam

Tascam us-2x2 Reference manual

SGL 9602 instruction manual

SGL

SGL 9602 instruction manual

Philips HF3519 user manual

Philips

Philips HF3519 user manual

Schwaiger HOME4YOU ZHS19 user manual

Schwaiger

Schwaiger HOME4YOU ZHS19 user manual

Crutchfield POWERALL 860PBJS32G owner's manual

Crutchfield

Crutchfield POWERALL 860PBJS32G owner's manual

Waterpik Water Flosser WP-560 quick start guide

Waterpik

Waterpik Water Flosser WP-560 quick start guide

manuals.online logo
manuals.online logoBrands
  • About & Mission
  • Contact us
  • Privacy Policy
  • Terms and Conditions

Copyright 2025 Manuals.Online. All Rights Reserved.