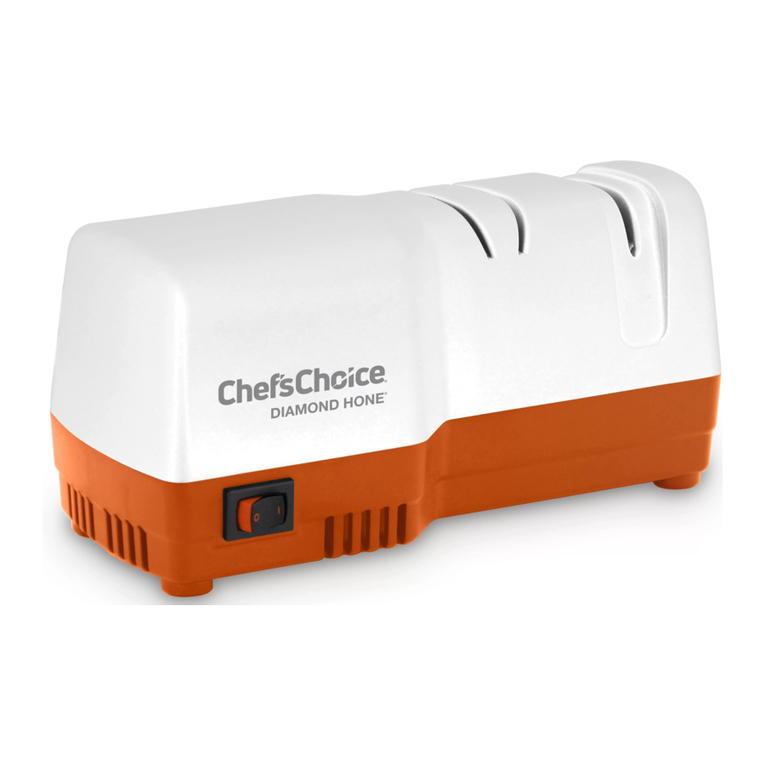
Pronto™Diamond Hone®
Messerschleifger t für
asiatisches Messer
Modell 463
Wir gratulieren!!
Das Pronto™Model 463, konzipiert für die Schärfung von
asiatischen Messern, wird von Chef’sChoice®, dem
weltweit führenden Unternehmen auf dem Gebiet der
Schneidkantentechnologie, hergestellt. Es handelt sich
um ein überaus schnelles manuelles Messerschleifgerät
für eine beispiellos leistungsfähige Schneide bei Ihren
asiatischen Schneidwaren. Die Schneide ist auf
extreme Schärfe feingeschliffen, behält jedoch starke
mikroskopisch kleine Zähne bei, die sie bei allen
Anforderungen in der Speisenvorbereitung und
insbesondere bei Produkten mit Faserstruktur mühelos
durch das Material gleiten lassen. Die Schneide ist
überraschend haltbar, kann jedoch bei Bedarf schnell
nachgeschliffen werden.
Sie werden von der einfachen Handhabung des
Pronto™und der guten Leistung Ihrer asiatischen Messer
angenehm überrascht sein. Bitte lesen Sie die
Anweisungen sorgfältig durch, und befolgen Sie sie
USING PRONTO™
Note: Always clean your knife before sharpening in the
Pronto™!You will find that the Pronto™can create and
maintain an exceedingly sharp and effective edge on all
your conventional fine edge and serrated cutlery. The
primary edge facets are each formed in Stage 1 at a
nominal 15 degrees which results in a total primary edge
of 30 degrees (15° on each side). Stage 2 creates a
second bevel at a slightly larger angle leaving a strong
double beveled edge structure that will stay sharp longer.
Always use the sharpener with the stage numbers 1 and
2, facing you.
Safety: Keep your fingers clear of the blade edge at all
times. Hold the handle with your left hand making
certain that all your fingers and thumb remain safely
behind the partition wall where the handle attaches to the
sharpening stage.
FINE EDGE KNIVES STAGE 1
To sharpen, hold the sharpener on the table with your
left hand. Insert the knife blade into the slot of Stage 1.
Hold the blade level with the table, press down to bring
the knife edge into firm sustained contact with both of
the two internal diamond coated disks and slide the
blade back and forth in a sawing-like motion. For
optimum results center the blade left to right in the
slot and avoid rubbing against the walls of the slot.
Apply a downward force of about 4-5* pounds as you
move the blade. Listen carefully to the disks to insure
both disks are rotating when you move the blade.
Sharpening will not be as effective if you press too lightly
while sharpening.
If your knife, before sharpening, is not very dull you may
find that only about 10 or less back and forth stroke pairs
in Stage 1 (with recommended downward pressure) will
be sufficient to put a keen edge on the blade. However, if
the knife starts out very dull you may find that 20 or more
back and forth paired strokes will be needed the firsttime
as you reshape and sharpen the old edge. Before leaving
Stage 1 check the edge for sharpness by slicing a piece
Pronto™Diamond Hone®
Knife Sharpener for Asian
Knives Model 463
Congratulations!!
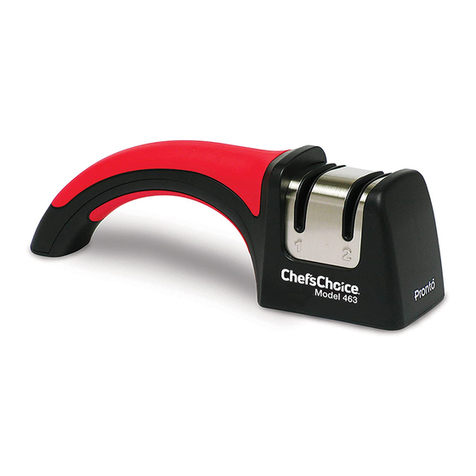
The Pronto™Model 463 designed to sharpen Asian style
blades is manufactured by Chef’sChoice®, the world’s
leader in cutting edge technology. It is an exceedingly fast
manual sharpener that will create an exceptionally
effective cutting edge on your Asian style cutlery. The
cutting edge is finely honed to extreme sharpness but
retains strong microscopic teeth that gives it a highly
effective bite for all your food prep needs and especially
for fibrous materials. The edge is surprisingly durable yet
can be resharpened quickly whenever necessary.
You will be pleased to see how easy the Pronto™is to
use and how well your Asian knives will perform. Read
and follow the instructions carefully.Keep the sharpener
close at hand so that you can enjoy the pleasure of sharp
knives every day.
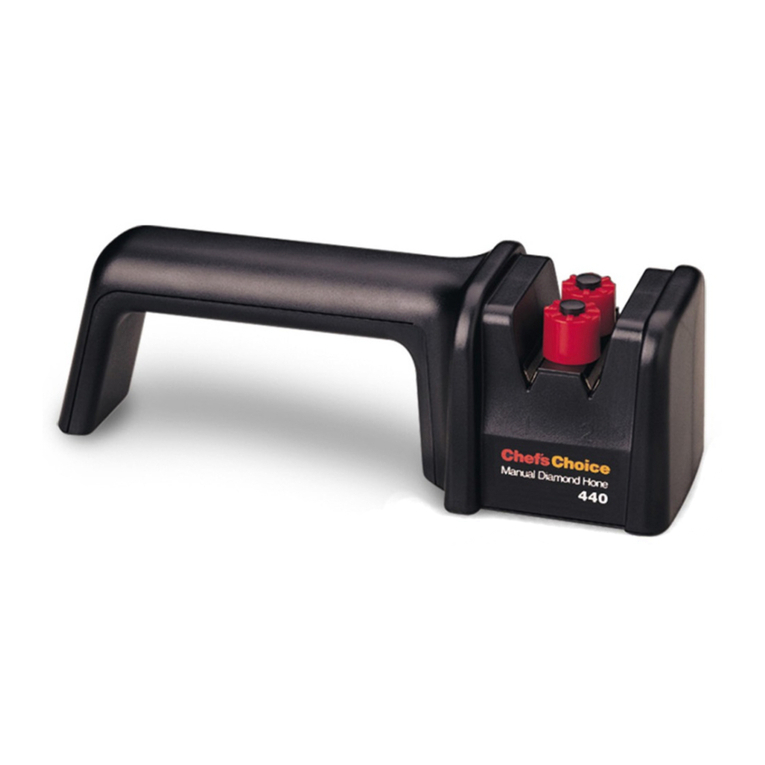
DESCRIPTION OF THE PRONTO™
You will appreciate that the soft touch ergonomical
handle of the Pronto™is extremely comfortable providing
a secure grip.There are two slots, the first (#1) uses fine
diamond abrasives to create and hone a sharp primary
edge and a second slot (#2) where that edge is ultrahoned
at a slightly larger angle with micron size diamonds to its
final sharpness.
In each, the first and second stage, both sides of the
edge are sharpened simultaneously by two precision
diamond coated conical honing disks. The orientation of
the disks is such that by sharpening in both stages the
entire length of the edge is sharpened.
Small rubber feet secure the Pronto™to any dry clean
surface. The soft touch handle further reduces the
opportunity for slippage while sharpening.
of paper. It should cut paper readily with only a slight
roughness to the cutting action.
* 4 to 5 pounds is about the weight of a 2 inch thick telephone book
STAGE 2
If the knife is correctly sharpened in Stage 1 only 2-5back
and forth stroke pairs in Stage 2 will complete the small
second bevel and the edge will be very sharp and
effective. It should cut paper smoothly allowing you to
make straight or curved cuts easily.
For optimum results center the blade (left and right)
within the slot and keep the length of the blade aligned
with the center line of the slot as you sharpen.Applyabout
3-4 pounds downward pressure on the blade in Stage 2.
Hold the blade level, make smooth consistent strokes
while maintaining recommended downward pressure
and make certain the disks are turning.
RESHARPENING THE KNIFE EDGE
Follow the procedure for Stage 2 described above for
“Using Pronto™”, making two to three (2-3) pairs of
strokes while maintaining recommended downward
pressure. Generally you should be able to resharpen
several times using only Stage 2. Listen to confirm the
sharpening disks are turning.Test edgefor sharpness and
if necessary make four (4) back and forth pairs of
repeated strokes in Stage 1 followed by two to three
(2-3) pairs in Stage 2.
SERRATED BLADES
Serrated blades can be sharpened in Stage 2. Center the
blade in the slot of Stage 2 and make five (5)
forward and back stroke pairs. Examine the edge and if
necessary make another 5 full strokes.Examine blade. If
the blade to be sharpened is very dull, first make two full
strokes (forward and back pairs) in Stage 1 and then
make five (5) paired strokes in Stage 2. Because of its
nature, a serrated knife will never appear as sharp or cut
as smoothly as a straight edged blade. Caution: Do not
make many strokes in Stage 1, which can quickly remove
metal from a serrated edge.
ASIAN BLADES
The Pronto™which sharpens at a primary angle of 15
degrees, can sharpen all double faceted Asian blades
such as the Santoku which is traditionally sharpened
at 15º.
Do not sharpen in the Pronto any single sided,
single facetedAsian Kataba knives, such as the traditional
sashimi styled blade that is commonly used to prepare
ultra thin sashimi.The Pronto™sharpens simultaneously
both sides of the cutting edge while the sashimi knives
are designed to be sharpened only on one side of the
blade. The versatile Chef’sChoice®Electric Model 15XV
and Model 1520 are designed to also sharpen all single
faceted Asian style knives.
CERAMIC KNIVES
The Pronto™is not recommended for ceramic knives.
SCISSORS
Do not attempt to use the Pronto™to sharpen scissors.
EdgeCraft does manufacture both electric and manual
scissor sharpeners.
BRANDS OF KNIVES
The Pronto™will put an excellent edge on all double bevel
15 degree Asian knives including Santoku style knives
regardless of brands, including Henckels, Wüsthof,
Sabatier, Lamson and Goodnow, Global, Forshner,
Russell Harrington, Forshner, Messermeisser, Mundial,
Cuisinart, Kitchen Aid, Shun and many, many more.
TEST FOR SHARPNESS
To test for sharpness and cutting ability of your knife,hold
a sheet of paper vertically by its upper edge and carefully
cut down through the sheet a small (but safe) distance
from your fingers.A sharp edge (on a straight edge blade)
will cut smoothly without tearing the paper.
Alternatively try cutting a tomato. The knife should
penetrate the skin of the tomato and cut through
it on the first pull without applying significant force to
the knife.
MAINTENANCE:
• The exterior can be cleaned with a damp
soft cloth
• Periodically shake out and dispose of the metal
sharpening dust by inverting the sharpener and
lightly tapping it onto a newspaper, paper towel,or
other paper sheet.
• No oils or other lubricating liquids are necessary
with this sharpener.
Limited Warranty: Used with normal care, this EdgeCraft product is
guaranteed against defective material and workmanship fora period of
one (1)year from dateof original purchase (“WarrantyPeriod”).We will
replace or repair, at our option,any product or part that is defective in
material or workmanshipwithout charge if the product is returned to us
postage paid with dated proof of purchase within the
Warranty Period.This warranty doesnot applyto commercial useor any
product abuse. ALL IMPLIED WARRANTIES, INCLUDING IMPLIED
WARRANTIES OFMERCHANTABILITYAND FITNESS FOR A PARTICULAR
PURPOSE, ARE LIMITED TO THE WARRANTY PERIOD. EDGECRAFT
CORPORATION SHALL NOT BE LIABLE FOR ANY INCIDENTAL OR
CONSEQUENTIAL DAMAGES. Some states do not allow limitations on
how long an implied warranty lasts and some states do not allow
exclusions orlimitationsof incidental or consequentialdamages,so the
above limitations or exclusions may not apply to you. This limited
warranty gives you specific legal rights, and you may also have other
rightswhich vary from state to state.
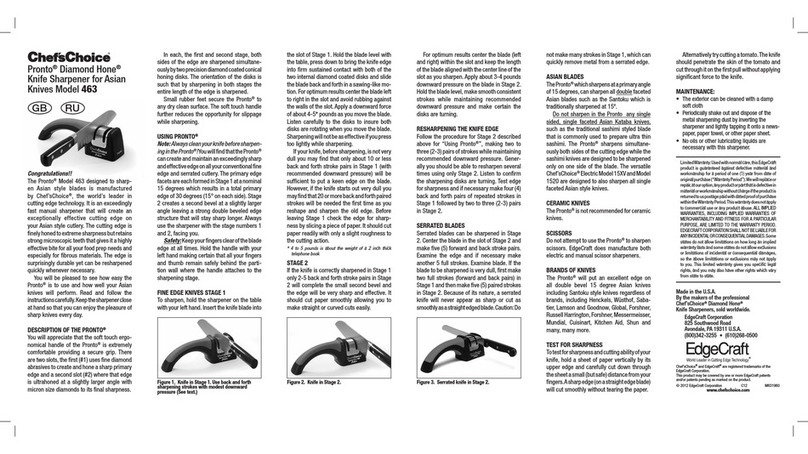
Figure 2. K ife i Stage 2.
Figure 1. K ife i Stage 1. Use back a d forth
sharpe i g strokes with modest dow ward pressure
(See text.) Figure 3. Serrated k ife i Stage 2.
GB
entsprechend. Bewahren Sie das Messerschleifgerät
immer griffbereit auf, damit Sie nie auf das Vergnügen
verzichten müssen, jeden Tag mit scharfen Messern
zu arbeiten.
BESCHREIBUNG DES PRONTO™
Der ergonomische Soft-Haltegriff des Pronto™ist äußerst
bequem und liegt sicher in der Hand. Das Gerät weist
zwei Schlitze auf: Im ersten (#1) werden feine
Diamantschleifmittel verwendet, um eine scharfe erste
Schneide zu erzeugenund abzuziehen. Im zweiten Schlitz
(#2) wird die Schneide mit mikroskopisch kleinen
Diamanten in einem etwas größeren Winkel zu ihrer
endgültigen Schärfe feingeschliffen.
In beiden Stufen werden beide Seiten der Schneide
gleichzeitig von zwei diamantbeschichteten konischen
Präzisionsschleifscheiben geschliffen. Die Scheiben
sind so ausgerichtet, dass in beiden Stufen die Schneide
über ihre gesamte Länge geschliffen wird.
Kleine Gummifüße bieten dem Pronto™sicheren Halt
auf jeder trockenen und sauberen Oberfläche. Der
Soft-Haltegriff verringert des Weiteren die Gefahr, beim
Schleifen abzurutschen.
GEBRAUCH DES PRONTO™
Hinweis: Reinigen Sie das Messer grundsätzlich vor dem
Schleifen mit dem Pronto™!Sie werden feststellen, dass
der Pronto™überaus scharfe, leistungsstarke und
haltbare Schneiden bei all Ihren üblichen Schneidwaren
mit Glatt- und Sägeschliff erzeugt. Die ersten Arbeitss-
chritte werden jeweils in Stufe 1 mit einem Nominal-
winkel von 15 Grad gebildet, wodurch eine erste
Schneide mit einem Gesamtwinkel von 30 Grad entsteht
(15° auf jeder Seite). Die 2. Stufe erzeugt eine zweite
Zuschärfung in einem etwas größerenWinkel und bildet
somit eine starke, beidseitig zugeschärfte Schneidstruk-
tur, deren Schärfe länger hält. Verwenden Sie das
Schleifgerät immer so, dass die Zahlen der Stufen 1 und
2 zu Ihnen hin zeigen.
Sicherheit: Halten Sie die Finger immer von der
Klinge fern.Halten Sie den Griff mit der linken Hand und
achten Sie darauf, dass sich alle Finger und der Daumen
D I
hinter der Schutzabtrennung befinden, die Griff und
Schleifstufe voneinander trennt.
MESSER MIT GLATTSCHLIFF PHASE 1
Zum Schleifen halten Sie das Schleifgerät mit der linken
Hand auf dem Tisch fest. Führen Sie die Klinge in den
Schlitz der ersten Stufe ein. Halten Sie das Messer
waagerecht zum Tisch, drücken Sie die Schneide nach
unten, bis sie die beiden internen diamantbeschichteten
Scheiben berührt, und bewegen Sie die Klinge in einer
sägeähnlichen Bewegung vor und zurück. Für ein
optimales Ergebnis zentrieren Sie die Klinge in der Mitte
des Schlitzes und vermeiden Sie ein Scheuern der Klinge
an den Seitenwände des Schlitzes. Drücken Sie die Klinge
mit der Kraft eines Gewichts von ca. 2 bis 2 1/2*
Kilogramm nach unten.Achten Sie sorgfältig darauf, dass
sich beide Scheiben beim Bewegen der Klinge drehen.
Der Schleifvorgang ist nur dann effektiv, wenn Sie beim
Schleifen ausreichenden Druck ausüben.
Wenn das Messer vor dem Schleifen nicht sehr
stumpf ist, genügen in Stufe 1 möglicherweise schon
10 oder weniger Vor- und Zurückbewegungen (mit dem
empfohlenen Druck nach unten), um für eine scharfe
Schneide der Klinge zu sorgen. Wenn die Klinge zu
Beginn jedoch sehr stumpf ist, müssen Sie sie
möglicherweise mehr als 20 Mal vor und zurück
bewegen, um die alte Schneide neu zu formen und zu
schleifen. Bevor Sie Stufe 1 abschließen, prüfen Sie die
Schärfe der Schneide, indem Sie ein Blatt Papier
durchschneiden. Die Schneide sollte das Papier
problemlos schneiden können und nur eine leicht raue
Schnittkante hinterlassen.
* 2 bis 2 1/2 Kilogramm entsprechen in etwas dem Gewicht eines
5 cm dicken Telefonbuchs.
STUFE 2
Wenn das Messer in Stufe 1 richtig geschliffen wurde,
sind in Stufe 2 nur 2-5 Vor- und Zurückbewegungen nötig,
um die kleine zweite Zuschärfung zu vervollständigen,
damit die Schneide äußerst scharf und leistungsfähig
ist.Es sollte Papier glatt durchschneiden und problemlos
gerade oder bogenförmige Schnitte ermöglichen.
Abbildu g 2. Messer i Stufe 2.
Abbildu g 1. Messer i Stufe 1. Zum Schleife mit
mäßigem Druck ach u te vor- u d zurückbewege
(siehe Text). Abbildu g 3. Messer mit Sägeschliff i Stufe 2.
D
Made in the USA
By the makers of the professional Chef’sChoice®
Diamond Hone®Knife Sharpeners, sold worldwide,
EdgeCraft Corporation
825 Southwood Road
Avondale, PA 19311, USA
(800)-342-3255; (610)-268-0500
Chef’sChoice®and EdgeCraft®are registered trademarks of the
EdgeCraft Corporation.
Patents pending.
© EdgeCraft Corporation 2010
M631950 G10
www.chefschoice.com
™


