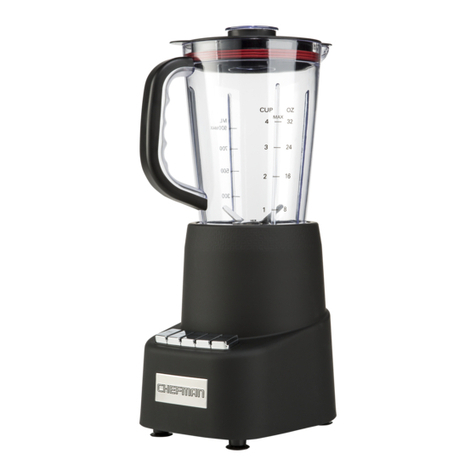
Chefman DYNAMIC RJ35-V3 User manual

READ ALL INSTRUCTIONS BEFORE USE
For your safety and continued enjoyment of this product, always
read the instruction manual before using.
COOKING FORWARD™
Welcome!
Whether this is your rst Chefman®appliance or you’re already part of our family,
we’re happy to be in the kitchen with you! With your new Chefman®Dynamic
Blending System, you can achieve evenly blended results easier and faster than
ever. With its powerful 700-watt motor, two different blending blades, multiple
speeds, and an extra-large 32-ounce blending pitcher, the Blending System can
do everything from pureeing ingredients for soups and sauces, to grinding coffee
beans, to crushing ice. The 12-piece set also comes with various size tumblers and
a to-go travel lid so you can take your morning smoothie on the road. With its
dishwasher-safe parts, the blender is also a breeze to clean.
We know you’re excited to start blending, but please take a few minutes to read
our directions, safety instructions, and warranty information.
From our kitchen to yours,
The Chefman®Team

1 Safety Instructions
5 Features
6 Operating Instructions
11 Troubleshooting
12 Recipes
15 Cleaning and Maintenance
16 Notes
17 Terms and Conditions
19 Warranty
CONTENTS

1
SAFETY INSTRUCTIONS
IMPORTANT SAFEGUARDS
This appliance is for HOUSEHOLD USE ONLY.
WARNING: When using electrical appliances, basic safety precautions should
always be followed including the following:
1. READ ALL INSTRUCTIONS.
2. Unplug from outlet when not in use, before putting on or taking off parts, and before
cleaning.
3. To protect against risk of electrical shock, do not put appliance or power cord in water
or other liquids.
4. This appliance should not be used by or near children or individuals with certain
disabilities.
5. This appliance is not intended for use by persons (including children) with reduced
physical, sensory or mental capabilities, or lack of experience and knowledge, unless
they have been given supervision or instruction concerning the appliance by a person
responsible for their safety.
6. Children should be supervised to ensure that they do not play with the appliance.
7. Avoid contact with all moving parts.
8. Never put the unit near a hot burner, in an oven or in a dishwasher.
9. Do not operate the appliance with a damaged cord or plug, or after the appliance
malfunctions. If this should occur, contact Chefman Customer Support.
10. Do not use outdoors or for anything other than intended use.

2
SAFETY INSTRUCTIONS
IMPORTANT SAFEGUARDS
11. Keep hands and utensils away from the blade during operation to reduce the risk of
personal injury and/or damage to the blender.
WARNING: The cutting blades are SHARP. Handle with care both when using and
cleaning the product.
12. Do not let cord hang over edge of table or counter, come into contact with sharp
edges or touch hot surfaces.
13. Do not pull on power cord to disconnect.
14. Always place the appliance on a rm and stable surface when in use.
15. The use of attachments not recommended or sold by Chefman may cause re, electric
shock, or injury.
16. Never use abrasive cleaning agents or abrasive cloths when cleaning the unit.
17. Do not use ngers to scrape food away from the cutting blade while the appliance is
plugged in. Serious injury may result.
18. Use the unit only when it is completely assembled.
19. Do not leave the blender unattended while the unit is running.
20. Before using for the rst time, remove all packaging and wash and dry parts.
21. To avoid overheating the motor, do not use the blender for more than 10 minutes
continuously. Allow the motor to cool between uses.
WARNING: To avoid the risk of injury, avoid the blade when the unit is still rotating.
SAVE THESE INSTRUCTIONS

3
WARNING: This appliance has a polarized plug (one blade is wider than the other). This
plug is intended to t into a polarized outlet only one way. If the plug does not t fully
into the outlet, reverse the plug. If it still does not t, contact a qualied electrician. Do not
attempt to modify the plug in any way or force it into the outlet. This could result in injury
or electric shock.
SHORT CORD INSTRUCTIONS
A short power supply cord is provided to reduce the hazards of entanglement or tripping
over a longer cord. Longer detachable power-supply cords or extension cords are
available and may be used if care is exercised in their use. If a longer detachable power-
supply extension cord is used:
1. The marked electrical rating of the extension cord should be at least as great as the
electrical rating of the appliance.
2. The cord should be arranged so that it will not drape over the countertop or tabletop
where it can be pulled on by children or tripped over.
SAFETY INSTRUCTIONS
IMPORTANT SAFEGUARDS

4
POWER CORD SAFETY TIPS
1. Never pull or yank on cord or the appliance.
2. To insert plug, grasp it rmly and guide it into outlet.
3. To disconnect appliance, grasp plug and remove it from outlet.
4. Before each use, inspect the power cord for cuts and/or abrasion marks.
If any are found, this indicates that the appliance should be serviced, and the
power cord replaced. Please contact Chefman Customer Support for assistance.
5. Never wrap the cord tightly around the appliance, as this could place
undue stress on the cord where it enters the appliance and cause it to
fray and break.
DO NOT OPERATE APPLIANCE IF THE POWER CORD SHOWS
ANY DAMAGE OR IF APPLIANCE WORKS INTERMITTENTLY
OR STOPS WORKING ENTIRELY.
Do not place the appliance
on a stovetop or any other
heatable surface.
SAFETY INSTRUCTIONS
IMPORTANT SAFEGUARDS

5
1. Removable Filler Cap
2. Blending Pitcher Lid
3. Large (32-oz) Blending
Pitcher with Handle
4. Motor Base
5. Control Buttons
6. Non-Skid Feet
7. Tall (24-oz) Tumbler (2)
8. Short (12-oz) Tumbler (1)
9. Stainless Steel
Emulsifying Blade
10. Stainless Steel
Grinding Blade
11. Storage Lid
12. Tumbler Comfort Ring
13. Travel Lid with Sealed
Spout
FEATURES
6
12
2
3
4
1
5
87
910
11 12 13

6
OPERATING INSTRUCTIONS
BEFORE FIRST USE
1. Remove and discard all packaging materials and check to ensure that all parts and
accessories are accounted for. Read and remove all removable stickers.
2. Wash and dry all attachments and accessories in warm, soapy water to remove any
packaging debris. Rinse well and dry thoroughly. All attachments and accessories,
except for the motor base, are also top-rack only dishwasher safe. WARNING: The
mixing blades are sharp. Handle them by their collars when assembling and cleaning
the blender. Failure to do so can result in personal injury.
3. Wipe down the motor base with a damp cloth; the motor base is not dishwasher safe.
WARNING: Never immerse the motor base or cord in water.
HOW TO BLEND USING THE BLENDING PITCHER
When blending large amounts, reach for the blending pitcher. Both the pitcher and the
tumblers are made of sturdy, BPA-free plastic.
1. With blender unplugged, set motor base on a at surface.
2. Choose the blade you want to use:
• For processing softer ingredients in sauces, soups, and smoothies, use the
emulsifying blade, which looks like an X.
• For processing harder ingredients, such as chopping nuts and grinding coffee
beans, choose the grinding blade. NOTE: The grinding blade should only be used
with dry foods; do not use it for ice.
3. Check that the white sealing ring is tted into the collar of the blade; this creates an
airtight seal.
4. Holding the blade attachment by its collar, screw it on to the bottom of the pitcher
and turn it clockwise to tighten.

7
5. Add the ingredients to be blended to the pitcher up to the “Max” line.
WARNING: To avoid leaking and/or personal injury, never ll past the “Max” line as
foods, especially liquids, rise in the pitcher when blended.
6. Secure the lid on the pitcher by twisting it clockwise. If ller cap is not in already, insert
it into lid and twist clockwise until you hear a click to seal. (You can remove the ller
cap during blending to add ingredients.)
7. Position the pitcher on the base by inserting the blade attachment collar into the motor
base and tting the locking tabs on the blade attachment into the slots on the motor
base. Press the pitcher rmly down into the base, then turn clockwise until the blade
attachment tabs lock securely in position.
8. Plug in the blender and press a speed button (HIGH, MEDIUM, LOW, or PULSE) to
begin blending. (See p. 9 for more information on speeds.)
WARNING: Do not operate the motor continuously for more than 1 minute at a time.
Allow the motor to rest for 3 minutes before continuing.
9. Press the OFF button to stop blending. (If using the pulse function, the unit will turn off
when the PULSE button is released.)
10. Remove the blending pitcher from base by rotating it counterclockwise.
OPERATING INSTRUCTIONS

8
HOW TO BLEND IN A TUMBLER
For smaller amounts, for blending and storing, or for making smoothie drinks to go, use a
tumbler.
1. Follow steps 1-3 from How to Blend in the Blending Pitcher on p. 6.
2. Add ingredients to tumbler; do not exceed the “Max” line.
3. Holding the blade attachment by its collar, screw it on to the open end of the
tumbler and turn it clockwise to tighten. NOTE: The blade attachment goes on what
will be the top of the tumbler after blending is done.
4. Position the tumbler on the base by inserting the blade attachment collar into the
motor base and fitting the locking tabs on the blade attachment into the slots on the
motor base. Press the tumbler firmly down into the base, then turn clockwise until
the blade attachment tabs lock securely in position.
5. Plug in the blender and press a speed button (HIGH, MEDIUM, LOW, or PULSE)
to begin blending. (See p. 9 for more information on speeds.) WARNING: Do not
operate the motor continuously for more than 1 minute at a time. Allow the motor to
rest for 3 minutes before continuing.
6. Press the OFF button to stop blending. (If using the pulse function, the unit will
turn off when the PULSE button is released.)
7. Remove the tumbler from the base by turning blade attachment counterclockwise,
then flip tumbler over so that the blade attachment is facing up. Twist the blade
collar counterclockwise, and then lift blade attachment up and out of the tumbler.
8. If drinking straight from the tumbler, press the tumbler comfort ring onto the lip
of the tumbler. If taking the tumbler on the road, put on the travel lid. If storing the
contents in the tumbler, put on the storage lid.
OPERATING INSTRUCTIONS

9
BLADE SPEED
Low
• Use low speed for lighter mixtures and creamy toppings. Ideal for mayonnaise,
whipped cream, salad dressings, soups, sauces, and shakes. Generally used with the
emulsifying blade.
Medium
• Use medium and the emulsifying blade for perfectly blended smoothies, fruit and
vegetable purees, hummus, and bean dips. Use medium with the grinding blade to
chop softer ingredients like onions, ginger, and garlic.
•
High
• Use high speed with the emulsifying blade to uniformly blend thick fruits and
vegetables. Or use high speed with the grinding blade to chop or grind harder
ingredients, such as coffee beans, nuts, cinnamon sticks. NOTE: Grinding blade should
only be used with dry foods.
Pulse
• Use pulse function for short bursts of high power or for coarse chopping and
blending any food, especially when you want to be careful about over-blending. Pulse
is only activated for as long as the button is pressed and ends when pulse button is
released.
OPERATING INSTRUCTIONS

10
WARNING: Do not operate the motor continuously for more than 1 minute at a time.
Allow the motor to rest for 3 minutes before continuing.
HOW TO CRUSH ICE
1. If using large pitcher, fit pitcher with emulsifying blade.
2. Fill container of choice (pitcher or tumbler) no more than halfway with ice.
TIP: Remove ice cubes from freezer a few minutes before crushing.
3. If using large blending pitcher, add ¾cup water or other liquid. If using tumblers, add
½and ¼cup respectively for tall and short tumblers, then attach emulsifying blade.
4. Attach container to base; put on lid if necessary.
5. Press PULSE button six times, then blend continuously on high speed for several
seconds.
6. Check contents and, if necessary, add more liquid and continue to process until all
cubes are reduced to the desired consistency.
OPERATING INSTRUCTIONS

11
PROBLEM POSSIBLE CAUSES SOLUTIONS
Blender doesn’t
work after speed
button is pressed
1. Unit not plugged in
2. Pitcher or tumbler is not
correctly positioned on
the motor base.
1. Plug unit in
2. Press OFF button. Reposition pitcher
or tumbler being sure locking tabs on
blade collar are aligned with slots on
motor base. Press down firmly and
turn clockwise until tabs lock into
position.
Blender blade
rotating very slowly
Pitcher or tumbler is
overloaded.
• Remove some food from the tumbler
or the pitcher and continue blending.
• Add liquid to the pitcher or tumbler
and continue blending.
Ingredients not
mixing well
Heavier ingredients have
fallen to the bottom
• Press OFF. Stir ingredients in pitcher
or remove tumbler and shake
ingredients to redistribute.
• If still not blending well, add a little
liquid and continue blending.
Blender stopped
operating while in
use
1. A hard or fibrous
ingredient, such as a
chunk of carrot, got
stuck in the blade.
2. The motor overheated
1. Unplug unit, carefully remove the
blade attachment and remove any
debris. Stir food and replace blade.
2. Press OFF and let blender to rest for
at least 3 minutes before trying to
blend again.
TROUBLESHOOTING

12
BLUEBERRY AND BANANA SMOOTHIE
Yield: 1 serving
Frozen blueberries are available all year long and make the smoothie nice and cold. When
blueberries are in season, feel free to use fresh.
Ingredients:
• 1 banana, cut into 2-inch pieces
• 1 cup frozen blueberries
• ¾cup milk
• ½cup vanilla yogurt
• 1 Tbsp honey
Steps:
1. In 24-oz tumbler, combine banana, blueberries, milk, yogurt, and honey.
2. Carefully attach emulsifying blade to tumbler and secure tumbler on blender base.
3. Press HIGH and blend ingredients until smooth.
RECIPES

13
CUCUMBER MELON GAZPACHO
Yield: 2 servings
This colorful and refreshing cold soup makes a perfect starter. Though you want a tiny dice of the
cucumber and cantaloupe for the garnish, the dice for the soup can be large, since it will be pureed
in the blender.
Ingredients:
• 1 English cucumber, peeled and diced
• ½cantaloupe, peeled, seeded, and diced
• ½cup olive oil
• ¼cup plain yogurt
• 2 Tbsp chopped fresh basil, plus small leaves for garnish, if desired
• 2 Tbsp fresh lime juice
• 1 garlic clove, coarsely chopped
• 1 tsp kosher salt
• Sliced fresh chives, for garnish (optional)
Steps:
1. Reserve a tiny handful of diced cucumber and cantaloupe for garnish if you like. Put the rest of
the cucumber and cantaloupe in the pitcher fitted with the emulsifying blade.
2. Add the olive oil, yogurt, basil, lime juice, garlic, and salt.
3. Put on lid and secure pitcher to blender base.
4. Press MEDIUM and blend ingredients until smooth.
5. Chill soup for at least 1 hour and up to 2 days.
6. Serve garnished with chives, diced cucumber and cantaloupe, and basil leaves, if desired.
RECIPES

14
BLENDER GUACAMOLE
Yield: 4 servings
Serve this creamy, classic guac with tortilla chips or use it to garnish your favorite tacos.
Ingredients:
• 2 ripe avocados, cut into ½-inch cubes
• ½small red or yellow onion, coarsely chopped
• ¼cup fresh cilantro leaves
• 2 Tbsp fresh lime juice
• 1 Tbsp finely chopped jalapeño
• 1 garlic clove, coarsely chopped
• ¼tsp kosher salt
Steps:
1. Combine avocados, onion, cilantro, lime juice, jalapeño, garlic, and salt in pitcher
fitted with the emulsifying blade.
2. Put on lid and secure pitcher to blender base.
3. Press MEDIUM to blend, stopping once or twice to scrape down pitcher, until smooth.
(Alternatively, press PULSE a few times for a chunkier result.)
4. Transfer guacamole to a serving bowl and serve immediately or cover with plastic wrap
and refrigerate until ready to eat.
RECIPES

15
With easy to disassemble parts, the blender is easy to clean.
1. Always turn off and unplug the Chefman Dynamic Blending System before
cleaning.
2. Whenever possible, rinse attachments and accessories immediately after
processing for both sanitary reasons and to make cleanup easier.
3. Except for motor base, all parts are top-rack dishwasher safe. You can also wash
parts (except for motor base) by hand with soapy water; rinse and dry well. Do
not use rough scouring pads or abrasive cleansers on any plastic or metal parts
as the surface may be damaged. WARNING: Use extreme care when handling
blades. Handle the blades by the collar and do not touch the blades with your
fingers. The blades are very sharp and can cause injury.
4. If necessary, soak blades in soapy water for 10 to 15 minutes. Use a small nylon
bristle brush to remove processed food from the blade and the blade area.
5. Clean the motor base as needed with a damp cloth or sponge. Dry thoroughly.
WARNING: Never immerse the base or the cord in water as damage and injury
can occur.
6. Dry well before storing. WARNING: Never wrap cord tightly around the
appliance. Never place any stress on cord, especially where the cord enters the
motor base, as this could cause the cord to fray and break.
CLEANING AND MAINTENANCE

16
NOTES

17
Our products are backed by a limited 1-year warranty. To register, follow the
instructions on the Chefman®Warranty Registration page in this User Guide.
We offer a limited 1-year warranty from the date of purchase. This warranty is void
without proof of purchase within the USA, Canada, or Mexico. Service centers and
retail stores do not have the right to alter or change the Terms and Conditions of this
warranty.
WHAT THE WARRANTY COVERS
• Manufacturer Defects
Chefman®products are warranted against defects in material and workmanship
for a period of 1 year from the date of purchase when used in accordance with the
Chefman®User Guide.
• Qualified Replacements
If your product does not work as it should, we will send you a new one. If the product
is no longer available, we will replace it with one that is comparable.
TERMS AND CONDITIONS
Limited Warranty
Table of contents
Other Chefman Blender manuals

Chefman
Chefman RJ19-SP-BLACK User manual

Chefman
Chefman RJ19-R1 User manual

Chefman
Chefman RJ19-V3-RBR Series User manual

Chefman
Chefman RJ19-RS1-BP User manual

Chefman
Chefman RJ09 User manual

Chefman
Chefman RJ28-6-SS SERIES User manual

Chefman
Chefman RJ190-T-SS User manual

Chefman
Chefman DYNAMIC RJ35-V2 User manual

Chefman
Chefman RJ19-V2-BP SERIES User manual

Chefman
Chefman RJ18-V2 User manual