ChemoMetec NucleoCounter NC-250 User manual

NucleoView NC-250™Software
User’s Guide
P/N 991-0252
Revision 1.6

991-0252 Rev. 1.6 June 2016 2
NucleoView NC-250™
P/N 991-0252 (English)
Revision 1.6
June, 2016
ChemoMetec A/S
Gydevang 43, DK-3450 Allerod, Denmark
Telephone: (+45) 48 13 10 20,
Fax: (+45) 48 13 10 21
Internet: www.chemometec.com,
E-mail: sales@chemometec.com

991-0252 Rev. 1.6 June 2016 3
Caution!
This software must be operated as described in this User’s Guide and documents referred to herein. Please read the entire guide and referred
documents before attempting to use this software.
Contacting support
Technical information including product literature and answers to questions regarding the operation of the NucleoView NC-250™ not covered in
this document and referred documents is available through the following:
For e-mail support, send questions to NucleoCounterNC-250™Technical Support on the address su[email protected]
Check out the FAQ section under support at www.chemometec.com
To speak with a Technical Support Specialist, call (+45) 48 13 10 20.
Please note the NucleoCounterNC-250™serial number and have it available when contacting ChemoMetec A/S for support. The NucleoCounter
NC-250™serial number is found on the label affixed to the rear side of the instrument. The version number of the NucleoView NC-250™ software
shall also be noted, this can be found on the Help –About menu item in the NucleoView NC-250™ software.
Sales and ordering information
For sales assistance with NucleoCounterNC-250™or the NucleoView NC-250™ software, to place an order for a NucleoCounterNC-250™or
consumables, call (+45) 48 13 10 20, fax (+45) 48 13 10 21, or send e-mail to sales@chemometec.com
Disclaimer Notices
The material in this document and referred documents is for information only and is subject to change without notice. While reasonable efforts
have been made in preparation of these documents to assure their accuracy, ChemoMetec A/S assumes no liability resulting from errors or
omissions in these documents, or from the use of the information contained herein.
ChemoMetec A/S reserves the right to make changes in the product design without reservation and without notification to its users.
Copyright Notices
Copyright © ChemoMetec A/S 2012. All rights reserved. No part of this publication and referred documents may be reproduced, stored in a
retrieval system, or transmitted in any form or by any means, electronic, mechanical, photocopying, recording or otherwise, without the prior
written consent of ChemoMetec A/S, Gydevang 43, DK-3450 Allerod, Denmark.
ChemoMetec and NucleoCounter are registered trademarks owned by ChemoMetec A/S. NucleoCounter, A2-sides, A8-slides and NucleoView are
trademarks of ChemoMetec A/S.
All other trademarks are the property of their respective owners.

991-0252 Rev. 1.6 June 2016 4
Table of contents
Quick Guide..............................................................................................................................................................................................5
Installation Guide .....................................................................................................................................................................................6
Installation Overview .....................................................................................................................................................................................6
Minimum Computer Requirements and Preparations before Installation.....................................................................................................6
Installing the NucleoView™ Software and NucleoCounter® Instrument........................................................................................................6
Installing Licenses and Protocols..................................................................................................................................................................15
Software Upgrade ........................................................................................................................................................................................15
Installing a new NucleoCounter® Instrument ..............................................................................................................................................15
Uninstall NucleoView™ Software .................................................................................................................................................................16
Validation with IQ, OQ and PQ protocols ................................................................................................................................................16
Installation Qualification (IQ Test) ...............................................................................................................................................................17
Operation Qualification (OQ Test) ...............................................................................................................................................................18
Performance Qualification (PQ Test)............................................................................................................................................................19
Main Window.........................................................................................................................................................................................20
Menu Line ....................................................................................................................................................................................................22
Selecting a Protocol ................................................................................................................................................................................24
Analysis Results ......................................................................................................................................................................................25
Browse Results .......................................................................................................................................................................................27
File Browser............................................................................................................................................................................................29
File Properties ........................................................................................................................................................................................30
Report Generator ...................................................................................................................................................................................31
Image Scaling..........................................................................................................................................................................................32
Image Overlay ........................................................................................................................................................................................33
Next Analysis..........................................................................................................................................................................................34
Protocols ................................................................................................................................................................................................35
Protocol Adaptation Wizard....................................................................................................................................................................36
Plot Manager..........................................................................................................................................................................................37
Layout Editing ..............................................................................................................................................................................................38
Plot Statistics................................................................................................................................................................................................39
Row Window in Plot Manager .....................................................................................................................................................................39
Histogram Plot in Plot Manager ...................................................................................................................................................................41
Large Histogram Plot in Plot Manager .........................................................................................................................................................42
Scatter Plot in Plot Manager ........................................................................................................................................................................44
Large Scatter Plot in Plot Manager...............................................................................................................................................................45
Table Plot in Plot Manager...........................................................................................................................................................................47
Large Table Plot in Plot Manager .................................................................................................................................................................48
Plot Manager Gate Configuration ................................................................................................................................................................50
Export Data ............................................................................................................................................................................................52
PDF Report .............................................................................................................................................................................................53
Options ..................................................................................................................................................................................................54
21 CFR Part 11 ........................................................................................................................................................................................56
Requirements on the Microsoft Windows Computer System......................................................................................................................56
NucleoView™ User Groups...........................................................................................................................................................................56
Approval.......................................................................................................................................................................................................57
Event Log......................................................................................................................................................................................................57
License, Protocol and Documentation Installation ..................................................................................................................................58
Introduction .................................................................................................................................................................................................58
Maintenance and Backup .......................................................................................................................................................................59
NucleoView™ Software Maintenance ..........................................................................................................................................................59
NucleoCounter® Instrument Maintenance ..................................................................................................................................................59
How To...................................................................................................................................................................................................60
How to Get Context Sensitive Help ..............................................................................................................................................................60
How to Verify Correct Operation of the NucleoCounter® Instrument after Transportation........................................................................60
Keyboard Shortcuts ................................................................................................................................................................................61
Trouble Shooting ....................................................................................................................................................................................62
Appendix A: Description of changes from latest revision.........................................................................................................................65

991-0252 Rev. 1.6 June 2016 5
Quick Guide
1. Install the NucleoView NC-250™ software and the NucleoCounter® NC-250™ instrument as
described in the documentation on the USB stick containing the NucleoView NC-250™ software.
2. Start the NucleoView NC-250™ software by double-clicking NucleoView NC-250™ icon on the
desktop.
3. Wait while the NucleoCounter® NC-250™ instrument initializes. The slide tray can be heard aligning
during this process. When the LED on the instrument turns green, the instrument is ready.
4. Click the button (below the ‘F3’button) and select the desired protocol.
5. Click the button to see the application note for the selected protocol.
Check that you have all the materials needed for this protocol (slides, reagents ...).
6. Mix your cells sample with the correct solution(s) and load an A2 or A8 sides.
7. Eject the slide tray and insert the slide.
8. Select the chambers on the slide to be analyzed by clicking in the checkboxes.
9. Optional: Write a descriptive text in the Sample ID field and enter a user name in the Operator
field.
10. Press the ‘Run’button.
A few moments later, the results of the analysis will be displayed.
11. Repeat steps 6 to 8 to perform the same protocol again on a new sample or repeat from step 4 to
start a new type of analysis.

991-0252 Rev. 1.6 June 2016 6
Installation Guide
Installation Overview
Important: You must be logged on as system administrator to install the NucleoView NC-250™ system
components.
In a first time installation, you will typically install both the NucleoView NC-250™ software and one or more
sets of NucleoCounter® NC-250™ instrument specific configuration data. This involves installation and
activation of various USB drivers on one or more USB ports.
To uninstall the software follow the described Un-installation procedure.
Minimum Computer Requirements and Preparations before Installation
Following PC requirements must be fulfilled before you can perform the installation:
1. Operating System: Windows 7, Windows 8.1 or Windows 10.
The Windows operating system must not be virtualized.
Specifically for Windows 7: Ensure that Windows Update KB3033929 have been installed (see the
trouble shooting section for details on this).
2. To install the NucleoView™ application, you need to log on with administrator rights.
3. At least 4 GB RAM and 10GB free disc space is recommended.
4. At least 2.0 GHz clock rate.
5. At least one USB port must be available.
6. Screen size minimum 1366 x 768 pixels.
To perform the installation you will also need the NucleoCounter® NC-250™ instrument and the NC-250™
Package which comprises power supply, cables and the USB stick containing the software.
IMPORTANT: Make sure the serial number printed on the instrument matches the serial number on the
USB stick.
Installing the NucleoView™ Software and NucleoCounter® Instrument
This section describes the software and instrument installation on Windows 7. For other versions of
Windows there will be minor variations, but as a general rule, simply accept all the default settings as they
are presented.
Installation of the software and instrument typically takes 5-8 minutes.
1. See the previous section about minimum computer specifications and preparations.
2. Ensure that the NucleoCounter® NC-250™instrument is NOT connected to the PC.
3. IMPORTANT: Log on with administrator rights for this installation session.
4. Insert the USB stick holding the software.
991-0252 Rev. 1.6 June 2016 7
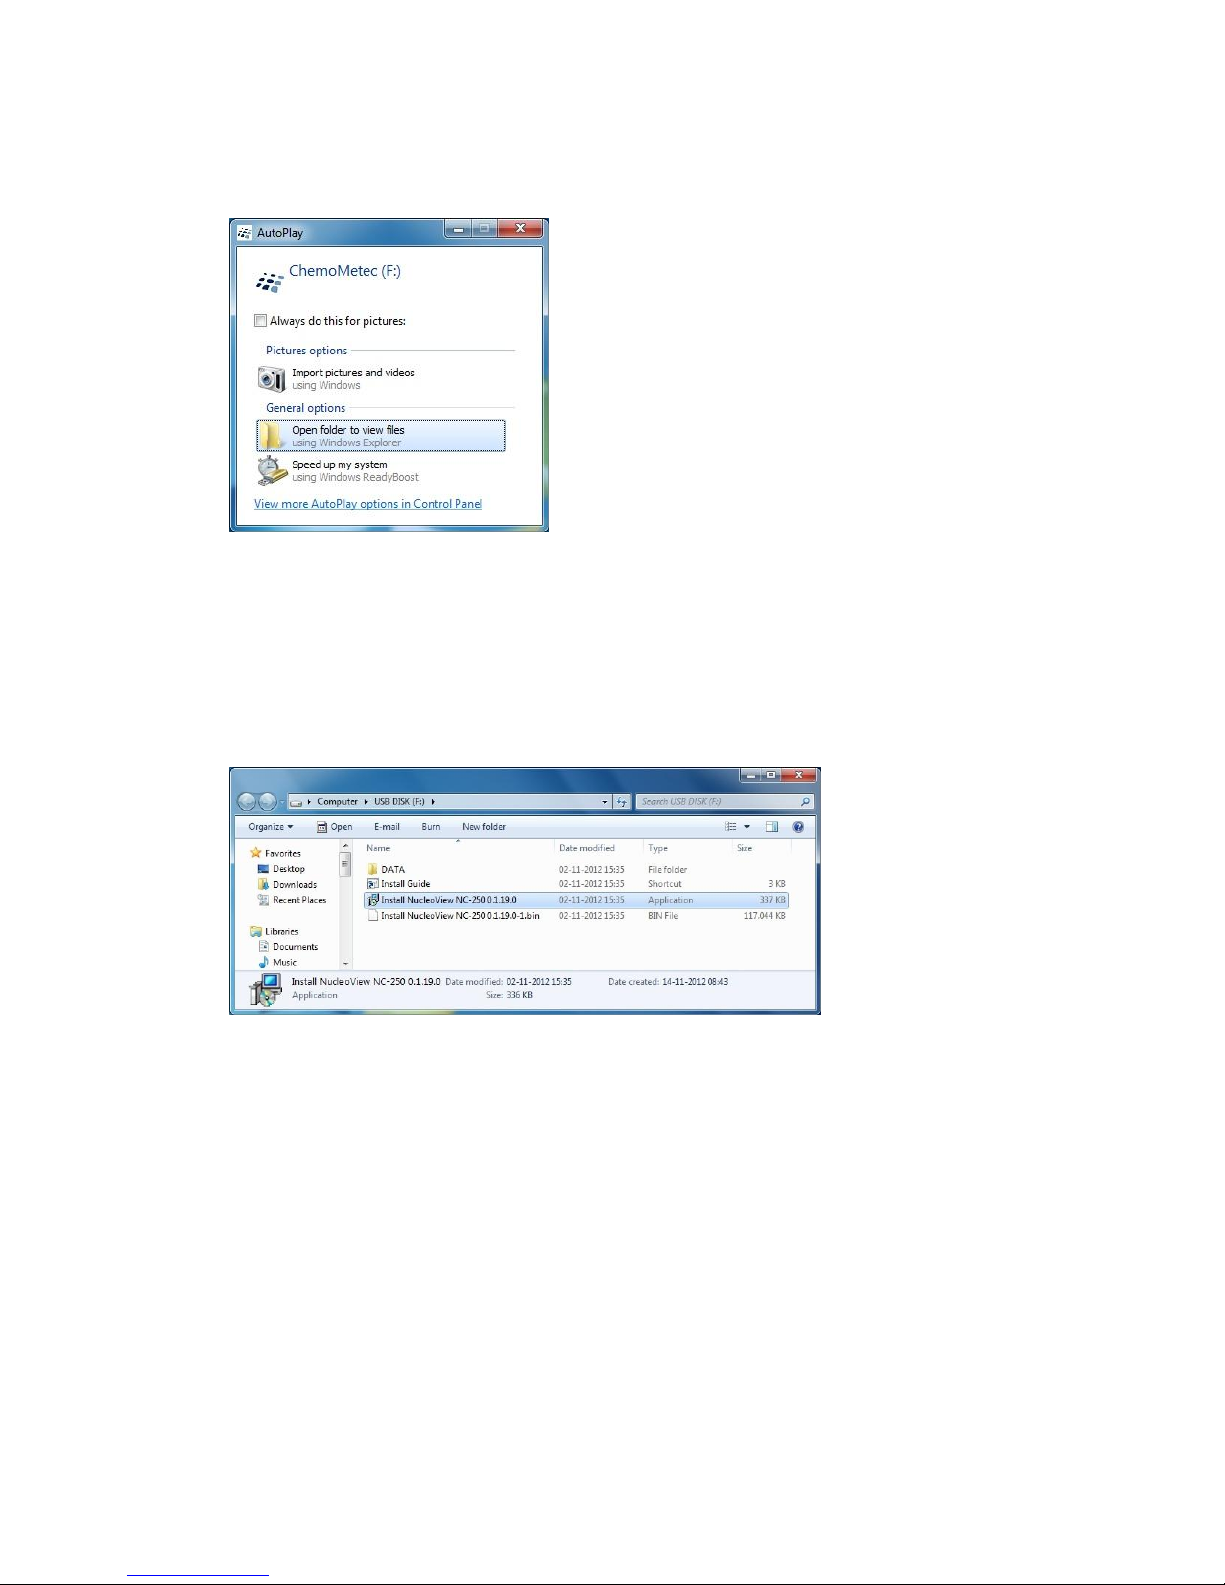
5. Windows will detect the USB stick and present an AutoPlay window if AutoPlay is enabled.
Select the Open folder to view files option.
If AutoPlay is not enabled open the contents of the USB stick via Windows Explorer.
6. The directory contents on the USB stick will be shown. Double-click on the Install NucleoView NC-
250™X.X.X.X file (the version number e.g. 0.1.19.0 will vary depending on your installation) to
launch the installation program.
Note: It is the .exe file you should double-click, not the .bin file. The .exe file also has the
installation icon associated in contrast to the icon for the .bin file.
7. If a window with the text ‘Do you want to allow the following program from an unknown publisher
to make changes to this computer?’appears, click ‘Yes’.
991-0252 Rev. 1.6 June 2016 8
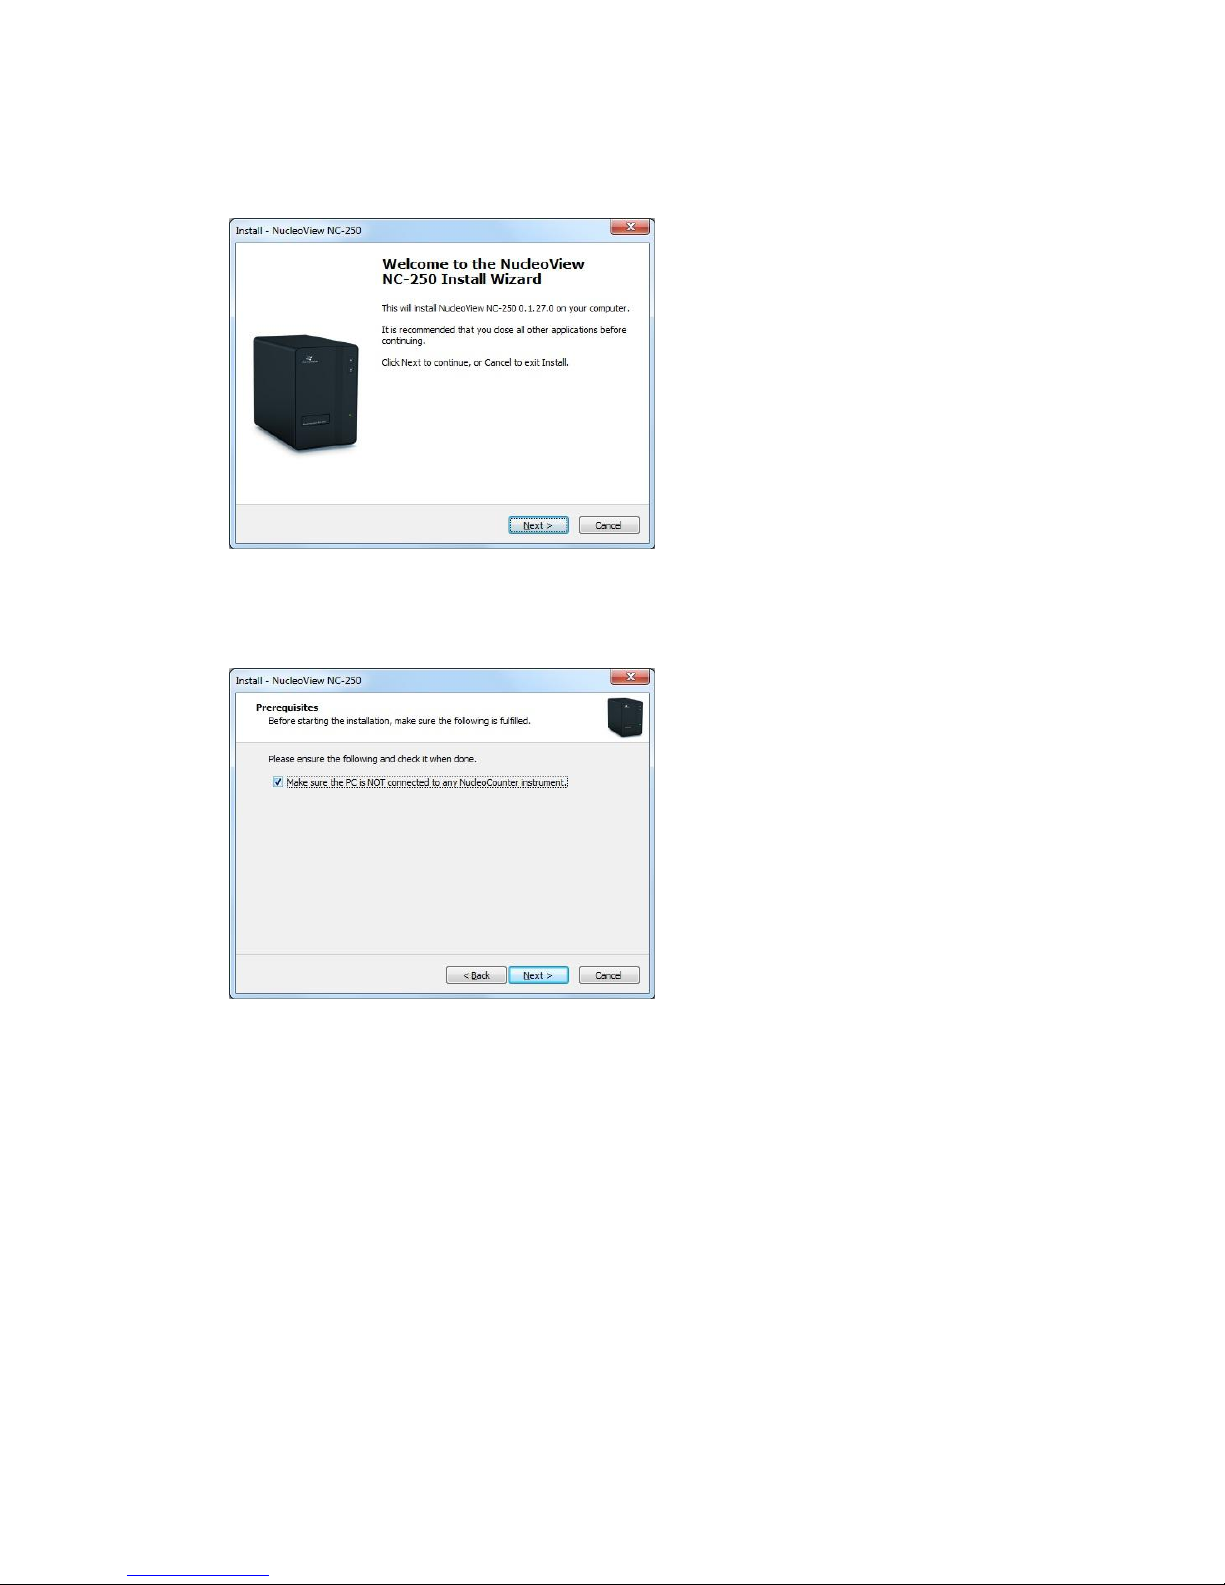
8. After a few seconds the ‘Welcome to the NucleoView NC-250™Install Wizard’window will appear.
Click ‘Next’.
9. On the Prerequisites window you must check the check box to confirm that you have disconnected
all NucleoCounter® instruments from the PC.
Click ‘Next’.
991-0252 Rev. 1.6 June 2016 9
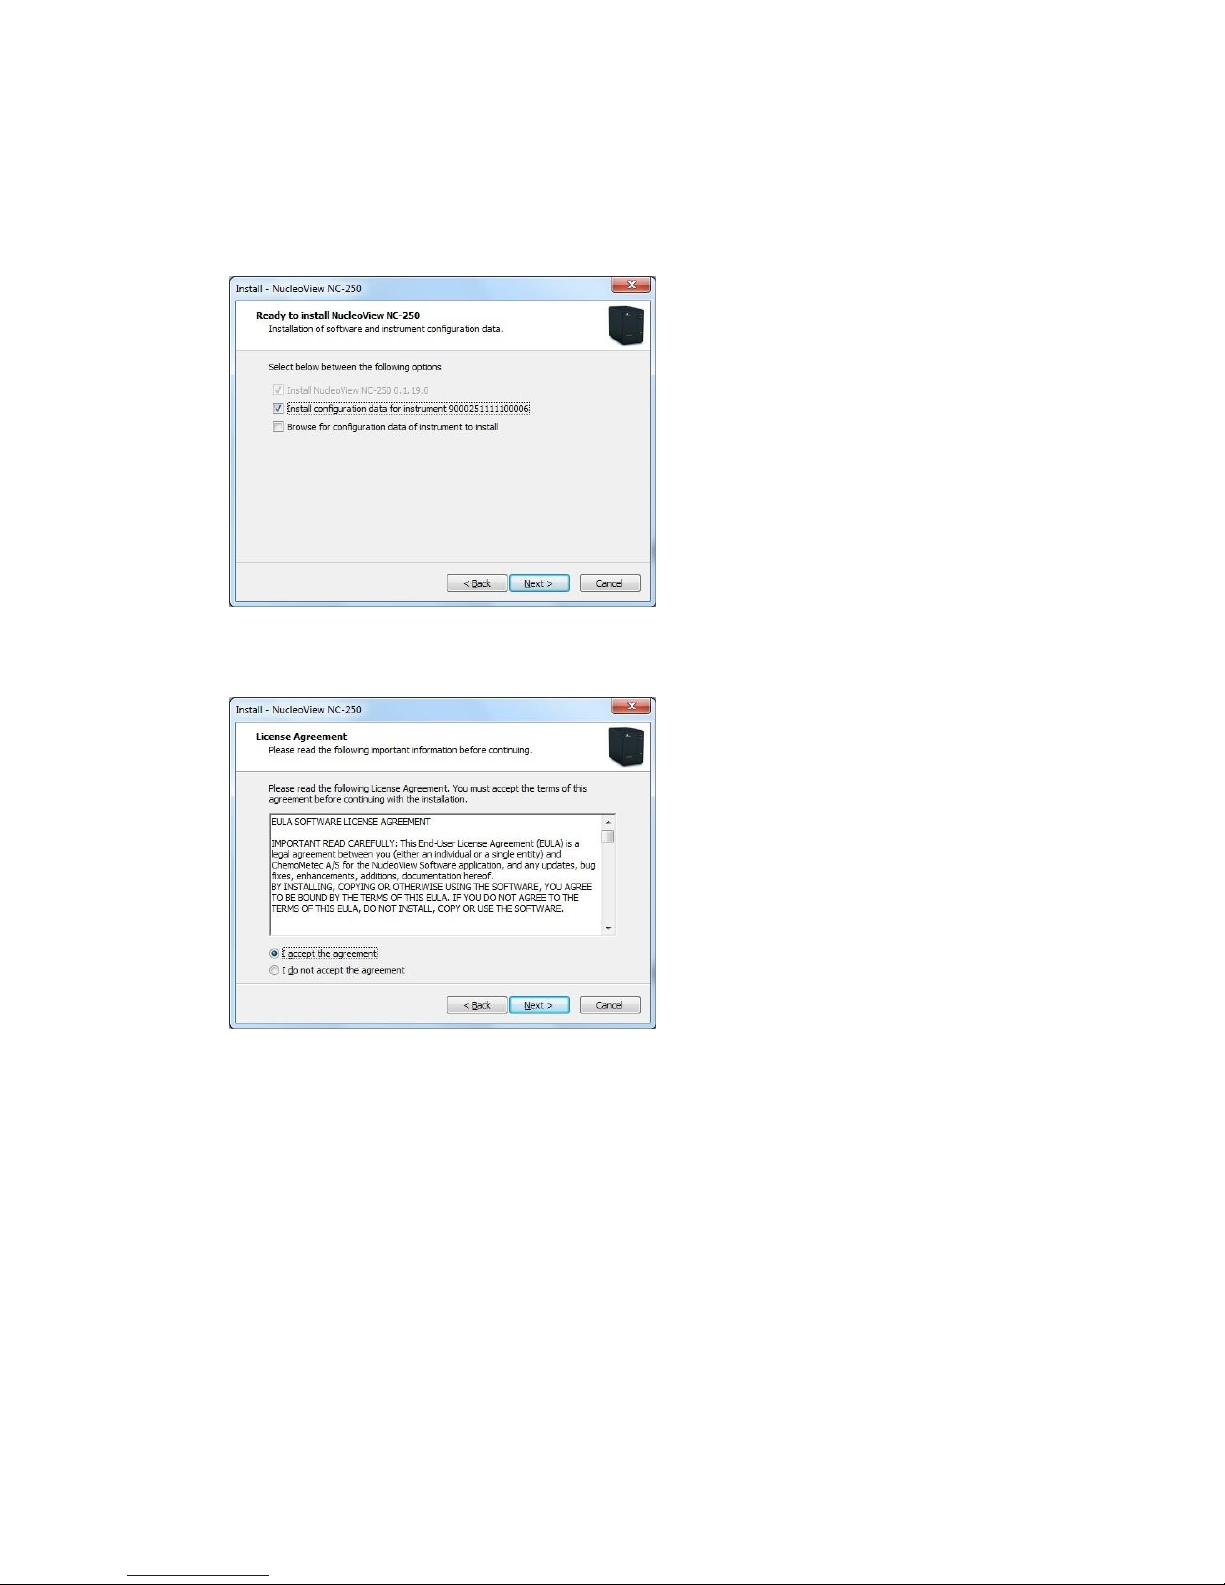
10. On the ‘Ready to install NucleoView NC-250™’ window you will be given options to install or
upgrade the NucleoView NC-250™software itself, to install configuration data for specific
instrument(s) and to browse for instrument configuration data which are stored elsewhere. Check
the appropriate options and click ‘Next’.
11. On the License Agreement window read the license agreement. To proceed with the installation
you will have to select ‘I accept the agreement’ and click ‘Next’.

991-0252 Rev. 1.6 June 2016 10
12. On the ‘Select Additional Tasks’ window check the desired options and click ‘Next’.
Checking the ‘Associate ChemoMetec Files with the NucleoView application’ will associate the
image files *.cm and protocol files *.cmsx with the NucleoView application making it possible to
open the files directly by double-clicking.
13. On the ‘Ready to install’window click ‘Install’.
The ‘Installing’window will appear and show progress of extraction and copying of files.
During the installation some windows may appear to pause, this is most likely due to installation of
redistributable files from Microsoft framework. Please wait for these files to install and do not close
the window. This process may take several minutes.
You may also see a command prompt window briefly appear, reporting about installation of a
driver.
991-0252 Rev. 1.6 June 2016 11
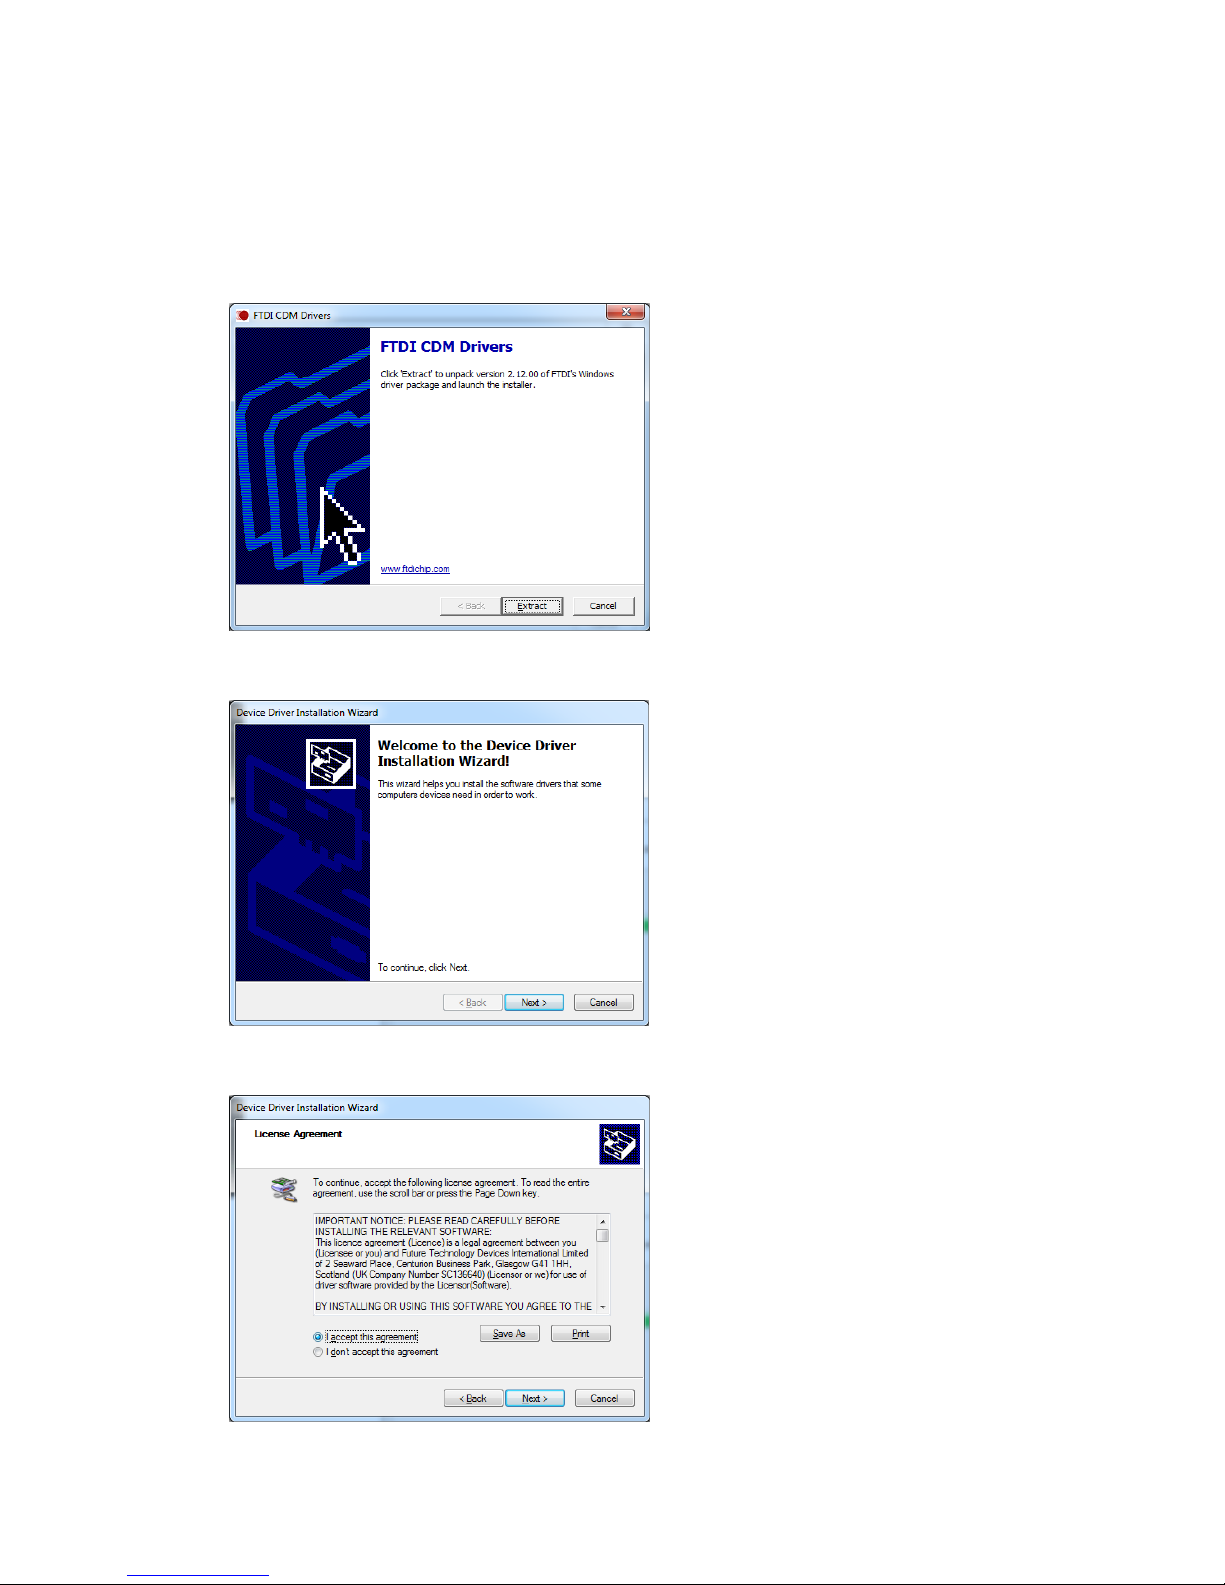
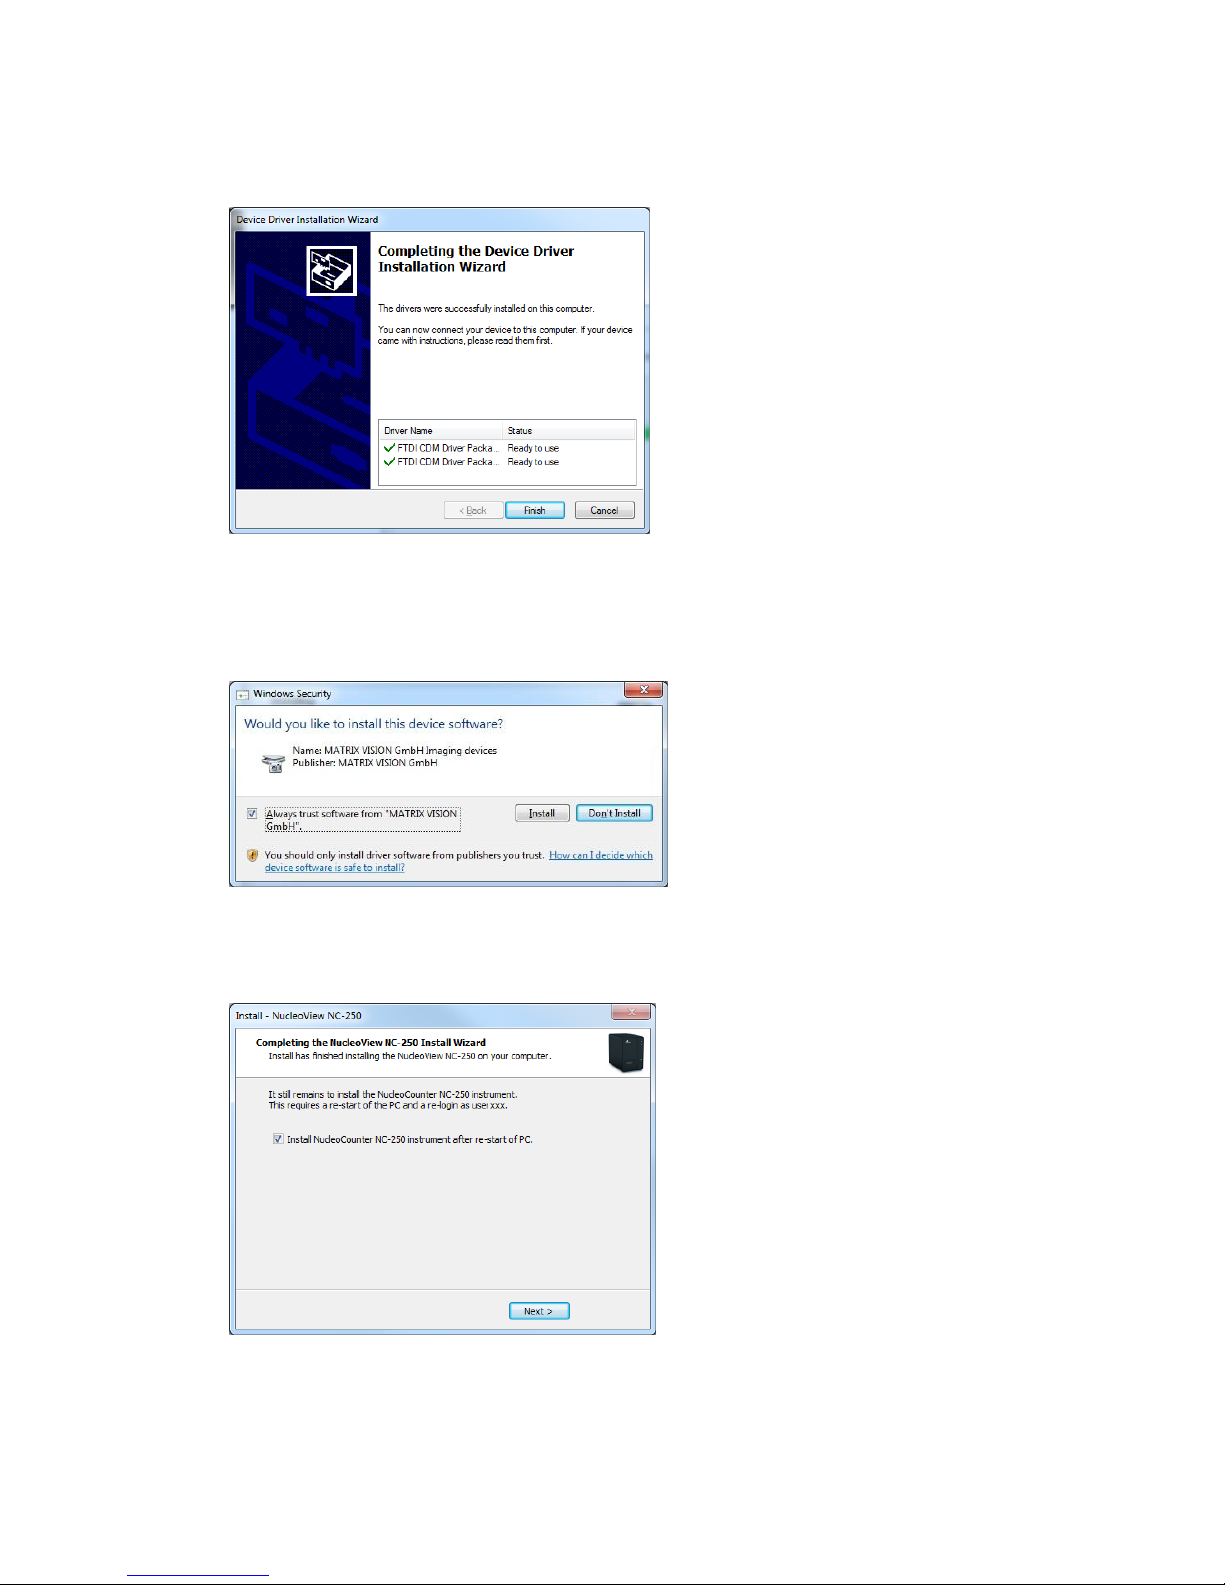
14. On the ‘Window Security’ window click Install.
Installation of FTDI CDM divers may appear.
Select ‘Extract’on the FTDI CDM Drivers window.
Select ‘Next’on the Device Driver Installation Wizard window.
Select ’I accept this agreement’and click ’Next’.
991-0252 Rev. 1.6 June 2016 12
Click ’Finish’to complete the FTDI driver installation.
15. On the ‘Window Security’window click Install.
Optional: To avoid this window during future software upgrades check the box Always trust
software from ‘MATRIX VISION GmbH’.
16. On the ‘Completing the NucleoView NC-250™Install Wizard’window you may optionally deselect
the check box if you only wish to install the software without attaching the instrument.
Click ‘Finished’.
17. On the ‘Completing the NucleoView NC-250™ Install Wizard’ window you may select the option to
restart the PC later. The Software requires a restart of the PC to operate correctly. Make sure to
login with the same user after restart.

991-0252 Rev. 1.6 June 2016 13
Click ‘Finish’.
18. After installation of the NucleoView NC-250™ software two new shortcuts have been placed on
your desktop. One is the NucleoCounter® NC-250™ instrument icon used to launch the NucleoView
NC-250™ software, the other is a shortcut to the data folder where NucleoView NC-250™ stores
application data.
After restart of the PC the NucleoView NC-250™software has successfully been installed.
The NucleoView NC-250™program will now automatically be started and it will guide you through the
instrument installation procedure, if the check mark for ‘Install NucleoCounter® NC-250™instrument after
Install has finished’was checked.
Note: Depending on file versions and previous install history, a reboot of the computer may be requested
before the NucleoView NC-250™program is launched. If a reboot is needed, it is essential that you log on
using the same administrator user as used during the above installation.
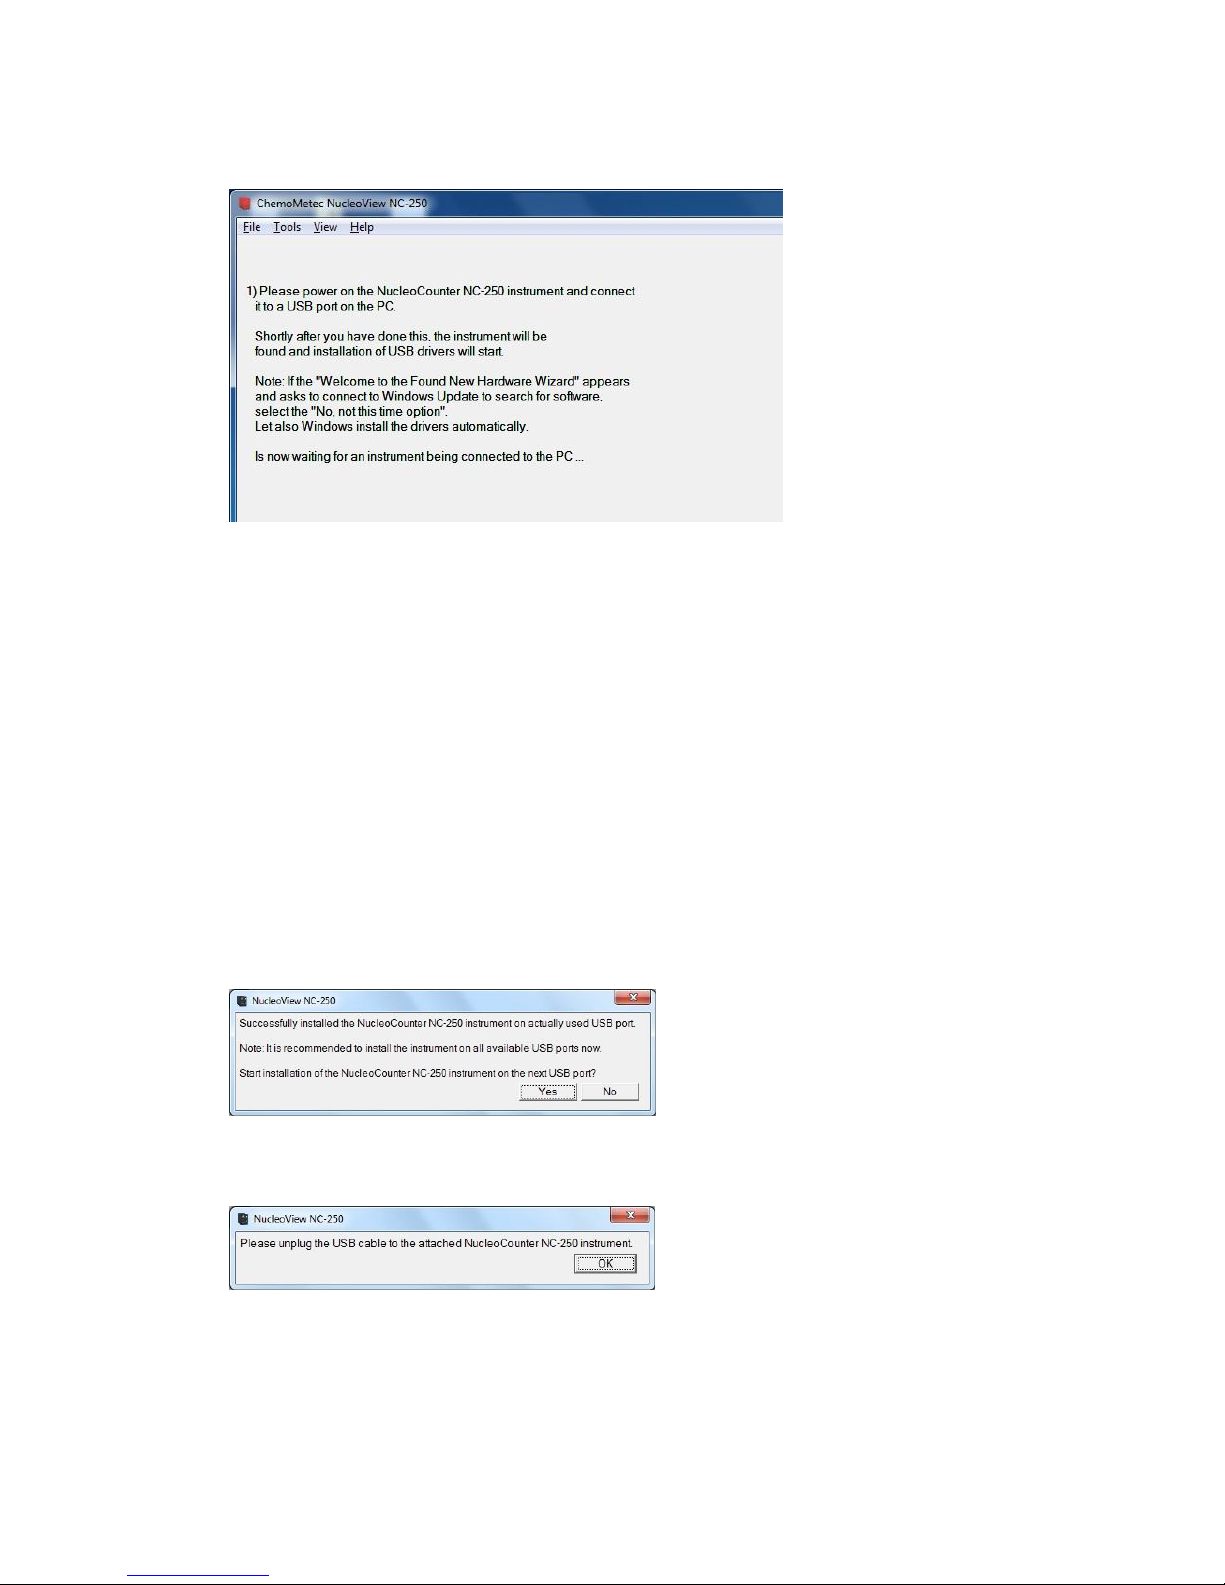
1. NucleoView NC-250™is now launched in installation guided mode. Click ‘OK’to continue with
installation of the NucleoCounter® NC-250™Instrument.
2. Follow the on-screen instructions for the installation of the NucleoCounter® NC-250™ Instrument
using the USB cable and power supply. Note that the instrument icon in the upper left corner of the
991-0252 Rev. 1.6 June 2016 14
application bar is red while no instrument is attached.
3. You will now see a series of pop-up messages from the Windows operating system informing about
driver installations. Among those are:
- A USB hub inside the NucleoCounter® NC-250™instrument
- FTDI device driver installed
- The camera
Due to the intentional and very fast reconfiguration of the camera, you may see an error message
from Windows, which is not of any consequence. Click Close on any of these pop up messages if
needed.
When the NucleoView NC-250™software detects and has initialized the instrument, the previous
red icon changes to true life colors indicating the instrument has been successfully installed.
4. NucleoView NC-250™ will display a message box stating successful installation of the instrument,
and recommends that you continue installing this instrument on the remaining USB ports on the
PC. Click ‘Yes’to do so.
5. You will then be prompted to unplug the USB cable from the USB port on the PC. Do this and click
‘OK’.
6. When NucleoView detects that the instrument has been disconnected, the icon will again turn red,
and you will be prompted to connect the instrument to another USB port on the PC.

991-0252 Rev. 1.6 June 2016 15
7. Repeat the procedure described to install the instrument on the remaining USB ports on the PC.
8. If you are installing more than one instrument on the same PC, you must repeat the USB
installation for all instruments on all USB ports, but note that only one instrument must be
attached at any time.
9. Make sure that virus protection and other programs do not affect disc operations on the
ChemoMetec data folder. Otherwise sharing violations may occur when a program such as a virus
protection program is scanning a cm file while NucleoView is trying to access the same file. In virus
protection programs disable scanning of the ChemoMetec data folder:
C:\Users\Public\Documents\ChemoMetec. Furthermore, if alternative folders are selected in the
options in NucleoView, also disable scanning of these folders.
Installing Licenses and Protocols
Follow the procedure described in the Licenses section to install licenses and protocols. This is not needed
during a normal installation procedure, as licenses and protocols are installed automatically.
Software Upgrade
New software releases are typically distributed via our web page or on USB sticks and are installed as
described below. Collected data (images), settings and installed licenses will be preserved.
1. IMPORTANT: Log on with administrator rights for this upgrade session.
2. Disconnect any NucleoCounter® NC-250™instrument connected to the PC.
3. Insert the USB stick holding the software upgrade or download and unpack the software upgrade.
4. Continue as described in the previous section ‘Installing the NucleoView NC-250™ Software and
NucleoCounter® NC-250™ Instrument’ and the NucleoView NC-250™Install Wizard will now guide
you through the remaining part of the upgrade.
Installing a new NucleoCounter® Instrument
To install one or more new NucleoCounter® NC-250™instruments, use the USB stick holding the
appropriate NucleoView NC-250™software release and follow the procedure in the previous section
describing installation of the software. The NucleoView NC-250™Install Wizard will guide you through the
remaining part of the upgrade. While following this procedure, you will be given the option to specify which
NucleoCounter® NC-250™ devices you want installed (identified by their serial numbers). Be sure to check
the boxes which specify the new serial number(s) you want installed.
You will also be given the option to browse for and select instrument data stored elsewhere.
IMPORTANT: You may install multiple instruments on the same PC, but be aware that NucleoView NC-250™

991-0252 Rev. 1.6 June 2016 16
is only able to operate one instrument at the time. You must never try to operate with more than one
instrument as behavior may not be correct.
Uninstall NucleoView™ Software
Either uninstall via Add/Remove Programs in the Control Panel, or run the un-installer via the ChemoMetec
->NucleoView NC-250™->Uninstall NucleoView NC-250™in the Start Menu. This may be required if you
wish to downgrade to an earlier version of NucleoView NC-250™.
Validation with IQ, OQ and PQ protocols
After installation/upgrade of the NucleoView NC-250™ software and/or NucleoCounter® NC-250™
instrument and after transportation of the NucleoCounter® NC-250™ instrument to a new location, it is
recommended that you perform validation by running the Installation Qualification (IQ Test), Operation
Qualification (OQ Test) and Performance Qualification (PQ Test) protocols as described below.

991-0252 Rev. 1.6 June 2016 17
Installation Qualification (IQ Test)
1. Start the NucleoView NC-250™ software by double-clicking the icon on the desktop.
2. Wait while the NucleoCounter® NC-250™ initialize. During this time, the motors may be heard
positioning.
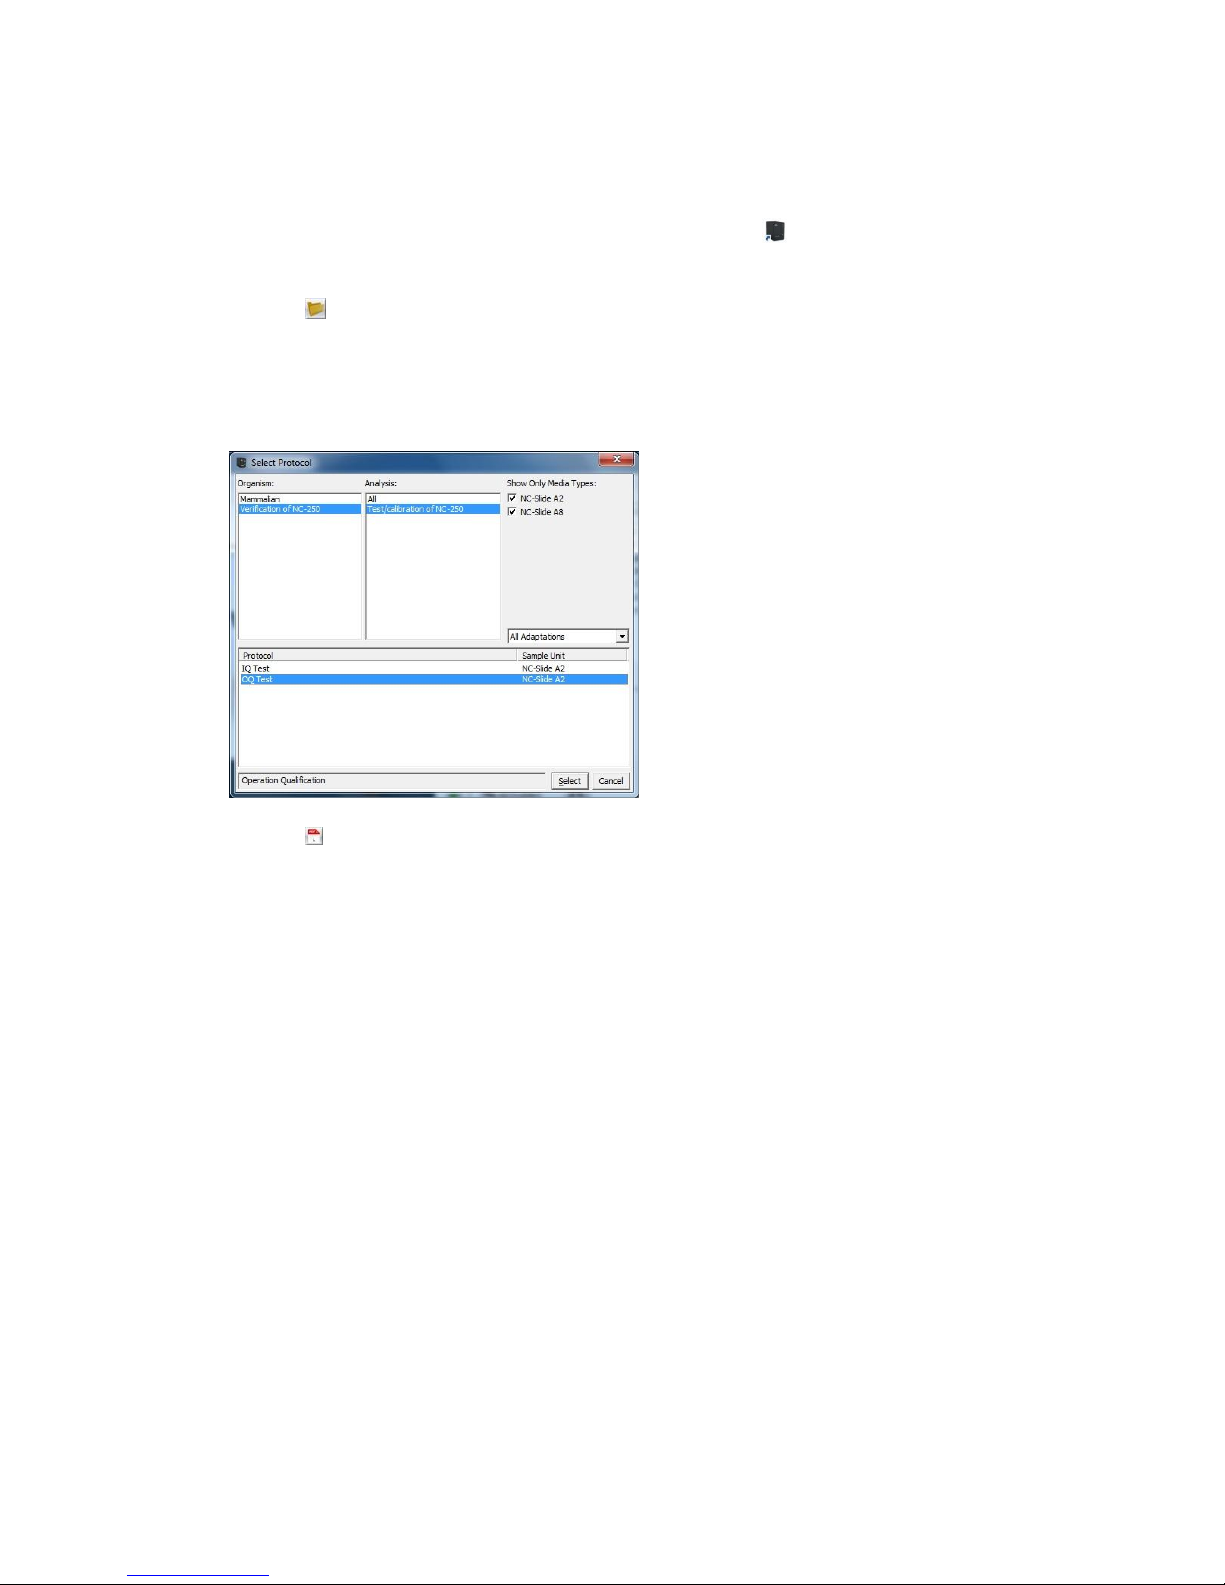
3. Click the button (just below the F3 button in the right side of the main window) to launch the
Select Protocol window.
4. In the Select Protocol window choose "Verification of NC-250" and "Test/calibration of NC-250".
Select the "IQ Test" protocol in the list box in the lower half of the window (make sure that the NC-
Slide A2 checkbox is checked).
5. Click the button to see the application note for the selected protocol.
6. Follow the instructions on screen and in the application note to finalize the IQ Test.
991-0252 Rev. 1.6 June 2016 18
Operation Qualification (OQ Test)
1. Start the NucleoView NC-250™ software by double-clicking the icon on the desktop.
2. Wait while the NC-250™ instrument is initializing. During this time, the motors may be heard
positioning.
3. Click the button (just below the F3 button in the right side of the main window) to launch the
Select Protocol window.
4. In the Select Protocol window choose "Verification of NC-250" and "Test/calibration of NC-250".
Select the "OQ Test" protocol in the list box in the lower half of the window (make sure that the
NC-Slide A2 checkbox is checked).
5. Click the button to see the application note for the selected protocol.
Check that you have all accessories needed for this protocol available (Slides, beads).
6. Follow the instructions on screen and in the application note to finalize the OQ Test.
991-0252 Rev. 1.6 June 2016 19
Performance Qualification (PQ Test)
1. Check that you have a 912-3003 NC Test Kit 3 (Slides, beads).
2. Start the NucleoView NC-250™ software by double-clicking the icon on the desktop.
3. Wait while the NC-250™ instrument is initializing. During this time, the motors may be heard
positioning.
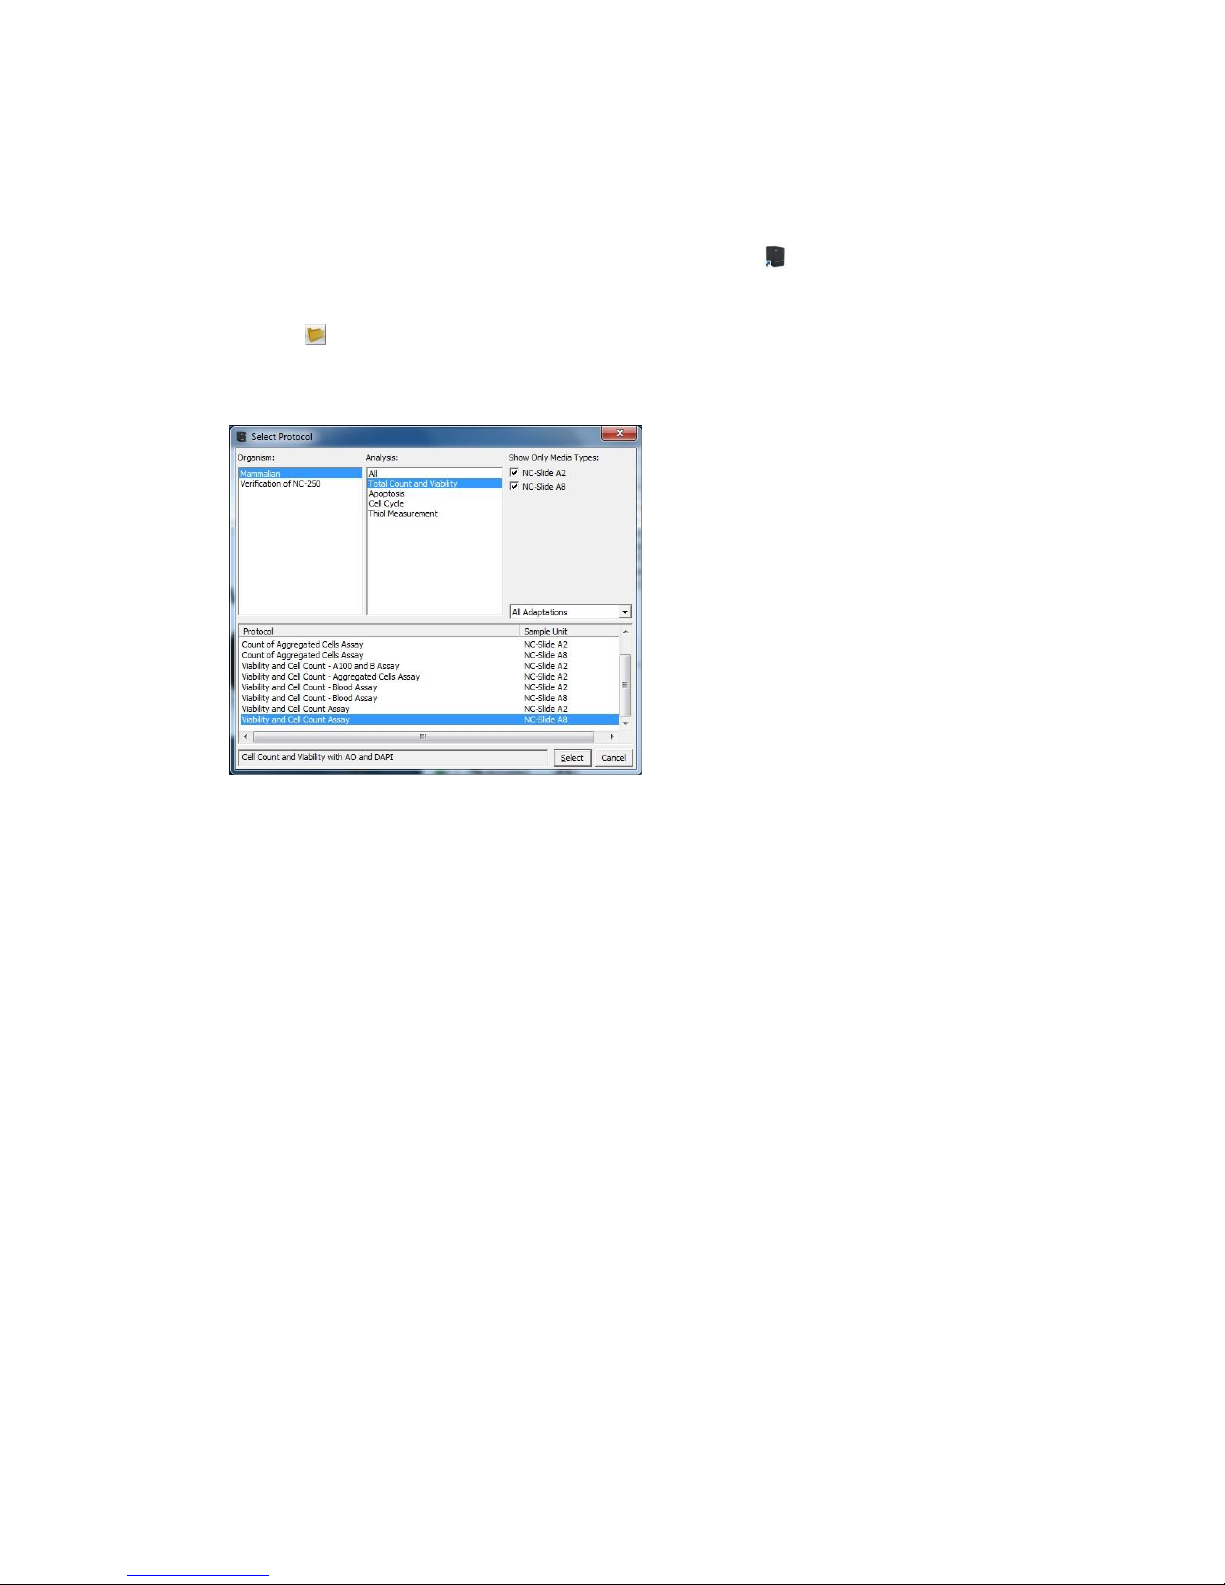
4. Click the button to launch the Select Protocol window.
5. In the Select Protocol window choose "Mammalian" and "Total Count and Viability".
In the list box in the lower half of the window, select the "Viability and Cell Count Assay" protocol
for the media type you wish to test.
6. Follow the instructions the 912-3003 NC Test Kit 3 to finalize the PQ Test.

991-0252 Rev. 1.6 June 2016 20
Main Window
Menu Line: See the Menu Line section below for a more detailed description of content.
Image Tab Page: If a file is selected, the image is shown on the left hand side of the main window. Zooming
in and out on the image may be done by using the scroll wheel with the mouse pointer inside the image
area. Zooming may also be achieved by using the + or - buttons. To zoom in on a tablet PC, touch the screen
with two fingers and then slide them apart. To zoom out, drag your fingers together. Pan with the ‘arrow’
buttons or by dragging with the mouse.
Right-click options: Right-click on the image to get a context menu offering the following options:
Copy Bitmap Image: Copies the displayed image area to the clipboard.
Track Position: Displays a bar in the top or bottom of the image, where the x and y position is
displayed together with the pixel values for different channels in the picture. The format is X-
position, Y-position: Pixel value Channel 0 Pixel value Channel 1 Pixel value Channel 2 …
This feature can be disabled again by right-clicking on the image and selecting Track Position.
Image Scaling: Opens the Image Scaling window, where the presentation of the image scale in the
different channels can be modified. See the Image Scaling section for further details.
Main Window Controls:
1. Image selection controls. These controls are used to select which image to show when a file holding
more than one image is selected. Images are numbered 1, 2 and upwards.
Other manuals for NucleoCounter NC-250
6
Table of contents
Other ChemoMetec Measuring Instrument manuals


