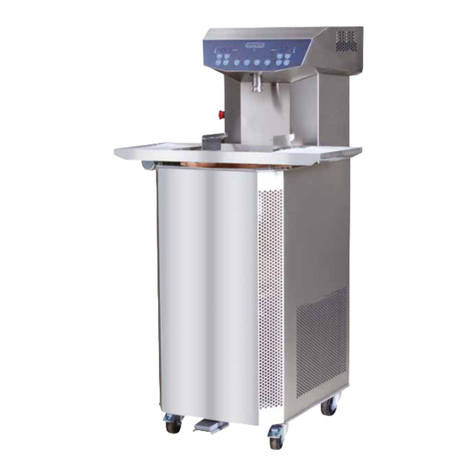
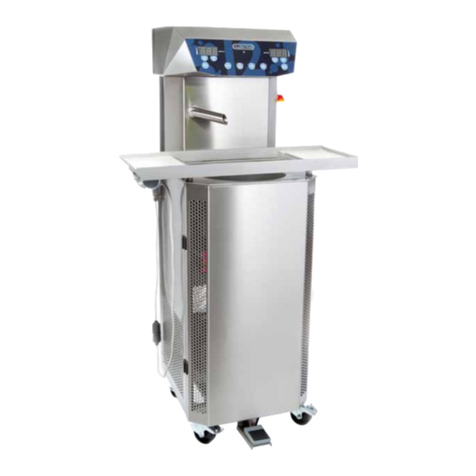
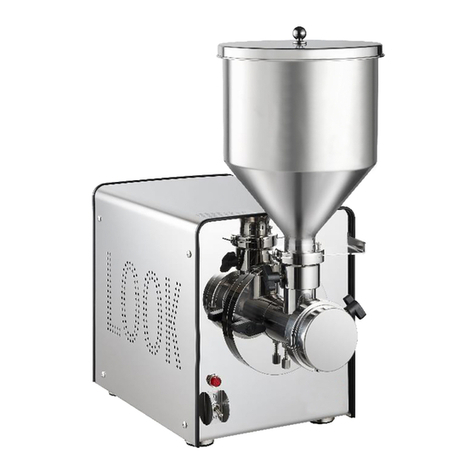
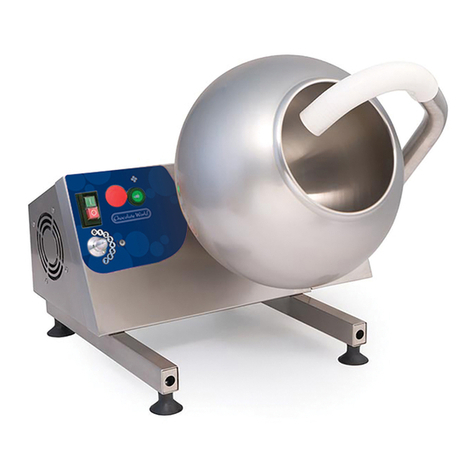
Chocolate World Cw60 User manual

Lange Elzenstraat 123 • 2018 Antwerpen • Belgium • Tel. +32 (0)3 216 44 27
CW60
AUTOMATIC TEMPERING MACHINE
USE AND MAINTENANCE MANUAL

CertifiCate of Conformity
Certificate of conformity according to EU Standards
CONTINUOUS CYCLE TEMPERING MACHINE
We, Chocolate World NV, Lange Elzenstraat 123, 2018 Antwerp, Belgium,
hereby declare that the mentioned product:
Type: CW60 Serial nr
Year of construction:
Date:
Qualifies for the following guidelines:
• 2006/42/EG
Guidelines related to the security of the machine
• 2004/108/EG
Electromagnetic compatibility guidelines.
• 2006/95/EG
Low Voltage directive
Filip Buelens
President
Lange Elzenstraat 123 • 2018 Antwerpen • Belgium • Tel. +32 (0)3 216 44 27
Fax +32 (0)3 216 98 33 • www.chocolateworld.be • [email protected]

3
DESCRIPTION
CONDITIONS OF WARRANTY
The machine is under warranty for 24 months starting from the date of delivery. The warranty is applied on
material defects and on workmanship defects. The warranty covers the repair or replacement of the part
when recognized as being defective. Any modifications made to the machine by the buyer or by third party,
which includes exposure of the machine to electrical tension which is 10 % different as the suggested tension
on the machine, results in automatic destruction of the warranty.
The CW60 is a continuous cycle tempering machine used for
processing chocolate. The tempering machine is composed
out of a tank with a capacity of 40 kg, where the chocolate is
melted by electrical heating systems.
A screw of Archimedes (circulation pump), made out of
stainless steel, pumps the chocolate along a heating
regulation/adjustment system to the top of the machine,
where the chocolate returns to the tank through the spout
of the machine.

4
NUMBERS AND NAMES MACHINE PARTS
14
4
15
17
16
18
3
5
19
1 Control panel
2 Chocolate dosing spout
3 Rotating arm
4 Slider
5 Stainless steel tank
6 Housing
7 Wheels
8 Dosing pedal
9 Keyhole
10 Emergency stop
11 Vibrating motor
12 Main Switch
13 Cooling unit
14 Vibrating table
15 Scraper
16 Vibrating mat
17 Vibrating spring
18 Electrical connection vibrating table + heating
19 Plexiglass lid
1
2
3
5
4
6
8
7
11
12
13
9
10
9

5
NUMBERS AND NAMES MACHINE PARTS
20 24
21
22
23
20 Coolant reservoir
21 Motor + gearbox
22 Water cooling motor pump
23 Sensor for tempering temperature
24 Print plate
25 Sensor for heating regulator
26 Warming of heating regulator
27 Valve
34 Condenser
26
27
34
25

6
NUMBERS AND NAMES MACHINE PARTS
28 Heating area
29 Tank cooling water
30 Cooling pump
31 Cooling water tap
32 Rotating arm motor
33 Sensor cooling tank
34 Condenser
35 Ventilator
36 Compressor
32
34
35
29
36
30
31
33
28

7
POWER AND PRINT PLATE CONNECTIONS
37 Exit 220 Volts (vibrating table)
38 Heating chocolate pump
39 Cooling water pump
40 Heating melting tank
41 Refrigerator system
42 Chocolate pump
43 Rotating arm
44 Primary connection transformer 220V
45 3 Phase + entrance Neutral
46 Transformer 220V - 24V
47 Secondary connection
transformer 24V
48 Auxiliary exit 24V
49 Heating spout
50 Interrupter pedal
51 Communication cable
52 Safety contact
37
38
39
41
42
43
44
45
46
47
52
48
49
50
51
40

8
TECHNICAL CHARACTERISTICS
A Tank temperature indication display
B Chocolate temperature indication display (tempered chocolate)
C Heating button
D Rotation arm
E Presence of main voltage
F Pump button
G Tempering function button
H Increase and decrease of temperature in melting tank
I Reset button
L Dosing function button
M on/off button for auxiliary 220V (vibrating table + heating)
N on/off button for auxiliary 24V (vibrating table + heating)
O Increase and decrease tempering temperature.
FRONTPANEL
A C D E F G B
IH M
LN O
• Tank capacity: 60 kg of chocolate
• Hourly production: up to 200 Kg
• Standard dosing function
• Power required Kw 3.5 (3 phase)
• Microprocessor technology
featuring digital temperature display
• Dosing pedal
• Heated vibrating table
1521
980
600 879
640

9
INSTALLATION
• Remove all packaging from the machine and remove the vibrating table (14) from the back of the machine.
Take off the plexiglass lid (19) and make sure nothing prevents the arm from rotating.
• Clean the machine as described on p.11
• Connect the machine by plugging in the electrical plug and assure the voltage and hertz supplied by your
electrical supplier are the same as shown on the identification tag of the machine.
• Activation procedure
- Activate the main switch (12)
- Press the
RESET
(C) button to activate the heating system
- Press the RESET
(I) button to reset the machine
- Press the
RESET
(D) button to activate the rotating arm
• Is the rotating arm (3) turning anticlockwise?
- If so, the machine is ready for use
- If not, switch off the rotating arm (D), heating (C) and main switch (12)
• Remove the plug from the electrical socket
• Open the plug en swap the grey and black cable from position. Never change the position of the blue and
the yellow-green cable!
• Restart the activation procedure. The rotating arm (3) should now turn anticlockwise.

10
USE OF THE CW60 TEMPERING MACHINE
For correct use of the machine, respect following instructions:
The machine is not made for chocolate mixed with an additional product.
Color powder is not a problem.
Remark: nuts, beans etc, will collect in one way and the pump will block complete.
• Activate the main switch (12)
• Activate the heating system by pressing button
RESET
(C)
• Install the desired melting temperature by using the
RESET
arrow buttons (H)
• Installed temperature can be read off on display A.
• We advise you to avoid setting the temperature above 50 degrees Celsius so you do not affect the organo-
leptic quality of the chocolate. For correct melting temperatures, we suggest following the recommenda-
tions of your chocolate supplier.
• Add 12 kg of small chocolate pieces or melted chocolate in the melting tank (5).
• Cover the melting tank (5) with the plexiglass lid (19).
• The buttons C-D-F and G are working sequentially and therefore function in 1 direction only:
- At first instance button C has to be activated before D, F and eventually G can be operated.
- To switch off the machine, first press button G, then F, next D en finally button C.
• When the chocolate is completely melted, remove the covering lid (19) and press button (D)
(activate rotating arm) and button (F) (activate pump)
After a couple of seconds the chocolate will flow through the dosing spout. The actual temperature of the
chocolate which is flowing out of the spout can be read off display B.
• Install the appropriate tempering temperature for the chocolate you are using by pressing the arrow
buttons (O). The optimal temperature for dark chocolate is between 30 and 31 degrees Celsius. For milk
chocolate optimal temperature lies between 29 and 30 degrees Celsius and for white chocolate between
28 and 29 degrees Celsius.
Note: these values are not binding and purely for indicative purposes. We suggest you to follow the
recommendations of your chocolate supplier. When the chocolate has reached the desired temperature,
you will be notified by a sound signal.
• When you press the dosing pedal, the flow of the chocolate coming out of the spout will stop. This allows
you, when placing a mould underneath the spout, to control the amount of chocolate being dosed, and
will prevent overflowing of the chocolate while using the moulds. When you release the dosing pedal, the
normal flow starts again.
Note: when using the dosing pedal you stop the pumping system, but not the cooling system. Therefore
the time of pressing the dosing pedal should only be a couple of second to avoid overcristallisation of the
chocolate in the cooling cilinder. In case the dosing pedal is pressed too long, you will be notified by a
sound signal.
• If necessary it’s possible to add melted chocolate to the tank during the tempering process. However do
consider that it will take a few minutes before the desired tempering temperature, which you can see in
display B, will be reached again

11
Switching off the machine after daily production:
• Press button G to switch off the tempering function.
• Wait a couple of minutes, and allow the temperature seen on display B to become equal to the tempera-
ture seen on display A. Then switch off the pump (F) followed by the rotating arm (D).
• Remove the vibrating table and put the plexiglass lid on the tank.
Note: The cooling system, which can be heard by the ventilator, works completely independantly and can
not be operated by the user. It will switch off automatically.
Switching off the machine for a longer time (+7 days)
• If necessary , remove the vibrating table
• Remove as much tempered chocolate from the machine through the spout as possible. We suggest to
pour the tempered chocolate in a suitable block mould and to store it in a dry and cool place.
• Press button G to switch off the tempering function, Then switch off the pump (F) followed by the
rotating arm (D).
• Remove excess chocolate with a hand scraper through the grill on the bottom of the kettle. Switch on the
rotating arm (D) and the pump (F) to remove the last chocolate from the pumping system.
• When no more chocolate comes out of the spout, switch of the pump (F), then the rotating arm (D) and
eventually the heating (C).
• Put the plexiglass lid on the tank.
Note: If you choose not to remove the chocolate from the machine, do consider it will harden and
therefore it will take several hours to melt the chocolate again afterwards.
Emptying the machine and pumping system (for maintenance use only)
• Follow steps 1-6 mentioned under ‘switching off the machine for a longer time (+7 days)
• Then open up the back panel of the machine by turning key 1 (53) clockwise in keyholes (9).
• Open the tap (27), after placing a suitable container under it. Switch on heating, pump and mixing arm.
• Let the chocolate run out as much as possible. If no more chocolate comes out, switch off the pump (F)
and afterwards the rotating arm (D). Close the tap and back panel again.
TROUBLESHOOTING OF SMALL PROBLEMS
• When switching on electricity again after an electrical breakdown, the machine will put itself automatically
in safety mode. During 10-15 minutes you can not operate the machine as this is the time required to
make the chocolate liquid again, hardened by the cooling capacity inside the pumping system.
• In case the machine has been without electricity for just a few seconds, you can simply press the reset
button to switch off the safety mode, so you can immediately resume normal production.
• In case a motor is being blocked by an object, preventing the motor to operate smoothly (eg: too much
hardened chocolate or metal clips), the machine will also turn into safety mode. This mode is indicated by
a red LED in the middle of the front panel. If such situation occures, switch off the machine by using the
main switch button (12), remove the object, and repeat the activation procedure earlier explained in this
manual.
53 Key 1

12
MAINTENANCE AND CLEANING OF THE TEMPERING MACHINE
To clean the exterior of the machine first use a cloth soaked in warm water to remove excess chocolate.
To polish the machine use a soft cotton cloth drained in an alcoholsolution.
Do not use any kind of aggressive soaps or abrasives (PH7: neutral value). The interior of the tank can be
cleaned with a dry clean cotton towel.
If neccesary, the pump system can be cleaned by flushing it with chocolate that you won’t be using for
consumption afterwards.
! Water makes chocolate solid hard! Do not use water to clean the pumping system!
Yearly check the level of the coolant, by removing the valve (26) and looking into the coolant tube. If no
coolant is visible, you need to add coolant untill visible again, composed by 80 % H²0 and 20 % organic
glycol. When done, close the tube using the valve (27)
INSTALLATION AND USE OF THE VIBRATING TABLE:
Assemble the vibrating table on the tempering machine by lining up the 4 springs with the 4 holders on the
machine.
Place the rubber mats on the 2 sides of the vibrating table, to avoid excessive noise while vibrating moulds.
Insert the 2 vibrating table plugs in the sockets on the left side of the machine.
The vibrating function of the vibrating table can be switched on/off by pressing button M.
The heating system of the vibrating table can be switched on/off by pressing button N.
WARNING
The rotating arm inside the melting tank is
a potential source of danger. Avoid at all
times to put hands, clothing or any other
object inside the melting tank while the
rotating arm is moving.
HOW TO USE
The staff operating the machine must be trained and have obtained the basic knowledge for
operating the tempering machine. They must follow all instructions as mentioned in this user
manual. Maintenance staff must be qualified and aware of the instructions mentioned in this
user manual.
Always be careful for the rotating motions of the rotating arm and any other moving
accessories. Prevent others to come too close to the machine while it’s operating.
When the machine is not used, always cover the melting tank by placing the lid over the tank.
The machine is equipped with an emergency stop which can be found on the right side of the machine. In
case of potential danger stop the machine from operating by pressing this emergency button (10). To activate
the machine again after the use of the emergency stop press the main switch and follow the instructions
mentioned before.
For maintenance operations regarding the structural parts of the machine always disconnect the
machine from the main power supply. Always reassemble the machine completely as in its original condition
before reconnecting again to the main power supply.

13
CALIBRATING THE WEIGHT
! this operation should always be performed with tempered chocolate!
• Press button “L” (balance) to open the menu.
• Select program ‘SHI’ on display A, using arrow keys ‘H’. ‘SHI’ can be found in the menu after positions
CH0 - CH9. When selecting ‘SHI’ , value ‘100’ will simultaneously appear on display “B”.
• Catch one shot of chocolate in a suitable container.
• Weigh carefully the contents of this container on the scales, without taking the weight of the container
itself into consideration.
• Enter the measured weight on the right display ‘B’, using the arrow keys ‘O’.
• Return to display ‘A’ and use arrow keys ‘H’ to activate the program ‘SHM’. Value ‘850’ will simultaneously
appear on display “B”.
• Repeat step 3 to step 5.
• Press the arrow keys “H” to confirm.
After performing this operation your machine has adjusted the ratio between the volume and weight of the
chocolate.
Above operation should always be performed when changing the chocolate type / reference.
If desired, the pause time between two shot weights can be modified. To do so, change the “SHP” value.
WORKING WITH THE DOSING FUNCTION
• Press button L to activate the dosing system. On display A you will see the first option of the 15 available
installed weights, originally the first value is installed on 50 grams.
• By pressing the H buttons you can stroll through the 15 available values of the memory of your
tempering machine. In case you want to modify any of these 15 values, go to the position you want to
change using button H.
• Press button ‘O’ to modify the weights. The changed value will be automatically stored.
DISPOSAL AND DESTRUCTION
The coolant liquid needs to be disposed according to the local law and legislation.
All used materials are in a chemical point of view harmless and can be handed out to waste collecting
companies.
PICTOGRAMS
Warning symbols have been placed on the machine. The first symbol can be found above the melting tank
and warns for potential danger of the rotating arm.
The other symbols are the leds situated on the control panel and warn for parts in movement and in function.
Lange Elzenstraat 123
2018 Antwerpen
Tel. +32(0)3 216 44 27
Fax +32(0)3 216 98 33
www.chocolateworld.be
TYPE
SERIE
ANNO
KW
FREON
Made in Belgium

14
DOSING HEAD
VIBRATING TABLE: SPARE PARTS
54 Dosing head
55 Sieve
56 Dosing plate 3x8
57 Dosing plate 3x7
58 Heating sticks
59 Screws
60 Scraper
4 Sliders
54
55
58
60
4
56
57
59
Table of contents
Other Chocolate World Commercial Food Equipment manuals
Popular Commercial Food Equipment manuals by other brands

Diamond
Diamond AL1TB/H2-R2 Installation, Operating and Maintenance Instruction

Salva
Salva IVERPAN FC-18 User instructions

Allure
Allure Melanger JR6t Operator's manual

saro
saro FKT 935 operating instructions

Hussmann
Hussmann Rear Roll-in Dairy Installation & operation manual

Cornelius
Cornelius IDC PRO 255 Service manual

Moduline
Moduline HSH E Series Service manual

MINERVA OMEGA
MINERVA OMEGA DERBY 270 operating instructions

Diamond
Diamond OPTIMA 700 Installation, use and maintenance instructions

Diamond
Diamond G9/PLCA4 operating instructions

Cuppone
Cuppone BERNINI BRN 280 Installation

Arneg
Arneg Atlanta Direction for Installation and Use
