Chuangkai Electronic CKT515 User manual

1
CKT515/CKT515A
Precision DC Resistance Tester
User's Manual
USER
English version
2019
Third edition Rev2.00
Changzhou Chuangkai Electronic Co.,Ltd
Persure Perfect
Condition
2
Foreword
Thank you for purchasing the products of Changzhou Chuangkai Electronic Co., Ltd. Please
read this manual carefully before use.
In this chapter you will learn about the following:
Safety instructions
Company description
Security Information
Limited warranty and scope of responsibility
Safety instructions
This manual describes the information and precautions required to operate the instrument safelyand maintain
the safe state of the instrument.Please read carefully before proceeding. Please read the following
safety-related items carefully to ensure safe and optimized use.
Disclaimer: Please read the following safety information carefully before starting to use the
instrument.Chuangkai Electronic Co.,Ltd will not assume any responsibility for personal safety and
property losses caused by failure to comply with the following terms.
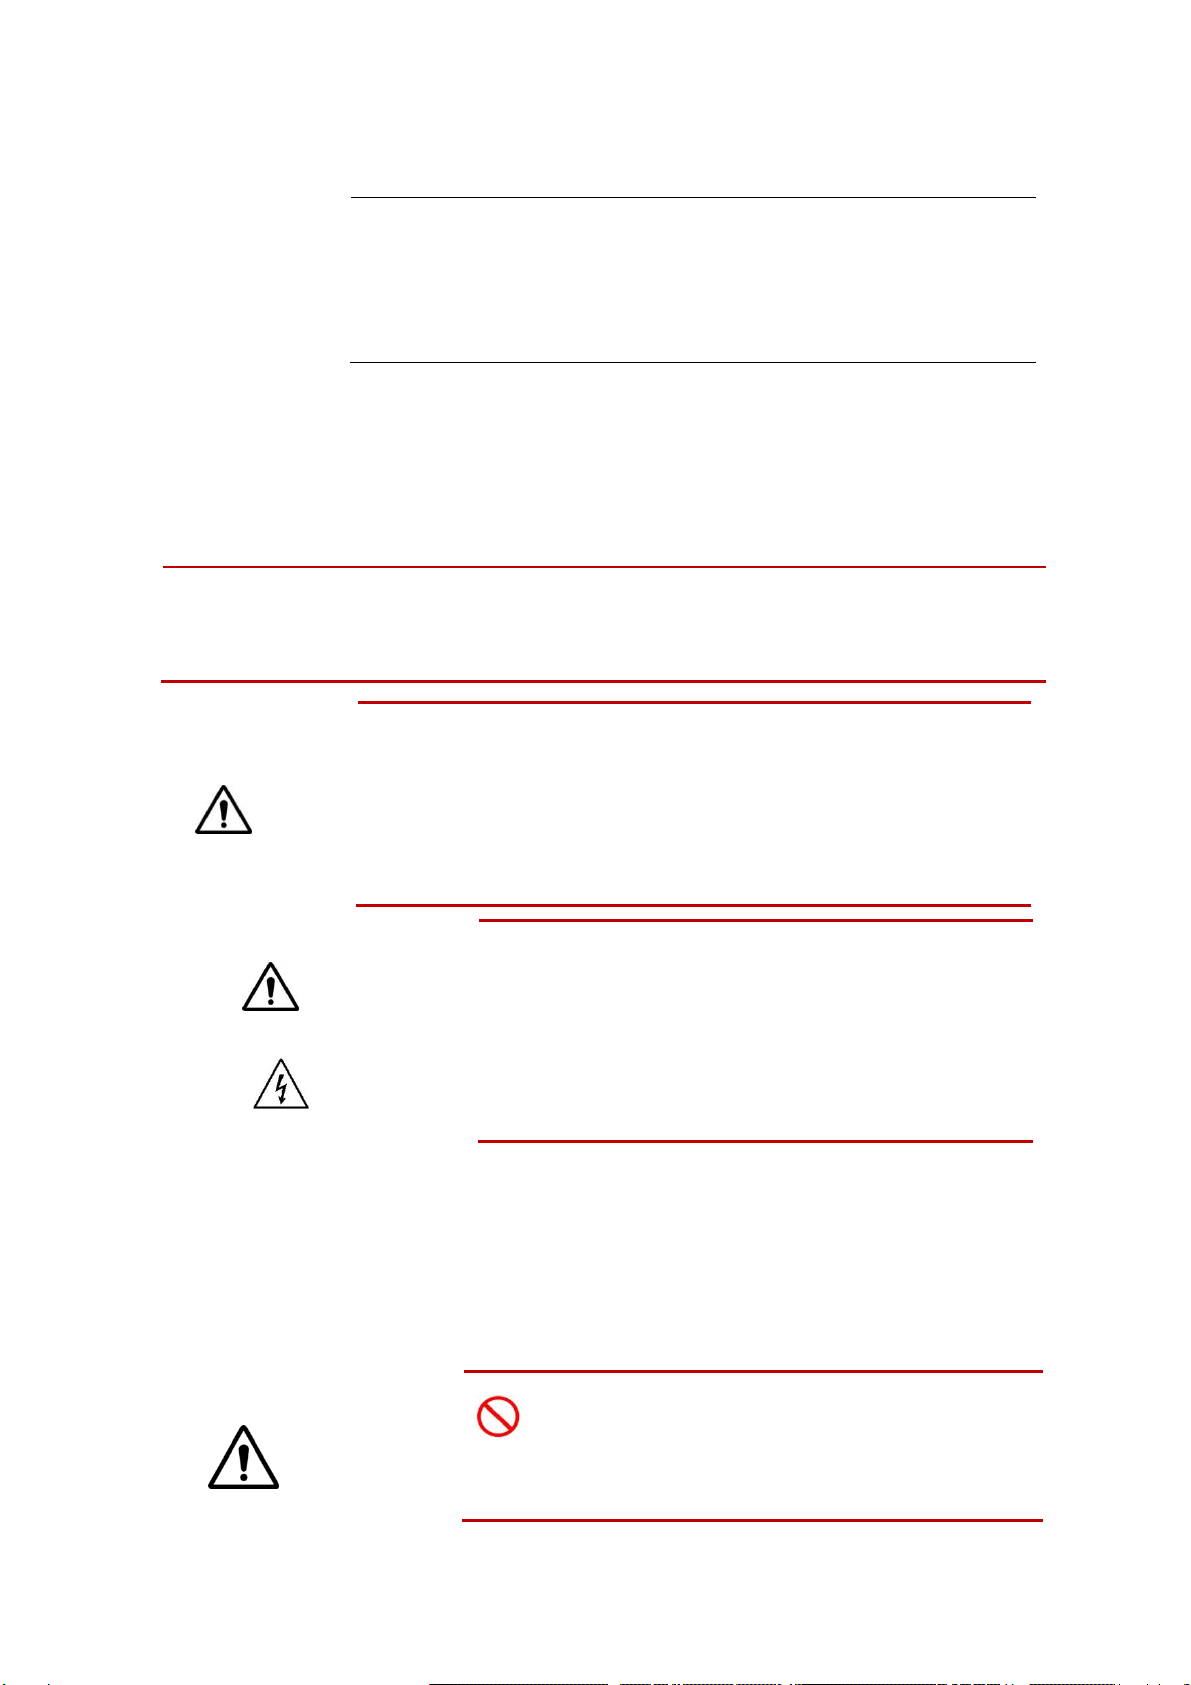
Caveat
The instrument has been designed and tested safely before leaving the factory
and shipped in a safe state.If the measurement method was incorrect, it may lead
to personal accidents and instrument malfunction.Please read the instructions
carefully and operate after fully understanding the content.In the event of an
accident, we will not be responsible except for the reasons of our products.
Warning
Danger
When you find that the following abnormal conditions have
occurred, please immediately terminate the operation and
disconnect the power cord.Immediately contact Chuangkai
Electronic Co., Ltd. Sales Department for
maintenance.Otherwise, it may cause fire or potential electric
shock hazard to the operator.
The instrument is operating abnormally.
The instrument produces abnormal noise, odor, smoke or flash during operation.
During operation, the instrument generates high temperatures or electric shocks.
The power cord, power switch, or power outlet is damaged.
Impurities or liquids flow into the instrument.
Security Information
Caveat:
This instrument strictly forbidslive
testing of the tested piece!
3
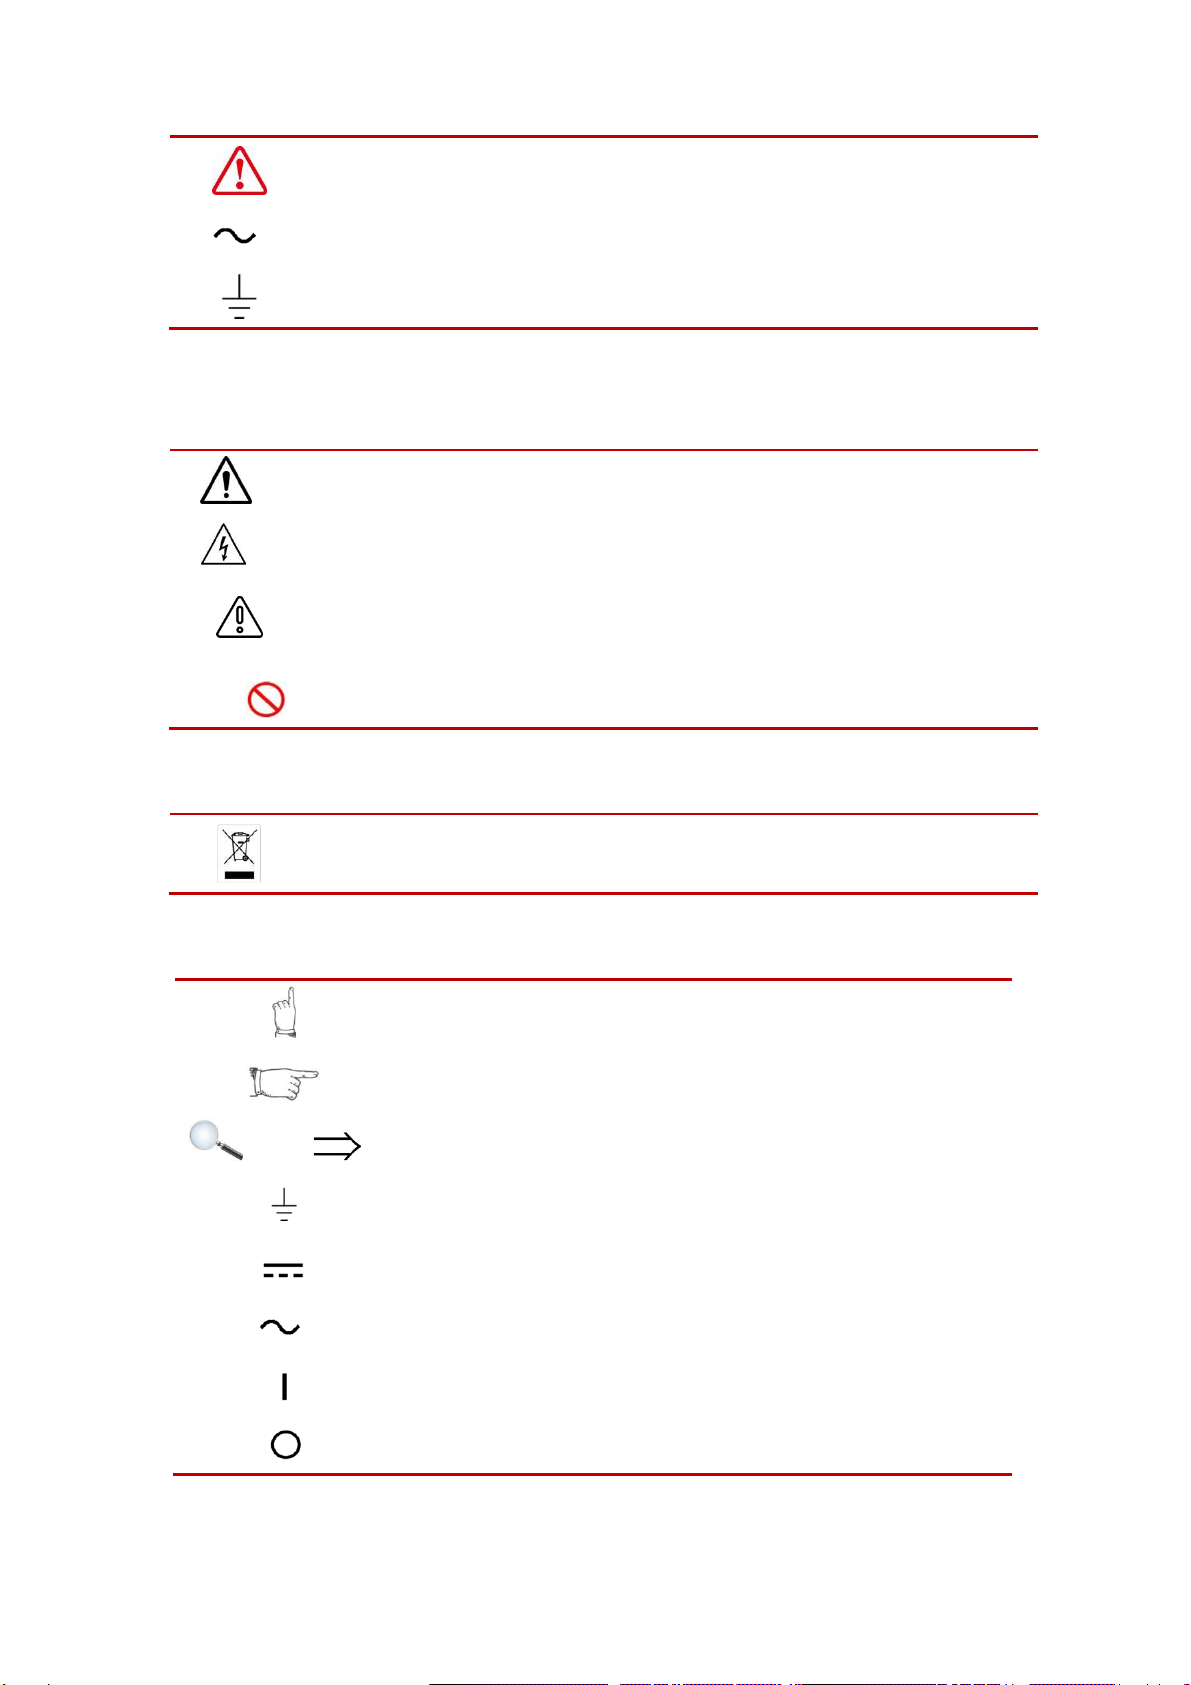
Symbol on the instrument
Indicates attention and danger.When the symbol or display is on the instrument, please
refer to the corresponding position of the manual.
Indicates alternating current (ac)
Indicates earth (ground) terminal
Safety symbol: The precautions in this manual are marked as follows according to their
importance.
Caveat
Indicates attention and danger.
Danger
Indicates an extremely high risk of death or serious injury to the user if an
operational error or misuse occurs.
Note
The product may cause damage to the product itself or other products under
certain circumstances or in actual application.
Indicates prohibited behavior
Symbols related to standards:
Marking of laws and regulations on the abandonment of electrical and electronic
equipment
Other symbols:
Details: indicates tips, details
Convention: indicates the agreement
Or
Reference: indicates where the reference content or reference is located
Indicates earth (ground) terminal
Indicates direct current (dc)
Indicates alternating current (ac)
Indicates that the power is "on"
Indicates that the power is "off"

4
Limited warranty and scope of responsibility
Changzhou Chuangkai Electronic Co., Ltd. guarantees that every CKT515/515A instrument you
purchase is completely qualified in quality and measurement.This warranty does not include fuses.
Chuangkai promises that the instrument mainframe and accessories produced by Chuangkai will not
have any defects in material and process defects during the warranty period. During the warranty period, if the
product proves to be defective, Chuangkai will repair or replace it for free.
From the date of shipment, Chuangkai promises to guarantee the warranty of its product’s mainframe for
two years and other accessories for one year.For hardware and software failures caused by the quality of the
product itself during the warranty period, please present the product warranty card and maintenance
registration card, and the product will be repaired free of charge by Chuangkai Maintenance Department or
Chuangkai authorized maintenance point.For products that exceed the warranty period, Chuangkai will
perform paid repairs for the user.
For products that are repaired free of charge (no special problems), Chuangkai promises to repair and
return to the user within five working days after receiving the instrument, and bear the transportation cost of
the return journey.
Chuangkai will not carry out free repairs if one of the following conditions occurs:
1、Accidental damage caused during transportation.
2、Instrument malfunction or damage caused by incorrect installation or use in a non-product specified
working environment.
3、The appearance of the product is artificially damaged (such as surface scratches, deformation, etc.).
4、Unauthorized dis-assembly of the machine for repair, modification, replacement of parts and tearing
of the product warranty seal.
5、Failure or damage caused by irresistible factors such as lightning strikes.
6、Direct or indirect damage caused by improper user operation.
If the instrument is inaccurate or cannot be measured due to improper operation of the user, the
instrument itself has no problem, and the return cost is borne by the user.
Jiangsu Province, China
Changzhou Chuangkai Electronic Co., Ltd
Company description
Note
The descriptions in this manual may not be all the contents of the instrument. The
information contained in the manual has been corrected before printing. However, as
Chuangkai Electronic Co., Ltd. continuously improves the products, it reserves the right to
modify the product specifications, characteristics, internal structure, appearance,
accessories,packaging and maintenance procedures of the produces in the future.
Therefore, the contents may be changed without prior notice.The confusion caused by
inconsistency between the instructions manual and the instrument can be contacted with
our company by the address on the back cover of the manual; the latest news and content
can also be found on the company website.

5
Table of contents
Foreword...........................................................................................................................................2
Safety instructions .....................................................................................................................2
Security Information..................................................................................................................2
Symbol on the instrument..........................................................................................................3
Limited warranty and scope of responsibility............................................................................4
Company description.................................................................................................................4
Chapter 1 Usage Precautions..........................................................................................................7
Packing content confirmation...............................................................................................7
Precautions for use ...............................................................................................................8
Instrument Upgrade instructions: .....................................................................................11
Chapter 2 Product Overview..........................................................................................................12
2.1 Product Overview and Model Description...................................................................12
2.2 Technical specifications, features, main functions ............................................12
2.3 Product introduction (name and function of each part).......................................13
2.3.1 Positive description...............................................................................13
2.3.4 Rear panel brief introduction ........................................................................19
2.3.5 Support of device seat....................................................................................20
Chapter 3. Preparation Before Measurement .................................................................................22
3.1 Preparation procedure.......................................................................................................22
3.2 Connection of power supply cable......................................................................................22
3.3 Connection of testing cable and test piece ..........................................................................22
3.4 Connection of temp probe..................................................................................................24
3.5 Connection of external interface cable ...............................................................................25
3.6 Power on/off.......................................................................................................................25
3.7 Device parameter setting....................................................................................................26
3.8 Clear...................................................................................................................................26
3.9 Start test.............................................................................................................................28
Chapter IV Test parameter setting and operation ..........................................................................29
1.1 Confirm the test object.......................................................................................................29
4.2 Methods to set parameters and input values ......................................................................29
4.3 Introduction and parameter setting of measurement setting page.....................................30

6
Chapter 5 System setting and file management...............................................................................35
5.1 System setting interface......................................................................................................35
5.2 File system interface...........................................................................................................38
5.3 File System Description (Storage/Recall Function) ............................................................40
Chapter 6 Sorting Comparator.......................................................................................................42
6.1 Sorting Settings Interface...................................................................................................42
6.2 Ring....................................................................................................................................43
6.3 PASS/FAIL Light...............................................................................................................44
6.3 Comparison Process...........................................................................................................44
Chapter 7 Remote Control..............................................................................................................45
7.1 RS232 / 485 communication method ..................................................................................45
7.2 Communication Protocol.................................................................................................46
7.3 Handler communication method .....................................................................................53
7.4 USB communication method...........................................................................................55
Chapter 8 Maintenance and Service .............................................................................................56
8.1 About correction............................................................................................................56
8.2 Packaging and Transportation .....................................................................................56
8.3 Storage ............................................................................................................................56
8.4 Warranty...........................................................................................................................56
8.5 Cleaning...........................................................................................................................57
8.6 About discarding............................................................................................................57
Appendix A: Specifications ............................................................................................................57
Appendix B: Selection Table..........................................................................................................59

7
Chapter 1 Usage Precautions
In this chapter you will learn about the following:
Packing content confirmation
Precautions for use
Instrument upgrade instructions
Packing content confirmation
Please confirm before use: When the instrument is delivered to your hand, please check and
confirm:
1、Please check the appearance of the product for damage or scratches.
2、Check the instrument accessories for any omissions according to the following table:
Table 1-1 Instrument Accessories
Seri
Name
Specification
Quan
Unit
Remarks
1
instrument
CKT515/515A
1
set
Standard
2
Four-terminal Kelvin test
CKT25015
1
set
Standard
3
Three-phase power cord
CKT28010
1
piece
Standard
4
fuse
CKT28001
2
piece
Standard
5
RS232 communication cable
CKT27061
1
piece
Standard
6
USB communication
cable
CKT27070
1
piece
Standard
7
Temperature probe
CKT280100
1
piece
Standard
8
user's manual
1
piece
Standard
9
Verification report
1
piece
Standard
10
Product certification
1
piece
Standard
11
Warranty
1
piece
Standard
If there is any damage or insufficient accessories, please contact the sales department or
distributor of Changzhou Chuangkai Electronic Co., Ltd. immediately.Whentransporting this
instrument, please use the packaging materials at the time of delivery.
Table 1-2 Optional Accessories
Seri
Name
Specification
Quan
Unit
Remark
1
RS485 communication cable
CKT515 Optional
1
piece
Optional
2
Data acquisition software
CKT515
1
piece
Optional
3
Multimeter pen test clip
CKT25015A
1
piece
Optional
4
Smd Kelvin test cable
CKT25015B
1
piece
Optional
5
Equipment test cable
(common)
CKT25015C
1
piece
Optional
6
Handler junction box
CKT27060
1
piece
Optional
Customers can choose according to their own requirements. If there is any damage or not matching
with their own selection, please contact the sales department or distributor of Changzhou
Chuangkai Electronic Co., Ltd. immediately.

8
Precautions for use
In order to use the instrument safely and to make full use of its functions, please observe the following
precautions.
Note
To prevent damage to the instrument, avoid vibration and collision during
handling and use.Payattention to failures caused by falling.When transporting
the instrument, please use the packaging materials at the time of delivery.
Caveat
Please do not modify, disassemble or repair.Failure to do so may result in
an accident or personal injury.
Do not let the instrument get wet or use wet hands to measure.Failure to do
so may result in electric shock.
1. About the placement and environmental conditions of the instrument
Environmental conditions
The CKT515/515A must be used under the following environmental conditions:
1) Temperature and humidity range: Temperature: 0 ~ 40 °C, Humidity: 80% RH below (no
condensation)
2) Temperature and humidity range with guaranteed accuracy: 23 ± 5 °C, 80% RH or less (no
condensation)
3) In order to ensure good ventilation, do not block the ventilation holes.
4) The instrument, especially the test leads connected to the device under test, should be
kept away from strong electromagnetic fields to avoid interference with the measurement.
Caveat
Please do not place the instrument in the following places, otherwise
it will cause malfunction or accident of the instrument.
Direct sunlight or high temperature places
a place where corrosive gas or explosive gas is generated
Places where strong electromagnetic waves are generated or near
charged objects
a place where mechanical vibration is frequent
Wet, dew condensation
Dustplace
Near induction heating device (high frequency induction heating
device, IH induction cooker, etc.)
A place affected by water, oil, chemicals, solvents, etc.
Note
Do not use near noise-generating devices.If the noise affects the test
object, it may cause the measured value to be unstable.
Placement method:
1) To prevent the temperature of the instrument from rising, be sure to keep a specified
distance from the surroundings when placing it.
2) Place the bottom side down.This instrument can be used when the stand is raised.

9
Note
The method of cutting off the power supply of the instrument can be
to unplug the power cord; in case of emergency, the plug of the power
cord can be unplugged to immediately power off; therefore, please
ensure that there is no room for sufficient operation.
Do not place on unstable pedestals or in inclined places.Otherwise
it may fall or turn over and cause personal injury or host failure
2. Power requirements:
The CKT515/515A can only be used under the following power conditions:
Supply voltage range: 220V±10% AC (198~242V AC) Power supply
frequency: 50Hz/60Hz (47.5~52.5Hz) Power supply range: ≤25VA
1)
2) The power input phase line l, neutral line n, and ground line
e should be the same as the power plug of the instrument.
3) This instrument has been carefully designed to reduce
clutter interference from the ac power supply input. However, it should be used in a low
noise environment. If it is unavoidable, install a power filter.
Danger
To prevent electric shock, connect the power ground to the ground
reliably.
If the user replaces the power cord, make sure that the ground of
the power cord is securely connected.
Caveat
Check the outer skin of the power cord, test leads, etc. for damage
or metal exposure before use.Since these damages may cause an
electric shock, please replace it with the model specified by the
company.
Before turning on the power, please confirm that the power supply
voltage listed on the power connection part of the instrument is
consistent with the power supply voltage you are using. If the
power supply voltage outside the specified range is used, it may
cause damage to the instrument or electrical accident.
To prevent electric shock and to ensure the safety of this
instrument, please connect the power cord to the three-phase
socket.
3. Fuse
1) The instrument is equipped with a fuse at the factory, and the user should use the fuse
provided by the company.
2) Replace the instrument fuse.Open the fuse box on the rear panel power outlet for
replacement.
Cave
at
To avoid personal injury, turn off the power before replacing the fuse.
4. Measurement considerations

10
Danger
Do not short-circuit the top of the test leads and the lines with
voltage.That is, the instrument is strictly prohibited from being
tested with the test piece!
About the use of power cords, test cables, and wires
Please use our company's power cord, test fixture or test cable. User-made or other company
test fixtures or test cables may result in incorrect measurement results.The instrument test
fixture or test cable should be kept clean and the pins of the tested device should be kept
clean to ensure good contact between the device under test and the fixture.
Danger
To avoid electric shock or short-circuit accidents, disconnect the
power to the test object before connecting the test cable.
Note
In order not to damage the wires and test cables, do not step on or
pinch the wires or test the cables.
To prevent malfunction due to wire breakage, do not bend or pull the
wire or cable connection.
To prevent disconnection, when pulling the power cord out of the socket
or the instrument, hold the plug part (outside the power cord) and pull
it out.
To prevent disconnection, when pulling out the connector, hold the
insertion part (outside the cable) and pull it out.
The tip of the needle test line is pointed and very dangerous.Please
pay full attention when using it to avoid injury.
If the wire is melted, the metal part will be exposed, which is very
dangerous. Do not touch the hot part.
The temperature probe is precision machined. Do not apply excessive
voltage pulses or static electricity to avoid damage.
Do not subject the temperature probe to excessive collisions or force
the wires to be damaged.
Before measurement
In order to achieve the test accuracy, the instrument should be warmed up for more than
30 minutes.
Note
To avoid damage to the instrument, do not input voltage or current to
the measurement terminals.
Do not measure the part to which the voltage is applied.Especially
after the transformer or motor temperature rise test or the withstand
voltage test, if measured immediately, the voltage or residual charge
will be induced and the instrument will be damaged.
The measurement of the internal resistance of the battery cannot be
performed, otherwise the instrument may be damaged.When measuring the
internal resistance of the battery, use the battery internal
resistance tester.

11
Instrument Upgrade instructions:
Upgrade the instrument as follows:
1、Copy the relevant upgrade files to the root directory of the U disk (no more than 4G),
and insert them into the USB interface of the instrument
2、Press set key to start the machine, and "U disk read success" appears on the screen
3、Press the < OK > key to upgrade. The upgrade is completed when the instrument white
screen or jump to the boot interface. Restart to complete the upgrade。
Note
Please use the company's corresponding upgrade software, and under
the guidance of the company's technical personnel, otherwise it
will cause the failure or accident of the instrument。

12
Chapter 2 Product Overview
In this chapter you will learn about the following:
Product summary and model description
Technical specifications, features,
main functions
product description
2.1 Product Overview and Model Description
product Overview
CKT515/515A DC resistance tester features high-precision, wide-range and performance. It
adopts the current mainstream 32bits CPU and high-density SMD placement technology, 24-bit
color 4.3-inch color LCD screen and rotary encoder. The interface is intuitive and refreshing.
Easy to operate.The instrument has high anti-interference; the range is: 0.1uΩ∽110MΩ;
the display digit is five and half.the test speed is up to 15 times/second; the test accuracy
is up to 0.01;the temperature compensation can eliminate the ambient temperature test.The
instrument provides a variety of interface functions to facilitate data communication and
remote control with PC. It has professional sorting function, 10 sets of data storage, multiple
sorting signal settings, and matching Handler interface. It can be used in automatic sorting
system to complete automatic pipeline testing. It can also be equipped with RS232 interface
(or converted to IEEE485 interface) for remote control and data acquisition and analysis.
The instrument is compact, compact and fully functional.Through the four-terminal test
method, high-speed, high-precision measurement of various high, medium and low value resistors;
various switch contact resistance; connector contact resistance; relay line package and
contact resistance; transformer, inductor, motor, Deflection coil winding resistance; wire
resistance; metal riveting resistance of cars, boats, airplanes; DC low resistance of fuses,
resistors, DC resistance of conductive rubber, printed circuit board lines and hole
resistance.Since the instrument is equipped with a temperature compensation function, it is
suitable for measuring the object whose resistance value changes due to temperature.The
instrument is widely used in research and development, production lines, feed inspection and
other places.
Model Description
In order to meet the requirements of different users, the CKT515/515A has 3 models to
choose from.
Model
Measuring range
Accuracy
CKT515
0.1uΩ-110MΩ
0.01%
CKT515A
1uΩ-20MΩ
0.01%
See
See Appendix B for the complete version of the DC
Resistance Tester.
Agreement
The complete set of all versions is described in this
manual.
2.2 Technical specifications, features, main functions

13
The CKT515/515A specifications contain the basic technical specifications of the
instrument and the range allowed by the instrument test.These specifications are all achievable
when the instrument is shipped from the factory.
See
The complete technical specifications are detailed in Appendix A.
1. Easy to view display / intuitive operability: high brightness, super clear 4.3 inch
color LCD display; easy to learn and intuitive to use;
2. The basic setting is easy to operate, with direct reading, percentage error and sorting
results; multiple parameters are displayed at the same time.
3. The comparator judgment light is directly displayed, without looking at the screen,
the operation efficiency can be improved.
4. Rich interfaces, including handler interface, RS232 interface, RS485 interface
(optional), USB host, USB device
5. High precision temperature test function: temperature can be tested by temperature
sensor.
6. Reliable contact detection function, can automatically detect whether the test end
is well connected to avoid misjudgment
7. Low voltage test function, effective range: 2 Ω, 20 Ω. Maximum test voltage ≤
60mV.
8. Calibration function: full range short circuit zero clearing function。
9. Comparator (sorting) function: built in 12 sorting data, which can judge the hi /
low of the measured parts.
10. Thermoelectric potential elimination: it can eliminate the thermoelectric potential,
minimize the influence of thermoelectric potential, and improve the measurement
accuracy of small resistance.
11. Ultra high speed and high precision measurement can improve the production efficiency.
Test speed: fast: 100 times / second; medium speed: 25 times / second; slow speed:
10 times / second; precision test: 4 times / second
12. Reliable 4-terminal measurement.
13. The allowable value of wiring resistance in low resistance range is 1.5 Ω; even in
the measuring current range of 1a, the test cable can be easily extended.
2.3 Product introduction (name and function of each part)
2.3.1 Positive description

14
Figure 2-1 Front panel
1、1、Trademark and model——Brand and model of instrument.
2、LCD display——480 × 272 pixels, color TFT LCD screen, used to set test conditions and
display measurement results.
3、Key area 2——一A group of multi-functional keys, including digital keys, direction keys,
ESC keys, etc.
4、USB DEVICE——USB DEVICE interface.It is used to save test data on USB flash disk and
upgrade firmware.
5、PASS/FALL indicator light——Sorting qualified indicator light. The green light indicates
that the test data is qualified, and the red light indicates that the test data is unqualified.
6、Test end (input end)——Four end test end. It is used to connect the four terminal test
cable and measure the tested parts.
7、Soft key area——Used to select the function corresponding to the lower side of LCD screen.
8、Power standby key——Long press the standby key, the instrument is in standby mode, and
the standby key is displayed in red.
Press and hold the standby key for a long time to turn to the working state, the instrument
turns to the working state, and the standby key displays green,
You can turn off the power switch at the back of the chassis if you need to turn off the
power during standby.
2.3.2 Key Area
1、Key area 1:May Function Soft Key
See
For details, see 2.3.2 "key area"
See
For details, see 3.3 "connection of test end".
See
For details, see 2.3.2 "key area"

15
Used to select the function on the right side of the LCD screen.See the image to the above.
Agreement
The four wordless "dark gray" keys on the button are the keypad one,
the main function key.The function of one or four keys in the keypad
is “soft”, that is, their functions are not fixed, they have
different functions on different display pages, and their current
functions are correspondingly displayed in the “soft keys” under
the LCD screen. Display area.
2、Key area 2: number key, direction (up, down, left, right) key, OK key, ESC key,
backspace (←), lock key, trig key, set key and disp key.
Figure 2-2 Key Area2
1)、Direction key
Up,down,left and right direction keys are used to move the cursor and select
setting parameters.
2)、OK key
Used for confirmation after setting parameters such as values.
3)、DISP key
Press the [disp] key to enter the "MEAS DISP" interface.
4)、SET key
Press the [disp] key to enter the "SYS SET" interface .
5)、Number key
“0~9”、 “.”、“+/-”,used to type in the value. See 4.1 for the
input method of the specific value.
6)、ESC key
No function.
7)、←key
Backspace key for numeric input.
8)、LOCK key
Key lock key. Press and hold for about 2 seconds, the key is locked, and the key lock
light is on; press and hold for 2 seconds again, the key is unlocked, and the key lock light

16
is off.
9)、TRIG key
Trigger key. When the trigger is set to manual trigger, press the trigger key once to
test the instrument. If the start signal is valid during external triggering, this key flashes
once, indicating that the instrument receives a start signal and tests once.
2.3.3MEASDIS interface - main interface (definition of display area)
The instrument has the following interfaces: measurement display interface, measurement
display reset interface, measurement setting interface, COMP setting interface, internal
file system interface, external file system interface, system setting interface.
Note
Do not use sharp objects and fingernails to touch the screen,
which may cause damage to the LCD screen. We will not be
responsible for the damage caused.
1、Measurement display interface(BoostDis ON)
Operation:If BoostDis is "on" in
the system setting interface, it will
automatically enter the measurement
display amplification interface
after power on; at this time, press
the [disp] menu key, and the <
measurement display magnification >
page will also be displayed on the
screen. As shown in the figure on the
right:
The status bar display area, measurement result display area, measurement status display
area, sorting statistics display area and function soft key display area refer to
"measurement display page".
2、Measurement display interface
Operation:If "off" is
displayed in the
system setting
interface, it will
automatically enter
the measurement
display interface
after power on; at
this time, if you
press the [disp]

17
menu key, the < measurement display > page will also be displayed on the screen.
As shown in the figure on the right:
1)、Status bar display area
This area indicates the name of the current display page, current ambient
temperature (need to insert temperature sensor and open temperature compensation), U disk
prompt and time. As shown in the
figure on the right:
2)、Measurement parameter display area
This area indicates the function and measurement parameters of the current
display setting instrument.
As shown in the figure above: these measurement parameters can be set in the
"measurement setting interface".
See
For details, See "4.3.3 measurement setting interface"
3)、The results show that the measurement area
This area displays the direct reading
resistance measurement results of the instrument (both
direct reading and percentage ratio are displayed)
As shown in the right figure: R: measured resistance value
Δ: the relative deviation of the measured resistance relative to the nominal
value。
Note
If the measurement is near 0 Ω, the measured value may become
negative. In other cases, when the measured value becomes negative,
please check whether the test line is connected in reverse
4)Measurement status display area
This area is divided into file (sorting)display area and part of poor contact status.
As shown in the figure on the right:
Display area of file (sorting):
Among them, H stands for super high and P stands for
qualified
L -- represents lower super F -- represents separation failure
Poor contact display: detect the poor contact between the tested object and the probe or the
broken status of the test cable.

18
Caution
If "Poor Contact" function is used in the measurement of objects with
variable characters by implementing voltage onto the object to be
measured, please note.
5)Sorting statistics display area
This area displays the number of HIGHER/LOWER/PASS
As shown in the figure on
the right:
Refer
Please refer to "4.3 Measurement interface setting" for details Please refer to
"4.3 Measurement interface setting" for details.
6)Functional soft key display area
This area is used to display the function menu corresponding to the cursor area. The functions
below can be realized by the corresponding soft keys on this interface. As shown in the figure on the
right:
Measurement setting(Enter the measurement setting interface)
Press corresponding
functional soft keys under
"Measurement setting" to enter
the measurement setting interface.
Refer
Please refer to "4.3.3 Measurement interface setting" for details"
Counting switch(ON/Off of sorting counting)
Press corresponding functional soft keys under “Sorting counting” and enter the
corresponding digit in the sorting counting area of this area to start or end the counting
As shown in the figure on
the right:
Is is mainly used in the statistics of measurement data.
With this function turned on, each time the sorting comparator outputs, the device will count
each test according to the sorting output result to judge whether the test test result is higher (H)
than upper limit, or lower (L) than lower limit, or pass a certain grade P(1-12).
The statistics are displayed in the quantity menu bar.
With this function turned off, "Counting off" will be displayed at the bottom of the grade
counting interface, which means that this function is turned off.
Counting clear:Press again the counting switch to cleat the counting and the HIPASSLO
values in the display area will be cleared and reset as zero.
Statistical parameter description:Hi(num):count the number of times the measurement result
is higher than the upper limit.

19
Lo(num):count the number of times the measurement result is lower
than the lower limit.
PASS(num):count the number of passed measurement results.
Tips
Each measurement result of the sample. Data are stored in device cache.
Hi is applicable to the upper limit of the comparison
Lo is applicable to the lower limit of the comparison
Sorting setting (Enter sorting setting page)
Press corresponding soft keys under “Sorting setting” to enter sorting setting interface.
Refer
Refer to “6.1 sorting setting interface” for details.
File system(Enter internal file setting page)
Press corresponding soft keys under “File system” to enter file system setting interface。
Refer
Refer to “5.2 file system interface” for details.
U disc record
Press corresponding soft keys under “ U disc record” to save current measurement data into U
disc.
If no U disc is inserted by user, the data won’t be save. If a U disc is inserted and recognized by
device (i.e., U disc letter is displayed in device status bar), data will be saved.
After a USB disc is inserted, a red USB disc letter indicates that the "USB disc switch" is off;
After a USB disc is inserted, a green USB disc letter indicates that the "USB disc switch" is on;
When no U disk is inserted, no U disk letter will be displayed, which indicates that the USB
disc is not inserted.
Refer
Refer to “5.2 file system interface” for details.
2.3.4 Rear panel brief introduction

20
Fig.2-4 Rear panel
1、Nameplate——Indicates specific model and numbers of device
2、Grounding pole——this wiring terminal connects to the metal outer enclosure of device to protect or
shield the grounding wire.
3、Power supply socket fuse and power supply switch——Socket is for AC input with fuse holder on it
(to receive a fuse to protect the device)
Power supply switch is used to turn on/off the power supply. When switch is at “I”, power is on,
when switch is at “O”, power is off.
Refer:
Refer to "Use precautions" and "3.5 Power on/off" for details.
4、HANDLER interface—— Via HANDLER interface, automatic test system can be easily integrated to
realize automatic test
Device outputs sorting comparison result signal and end signal through the interface, and obtains
"Start" signal via this interface.
Refer:
Refer to "HANDLER interface instructions" fro details.
5、RS232(or RS485)interface——Connect by DB-9 cable to realize 232/485 serial communication with
upper monitor (computer)
Refer:
Refer to “RS232485 interface instructions” for details.
6、USB HOST interface——Use square -head USD cable for the connection of USB HOST interface。
7、TEMP DETECTOR interface——Connect to the HD temp sensor to measure the external
environment temp.
Refer:
Refer to “3.4 Connection of temp probe” for details.
8、Blank panel——Spare. Please do not remove the blank panel prevent electric shock accident.
2.3.5 Support of device seat
The handle of the device can be adjusted. Hold both sides of the handle with both hands at the same
time, gently pull both sides of the box, and then rotate the handle.
The handle close to the front can be propped up; When adjusting the handle, pull the handle outward
and fold up the device handle. The handle of the device can be positioned at 4 places as shown in the
figure below.
The handle can be removed so that ti can be installed on the equipment rack.
Caution
Do not apply pressures from the top when the placing support is standing.
This manual suits for next models
1
Table of contents
Other Chuangkai Electronic Test Equipment manuals