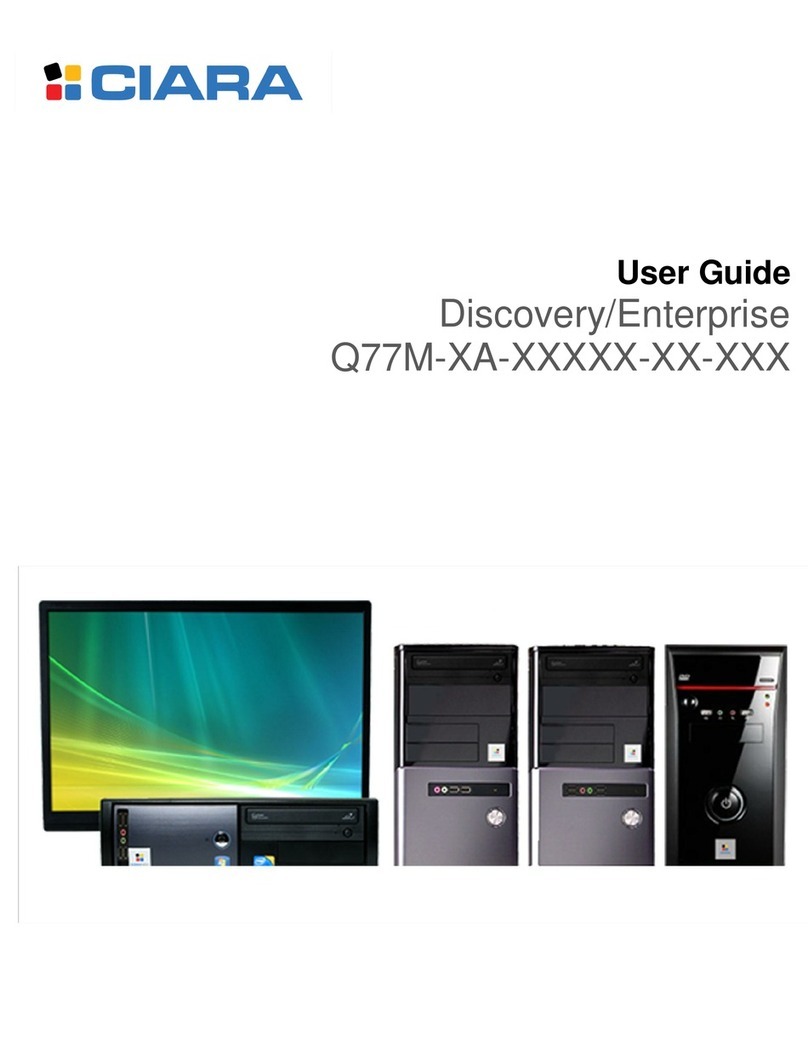
Ciara-tech Enterprise/Discovery JO User manual

User Guide
Discovery / Enterprise JO
Personal computer
µATX
form factor
Intel®DQ35JO
motherboard
Quality | Performance | Service www.CIARA-TECH.com

CIARATECH Enterprise/Discovery JO
9300 Trans Canada Highway
Montreal, Quebec H4S 1K5
Tel: (514) 798-8880
Fax: (514) 798-8889
•Microsoft, Windows Vista, Windows 2000 and Windows XP are registered trademarks of
Microsoft Corporation
•Intel and Pentium®are registered trademarks of Intel Corporation
•Novell and NetWare are registered trademarks of Novell Corporation
•All other names, brands, and trademarks are trademarks of their respective companies
First Printing October 2007
Printed in Canada
- 2 -

CIARATECH Enterprise/Discovery JO
TABLE OF CONTENTS
FIRST PRINTING SEPTEMBER 2007......................................................................2
TABLE OF CONTENTS............................................................................................3
ABOUT THIS GUIDE...............................................................................................6
COMPATIBILITY ....................................................................................................7
ONE YEAR LIMITED WARRANTY...........................................................................8
Procedures to be followed:.....................................................................................................................9
LIMITED WARRANTY .......................................................................................................................10
RADIO INTERFERENCE PRECAUTIONS...............................................................11
DECLARATION OF CONFORMITY......................................................................12
FCC INFORMATION TO USER ............................................................................13
WARNING...........................................................................................................13
1.0: INTRODUCTION TO THE CIARATECH ENTERPRISE/DISCOVERY JO.....................14
1.1: Upgrading ........................................................................................................................................17
1.2: Networking......................................................................................................................................17
2.0: THE CIARATECH ENTERPRISE/DISCOVERY JO BIOS....................................18
2.1: BIOS Configuration and Installation .........................................................................................18
2.2: BIOS Set-up Program Menu Bar..................................................................................................19
2.3: BIOS Set-up Program Function Keys .........................................................................................19
2.4: BIOS Flash Memory Organization..............................................................................................19
2.5: PCI Autoconfiguration ..................................................................................................................19
2.6: PCI IDE Support.............................................................................................................................19
2.7: System Management BIOS (SMBIOS) .......................................................................................20
2.8: Legacy USB Support ......................................................................................................................20
2.9: BIOS Updates ..................................................................................................................................21
2.9.1 Language Support ...................................................................................................................21
2.9.2 Custom Splash Screen........................................................................................................21
2.10: BIOS recovery...............................................................................................................................21
2.11: Boot Options.................................................................................................................................22
2.11.1 CD-ROM Boot ..........................................................................................................................22
2.11.2 Network Boot ......................................................................................................................22
2.11.3 Booting without attached devices ....................................................................................22
2.11.4 Changing the Default Boot Device during POST...........................................................22
2.12: Adjusting Boot Speed..................................................................................................................22
2.12.1 Peripheral Selection and Configuration ..........................................................................23
2.12.2 BIOS Boot Optimizations........................................................................................................23
2.13: BIOS Security Features................................................................................................................23
- 3 -

CIARATECH Enterprise/Discovery JO
3.0: CIARATECH ENTERPRISE/DISCOVERY JO SPECIFICATIONS.......................25
3.1:
Configuration & Layout -
CIARATECH
Enterprise/Discovery JO Main board
.......................................25
3.2: The PCI Express Bus ......................................................................................................................27
3.3: Disk Drives......................................................................................................................................27
3.3.1: Floppy Disk drive.....................................................................................................................27
3.3.2: Serial ATA Interface .................................................................................................................28
3.3.3: Parallel IDE Controller.............................................................................................................28
3.3.4: CD-ROM Drives........................................................................................................................28
3.4: Keyboard..........................................................................................................................................29
3.5: Intel GMA3100 Video Set-up .......................................................................................................29
Digital Video Interface (DVI) ............................................................................................................30
Installing Utility and Driver Software .............................................................................................30
DPMS Settings.....................................................................................................................................30
3.6: Audio Set-up ...................................................................................................................................30
3.7: I/O Port Set-up ................................................................................................................................31
RJ-45 LAN Connector LEDs ..............................................................................................................31
3.9: Intel®Active Management Technology .....................................................................................32
3.9.1: Intel®AMT Status Indicator....................................................................................................32
3.10: Trusted Platform Module (TPM)...............................................................................................33
4.0: INSTALLING AND UPGRADING YOUR SYSTEM ..........................................34
4.1: Unpacking Your Computer...........................................................................................................34
4.2: Choosing a Site for the System ....................................................................................................34
4.3: Connecting I/O Devices.................................................................................................................35
4.4: Installing Adapter Cards...............................................................................................................36
4.5: Replacing the System Batteries....................................................................................................36
4.6: Installing an Upgrade CPU...........................................................................................................37
4.7: Installing an Upgrade Flash BIOS...............................................................................................37
4.8: Installing DIMM Memory Modules...........................................................................................37
Memory Bank Configuration ............................................................................................................38
Installing DIMM Modules.................................................................................................................38
4.9: System Maintenance ......................................................................................................................40
5.0: USING THE CIARATECH ENTERPRISE/DISCOVERY JO.................................41
5.1: Introduction.....................................................................................................................................41
5.2: A Caution about Viruses...............................................................................................................41
5.3: Windows ..........................................................................................................................................41
5.4: Windows 2000 Server, Windows 2003 Server & Novell NetWare .........................................41
6.0: DOCUMENTING YOUR COMPUTER............................................................42
6.1: Base System Details .......................................................................................................................42
6.2: Hardware Configuration ...............................................................................................................42
7.0: QUICK INSTALLATION GUIDE ....................................................................43
7.1: Mid-Tower Chassis Characteristics.............................................................................................43
7.2: Small Form Factor Chassis Characteristics ................................................................................44
7.3 : Opening and accessing the chassis.............................................................................................45
7.4: Preparing the chassis for installation..........................................................................................47
7.5: Insertion of the processor..............................................................................................................49
7.6: Installation of the memory modules...........................................................................................51
7.7: Installation of an expansion card.................................................................................................52
7.8: Insertion of the motherboard .......................................................................................................53
- 4 -
7.9: Installation of the optical drive module.....................................................................................54

CIARATECH Enterprise/Discovery JO
7.10: Installation of the hard drive......................................................................................................55
7.11: Connecting the keyboard ............................................................................................................57
7.12: Connecting the LCD Monitor.....................................................................................................57
7.13: Precautions against static electricity .........................................................................................58
8.0: TROUBLESHOOTING YOUR SYSTEM............................................................59
8.1: BIOS Errors and Messages............................................................................................................59
8.2: Beep Codes.......................................................................................................................................59
8.3: Helpful hints ...................................................................................................................................60
8.4: Solving General Problems ............................................................................................................61
8.5: Solving Power Supply Problems.................................................................................................62
8.6: Solving Diskette Problems ...........................................................................................................64
8.7: Solving Hard Drive Problems......................................................................................................65
8.8: Solving Display Problems ............................................................................................................66
8.9: Solving Audio Problems ...............................................................................................................68
8.10: Solving Printer Problems............................................................................................................68
8.11: Solving Keyboard and Mouse Problems..................................................................................69
8.12: Solving Hardware Installation Problems.................................................................................70
8.13: Solving Memory Problems .........................................................................................................71
8.14: Solving Processor Problems .......................................................................................................71
8.15: Solving Optical Drive Problems................................................................................................72
GLOSSARY..........................................................................................................73
- 5 -

CIARATECH Enterprise/Discovery JO
ABOUT THIS GUIDE
Please read this User's Guide before using your CIARATECH Enterprise/Discovery JO computer. If you
are an experienced user then you may wish to proceed to Chapters 2, 4 & 5.
This User's Guide is divided into eight chapters that provide information on Models, Features and
Upgrades, Hardware Specifications, Set-up, Configuration, and Installation, as well as an Equipment Log
and a Glossary. Please remember to fill out the Equipment Log that you will find in Chapter 6, and keep
a copy in a safe place.
Chapter 1 will stimulate your desire to learn more about the many exciting upgrades and enhancements,
including PCI Express video cards, PCI Express add-in cards and conventional PCI sound controllers and
disk controllers that we offer for your CIARATECH Enterprise/Discovery JO computer. Please contact us
at CIARATECH for any additional details.
With proper care and operating procedures your CIARATECH Enterprise/Discovery JO will give many
years of service and high performance computing.
- 6 -

CIARATECH Enterprise/Discovery JO
COMPATIBILITY
All CIARATECH Enterprise/Discovery JO models run the following operating systems software:
•MS-Windows (All Versions, including 2000, XP and Vista)
•SCO UNIX/ Open Desktop
•Linux
CIARATECH Enterprise/Discovery JO models will operate on Windows NT Server, Windows 2000
Server, Windows 2003 Server, Novell NetWare, SCO Unix and all UNIX based networks, provided that
appropriate network adapter cards and applications software have been installed.
CIARATECH is licensed to supply the Windows 2000, Windows XP and Vista operating systems software
with its CIARATECH Enterprise/Discovery JO computers. A package of the latest version of Windows
software and a manual is included with the CIARATECH Enterprise/Discovery JO.
If you have purchased a Windows license with your CIARATECH Enterprise/Discovery JO system, please
abide by the Copyright and License terms and conditions that are enclosed with this software package.
These require that the Windows software may only be used and installed on the CIARATECH
Enterprise/Discovery JO computer with which they were purchased.
You may make copies of this Windows software for your own back-up purposes only.
All CIARATECH Enterprise/Discovery JO series computers are certified by the Underwriters Laboratories
of Canada (UL), and meet or exceed the Class B limitations for Radio noise emissions from digital
apparatus as set out in the Radio Interference Regulations of Industry Canada.
- 7 -

CIARATECH Enterprise/Discovery JO
ONE YEAR LIMITED WARRANTY
CIARATECH customarily provides a one (1) year, 100% parts and labour non-transferable and limited
warranty to all Original Purchasers of its Enterprise/Discovery JO series computers. The warranty terms
are normally Return-to-Depot. This one-year limited warranty starts on the "Date of Delivery". The
warranty covers any optional product(s) manufactured and sold by CIARATECH and installed by
CIARATECH in an Enterprise/Discovery JO series System Unit. This one-year limited warranty, however,
does not apply to any other item not internally installed in the System Unit by CIARATECH, or to any
subsequent owners.
If you have purchased a different type of warranty, or an extension to the standard warranty, you will
need to provide the CIARATECH Service Contract Number to the Customer Support representative when
placing a call for service or support. It is advisable to affix this Contract Number to the machine in the
event that service is required.
In lieu of either the On-Site or Return-to-Depot portions of the warranty, CIARATECH reserves the right
to directly ship certain customer replaceable components as replacement products for failed components.
When this option is invoked, the customer will be asked to replace the component(s) and return the
original failed component to CIARATECH within five (5) working days.
- 8 -

CIARATECH Enterprise/Discovery JO
Procedures to be followed:
1. Refer to the back of your system main CPU unit and record the model number and serial
number from the Machine Identification Label.
2. Make sure that you know the name and version number of the operating system that you are
using, what accessory expansion cards you have installed in your system, and that you have the
system Owner’s and User’s Guides ready to hand.
3. Call CIARATECH Support Centre at 877-242-7272.
4. Provide the computer system’s model number and serial number. If you have purchased an
extended warranty, please provide the Service Contract number as well. The Customer Service
Representative will verify your warranty status immediately, and then pass the call to the
dedicated PC Support Group for further action.
5. Answer any questions from the support personnel to the best of your ability: The support group
may ask you to provide additional information, run specific commands, change or verify
parameter settings, etc…
6. The support personnel may be able to rectify the problem over the telephone, at which time you
should ask for and record the unique call number for your own records. If the support group is
unable to resolve the problem remotely, an On-Site call may be generated or additional
information will be provided to you to obtain a Returned Merchandise Authorization Number
(RMA), depending upon the type and current status of your warranty.
7. Make a back-up copy of all of the files on your hard disk before returning your computer for
service. CIARATECH is not responsible for the loss or damage of any data on the returned
system. In some cases, hard disks may need to reformatted or replaced. It is the responsibility
of the user to ensure data is backed up prior to shipment to CIARATECH.
8. Use the original box with its foam protective inserts whenever you return your computer to us
for service. CIARATECH is not responsible for shipping damage due to poor packaging.
Include your phone number and a list of times when you may be contacted.
If you have any questions please contact us at our Montreal address shown in our web site at:
http://www.ciara-tech.com
- 9 -

CIARATECH Enterprise/Discovery JO
LIMITED WARRANTY
CIARATECH warrants the product (“Product”) you have purchased from CIARATECH or from an authorized CIARATECH reseller to
be free from defects in materials and/or workmanship under normal use during the warranty period applicable to the product as
defined by the standard warranty purchased with the Product, or any additional warranties and/or warranty extensions purchased
through CIARATECH or an authorized CIARATECH reseller. The warranty period commences on the date of purchase. This warranty
extends only to you, the original Purchaser. It is not transferable to anyone who subsequently purchases leases or otherwise obtains
the Product from you. It excludes expendable (consumable) parts.
During the warranty period, CIARATECH will, at no additional charge, repair or replace defective parts with new or serviceable used
parts that are equivalent to new parts in performance, form, fit and function. All exchanged parts and Products replaced under this
warranty will become the property of CIARATECH. If after repeated efforts, CIARATECH is unable to restore the Product to good
working order, you may claim the purchase price of the Product. This Limited Warranty also does not extend to any Product that
has been damaged or rendered defective (i) as a result of the use of the Product other than for its intended use, failure to use the
Product in accordance with the User’s Guide which accompanies the Product or other misuse, abuse or negligence to the Product;
(ii) by the use of parts not manufactured or sold by CIARATECH; (iii) by modification of the Product; (iv) as a result of service by
anyone other than CIARATECH or an Authorized CIARATECH Service Provider; or (v) improper transportation or packaging when
returning the Product to CIARATECH or an authorized CIARATECH Service Provider.
This Limited Warranty does not extend to expendable (consumable) parts. Expendable parts are those items that during the normal
course of product usage will require periodic replacement, e.g., printer cartridges, batteries, diskette/tape head cleaning kits, etc.
Regarding any CIARATECH supplied software which accompanies the Product, CIARATECH warrants the media (e.g., diskette, hard
disk, CD ROM) upon which this software is delivered to be free from defects in material and/or workmanship for a period of ninety
(90) days from the date of purchase by the end-user. In the event of defective media, as your exclusive remedy and the sole liability
of CIARATECH, CIARATECH will replace the defective media at no charge to you if you return the defective media, with prepaid
shipping, to CIARATECH within the warranty period.
Except for this media warranty, this software is provided “As is” and CIARATECH disclaims any and all warranties, express or
implied, including but not limited to any implied warranty of non-infringement of third party rights, merchantability or fitness for a
particular purpose. CIARATECH does not warrant that the operation of this software will be uninterrupted or error free or that this
software will meet your requirements.
CIARATECH is not responsible for damage to or loss of any programs, data, or removable storage media. You are responsible for
saving (backing up) any programs, data or removable storage media.
EXCEPT FOR THE WARRANTIES SET FORTH HEREIN, CIARATECH DISCLAIMS ALL OTHER WARRANTIES,
EXPRESS OR IMPLIED OR STATUTORY, INCLUDING BUT NOT LIMITED TO THE IMPLIED WARRANTIES OF
MERCHANTABILITY OR FITNESS FOR A PARTICULAR PURPOSE. ANY IMPLIED WARRANTIES THAT MAY BE
IMPOSED BY APPLICABLE LAW ARE LIMITED TO THE TERMS OF THIS LIMITED WARRANTY. IN NO EVENT
SHALL CIARATECH BE LIABLE FOR ANY INCIDENTAL, SPECIAL, OR CONSEQUENTAL DAMAGES, INCLUDING
BUT NOT LIMITED TO LOSS OF BUSINESS, PROFITS, DATA OR USE, WHETHER IN AN ACTION IN CONTRACT OR
TORT OR BASED ON A WARRANTY, ARISING OUT OF OR IN CONNECTION WITH THE USE OR PERFORMANCE OF
THE PRODUCT OR ANY CIARATECH SUPPLIED SOFTWARE WHICH ACCOMPANIES THE PRODUCT, EVEN IF
CIARATECH HAS BEEN ADVISED OF THE POSSIBILITY OF SUCH DAMAGES. YOU AGREE THAT REPAIR,
REPLACEMENT OR REFUND, AS APPLICABLE, UNDER THE WARRANTY SERVICES DESCRIBED HEREIN ARE
YOUR SOLE AND EXCLUSIVE REMEDIES WITH RESPECT TO ANY BREACH OF THE CIARATECH LIMITED
WARRANTY SET FORTH HEREIN.
Some provinces (or states) do not allow the exclusion or limitation of incidental or consequential damages for consumer products,
and some provinces (or states) do not allow limitations on how long an implied warranty lasts. In such provinces (or states), the
exclusions or limitations of this Limited Warranty may not apply to you.
This Limited Warranty gives you specific legal rights. You may also have other rights that vary from province to province and state
to state. You are advised to consult applicable provincial or state laws for a full determination of your rights.
- 10 -

CIARATECH Enterprise/Discovery JO
RADIO INTERFERENCE PRECAUTIONS
To minimize the likelihood of interference being caused to any radio or TV equipment, CIARATECH
recommends that shielded cables with metal RFI/EMI connector hoods be used to connect all peripheral
devices to the CIARATECH Enterprise/Discovery JO computer.
In the event that perceptible interference occurs, then please ensure that a ground connection is made
from any peripheral devices to the computer chassis. However, a separate ground connection is not
necessary if a shielded cable is used to connect the computer with any peripheral device.
Very often, simply moving the computer equipment to another location a few feet away will remove any
signs of interference to television reception.
Under no circumstances should any "radio-type" modems be attached to the computer, unless a license
has been obtained from the appropriate regulatory authorities (in Canada - the Department of
Communications of Industry Canada, and in the U.S.A. - the Federal Communications Commission).
- 11 -

CIARATECH Enterprise/Discovery JO
DECLARATION OF CONFORMITY
We, Manufacturer/Importer
CIARATECH
9300 Trans Canada Highway
Montreal, Quebec H4S 1K5
Tel: (514) 798-8880
Fax: (514) 798-8889
declare that the product
Personal Computer System
CIARATECH Enterprise/Discovery JO
is in conformity with Part 15 of the FCC Rules.
Robert Ahdoot, President
CIARATECH
- 12 -

CIARATECH Enterprise/Discovery JO
FCC Information to User
This equipment has been tested and found to comply with the limits for a Class B digital device, pursuant
to Part 15 of FCC Rules. These limits are designed to provide reasonable protection against harmful
interference in a residential installation. This equipment generates, uses, and can radiate radio frequency
energy and, if not installed and used in accordance with the instruction guide, may cause harmful
interference to radio communications. However, there are no guarantees that radio interference will not
occur in a particular installation. If this equipment does cause harmful interference to radio or television
reception, which can be determined by turning the equipment off and on, the user is encouraged to try to
correct the interference by one or more of the following measures:
•Reorient or relocate the receiving antenna.
•Increase the distance between the equipment and the receiver.
•Connect the equipment into an outlet on a circuit different from that to which the receiver is
connected.
•Consult the vendor or an experienced radio/TV technician for help.
Warning
Changes or modifications not expressly approved by CIARATECH could void the user’s authority to
operate the equipment.
This equipment is equipped with a shielded 3-wire power cord and plug. Use this power cord in
conjunction with a properly grounded electrical outlet to avoid electrical shock and to reduce radio
frequency interference that may emanate from the power cord.
We recommend you use shielded remote I/O cables, with properly grounded shields and metal connectors
in order to reduce radio frequency interference, which may emanate from these cables.
- 13 -

CIARATECH Enterprise/Discovery JO
1.0: Introduction to the CIARATECH Enterprise/Discovery JO
This is the User's Guide for the CIARATECH Enterprise/Discovery JO family of microcomputers. The
CIARATECH Enterprise/Discovery JO is a series of PCI and PCI Express bus computers that use Intel
Core™2 Quad at front side bus speed of 1066 MHz, Core™2 Duo at front side bus speeds of 1333, 1066
or 800 MHz, Pentium Dual-Core at front side bus speed of 800 MHz and the Intel Celeron processors at
front side bus speeds of 800 MHz both in the LGA775 package. All versions have one PCI Express x16
video slot, two PCI Express x1 expansion slots and one conventional PCI bus slot.
All CIARATECH Enterprise/Discovery JO versions use a Intel BIOS, a 512KB, 2 , 4 or 8 MB secondary
external cache memory on the CPU and up to 8 GB of main memory DDR2 type, 667 or 800 MHz. Any
version is configurable with processors ranging in speed from 1.6 to 3.0 GHz. The Set-Up and
Configuration procedures for all versions are identical.
While supplied as standard in a mini tower case, CIARATECH can supply the CIARATECH
Enterprise/Discovery JO in a full range of cases that include smaller desktop ones as well as larger towers
that are suitable for applications that require a greater expansion capacity.
The CIARATECH Enterprise/Discovery JO computer version is determined by the particular CPU
installed and currently the following versions are offered. These are:
Processor type Number Cache FSB Speed
Celeron 420 512 KB 800 MHz 1.6 GHz
Celeron 430 512 KB 800 MHz 1.8 GHz
Celeron 440 512 KB 800 MHz 2.0 GHz
Pentium Dual-Core E2140 1 MB 800 MHz 1.6 GHz
Pentium Dual-Core E2160 1 MB 800 MHz 1.8 GHz
Pentium Dual-Core E2180 1 MB 800 MHz 2.0 GHz
Core™2 Duo E4300 2 MB 800 MHz 1.8 GHz
Core™2 Duo E4400 2 MB 800 MHz 2.0 GHz
Core™2 Duo E4500 2 MB 800 MHz 2.2 GHz
Core™2 Duo E6300 2 MB 1066 MHz 1.86 GHz
Core™2 Duo E6320 4 MB 1066 MHz 1.86 GHz
Core™2 Duo E6400 2 MB 1066 MHz 2.13 GHz
Core™2 Duo E6420 4 MB 1066 MHz 2.13 GHz
Core™2 Duo E6550 4 MB 1333 MHz 2.33 GHz
Core™2 Duo E6600 4 MB 1066 MHz 2.4 GHz
Core™2 Duo E6700 4 MB 1066 MHz 2.66 GHz
Core™2 Duo E6750 4 MB 1333 MHz 2.66 GHz
Core™2 Duo E6850 4 MB 1333 MHz 3.0 GHz
Core™2 Quad Q6600 8 MB 1066 MHz 2.4 GHz
Core™2 Quad Q6700 8 MB 1066 MHz 2.66 GHz
Figure 1.1: CPU support list for CIARATECH Enterprise/Discovery JO Computers
All versions utilize essentially the same Set-Up and configuration procedures and the same Intel BIOS.
Other processors may be supported in the future. This board is designed to support processors with a
maximum wattage of 105 W. The processors listed above are only supported when falling within the
wattage requirements of the DQ35JO board.
.
- 14 -

CIARATECH Enterprise/Discovery JO
With care and proper operating procedure, all CIARATECH Enterprise/Discovery JO computers will give
many years of trouble-free service. The CIARATECH Enterprise/Discovery JO can be configured for a
wide range of special purpose, business, industrial and scientific applications.
The information provided in this guide is all that you should need to set up and use your CIARATECH
Enterprise/Discovery JO computer. We offer Technical Reference Manuals for sale to knowledgeable
users.
Please note that any modifications or additions not made by CIARATECH or our authorized
personnel, to any CIARATECH Enterprise/Discovery JO that is under Warranty, such as your
insertion or removal of adapter cards not supplied and installed by CIARATECH could cause
damage and may void the Warranty.
Please do not experiment if you are unsure, and remember we are ready to answer your questions.
Please call us first.
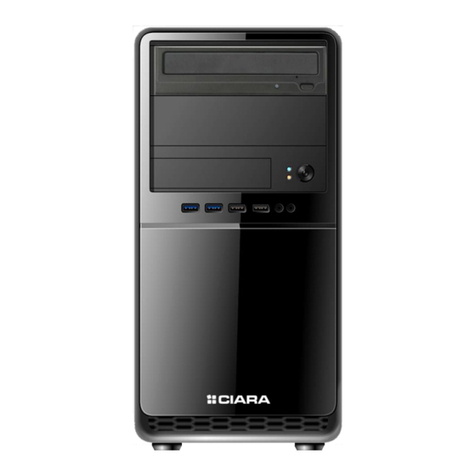
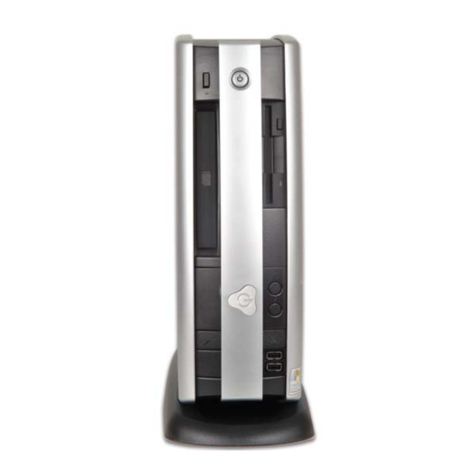
Figure 1.2: CIARATECH Enterprise / Discovery JO in Medium-Tower (Enterprise) or desktop (Discovery) casing
- 15 -

CIARATECH Enterprise/Discovery JO
Processor: Intel Core™2 Quad (2.4 to 2.66 GHz),
Intel Core™2 Duo (1.8 GHz to 3.0 GHz),
Intel Pentium ®Dual-Core (1.6 GHz to 2.0 GHz) and
Celeron (1.6 to 2.0 GHz)
with LGA775 connector.
Bus: Front side bus: 800, 1066 or 1333 MHz.
One PCI Express x16 video slot, two PCI Express x1 expansion slots
and one conventional PCI slot.
System Board: Intel DQ35JO µATX format main board uses Intel Q35 chipset
BIOS: Intel Flash BIOS standard, with ACPI, APM, DMI, Energy Star, Plug
& Play and SMBIOS features.
RAM: DDR2 240 pin Type 667 or 800 MHz SDRAM, minimum 512 MB
and 8 GB maximum. Four DIMM sockets. SPD (Serial Presence
Detect) memory is mandatory. Non-ECC memory only is supported.
Ports: One serial port header, video port, twelve USB 2.0 ports (6 + 6),
audio ports (3 +2), RJ45 port, two IEEE1394a ports
Drives: 3.5” 1.44 MB floppy drive (optional USB external), vast choice of
EIDE CD-ROM drives and vast choice of Serial ATA hard disk
drives. The IDE controller supports two IDE devices at Ultra DMA
33/66/100.
Six Serial ATA controllers including one eSATA (3 Gbps) supporting
one drive each.
Casing: Enterprise: Mid-tower, 350 W power supply (80 PLUS®),
four external 5 ¼” bays and two external 3 ½” bays in the front,
four internal 3 ½” bays.
Discovery: Desktop, 300 W power supply (80 PLUS®),
one external 5 ¼” bay and one external 3 ½” bay in the front,
one internal 3 ½” bay.
Video: Integrated Intel 82Q35 GMA3100 video controller with 400 MHz
core frequency, DX9.0c and OpenGL 1.4 compliant, Hardware Pixel
Shader 2.0, Vertex Shader Model 2.0, 3D Graphics Rendering
enhancements:1.6 dual texture GigaPixel/sec max fill rate, 16-bit and
32-bit color and Vertex cache. DVMT technology enabling the
controller to use up to 287 MB of system memory.
Display Supports analog displays up to 2048 x 1536 at 75 Hz refresh
(QXGA). Dual independent display support. DDC2B compliant
interface with Advanced Digital Display 2 card or Media Expansion
Card (ADD2/MEC), support for TV-out/TV-in and DVI digital
display connections.
Audio: Integrated Intel High Definition Audio 4-channel (Realtek ALC268-
GR audio codec) sound controller with audio in, audio out and
microphone.
Network: Integrated Intel 82566DM-2 Ethernet network interface controller
Gigabit 10/100/1000 Mbits with WOL.
Certification: UL (E204926), FCC Class B, Microsoft (Windows 2000, Windows
XP and Windows Vista) certified, compliant with Energy Star
guidelines for energy efficiency.
Figure 1.3: Standard Features of CIARATECH Enterprise/Discovery JO Computers
- 16 -

CIARATECH Enterprise/Discovery JO
1.1: Upgrading
As the purchaser of a powerful state of the art CIARATECH Enterprise/Discovery JO computer you have
no doubt decided on the features and upgrade capabilities that you might wish to add to your computer.
There are many exciting possibilities for upgrading your CIARATECH Enterprise/Discovery JO.
CIARATECH has extensively tested a range of potential upgrade and enhancement options that range from
hard disks to various optical drives. Some of these work much better than others and we are able to
recommend the ones that work best with your CIARATECH Enterprise/Discovery JO computer.
CIARATECH will be pleased to help you to ensure that you choose the most reliable and compatible system
components when the time comes to upgrade and enhance your CIARATECH Enterprise/Discovery JO
computer in a manner that will preserve the Warranty. Figure 1.4 summarizes the general features of the
various types of upgrades and enhancements that may be added to any CIARATECH Enterprise/Discovery
JO.
UPGRADES AVAILABLE CIARATECH Enterprise/Discovery JO
Serial ATA Hard Disk Drives Several hard disks ranging from 80 GB to 1 TB
SCSI Hard Disk Drives Several hard disks ranging from 36 to 300 GB
Optical Drives Internal & external CD-ROMs, DVD-ROM’s,
and writeable CD and DVD drives may be
added.
PCI Express x16 Video
Controller All video controllers compliant with the PCI
Express x16 standard, with 128 MB of video
memory or more.
System Memory Up to 8 GB DDR2, 240 pin, 667 or 800 MHz.
Disk Controllers A PCI bus Parallel ATA IDE controller is built
into the system as well as six Serial ATA
controllers (3 Gbps).
SATA RAID (0, 1, 0+1 and 5)
PCI bus Ultra320 SCSI controller options are
available.
Hi Res. Monitors & Display
Adapters 17 to 27 inches CRT or LCD monitors.
Network Adapters Several PCI or PCI Express x1 bus network
adapter cards for Ethernet and Token Ring
transmission media are available.
Figure 1.4: Upgrades for CIARATECH Enterprise/Discovery JO Computers
1.2: Networking
Among the more exciting applications for extending the power and utility of CIARATECH
Enterprise/Discovery JO computers is to connect them (using communication links and adapter cards)
with other computer systems to form computer / communication networks in order that software
resources (such as databases) and hardware resources (such as printers and modems) may be shared. This
is referred to as Local Area Networking (LAN) and Wide Area Networking (WAN).
All CIARATECH Enterprise/Discovery JO computers can be networked using a wide variety of network
adapters that permit the CIARATECH Enterprise/Discovery JO computer to operate with a full range of
mini and mainframe computers. For example the CIARATECH Enterprise/Discovery JO can be networked
using a wide variety of Ethernet adapter cards while running the UNIX Operating System.
CIARATECH System Integration and Networks Group would be pleased to provide you with turnkey
solutions for all your Windows 2000 Server, Windows 2003 Server, Novell NetWare and SCO/UNIX
networking needs. We have trained and certified experts on staff to help you.
- 17 -

CIARATECH Enterprise/Discovery JO
2.0: The CIARATECH Enterprise/Discovery JO BIOS
2.1: BIOS Configuration and Installation
The purpose of this section is to describe the procedures to set up the BIOS configuration options of your
CIARATECH Enterprise/Discovery JO computer. All this work is done for you at the CIARATECH plant
enabling the system to be ready to start on Power on. However, we are describing this procedure as a
means of transparency.
Every CIARATECH Enterprise/Discovery JO is now supplied with the latest version of the Intel BIOS.
The Intel BIOS is a set of permanently recorded software that gives the CIARATECH
Enterprise/Discovery JO its fundamental operational characteristics.
The Intel BIOS is made up of code that provides the device-level control for the major I/O devices in the
CIARATECH Enterprise/Discovery JO computer system. It contains a set of routines (called POST, for
Power-On Self-Test) that check out your CIARATECH Enterprise/Discovery JO system when you turn it
on.
The Intel BIOS name will be displayed on the screen of the monitor every time the power is turned on.
The Set-Up procedure involves storing in the CIARATECH Enterprise/Discovery JO computer data &
hardware information (called configuration information) including:
•Date & time,
•Type(s) of floppy disk drive(s),
•Type(s) of hard disk drive(s),
•Type of display adapter,
•Presence or absence of a keyboard,
It will be necessary to run the Set-Up program if you do any of the following:
•Replace the battery,
•Install a second hard drive or replace the one you have with a new model,
•You have not used your system for a considerable period,
•The original set-up has been "lost".
In any of these cases you must use the Set-Up program to modify the system parameters to reflect the
options actually installed in your system.
To use the Set-Up program proceed as follows:
1. Turn on or re-boot (press simultaneously <CTRL>, <ALT>, <DEL>) your
CIARATECH Enterprise/Discovery JO system. After the Intel BIOS performs a
series of diagnostic checks, the following message appears:
PRESS <F2> to enter Set-Up.
2. Press the <F2> key to enter the Intel BIOS Set-Up program.
3. Choose a Set-Up option with the arrow keys and press < ↵> to select.
- 18 -

CIARATECH Enterprise/Discovery JO
2.2: BIOS Set-up Program Menu Bar
Function Description
Maintenance Clears passwords and displays processor information.
Main Displays processor and memory information.
Advanced Configures advanced features available through the chipset.
Security Sets passwords and security features.
Power Configures power management features and power supply controls.
Boot Selects boot options.
Intel ME Configures options for the Intel Management Engine and Intel Active
Management Technology
Exit Saves or discards changes to Set-up program options.
2.3: BIOS Set-up Program Function Keys
BIOS Set-up Program Function Key Description
<←> or <→> Selects a different menu screen (Moves the cursor left or right).
<↑> or <↓> Selects an item (Moves the cursor up or down).
<Tab> Selects a field (Not implemented)
<Enter> Executes command or selects the submenu.
<F9> Loads the default configuration values for the current menu.
<F10> Saves the current values and exits the BIOS Set-up program.
<Esc> Exits the menu.
2.4: BIOS Flash Memory Organization
The Serial Peripheral Interface Flash Memory (SPI Flash) includes a 32 Mbit (4096 KB) flash memory
device.
2.5: PCI Autoconfiguration
The BIOS can automatically configure PCI devices. PCI devices may be onboard or add-in cards.
Autoconfiguration lets a user insert or remove PCI cards without having to configure the system. When
a user turns on the system after adding a PCI card, the BIOS automatically configures interrupts, the I/O
space, and other system resources. Any interrupts set to Available in Setup are considered to be
available for use by the add-in card.
2.6: PCI IDE Support
If you select Auto in the BIOS Setup program, the BIOS automatically sets up the PCI IDE connector with
independent I/O channel support. The IDE interface supports hard drives up to ATA-66/100 and recognizes
any ATAPI compliant devices, including CD-ROM drives, tape drives, and Ultra DMA drives. The BIOS
determines the capabilities of each drive and configures them to optimize capacity and performance. To
take advantage of the high capacities typically available today, hard drives are automatically configured for
Logical Block Addressing (LBA) and to PIO Mode 3 or 4, depending on the capability of the drive. You
can override the auto configuration options by specifying manual configuration in the BIOS Setup program.
- 19 -

CIARATECH Enterprise/Discovery JO
To use ATA-66/100 features, the following items are required:
• An ATA-66/100 peripheral device
• An ATA-66/100 compatible cable
• ATA-66/100 operating system device drivers
NOTE: Do not connect an ATA device as a slave on the same IDE cable as an ATAPI master device.
For example, do not connect an ATA hard drive as a slave to an ATAPI CD-ROM drive.
2.7: System Management BIOS (SMBIOS)
SMBIOS is a Desktop Management Interface (DMI) compliant method for managing computers in a
managed network.
The main component of SMBIOS is the Management Information Format (MIF) database, which contains
information about the computing system and its components. Using SMBIOS, a system administrator can
obtain the system types, capabilities, operational status, and installation dates for system components. The
MIF database defines the data and provides the method for accessing this information. The BIOS enables
applications such as third-party management software to use SMBIOS. The BIOS stores and reports the
following SMBIOS information:
• BIOS data, such as the BIOS revision level
• Fixed-system data, such as peripherals, serial numbers, and asset tags
• Resource data, such as memory size, cache size, and processor speed
• Dynamic data, such as event detection and error logging
Non-Plug and Play operating systems, such as Windows NT*, require an additional interface for obtaining
the SMBIOS information. The BIOS supports an SMBIOS table interface for such operating systems.
Using this support, an SMBIOS service-level application running on a non-Plug and Play operating system
can obtain the SMBIOS information.
2.8: Legacy USB Support
Legacy USB support enables USB devices to be used even when the operating system’s USB drivers are
not yet available. Legacy USB support is used to access the BIOS Setup program, and to install an
operating system that supports USB. By default, Legacy USB support is set to Enabled.
Legacy USB support operates as follows:
1. When you apply power to the computer, legacy support is disabled.
2. POST begins.
3. Legacy USB support is enabled by the BIOS allowing you to use a USB keyboard to enter and
configure the BIOS Setup program and the maintenance menu.
4. POST completes.
5. The operating system loads. While the operating system is loading, USB keyboards and mice are
recognized and may be used to configure the operating system. (Keyboards and mice are not recognized
during this period if Legacy USB support was set to Disabled in the BIOS Setup program.)
6. After the operating system loads the USB drivers, all legacy and non-legacy USB devices are
recognized by the operating system, and Legacy USB support from the BIOS is no longer used.
7. Additional USB legacy feature options can be access by using Intel Integrator's Toolkit.
To install an operating system that supports USB, verify that Legacy USB support in the BIOS Setup
program is set to Enabled and follow the operating system’s installation instructions.
- 20 -
This manual suits for next models
2
Table of contents
Other Ciara-tech Desktop manuals
