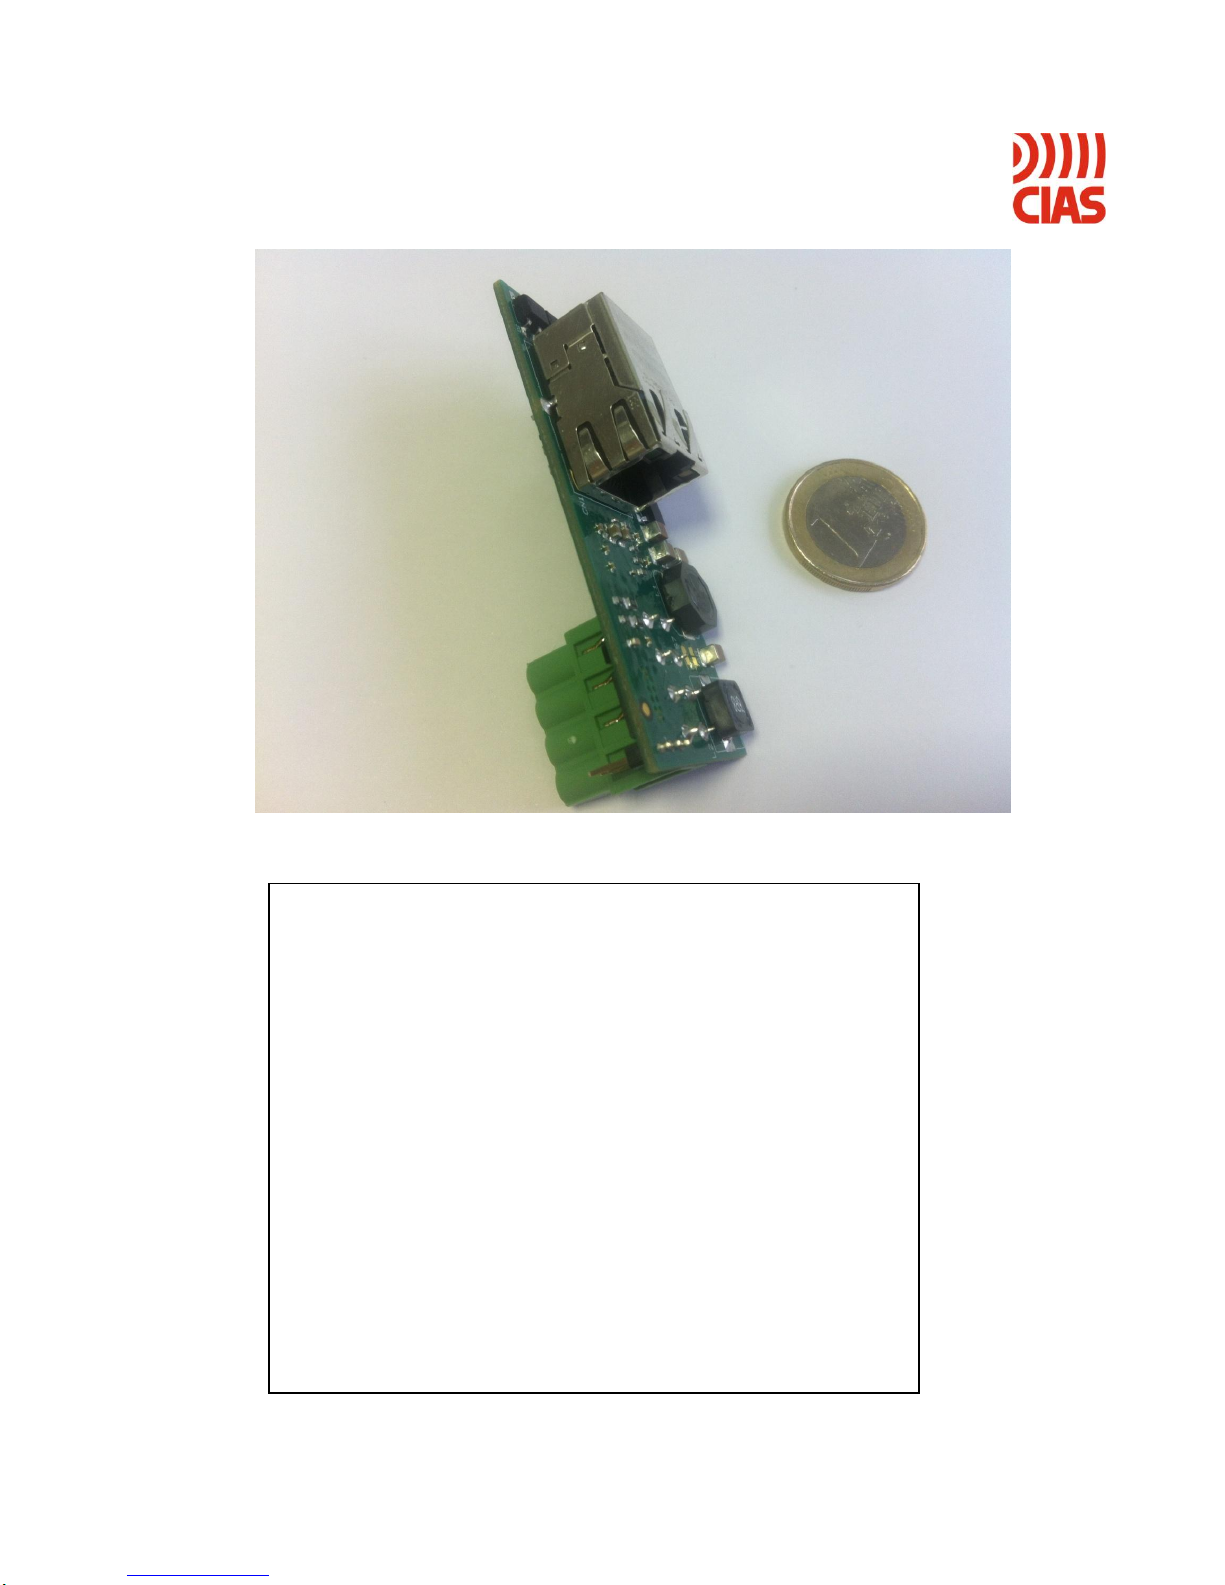
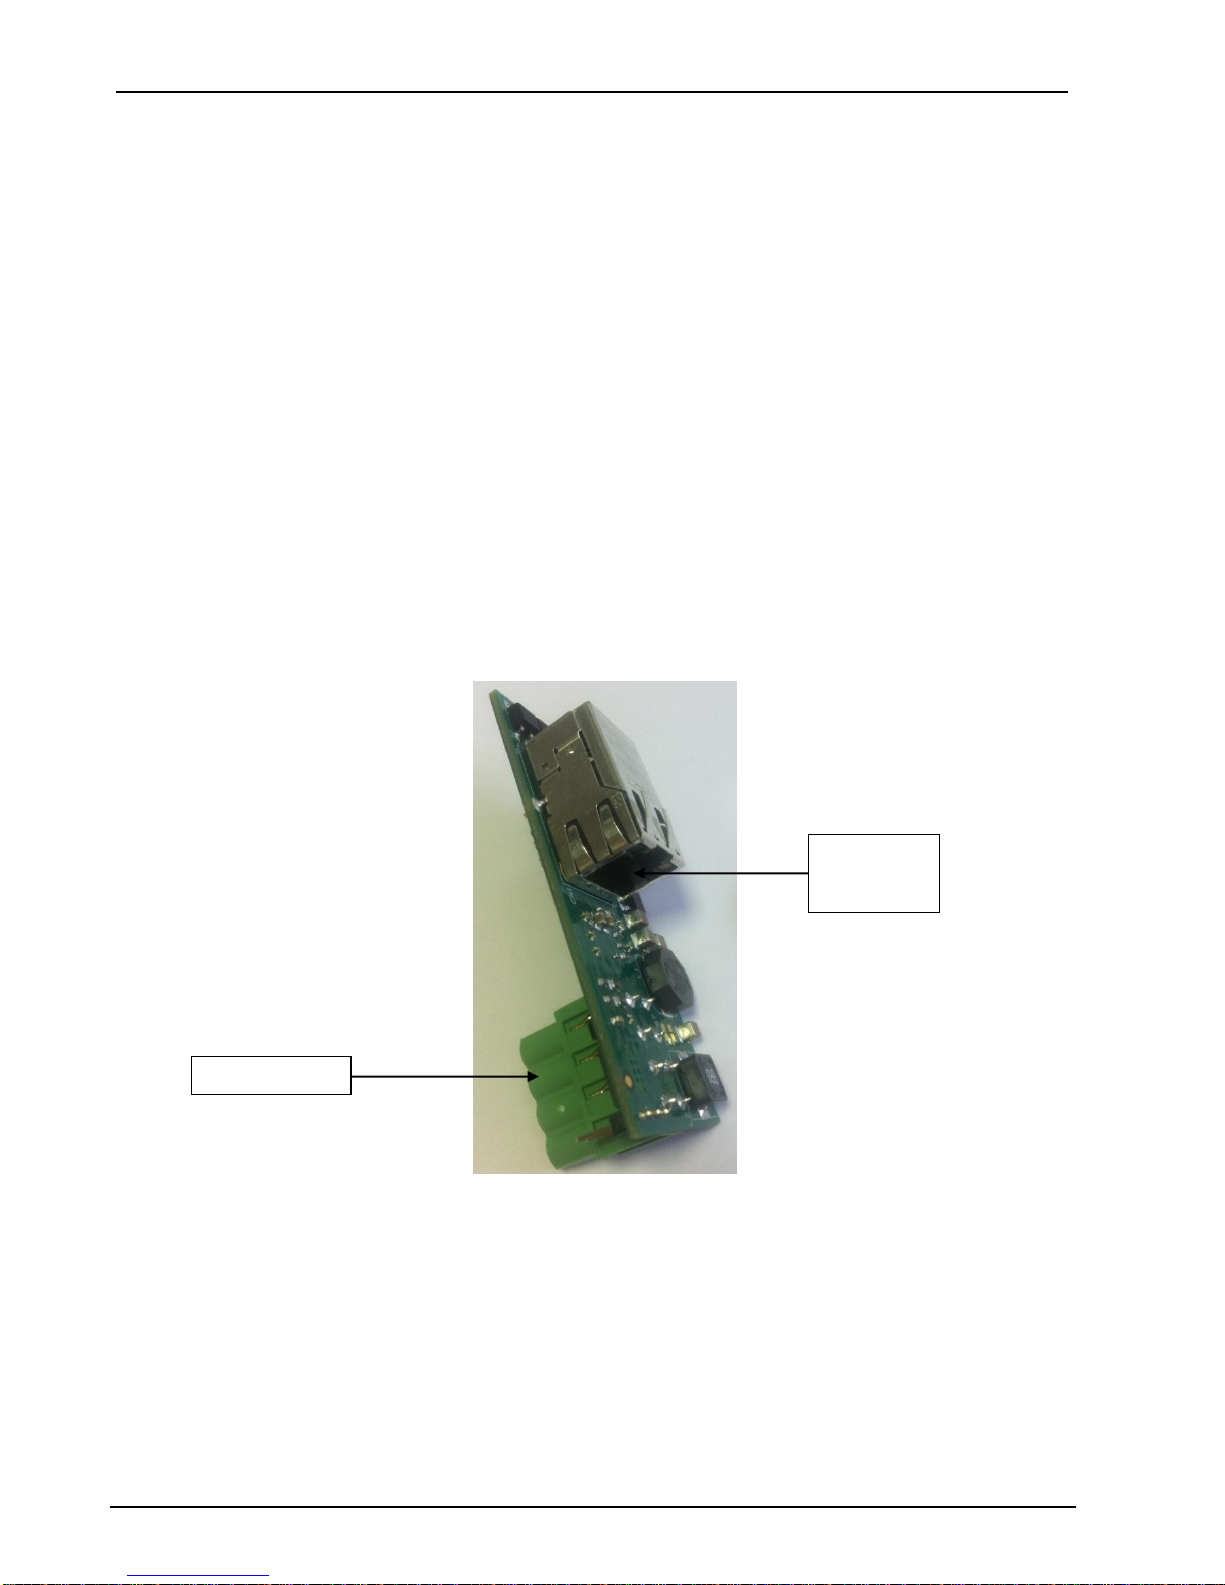
CIAS Elettronica S.r.l. Ed 1.1
Manuale di Installazione Pagina 9 di 20 IP-DOORWAY
3.2 Software di configurazione opzionali
E’ comunque possibile accedere alla configurazione di IP-DOORWAY attraverso i SW della CIAS
per la configurazione dei dispositivi con interfaccia ethernet, per esempio:
- IB-ETH-CONF
- IB-SYSTEM IP (funzionalità CONFIGURATORE CIAS TS)
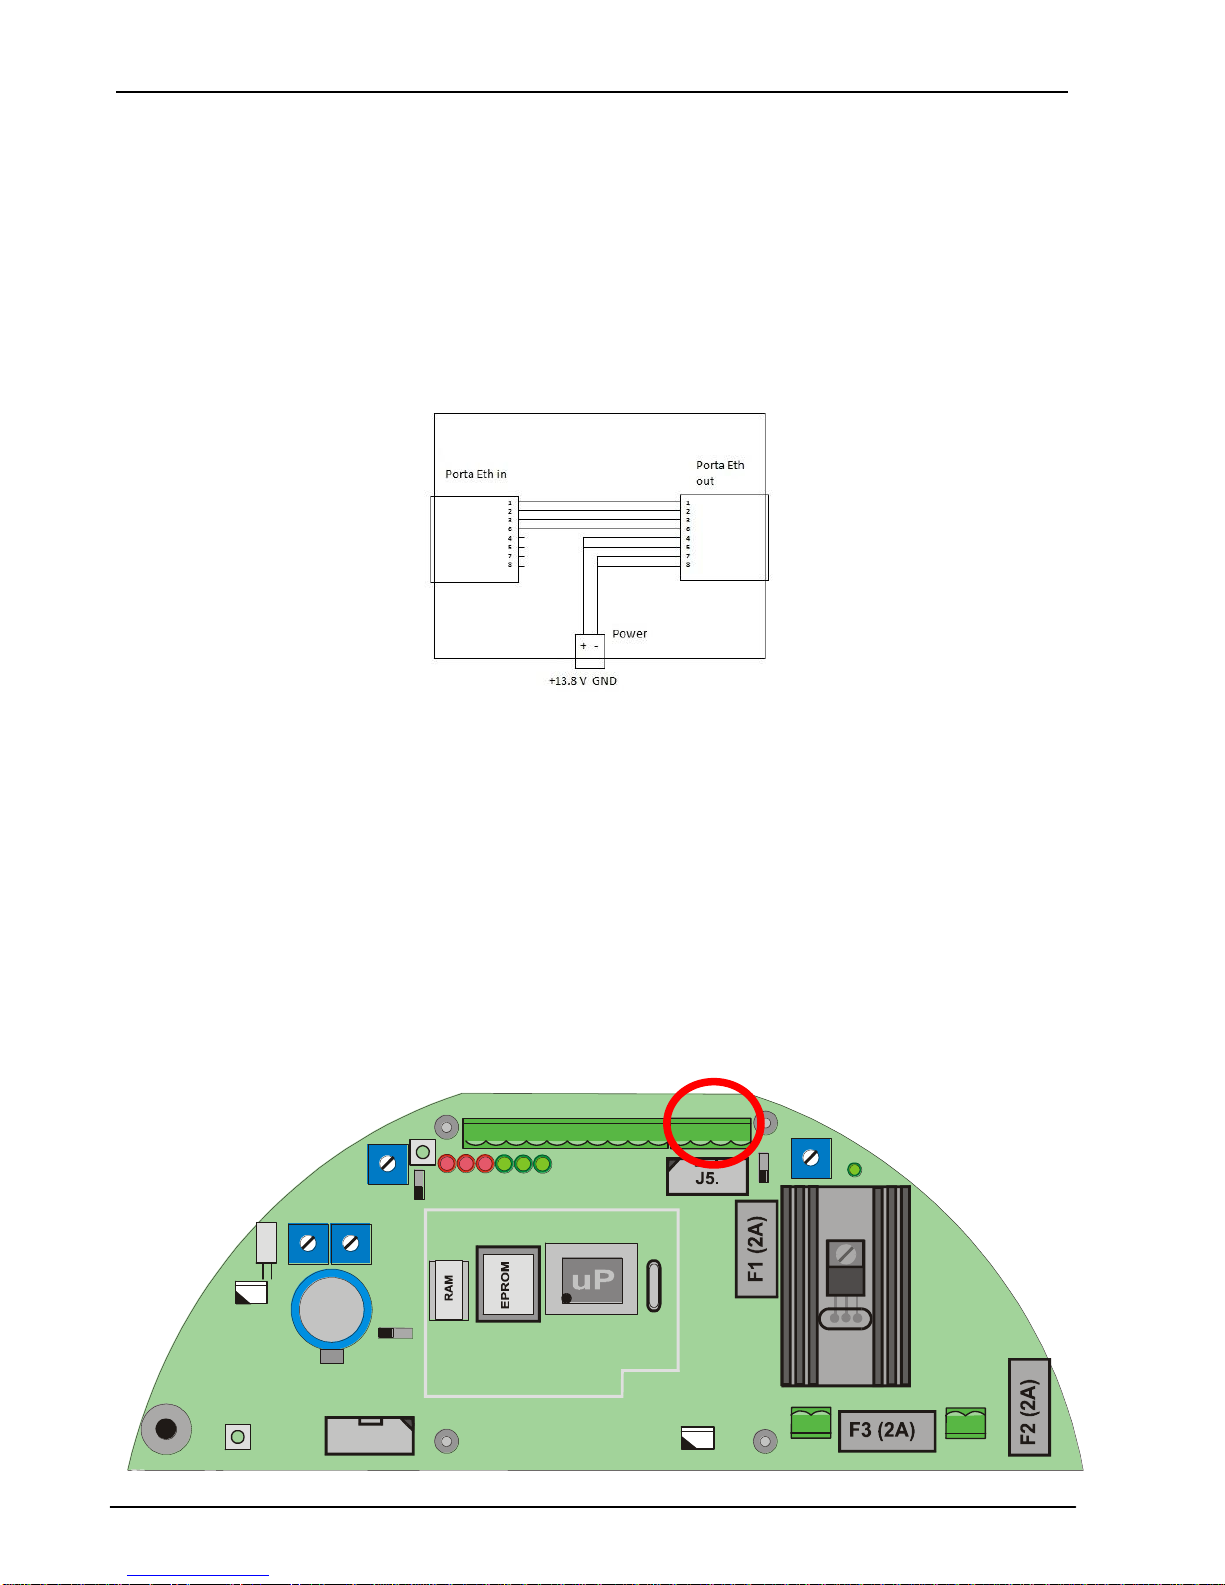
Accertarsi che il PC che si sta utilizzando, abbia un indirizzo IP appartenente alla rete a cui esso
è connesso in quel momento, quindi avviare il SW per gestire la configurazione e riferirsi al
manuale dello specifico SW, per effettuare le fasi di:
- RICERCA DISPOSITIVI
- ASSEGNAZIONE INDIRIZZI
- IMPOSTAZIONE PARAMETRI DI LAVORO
3.2.1 Ricerca dispositivi
Premere il tasto search devices, per individuare automaticamente tutte le interfacce IP-
DOORWAY connesse alla rete e visibili dal PC che si sta utilizzando. Nel caso in cui la lista non
fosse completa controllare il collegamento delle interfacce alla rete ed eventualmente la
presenza di infrastrutture di rete (router, firewall, proxy, etc.) in grado di bloccare i pacchetti
utilizzati per la programmazione delle stesse in quanto inviati in broadcast (contattare
l’amministratore di rete).
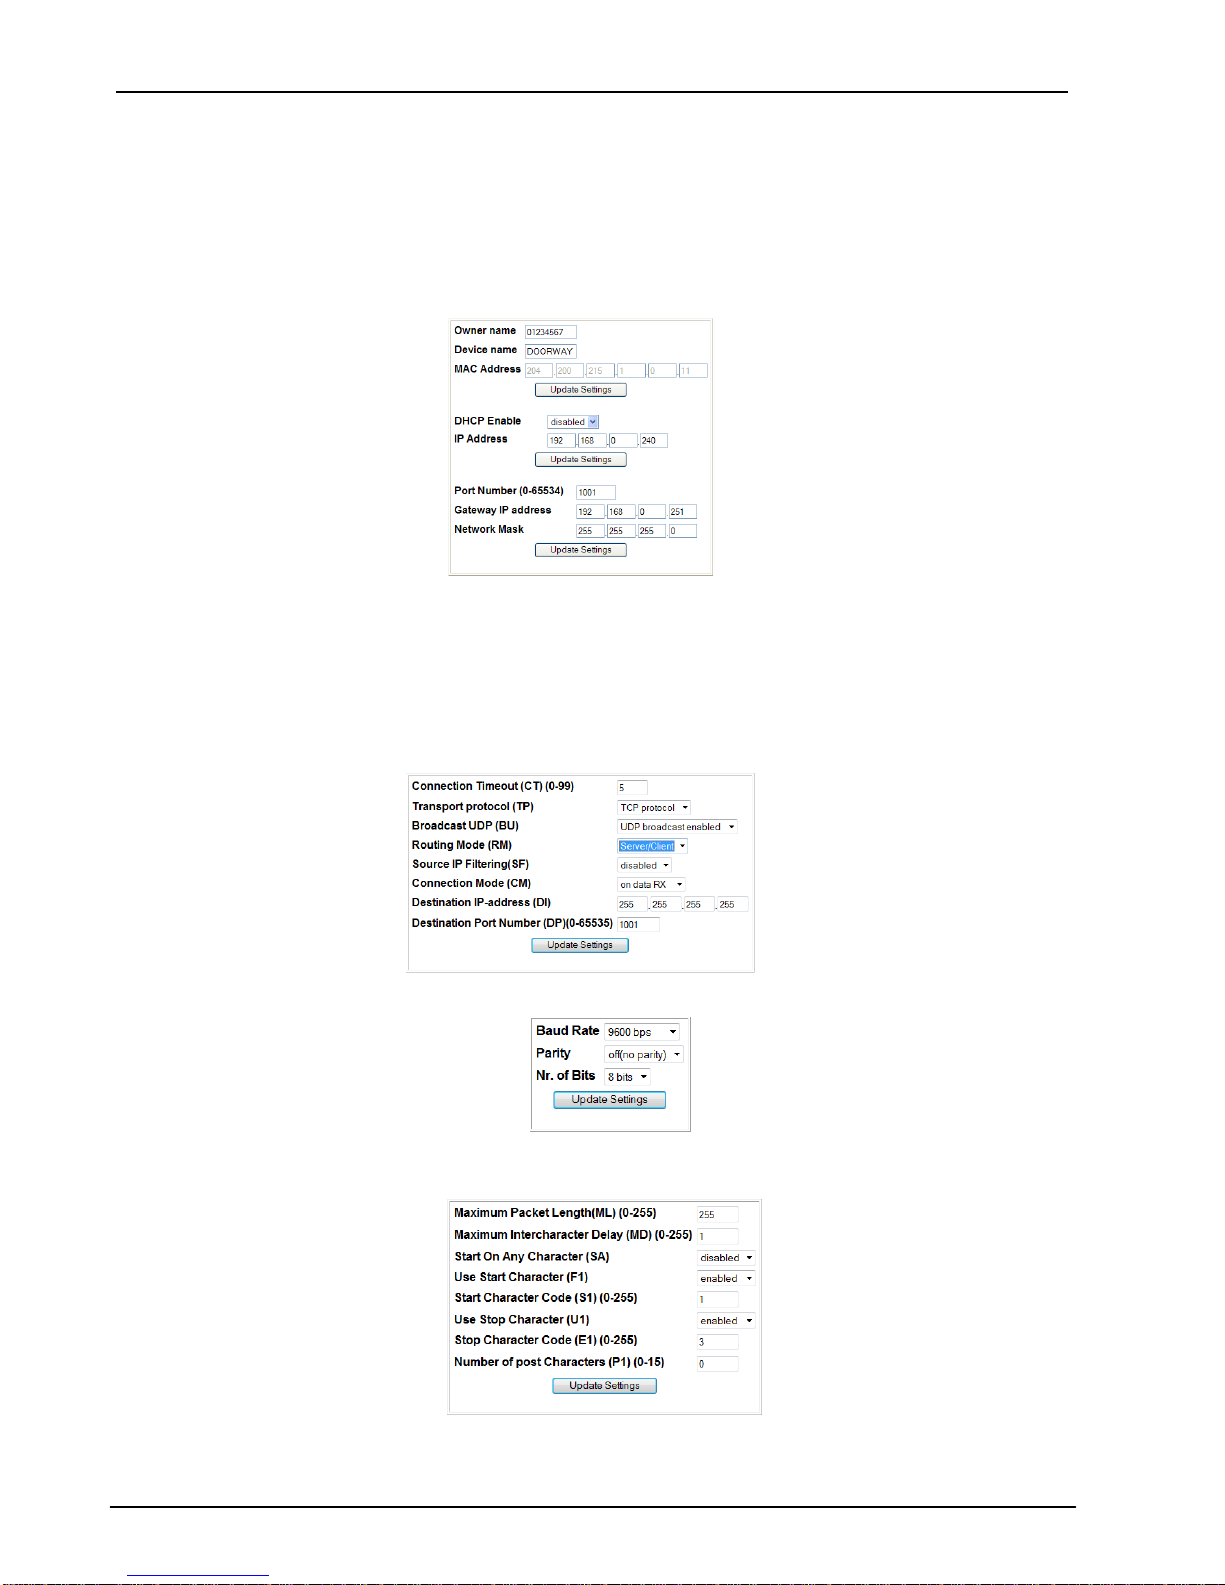
Per ogni dispositivo individuato viene visualizzato: il MAC address del dispositivo, l’indirizzo IP
attualmente impostato, la porta dati utilizzata, il nome del proprietario, il nome identificativo del
dispositivo.
3.2.2 Assegnazione indirizzi
Prima di procedere alla programmazione delle interfacce è necessario assegnare gli indirizzi IP.
Gli indirizzi delle interfacce IP-DOORWAY devono appartenere alla rete in cui saranno installati.
Per assegnare un nuovo indirizzo, selezionare un dispositivo dall’elenco ed attivare la funzione di
riassegnazione dell’indirizzo IP del SW specifico.
Se viene richiesta la password per accedere al dispositivo selezionato, inserire la password o
lasciare il campo in bianco se non è stata impostata alcuna password di protezione (default).
Una volta confermata la password inserire il nuovo indirizzo IP per il dispositivo selezionato.
Procedere in questo modo fino ad aver assegnato un indirizzo IP valido ad ogni interfaccia
presente nella lista.
È possibile verificare la buona riuscita del procedimento eseguendo nuovamente una ricerca dei
dispositivi collegati.